Setup SAP
Now we will prepare and configure SAP to send the logs to Sentinel Agent, which will be deployed later on.
Downloading SAP Change Requests
- Log on to the SAP S/4HANA host via SSH (or Putty)
ssh -i SAPCALKey.pem root@S4HANAIP
- On the host console, create a directory and download the Change Requests:
cd
mkdir CRs
cd CRs
wget -q https://raw.githubusercontent.com/Azure/Azure-Sentinel/master/Solutions/SAP/CR/K900271.NPL
wget -q https://raw.githubusercontent.com/Azure/Azure-Sentinel/master/Solutions/SAP/CR/R900271.NPL
wget -q https://raw.githubusercontent.com/Azure/Azure-Sentinel/master/Solutions/SAP/CR/K900202.NPL
wget -q https://raw.githubusercontent.com/Azure/Azure-Sentinel/master/Solutions/SAP/CR/R900202.NPL
wget -q https://raw.githubusercontent.com/Azure/Azure-Sentinel/master/Solutions/SAP/CR/K900201.NPL
wget -q https://raw.githubusercontent.com/Azure/Azure-Sentinel/master/Solutions/SAP/CR/R900201.NPL
- Let’s set permissions so SAP can read the files and move then to the sap/trans folder:
chown s4hadm:sapsys *.NPL
cp -p K*.NPL /usr/sap/trans/cofiles/
cp -p R*.NPL /usr/sap/trans/data/
Here is an example of what you should see:

Setting up SAP Change Requests
-
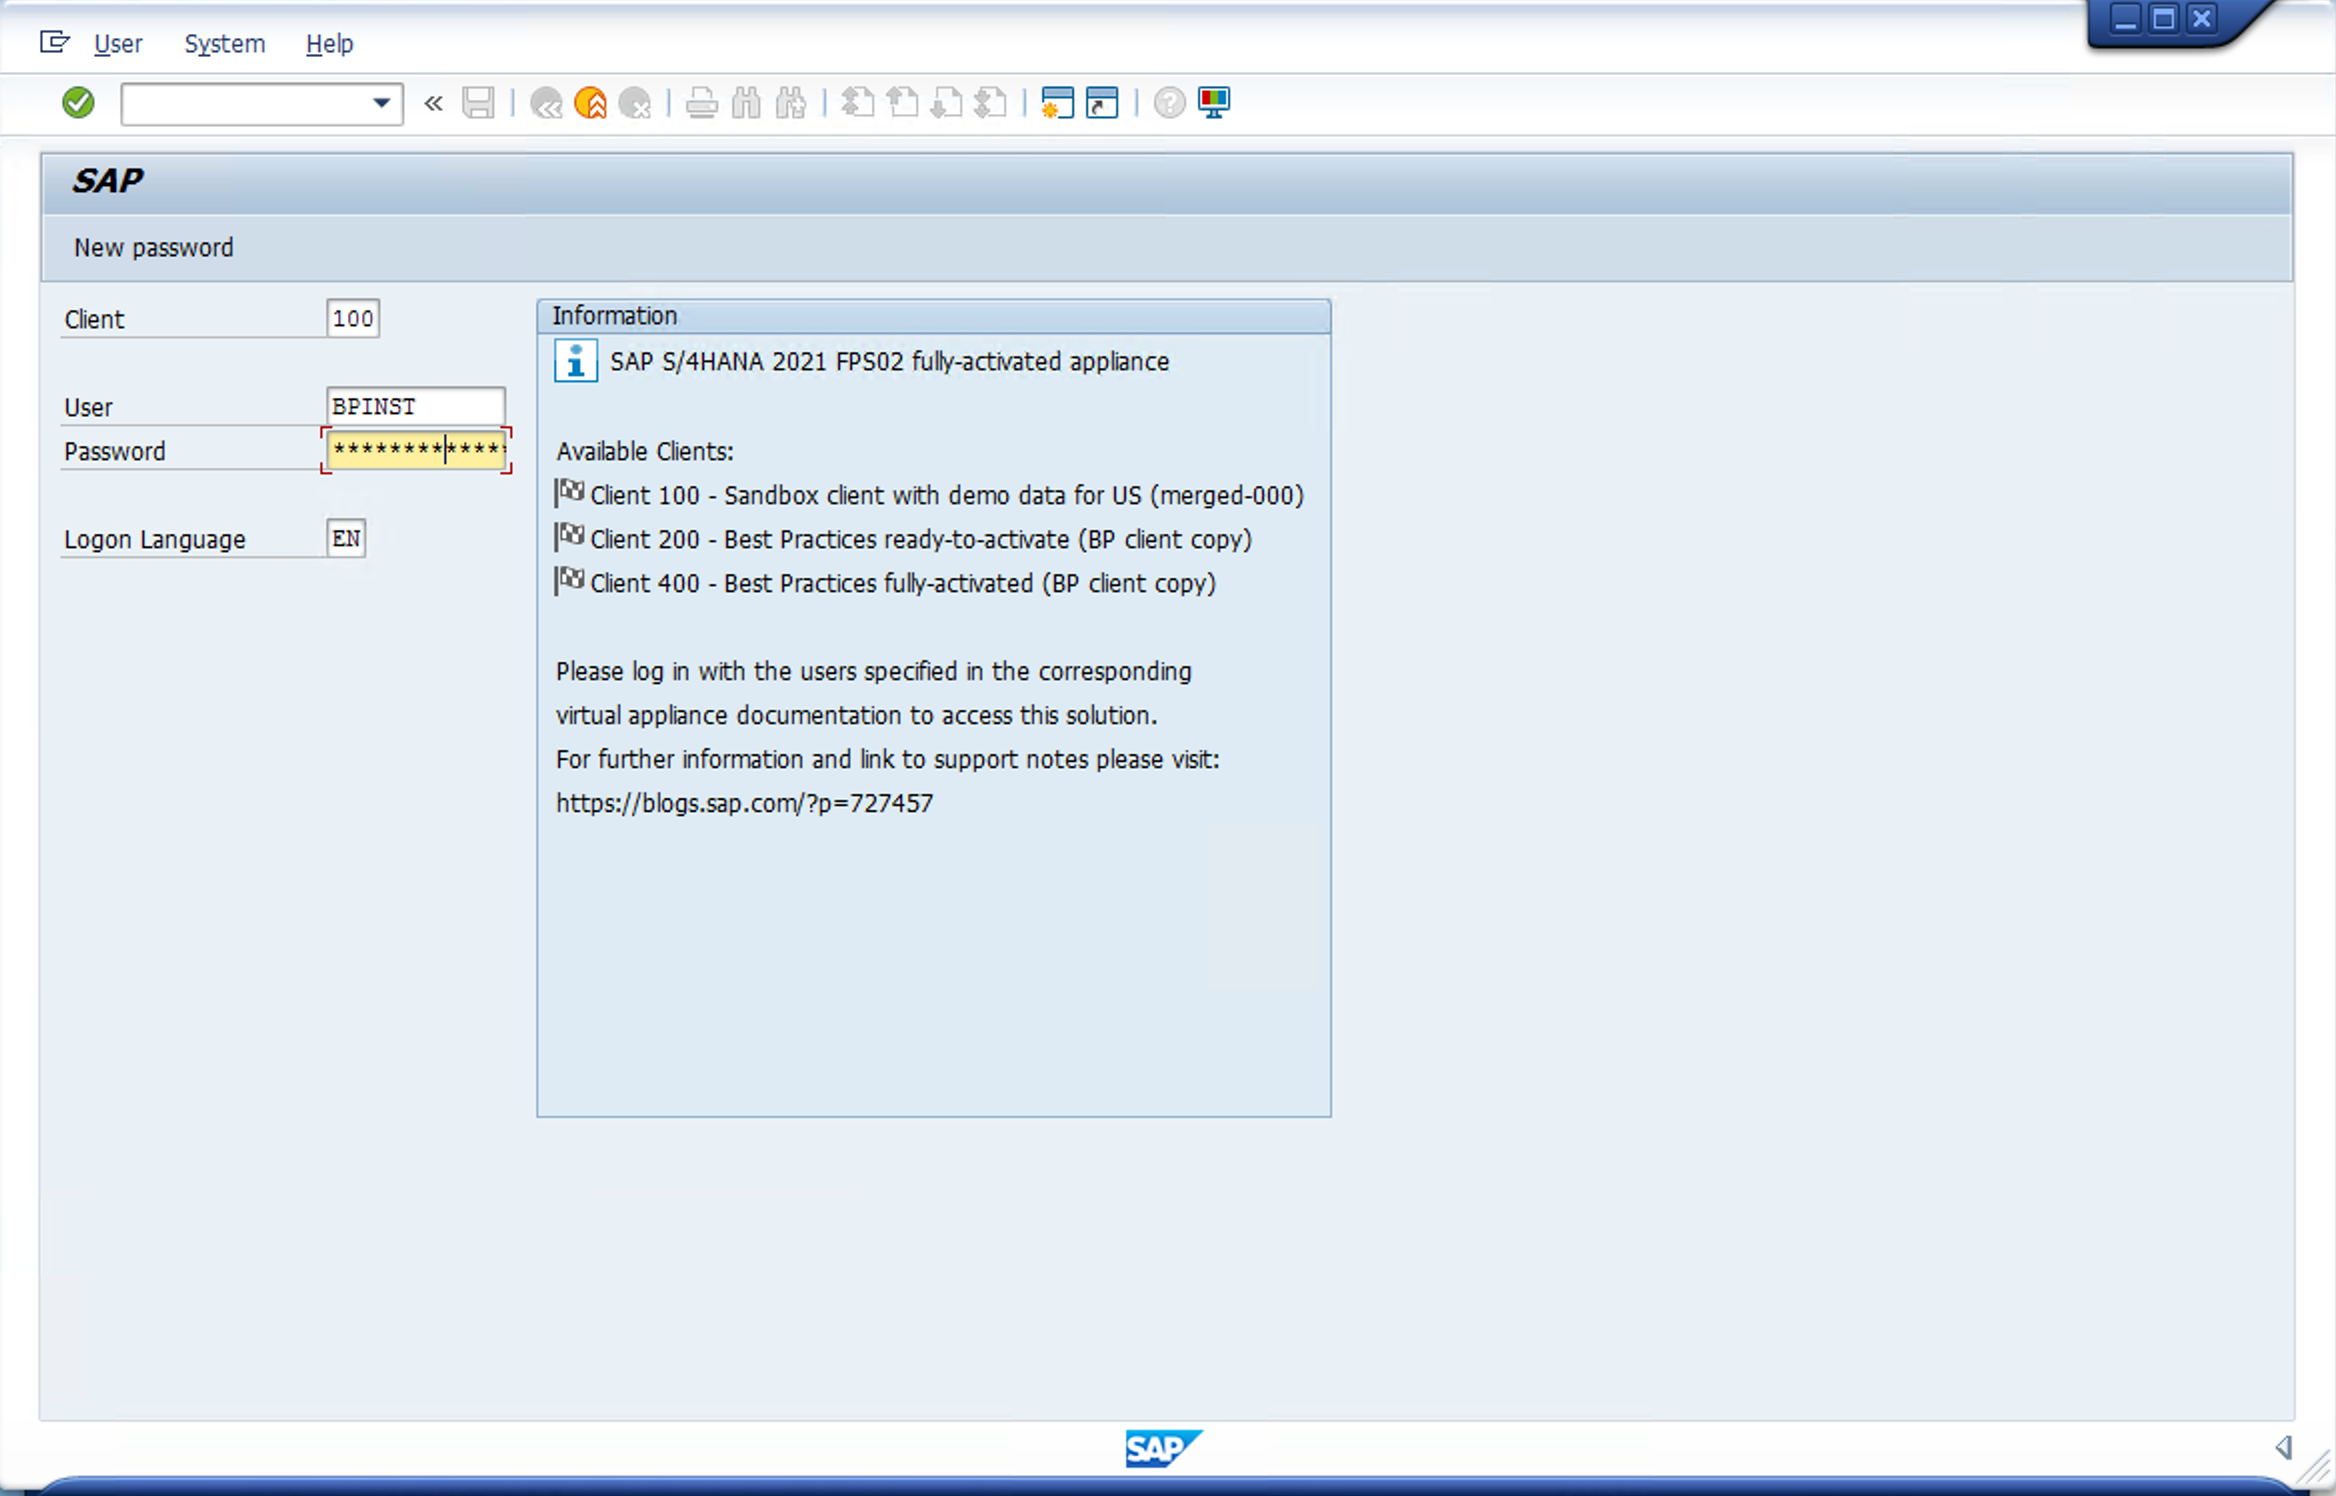
Log on to the Bastion Host and log on the SAP GUI (SAP Logon) with user BPINST/Welcome1
-
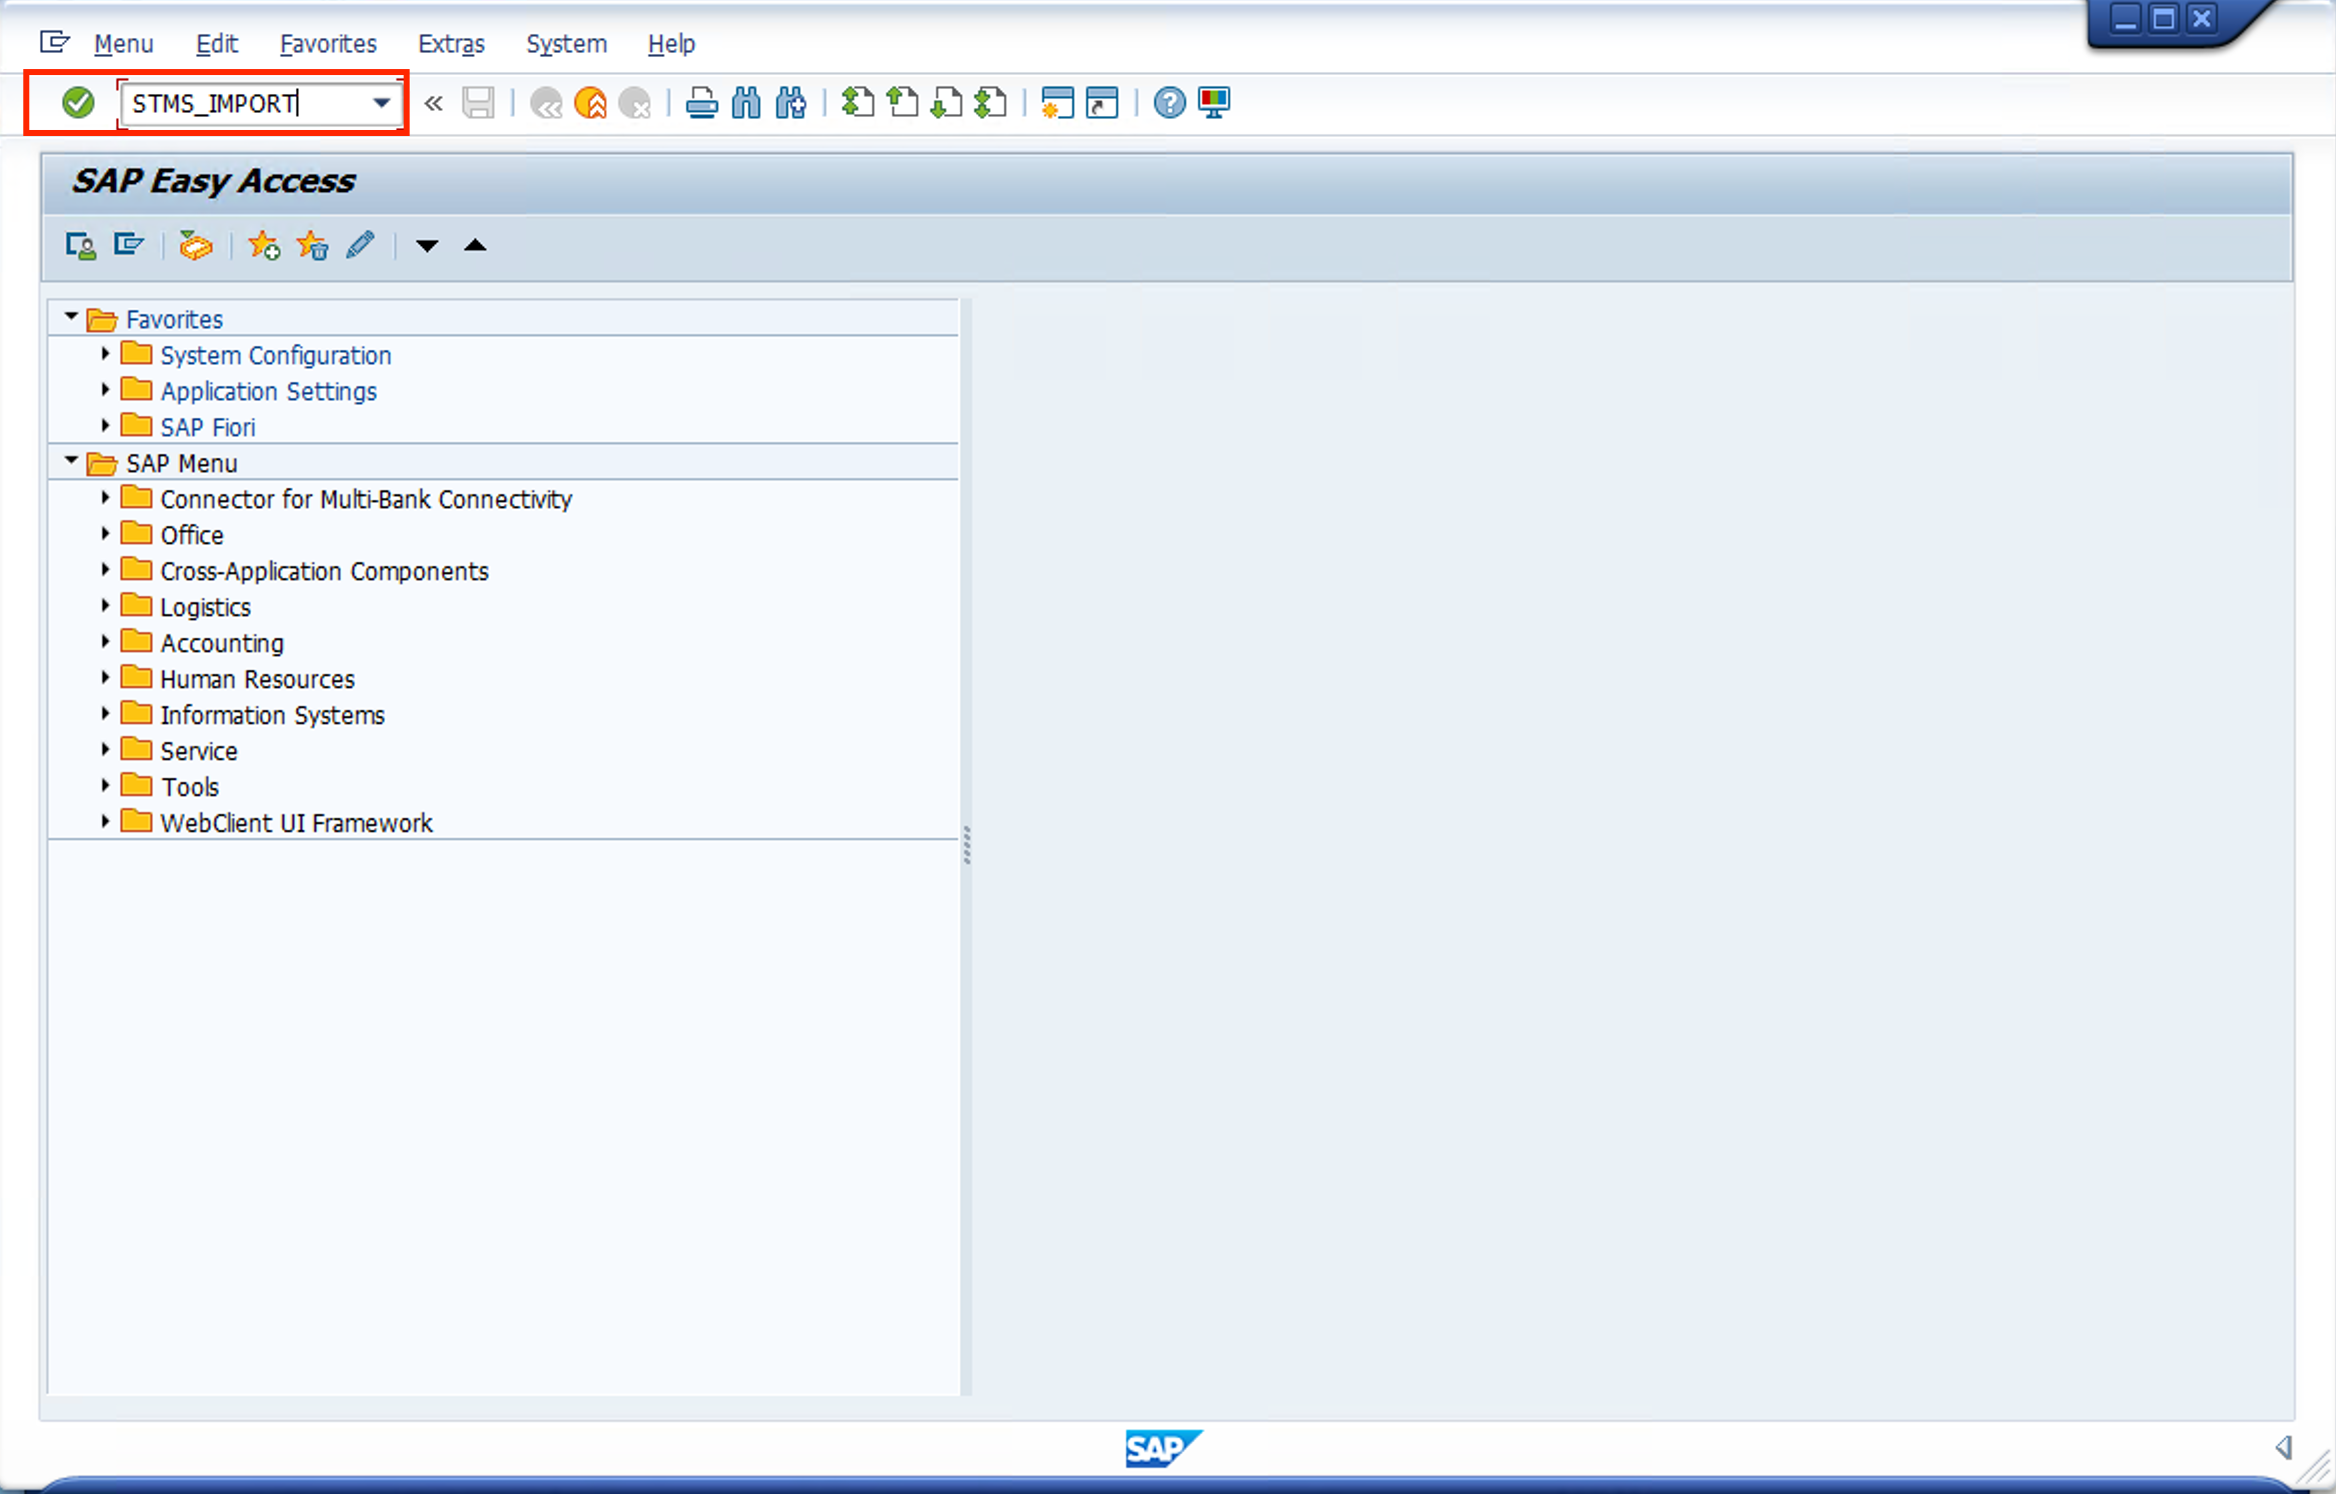
Go to TCODE STMS_IMPORT
-
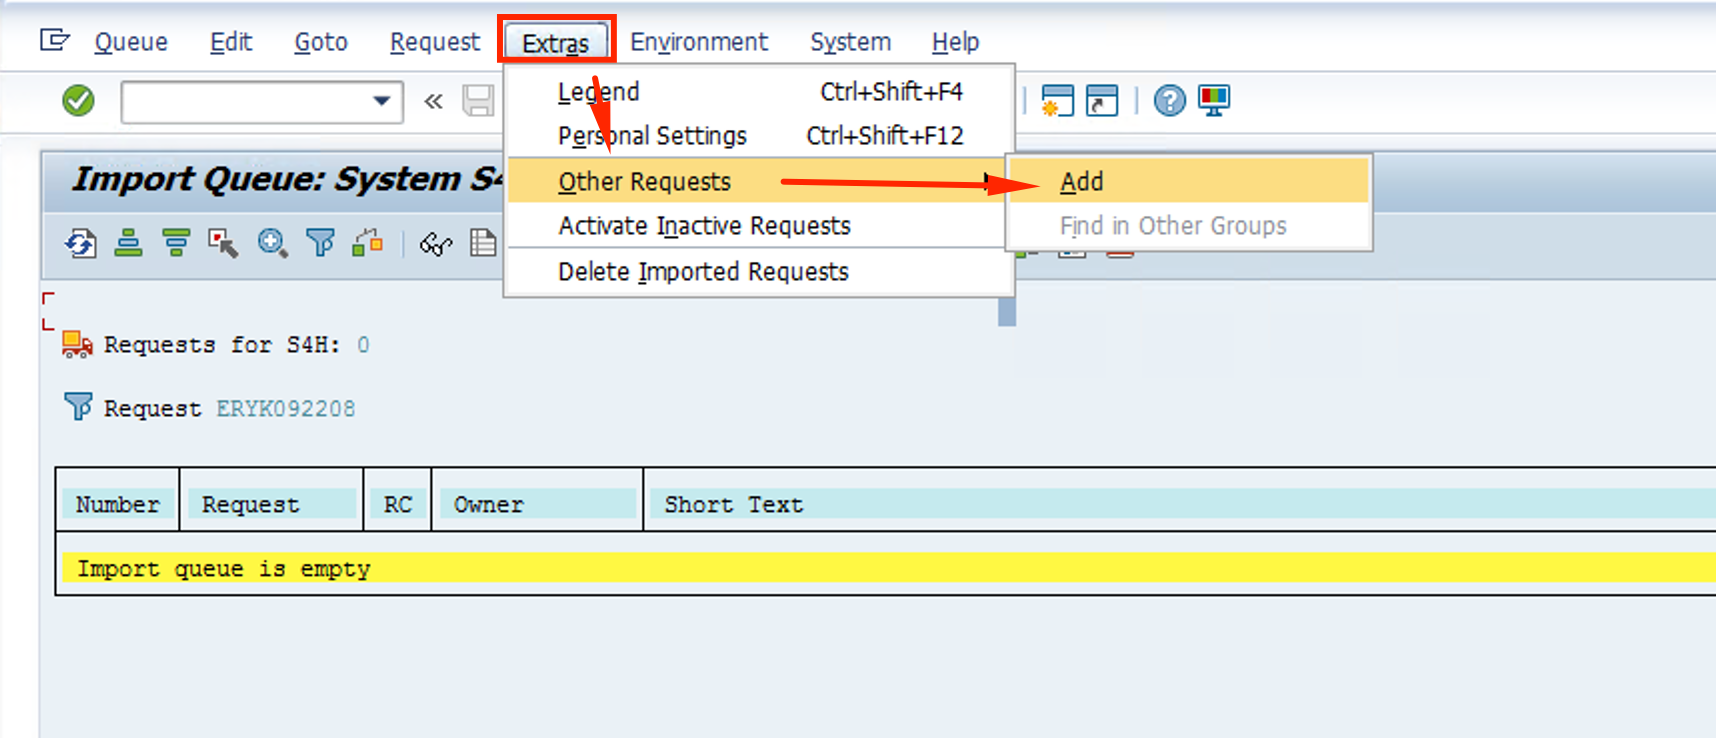
The next steps will be repeated for all 3 CRs we downloaded: NPLK900201, NPLK900202 and NPLK900271
-
Click on Extras on the menu bar, then Other Requests and then Add
-
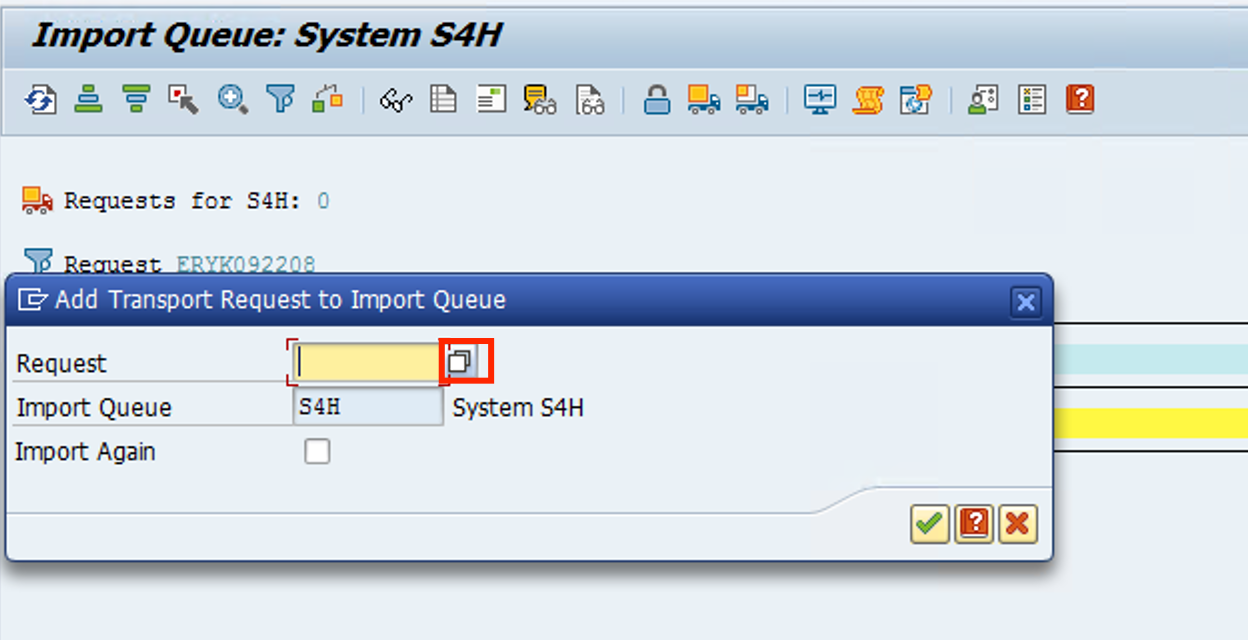
Click on the button beside Request
-
Select the first Request and click on the green checkmark
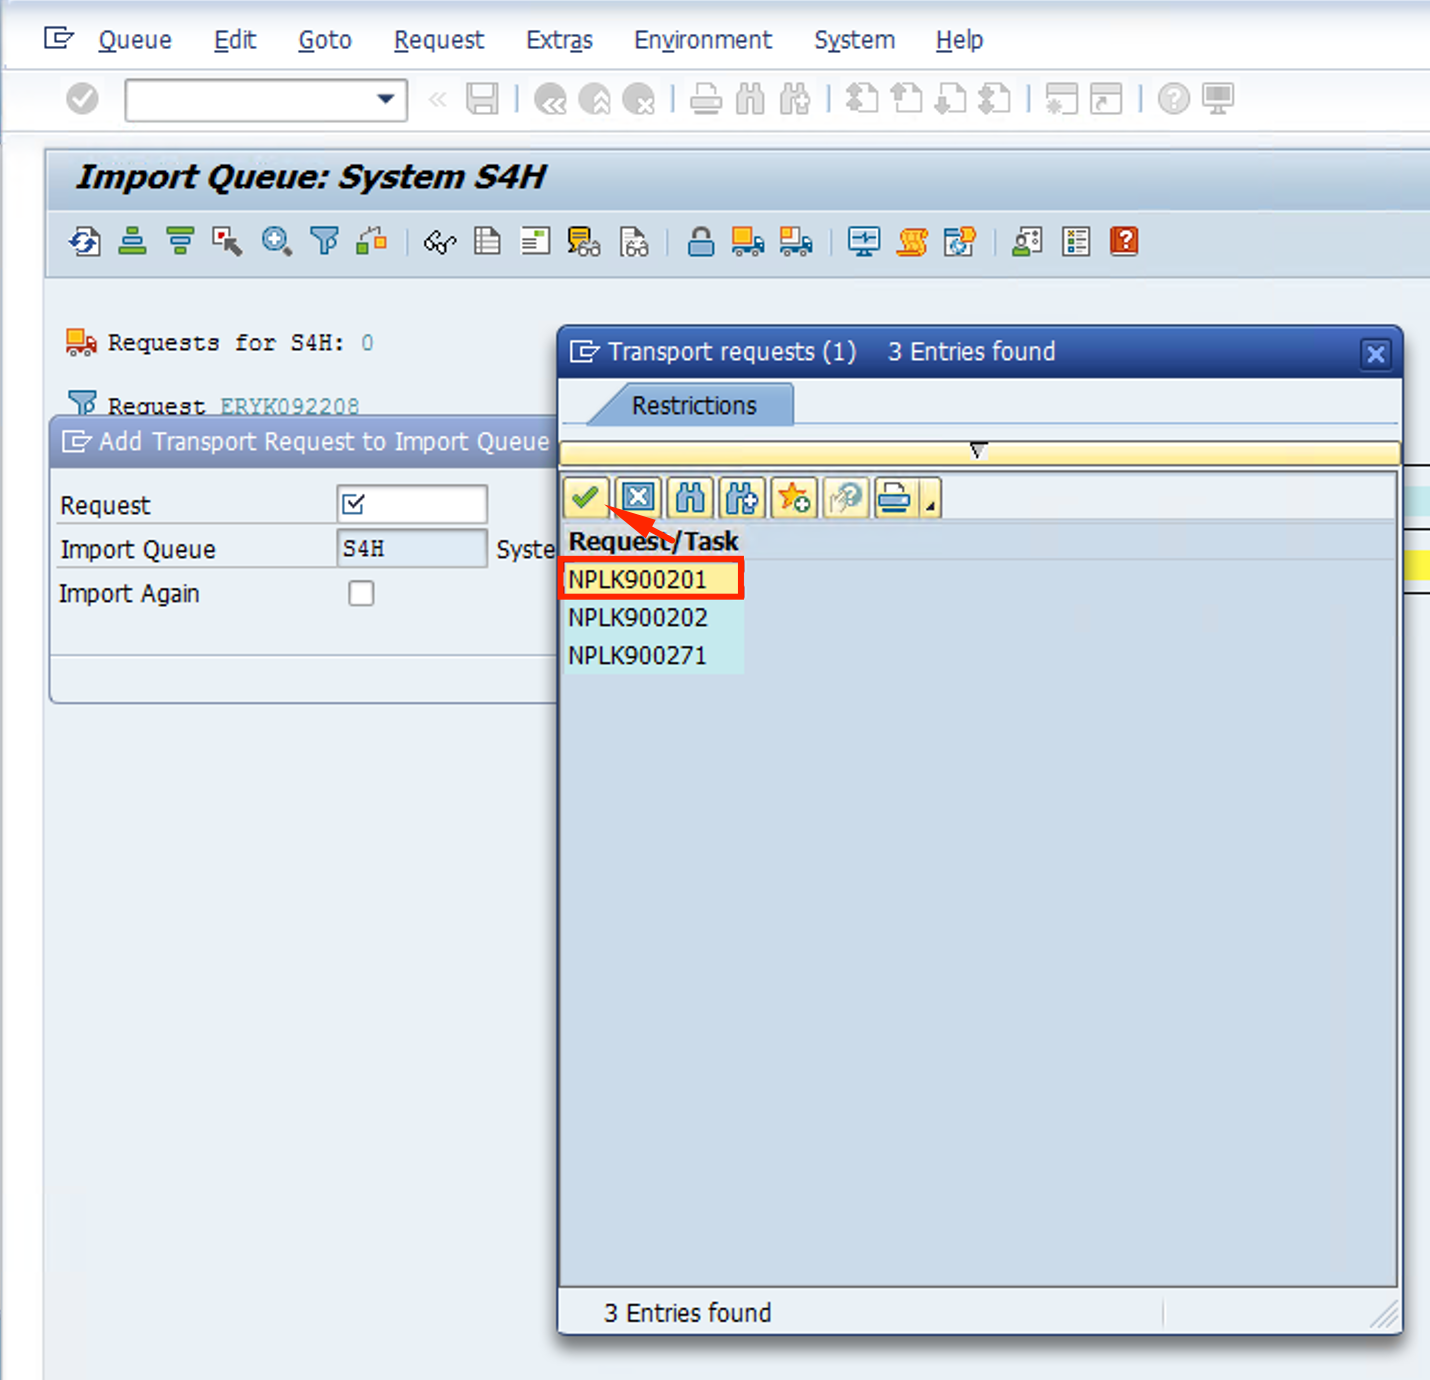
-
Click on the green checkmark and confirm
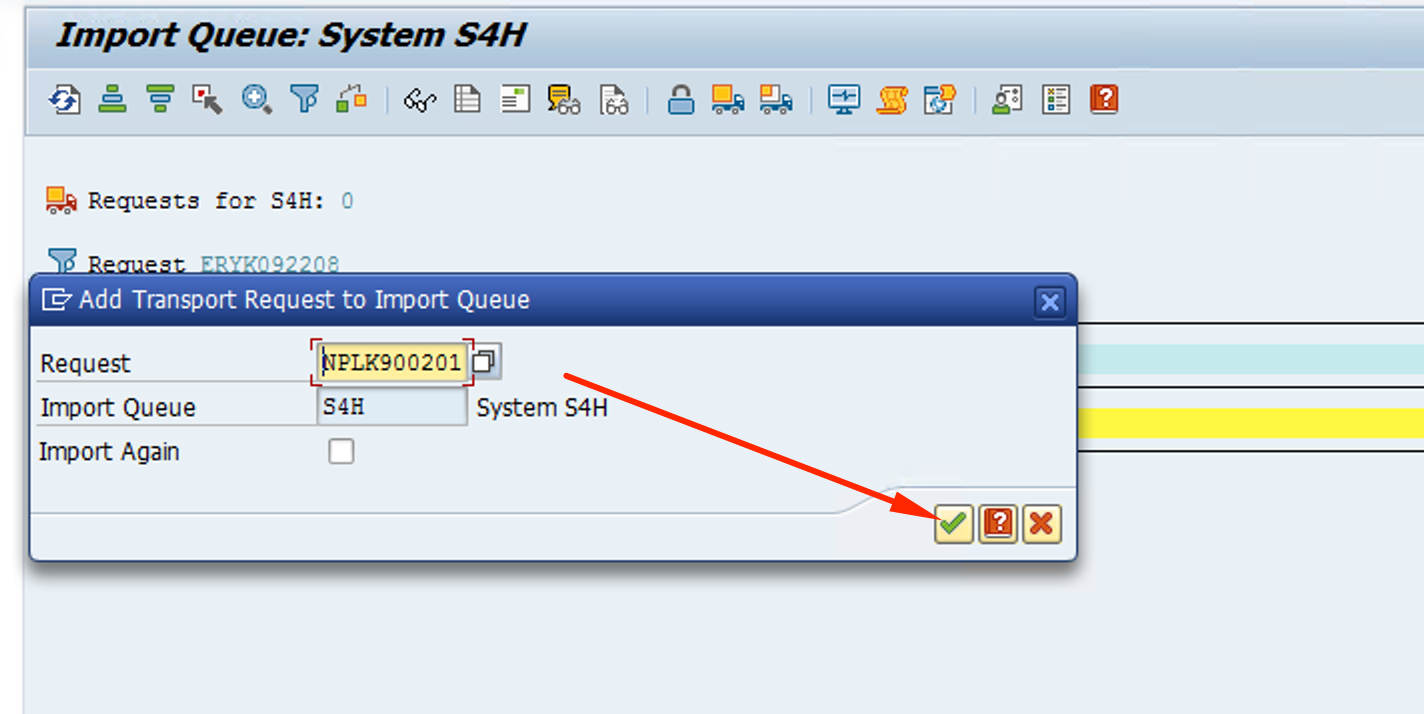
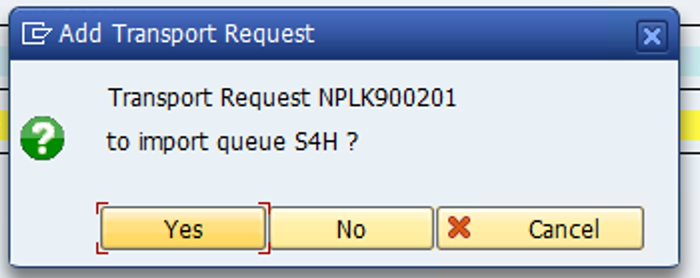
-
REPEAT THE PROCESS 4-7 FOR THE OTHER 2 REQUESTS
-
Now let’s Import all Requests, by clicking on the icon
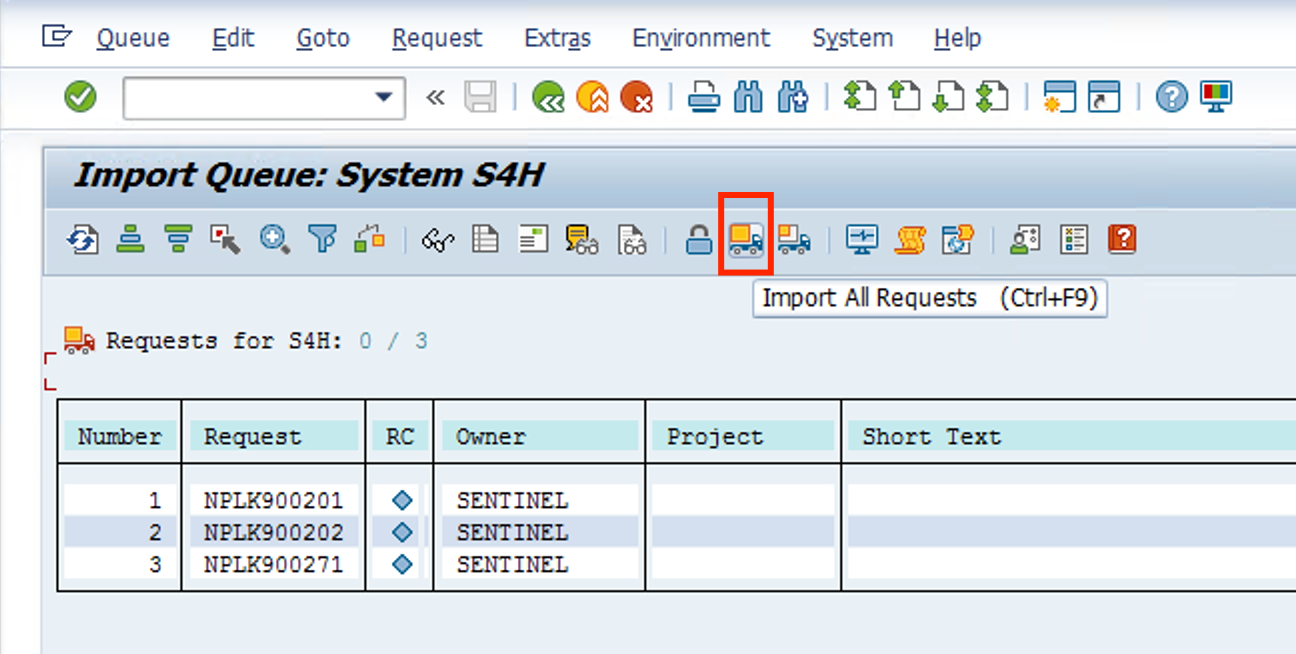
-
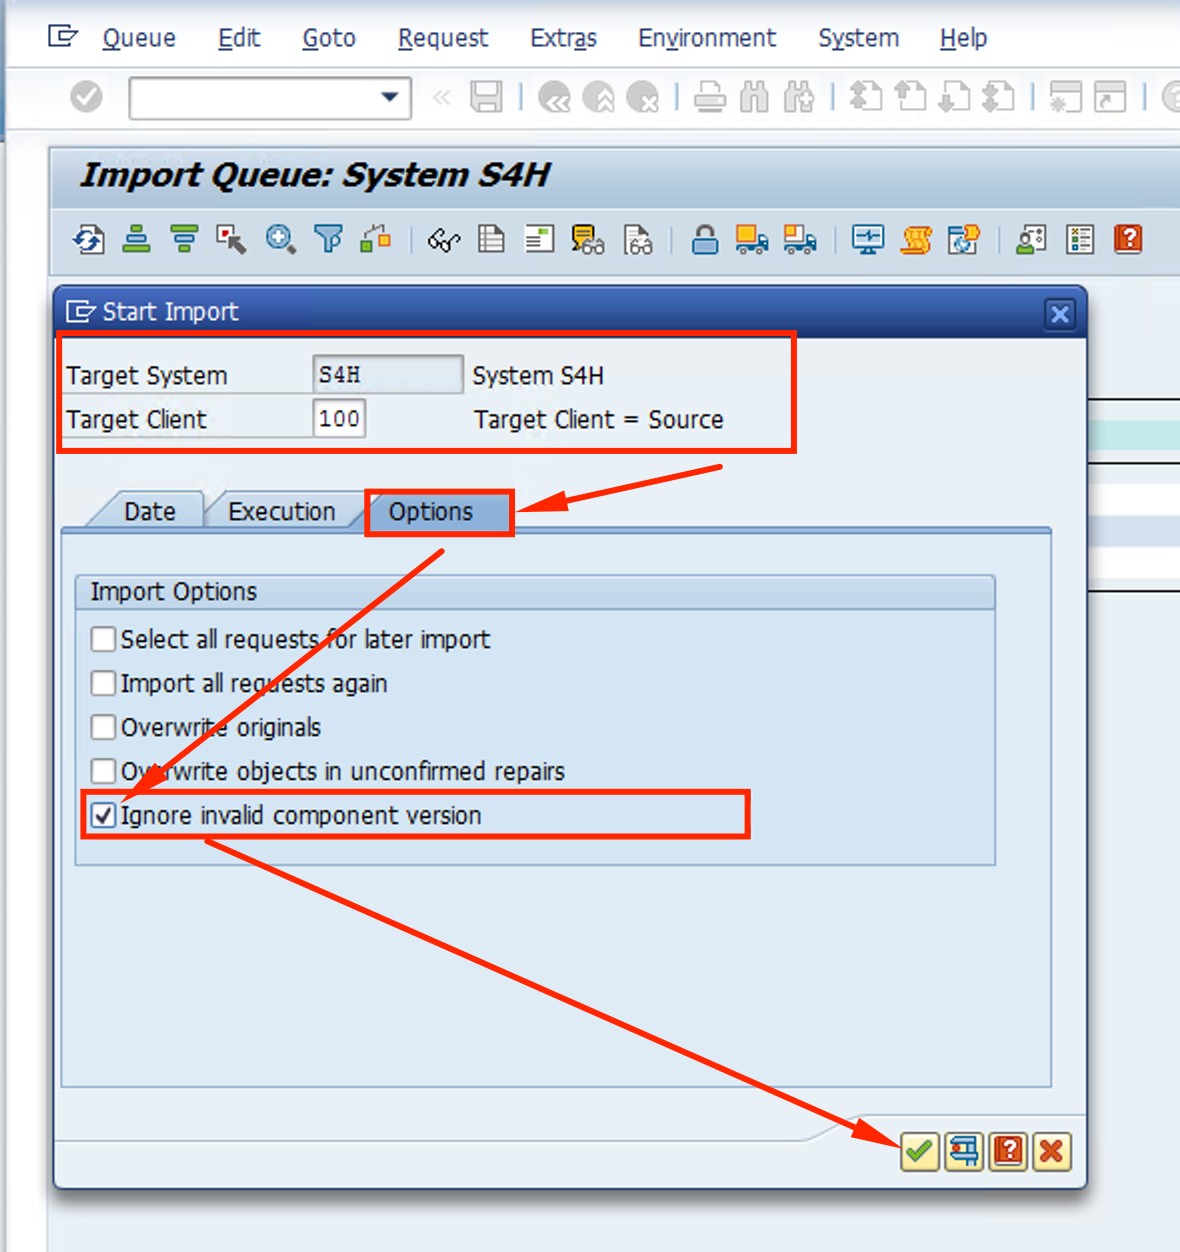
Setup the Import process:
- Target Client: 100
- Click on Options and check Igonre invalid component version
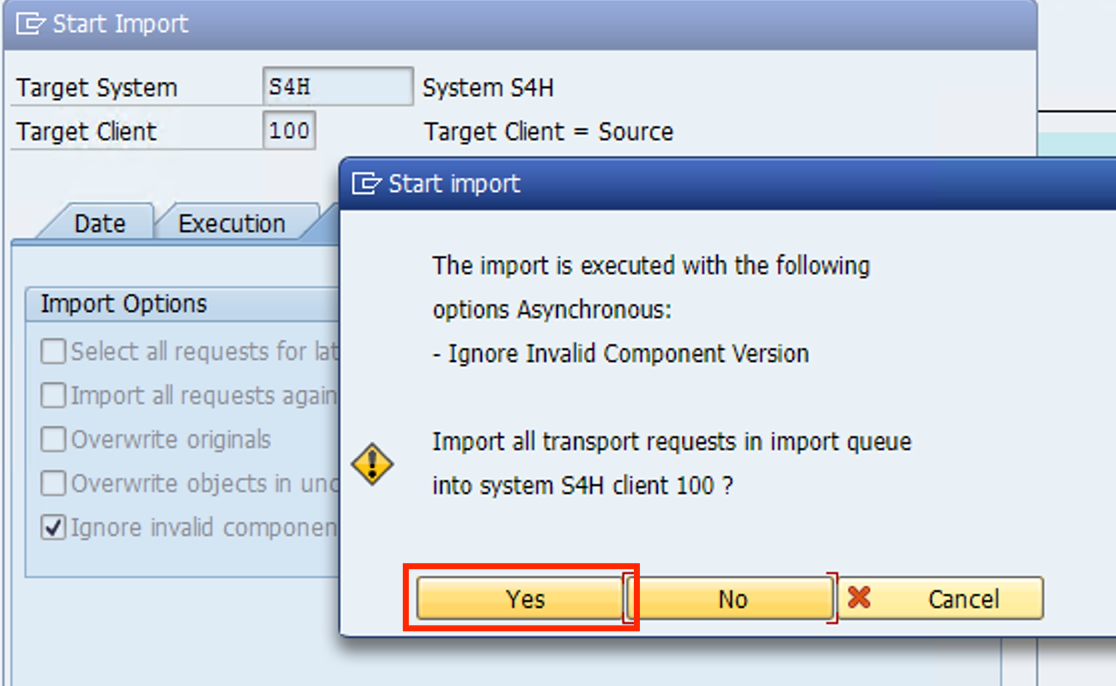
- Click on the Green checkmark and confirm on the pop up
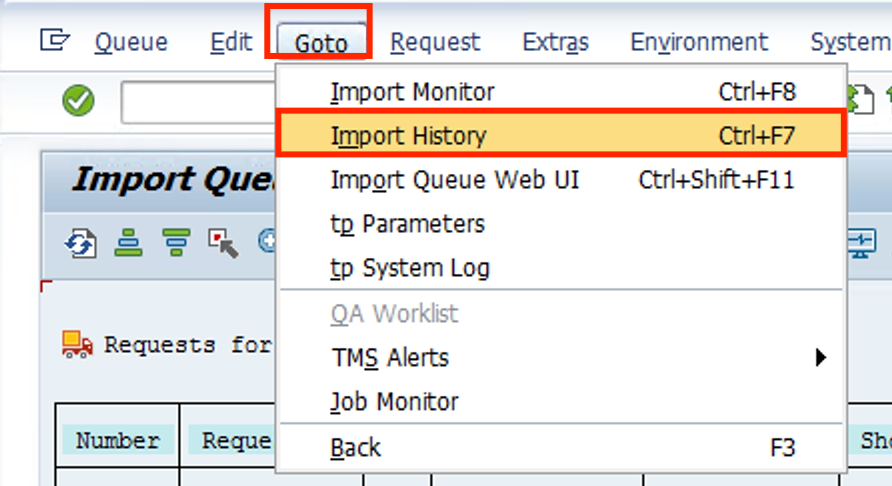
- To make sure the requests installed correctly, go to the Goto and then Import History
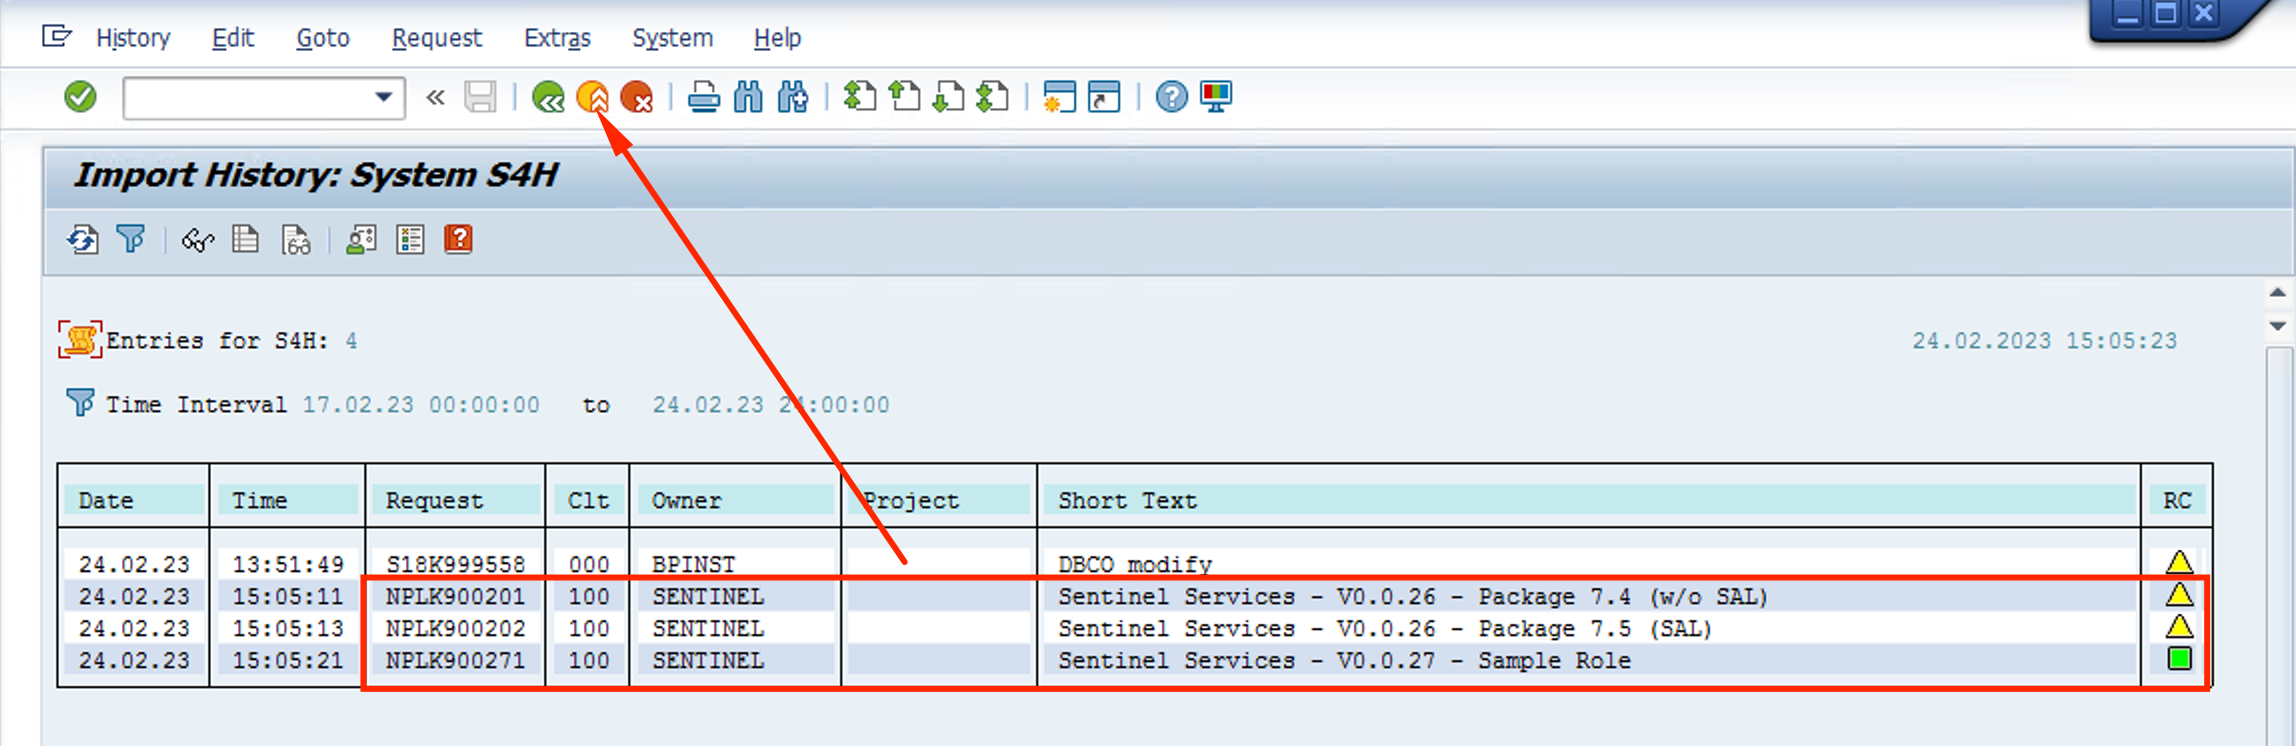
- You should see a screen similar to this, with a green status for Sample Role and a warning for the other 2. Return to the main screen using the Back button
Now, with the Change Requests implemented, we can create the ROLE and then the USER for Senntinel to read the logs from SAP.
Setting up the Role for Sentinel
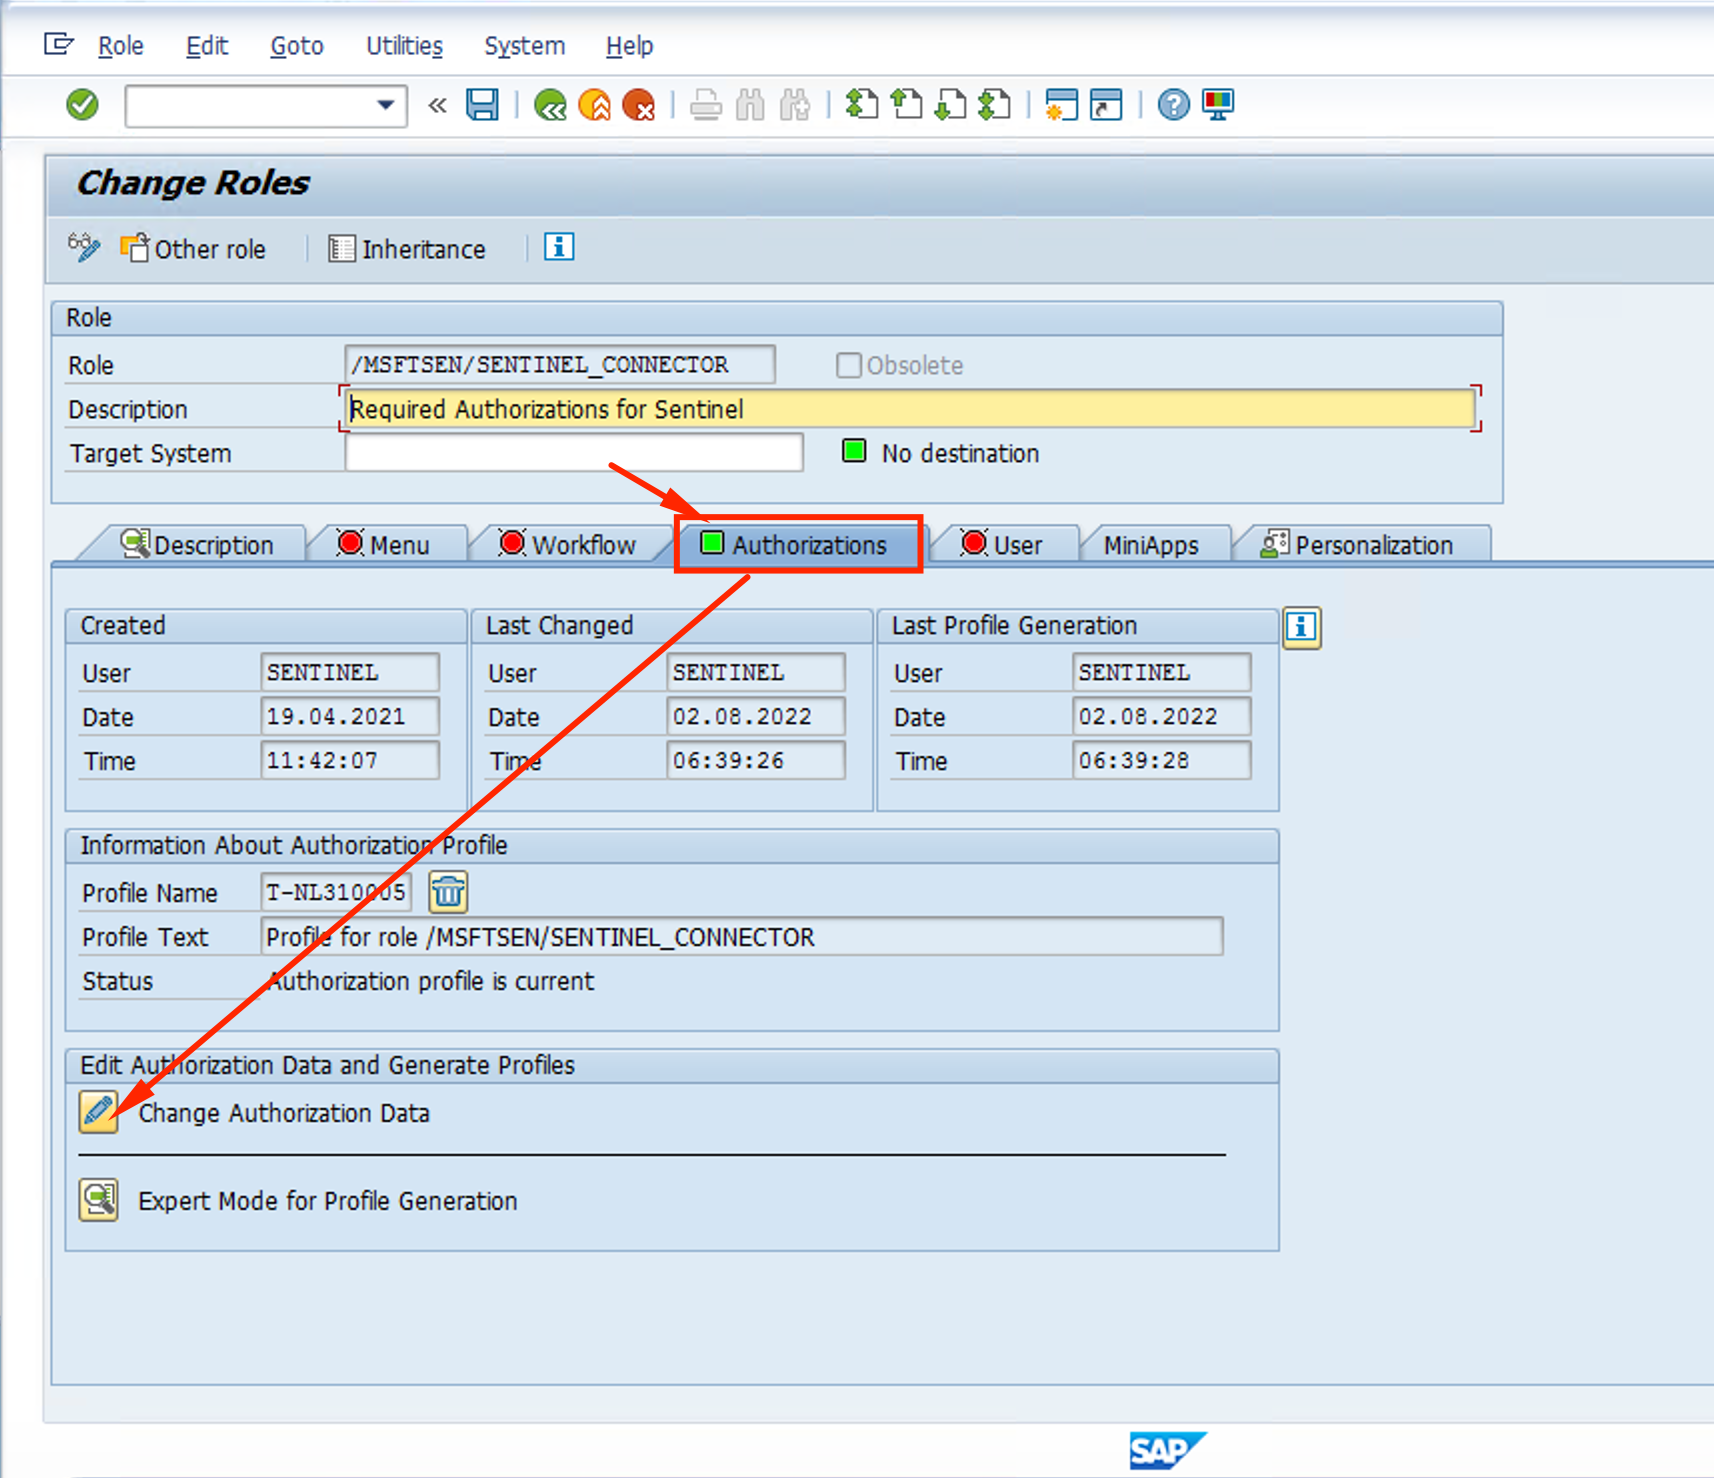
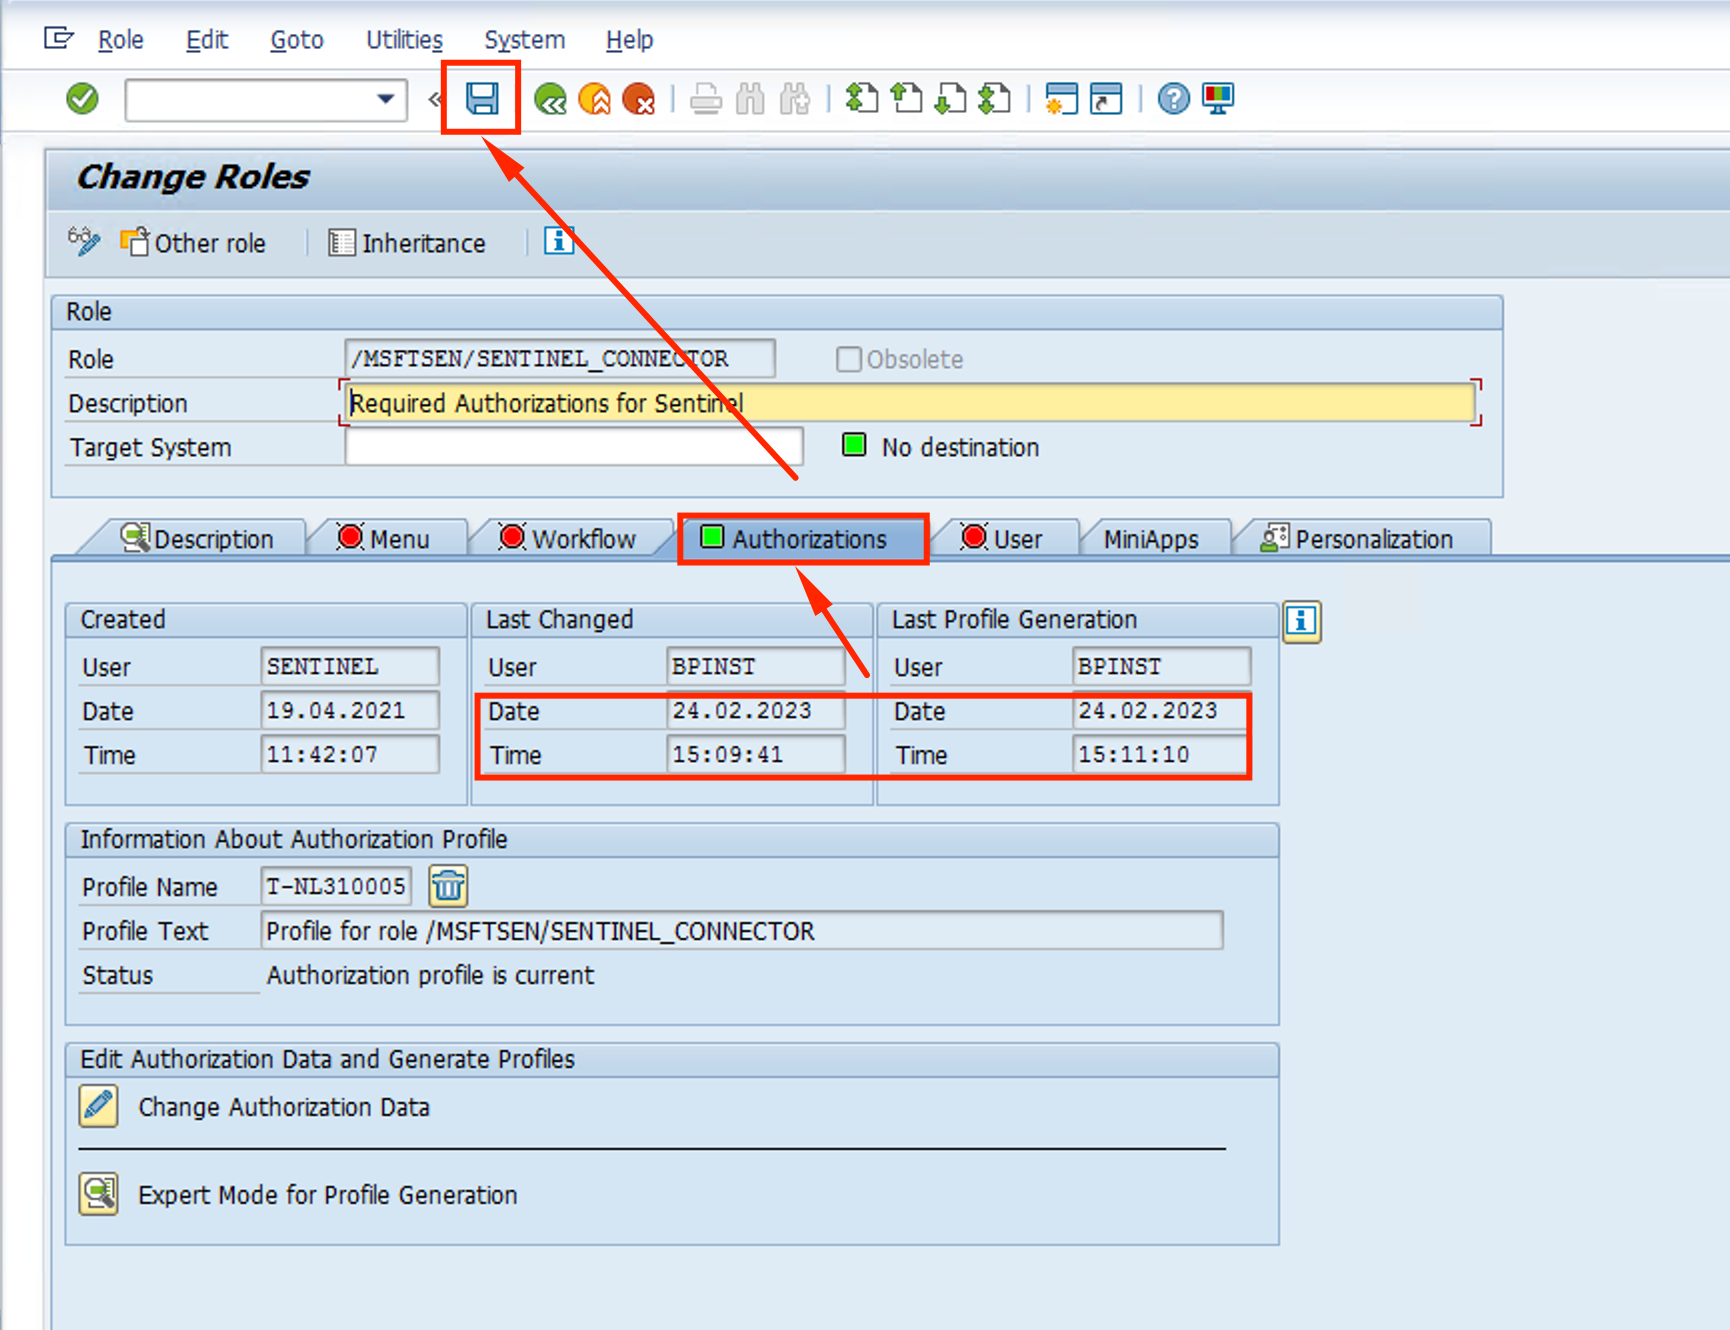
With CR NPLK900271, a role called /MSFTSEN/SENTINEL_CONNECTOR was created for Sentinel. Let’s adjust it.
- Go to TCODE PFCG
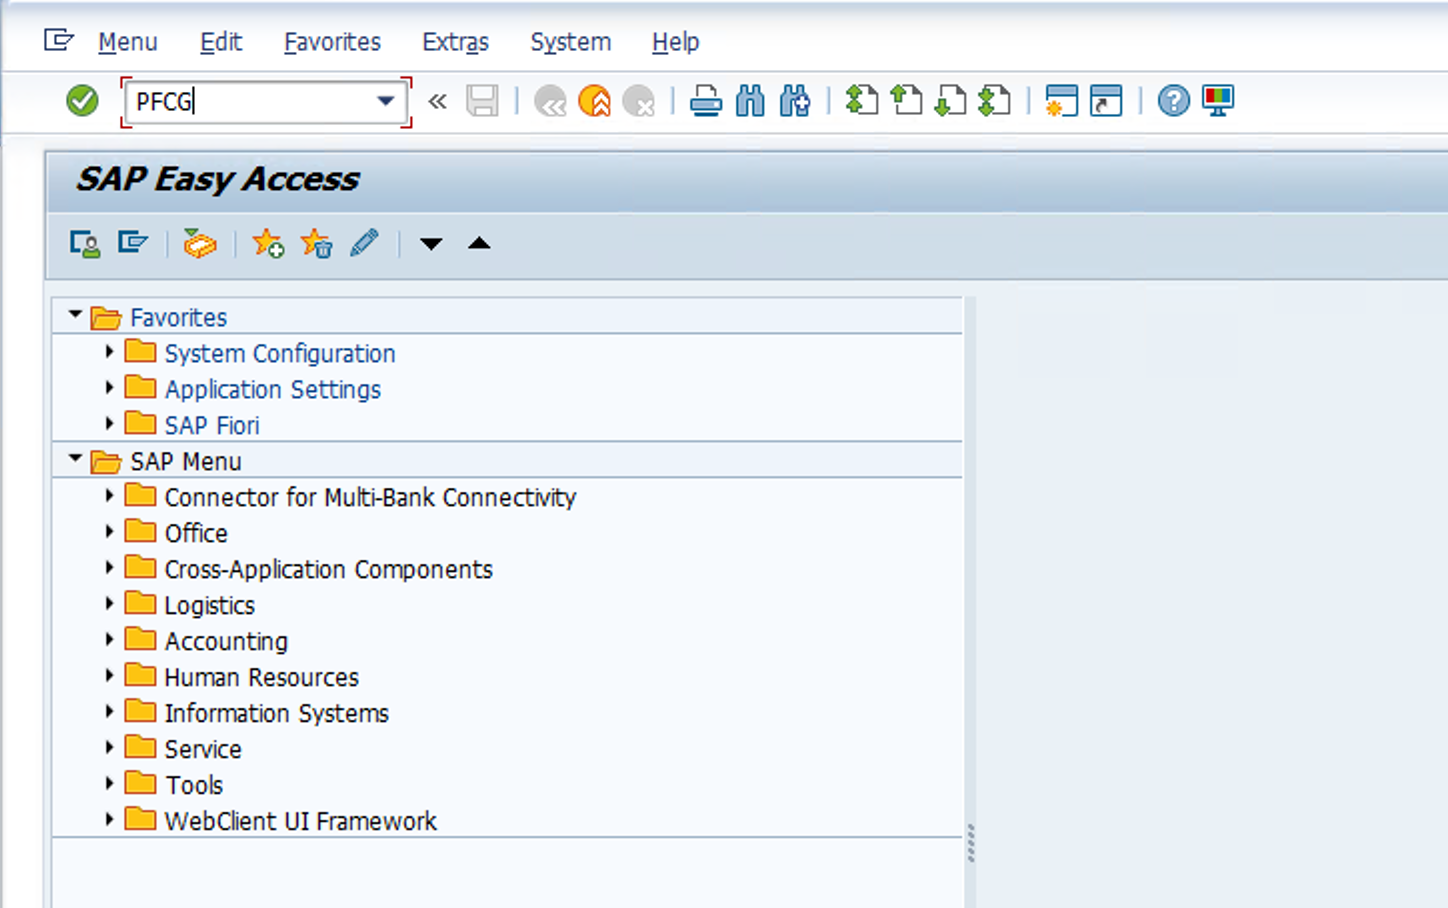
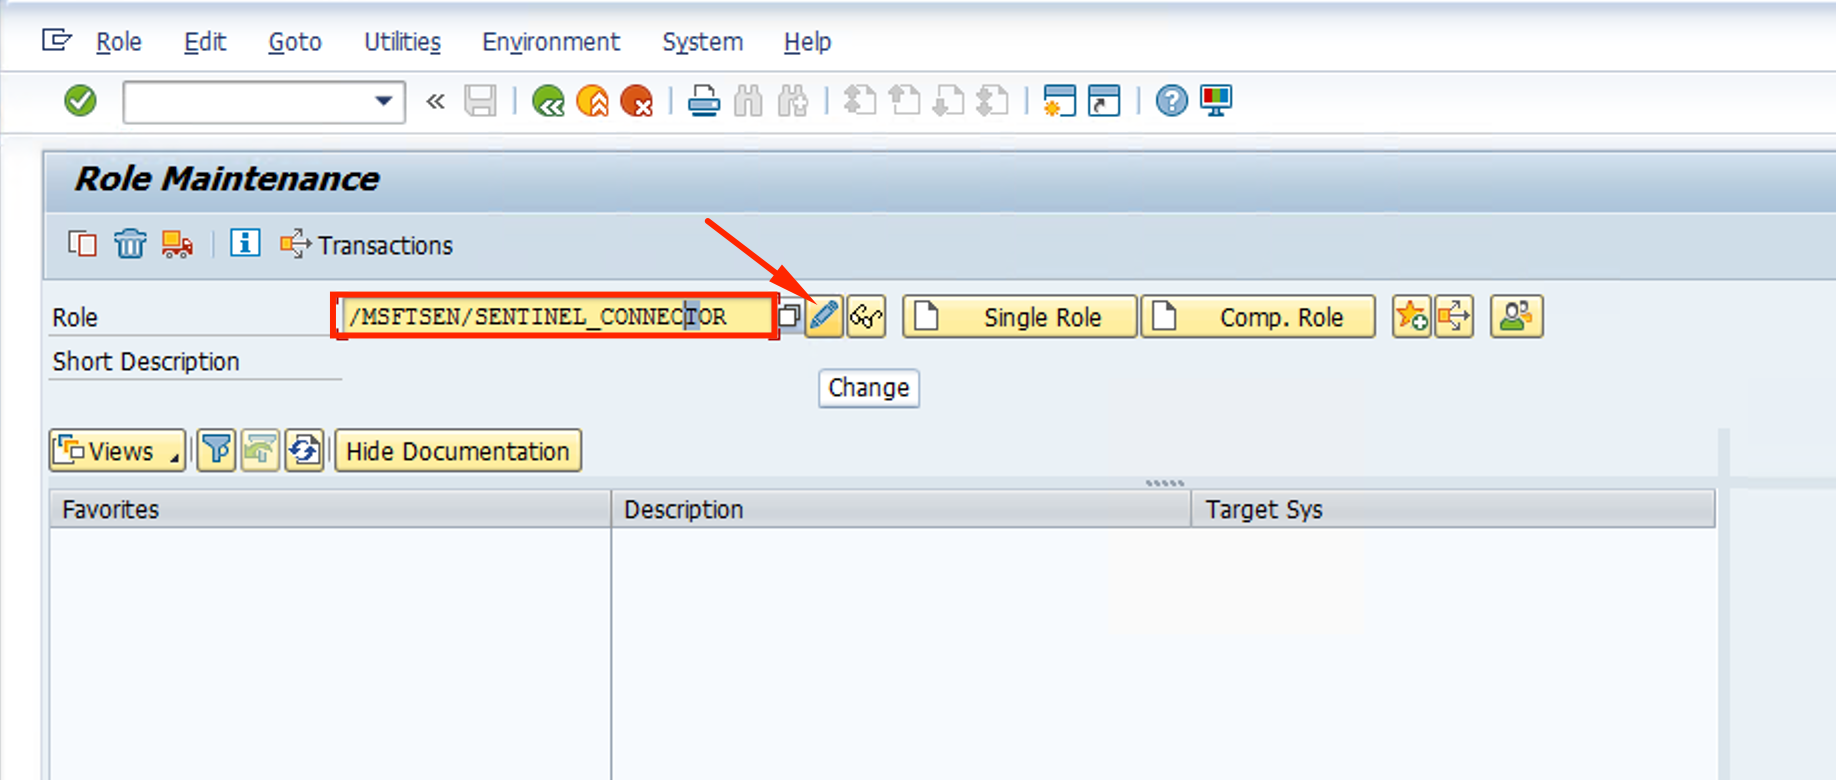
- Fill in the Role parameter with /MSFTSEN/SENTINEL_CONNECTOR and click on the Change button (Pencil icon)
- Click on the Authorizations tab and then on the Change Authorization Data button
- Note that the status is Unchanged. Click on the Generate button and the status should change. CLick on the Back button
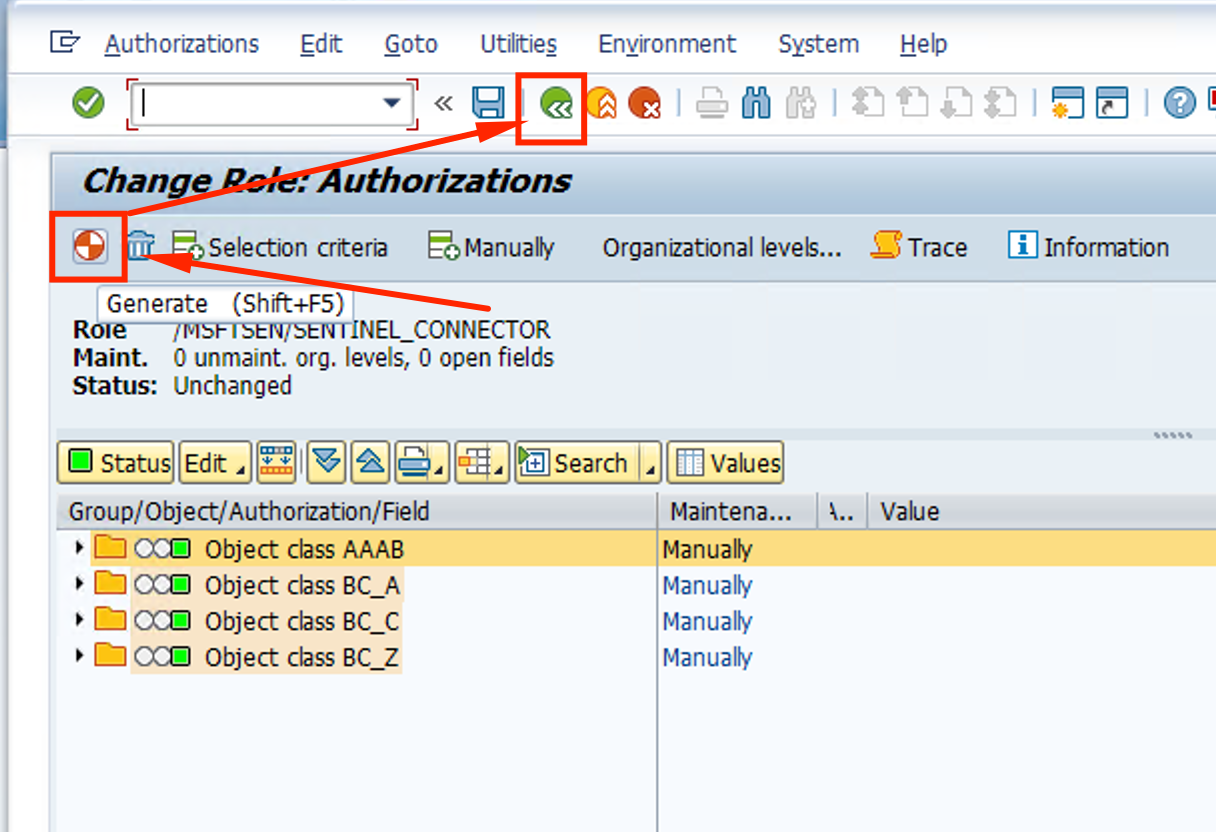
- Authorizations Tab should be green and Last Changed date should have been updated. Click on Save
Setting up the User for Sentinel
Now we can create the user for Sentinel on SAP with the proper permissions.
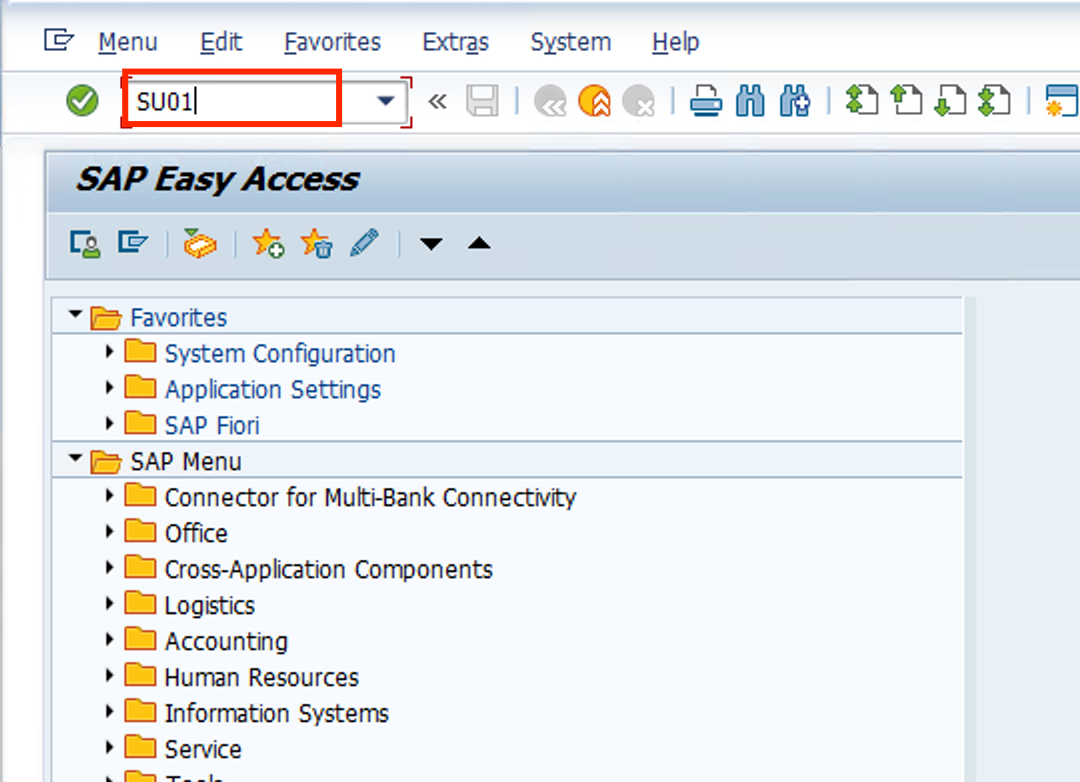
- Go to TCODE SU01 on the main screen of SAP GUI.
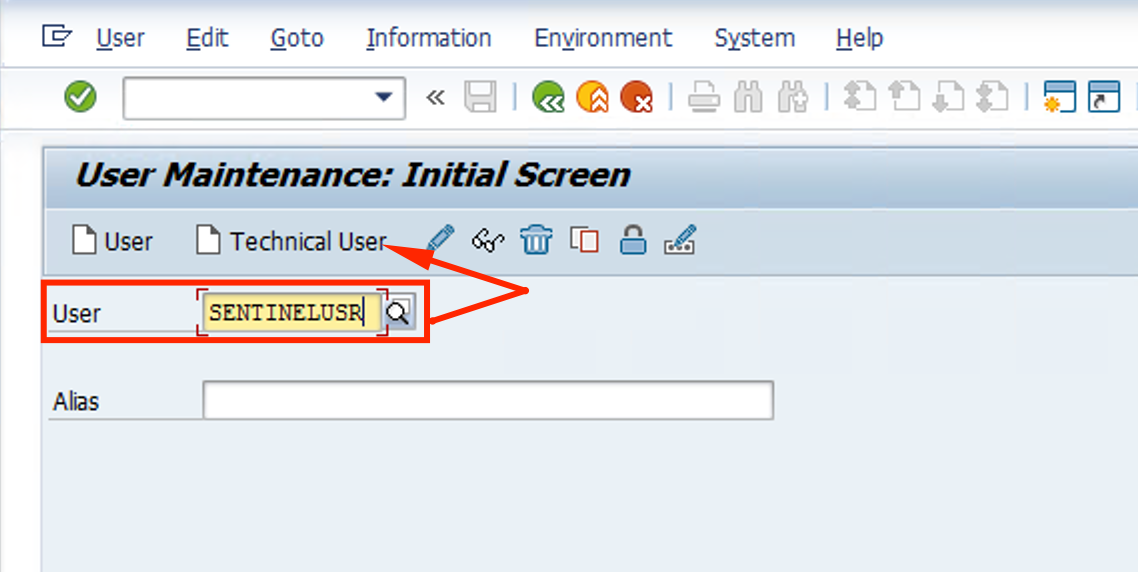
- On the Logon Data tab, fill in the User parameter with SENTINELUSR and click on the Technical User button
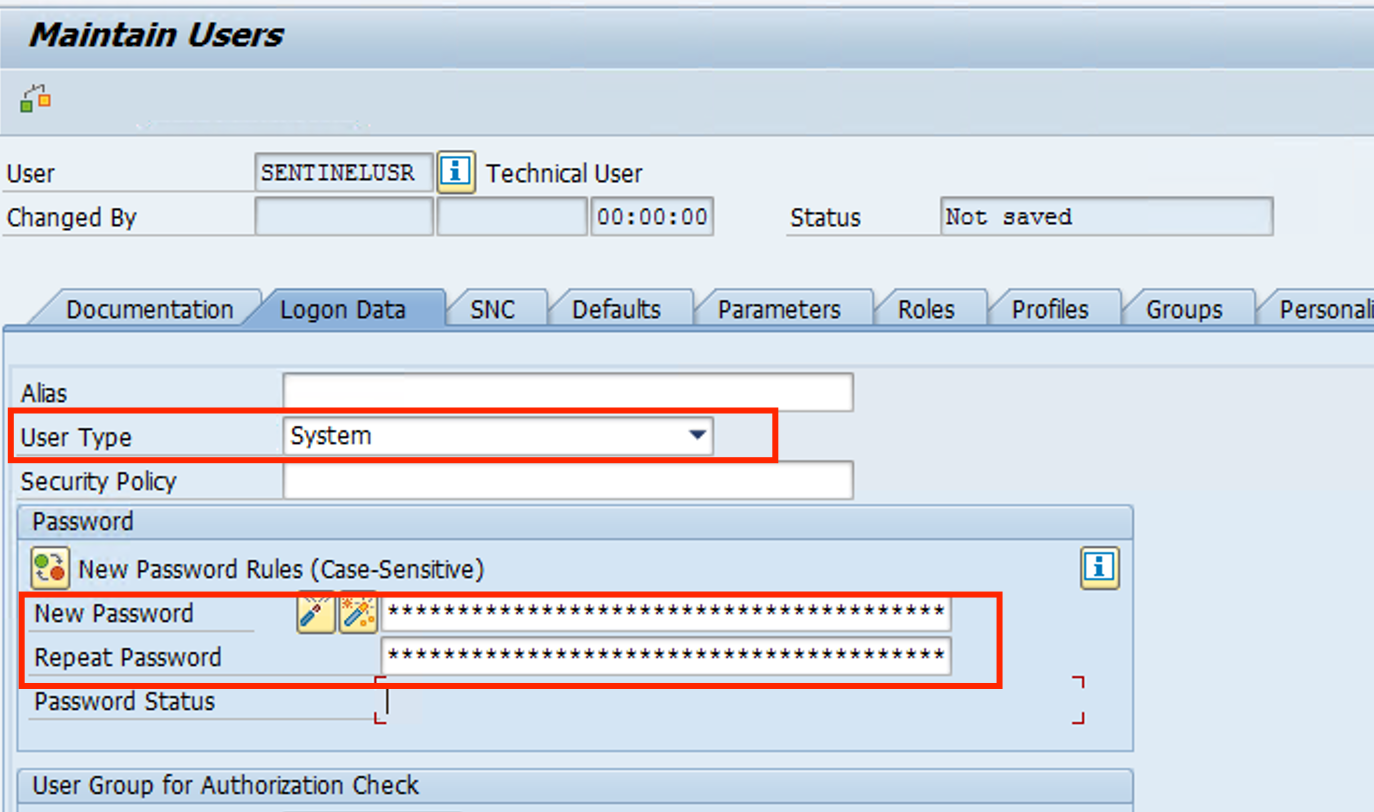
- Change the User Type to System and on Password use Microsoft01 twice.
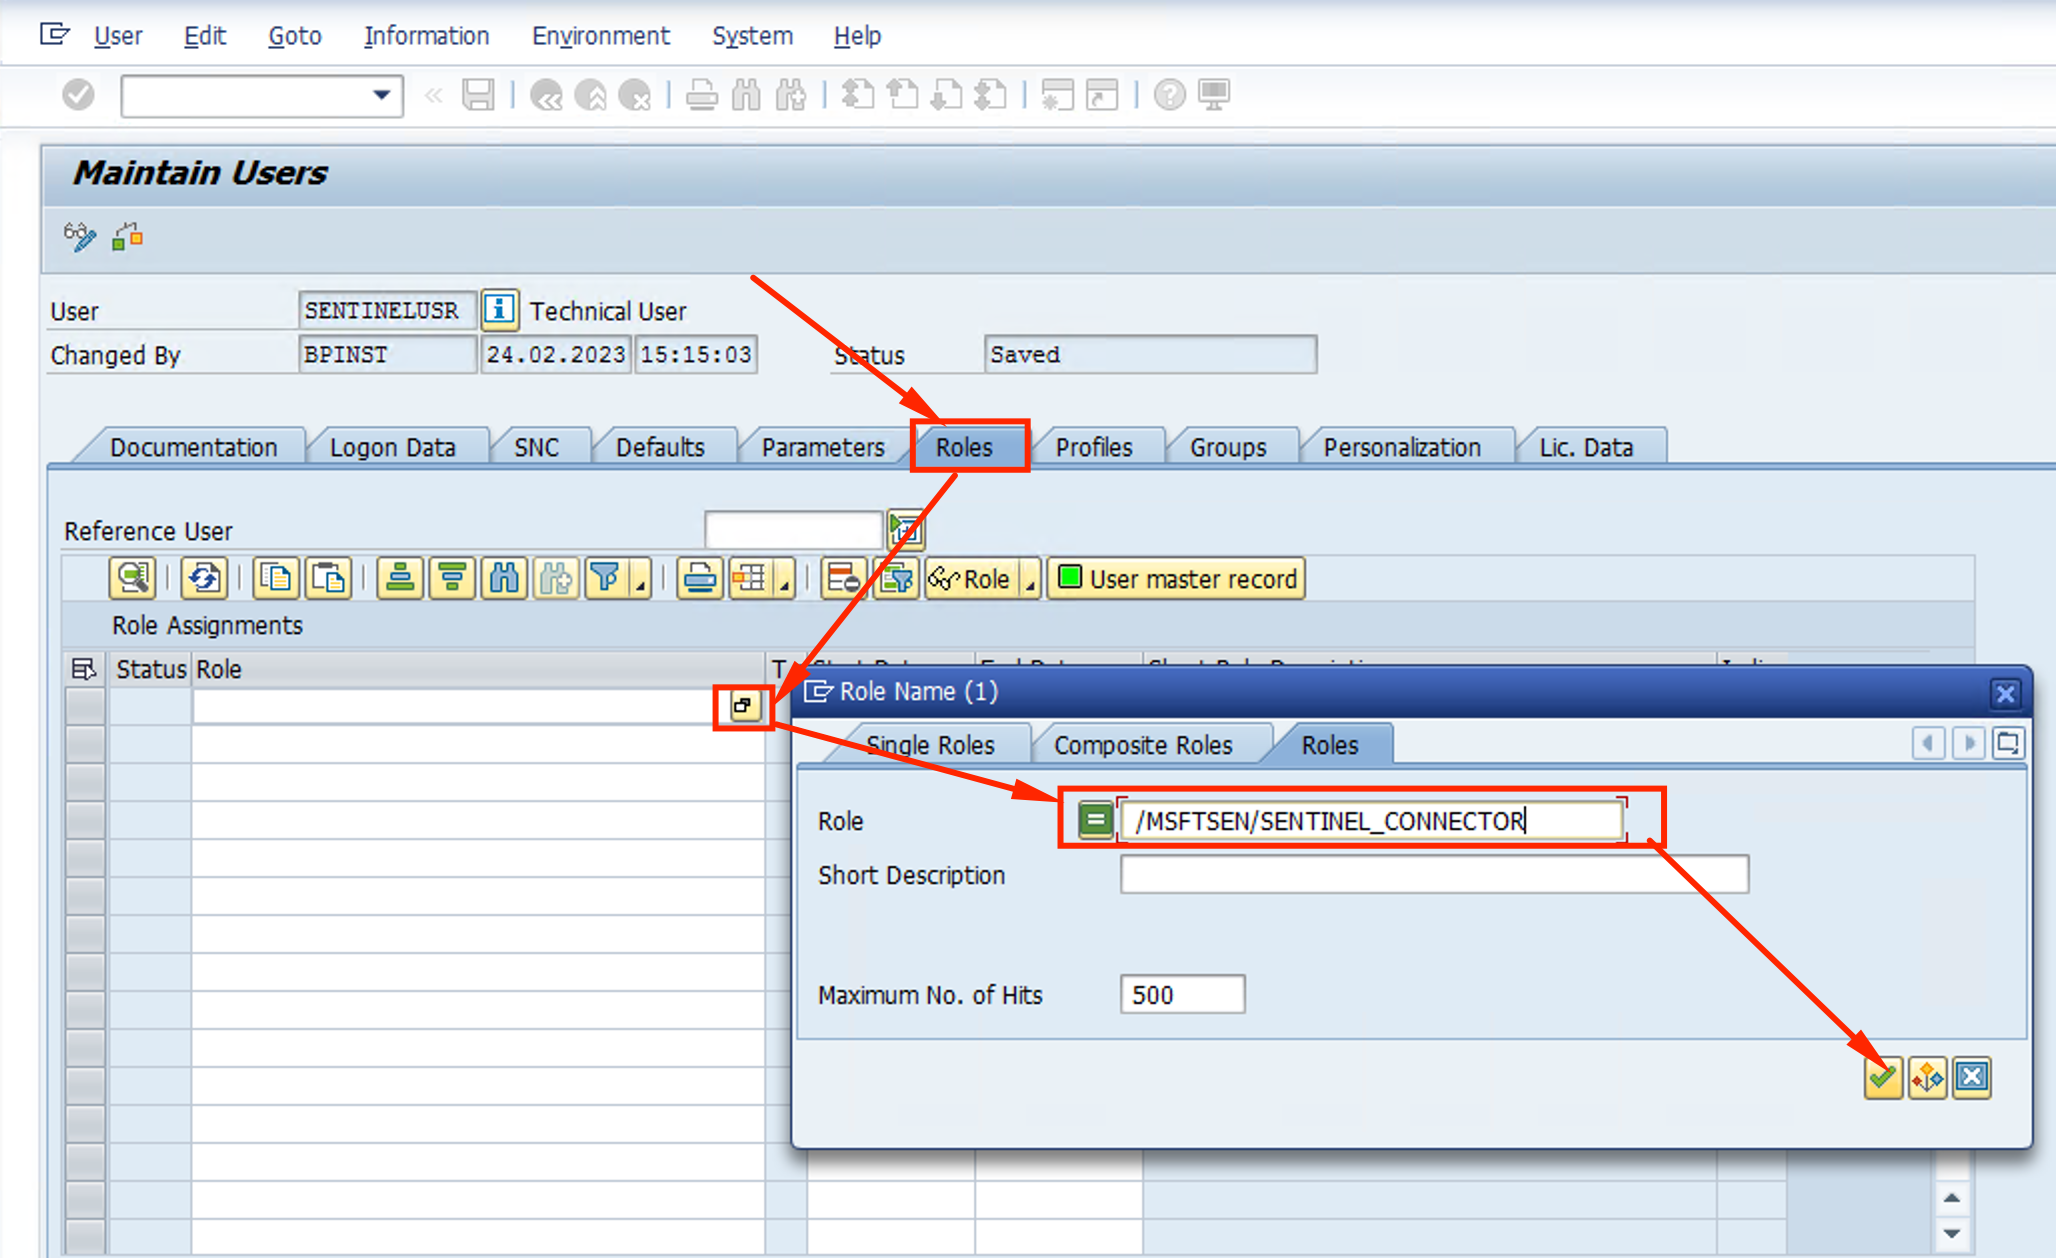
- Click on the Roles tab and it should be empty. On the first Line fo the Roles, click on the search button and search for the Role that we created /MSFTSEN/SENTINEL_CONNECTOR and click on the green checkmark.
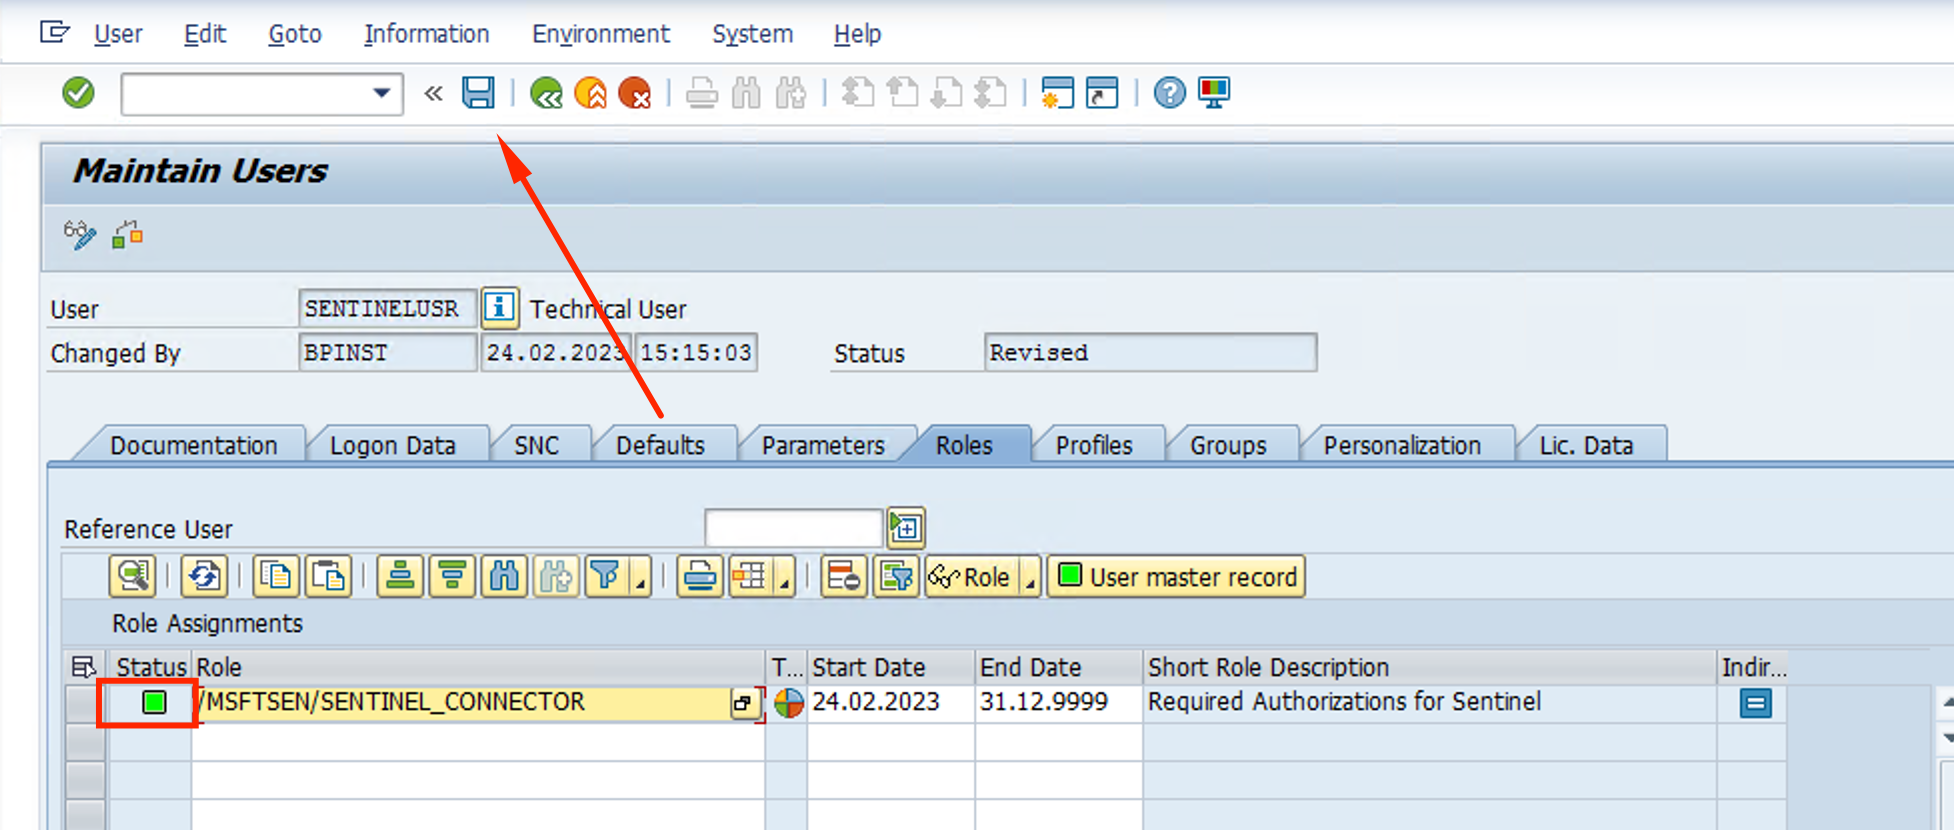
- Mark the Role with a check and click on the green checkmark

- Status should be green. Click Save
Now we have setup the permissions for Sentinel to get the logs from SAP.
As a final step, we need to enable Audit Logs on SAP, since this is not the default on the SAP CAL deployment.
Setting up Audit Logs on SAP
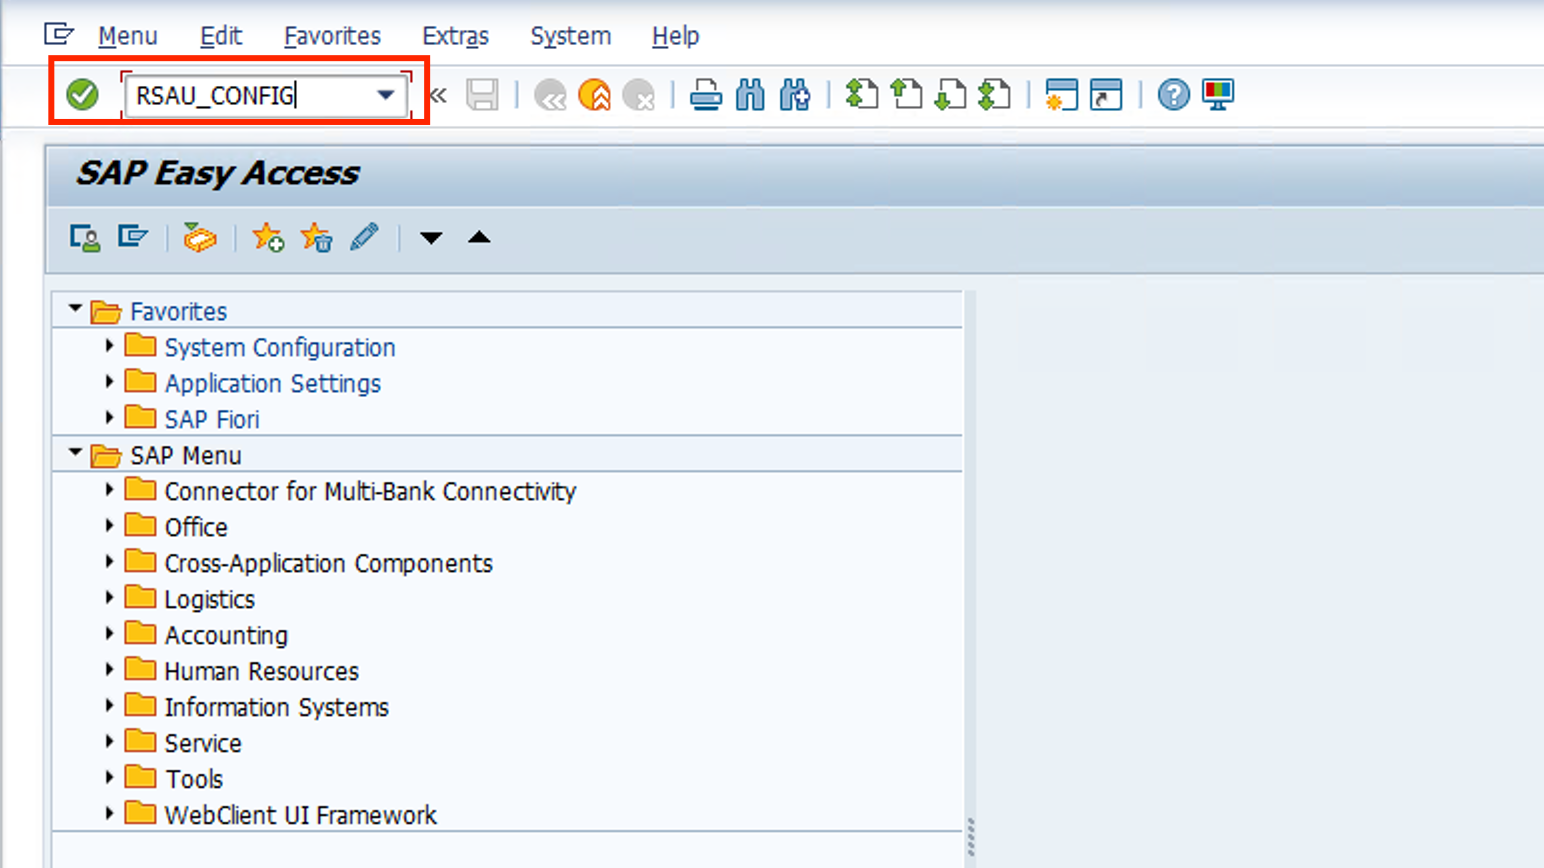
- Go to TCODE RSAU_CONFIG on the main screen of SAP GUI.
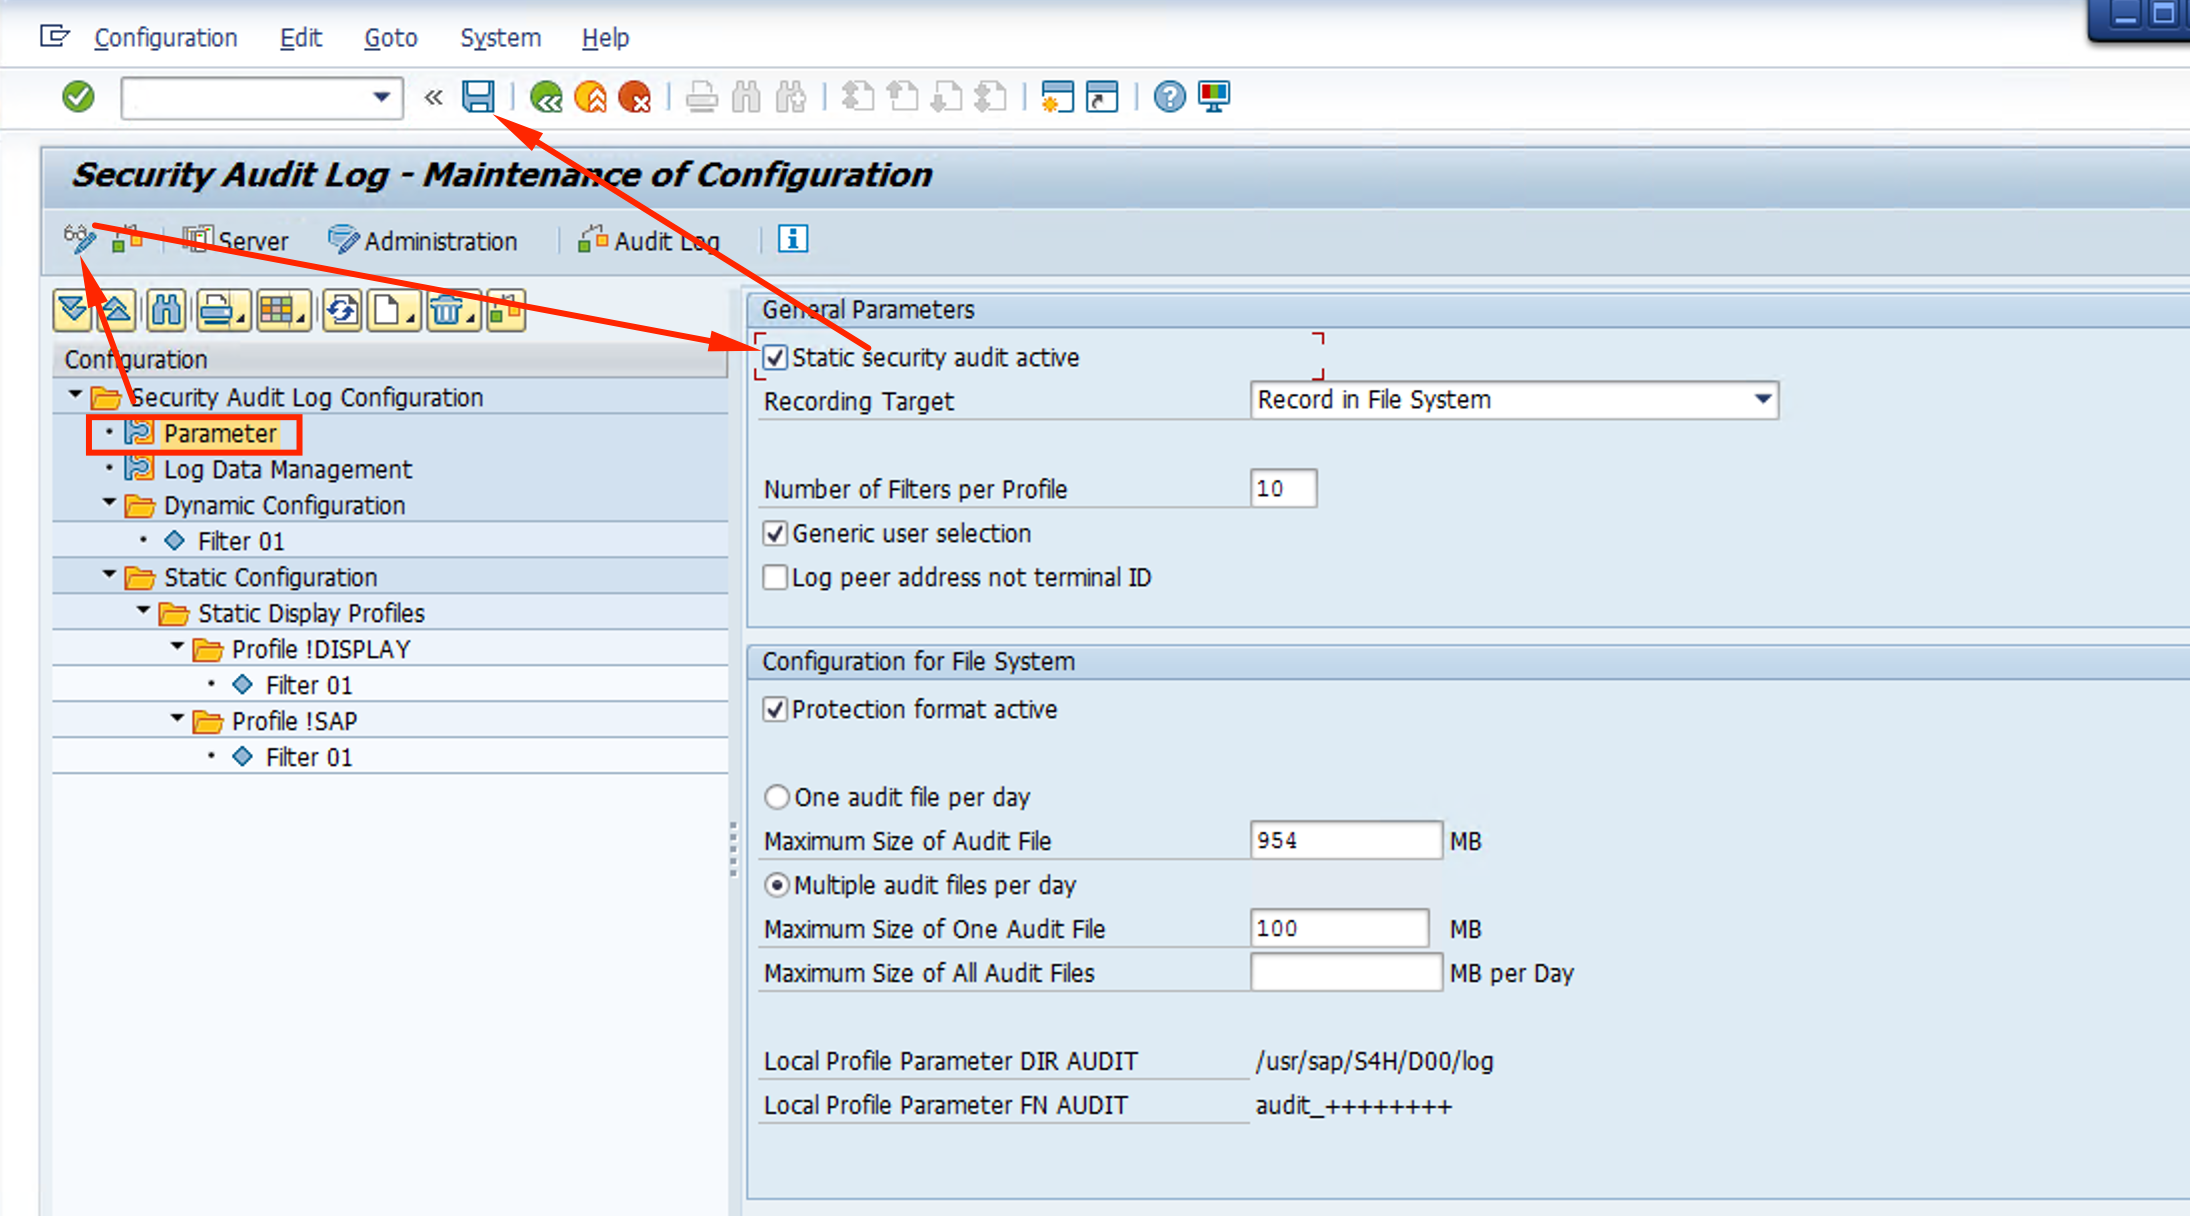
- Click on Parameter, then on the Edit button (Glasses and pencil icon), enable Statitc security audit active and hit Save
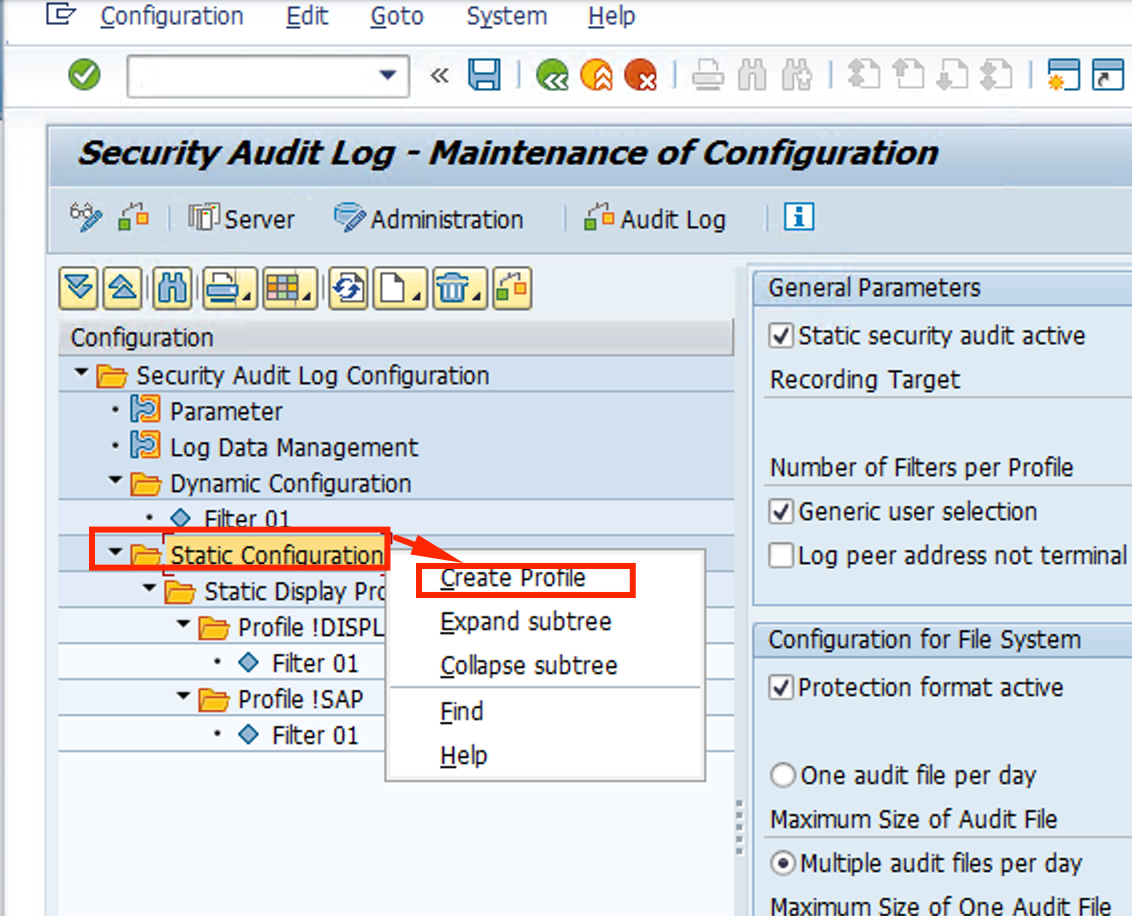
- Right-click on the Static Configuration menu item and then select Create Profile
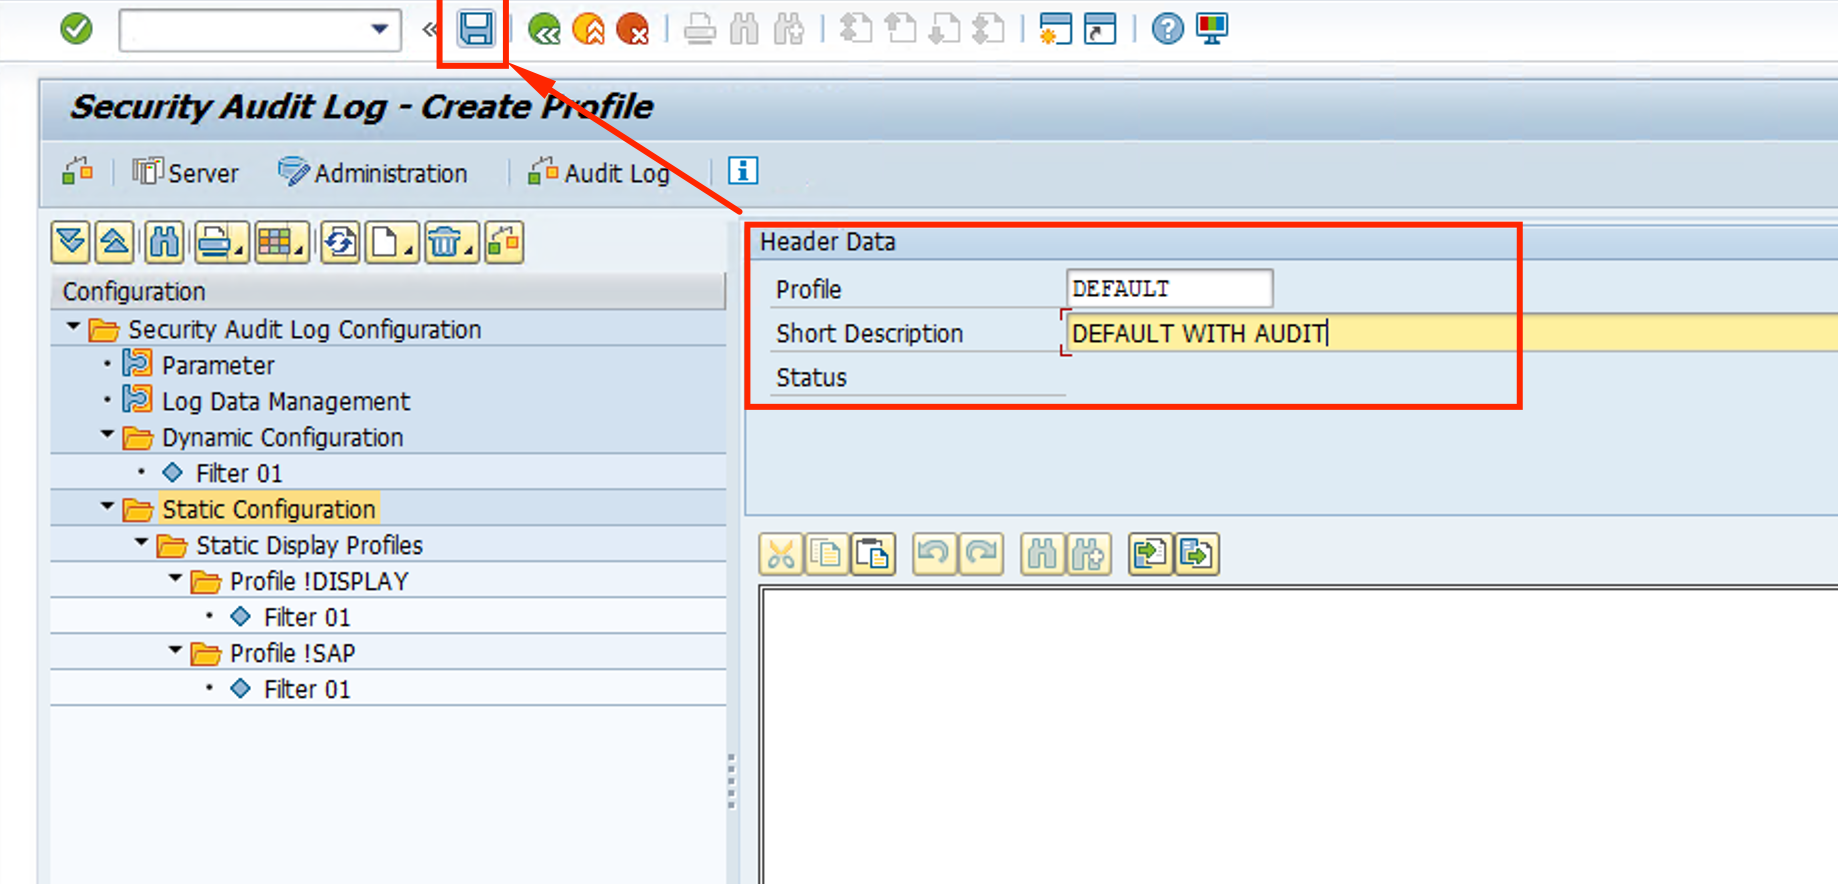
- Name the profile Default and as Description put Default with Audit. Click Save button
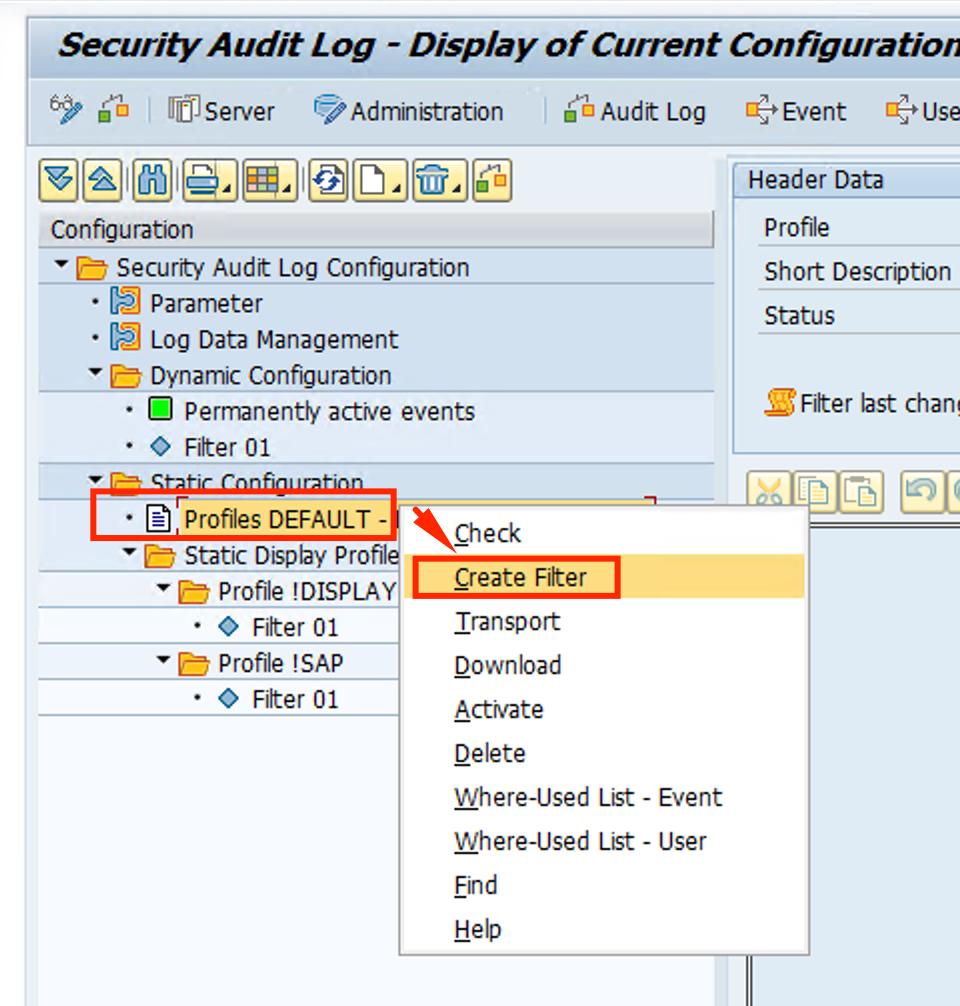
- The new profile will show up under Static Configuration. Right click it and select Create Filter
- Make the following changes:
- Enable Filter for recording active
- Client = *
- User = *
- Select Classic event selection
- Mark All Audit Classes
- Click Save

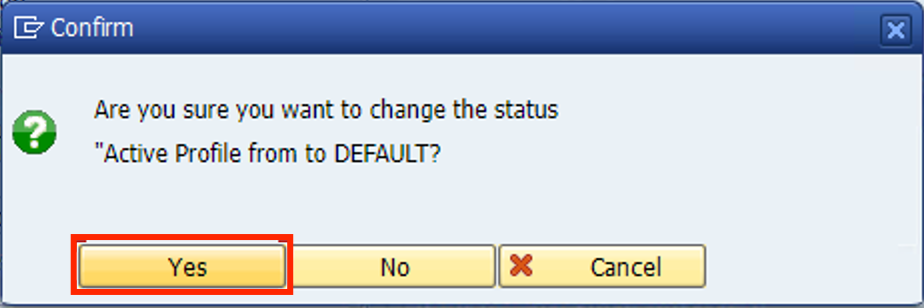
- Right click the Default profile again and select Activate. Confirm the change.
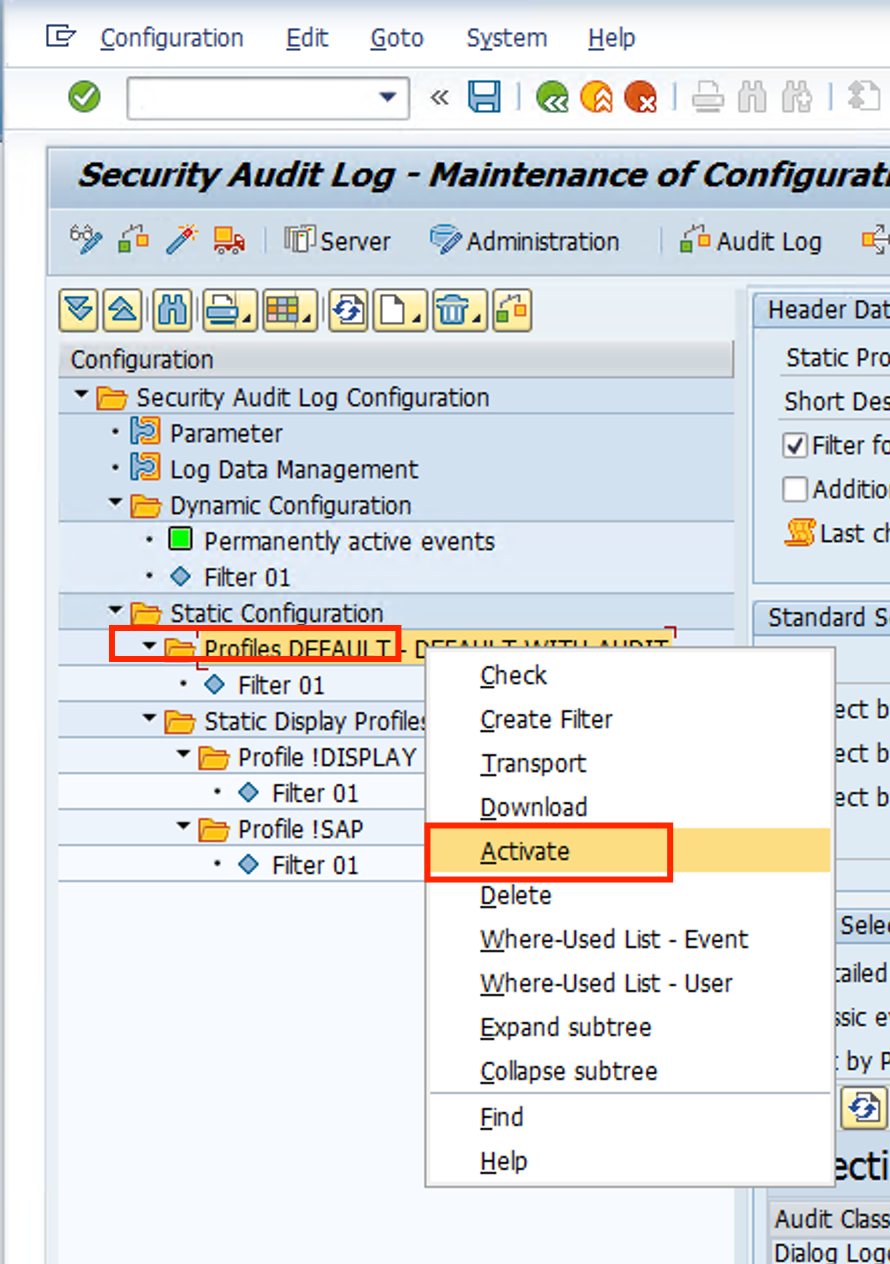
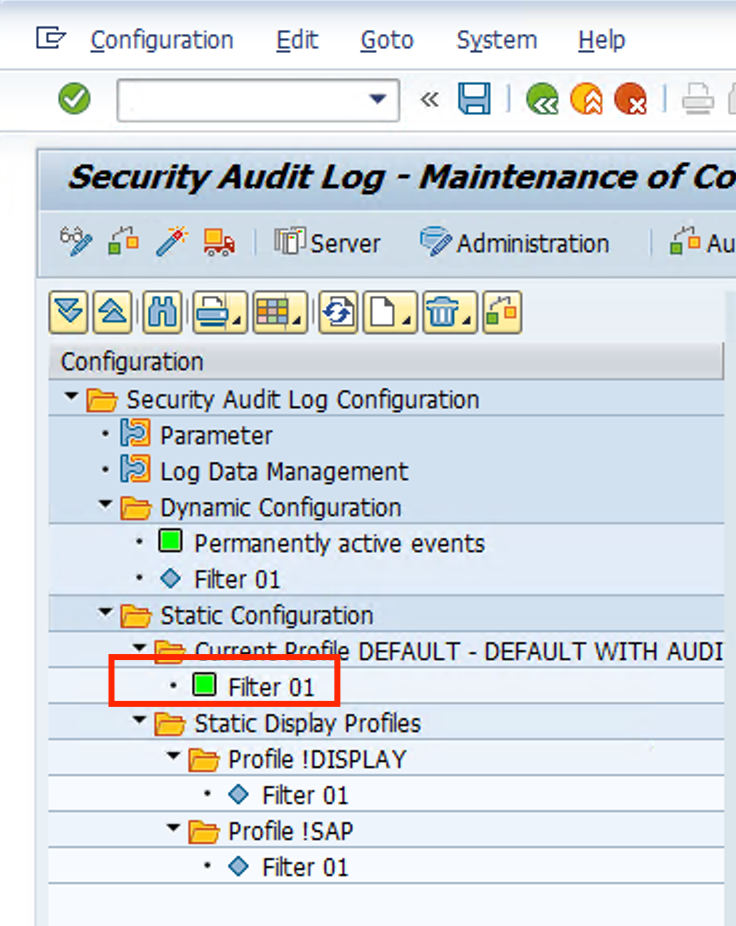
- Filter under Default should show up with a green icon.
- Finally, we need to reboot SAP for changes to be in effect. On the SAP CAL dashboard on your web browser, clieck on Appliance, select your deployment, and on the right side, click on the … and select Reboot so changes can be in effect.

That was a long one. It needs to be done just once.
Go grab a coffee and a snack and give it 10 minutes for SAP to reboot and come back online with the changes and logs activated.