Setup Azure AD, Fiori & SSO
Now we will start to configure Azure Active Directory to be a provider for SAP. This will be a back and forth process where we configure AD, go to SAP to configure it, and return to finish AD configuration.
- Go to Azure Portal and select Azure Active Directory

Setting Up Active Directory
In case you don’t have an AD configured already on your subscription, keep going. To use existing AD, jump to step #6.
- Let’s create and Azure AD Tenant. Click on Create and select Azure Active Directory; click Next to Configuration
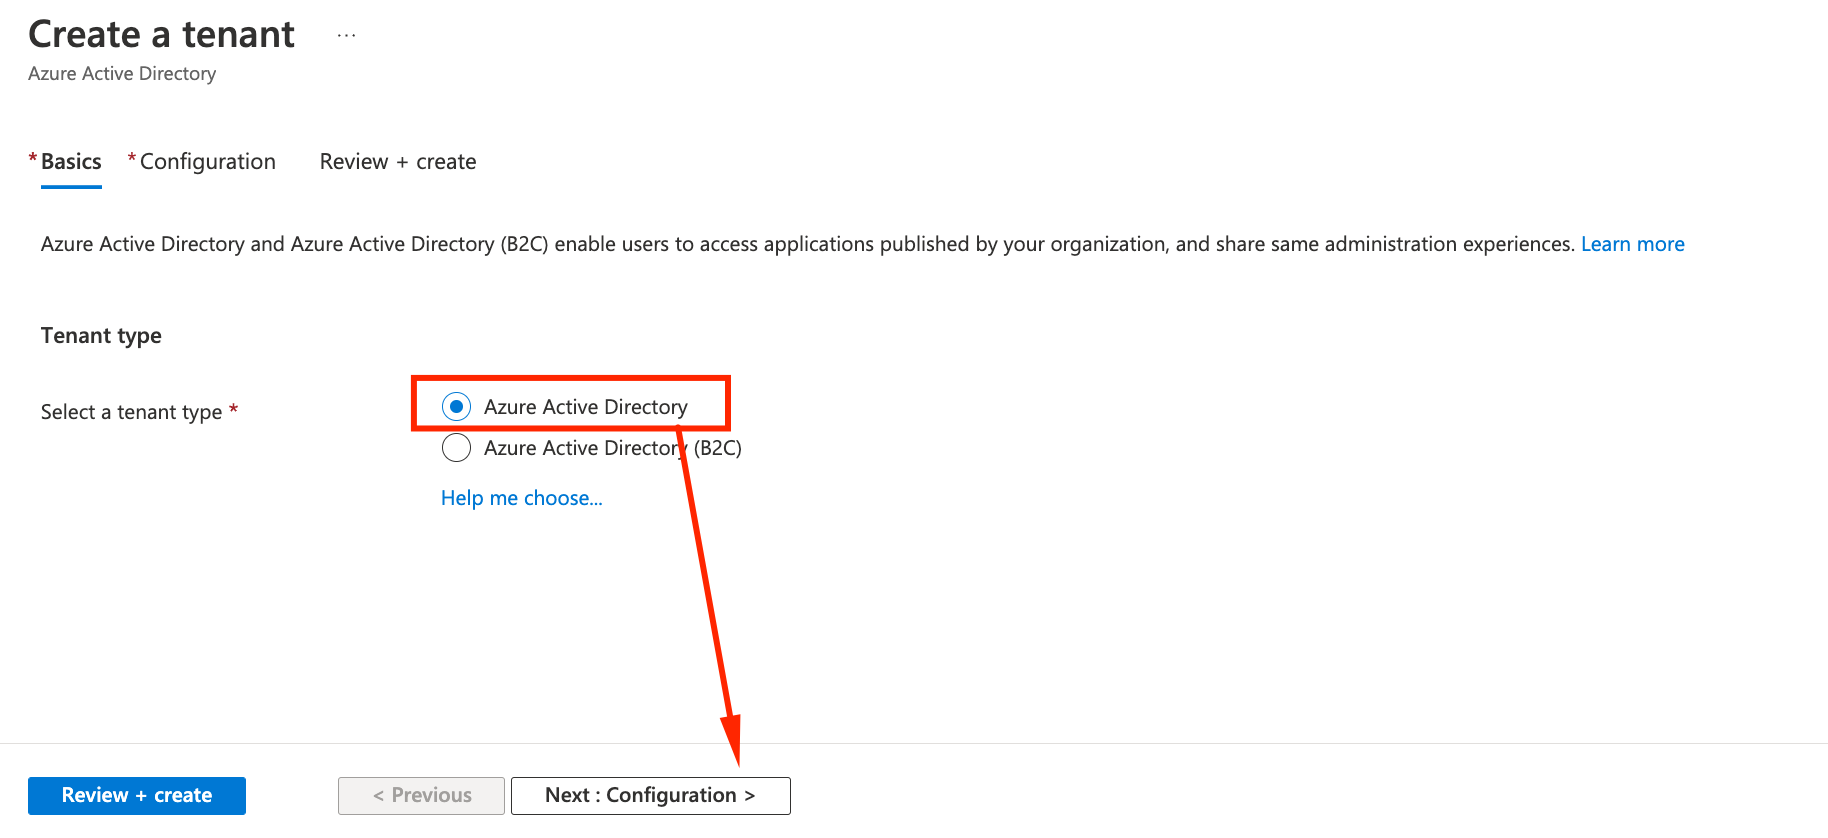
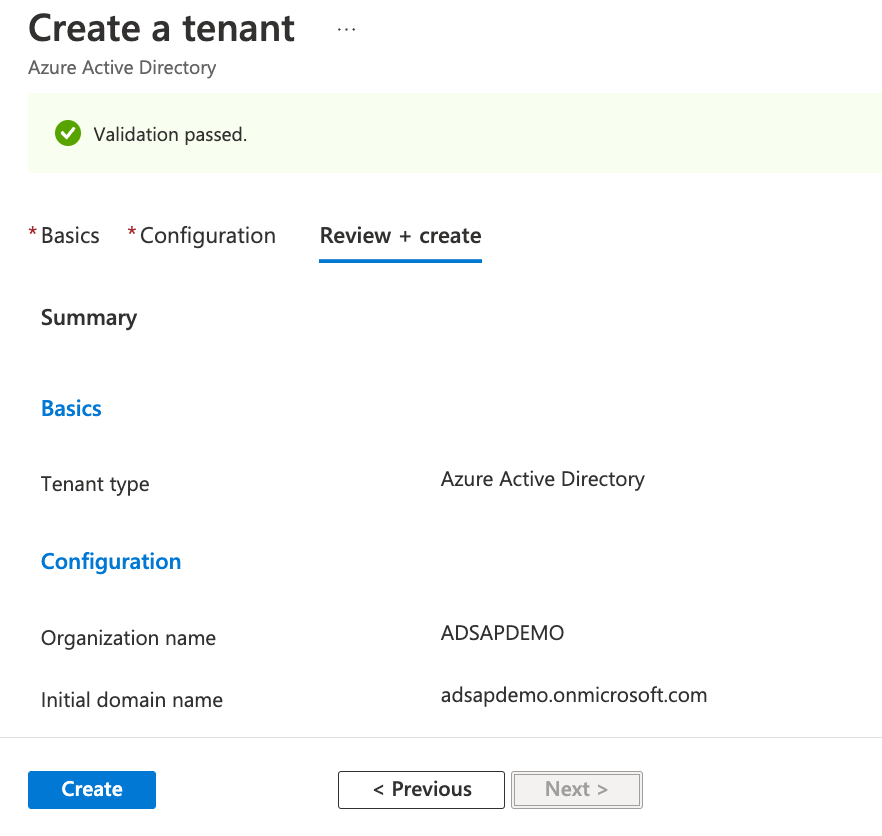
- On the configuration tab, give it an organization name (in the example ADSAPDEMO) and a UNIQUE Domain (in the example we used the same name). Make sure the Tenant is in the same region that your S/4HANA (In the example United States). Click Review and Create
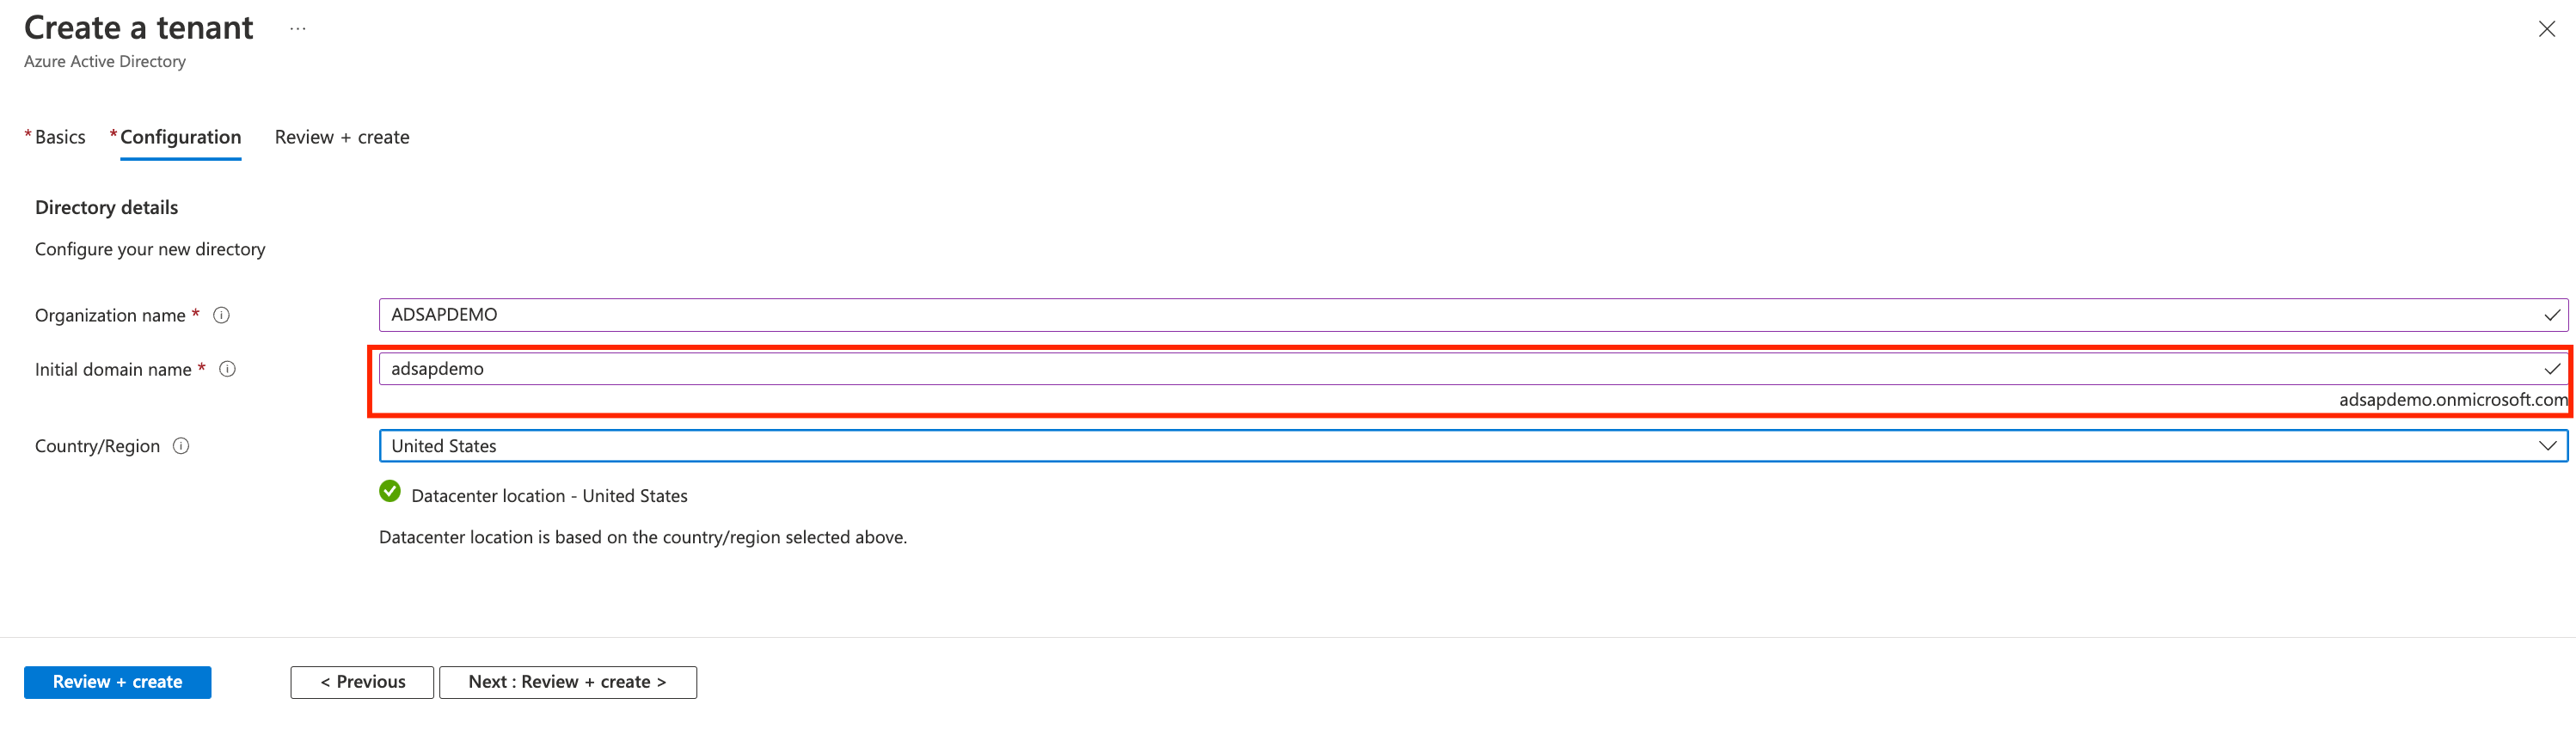
- Click Create
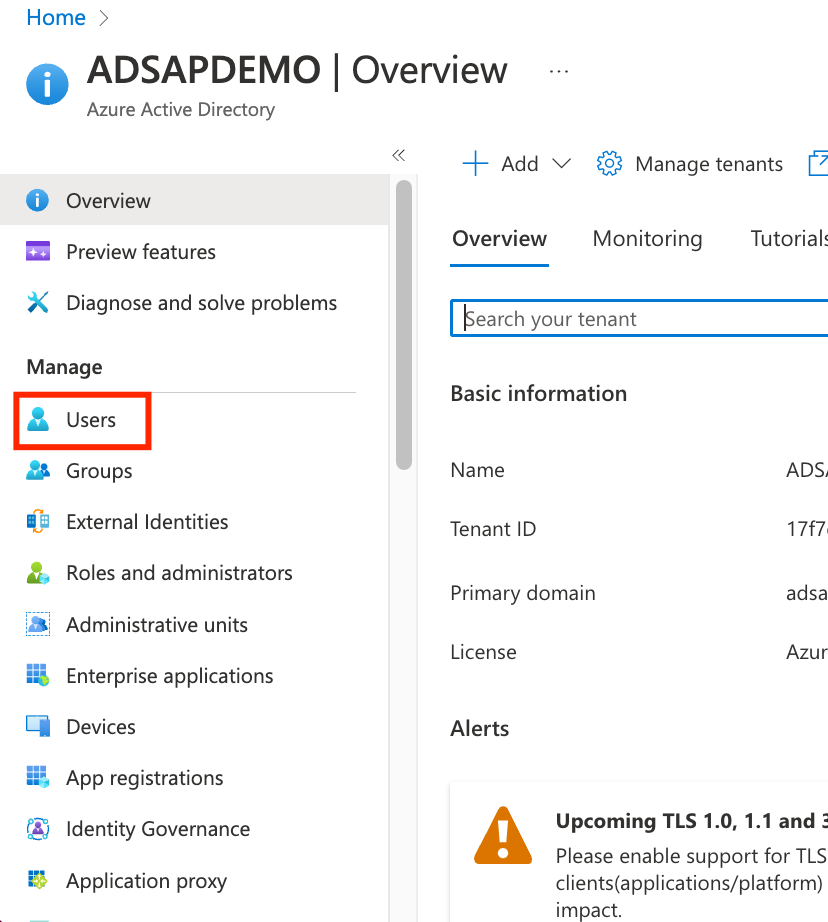
Creating our AD user
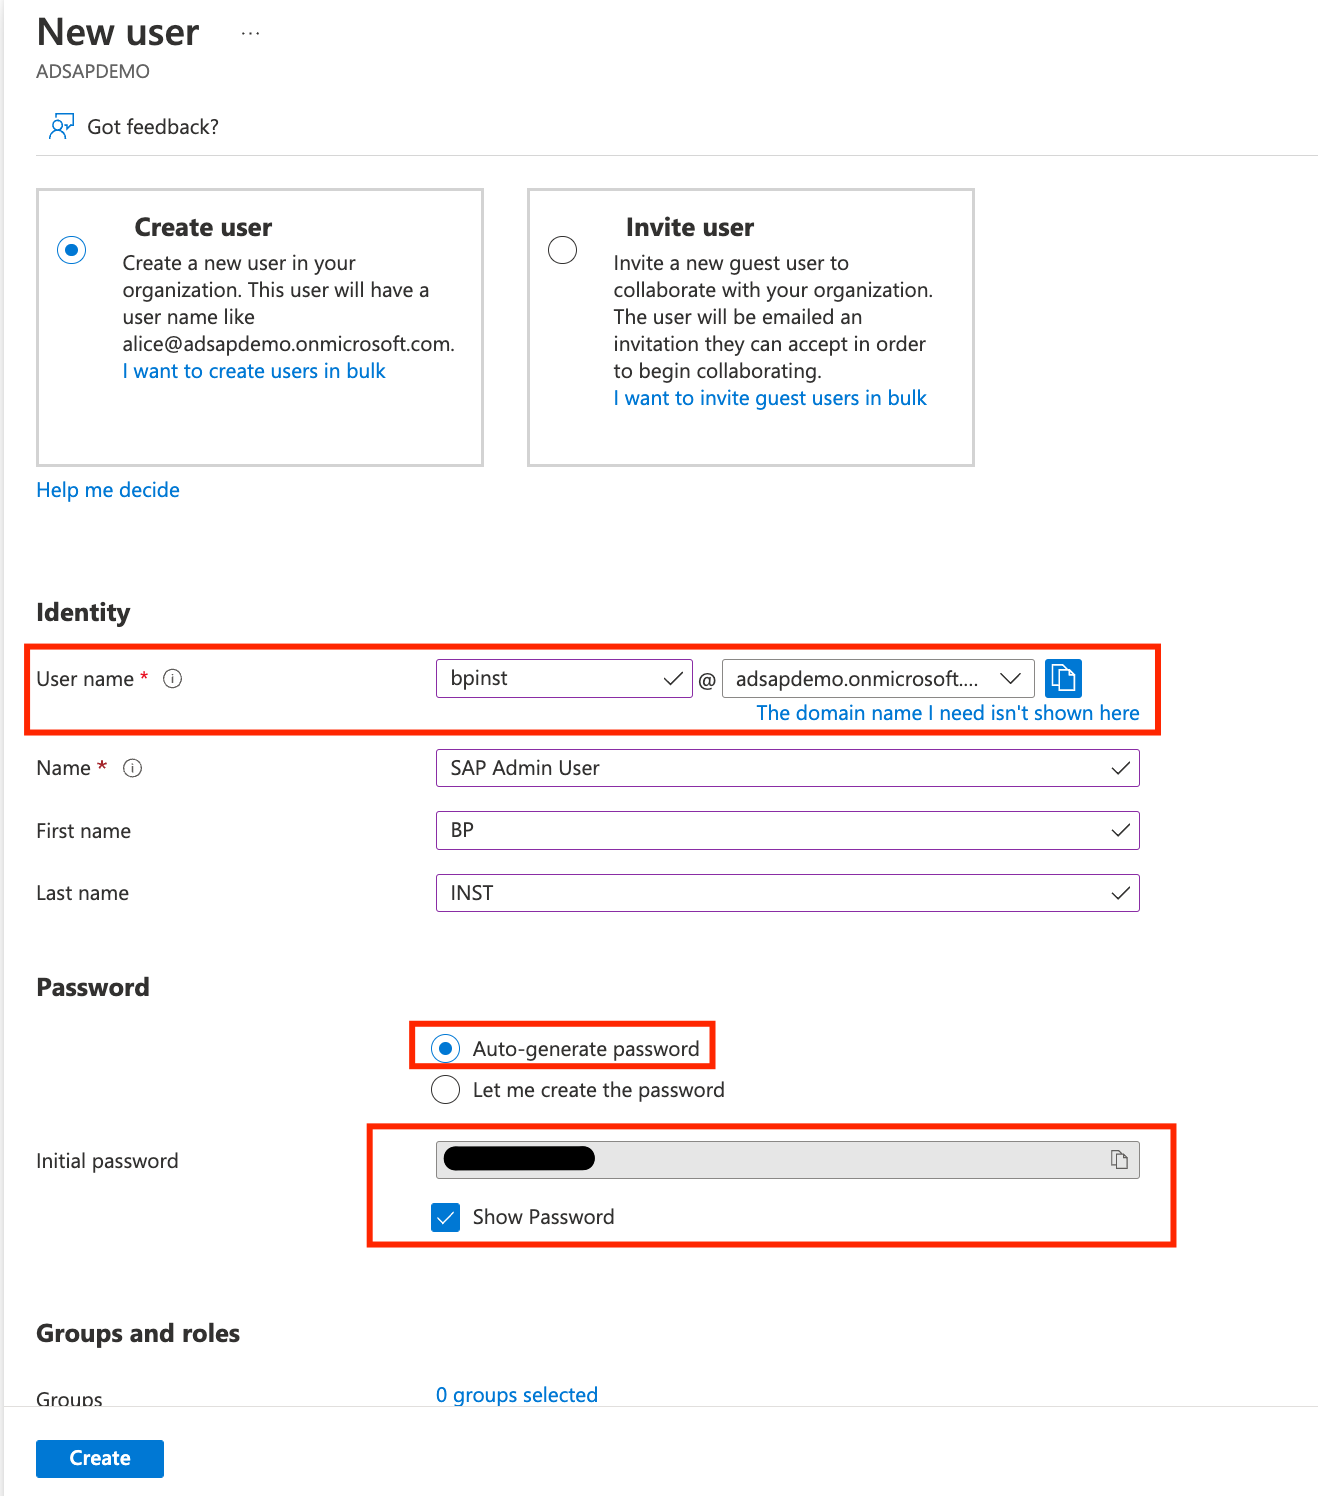
- Go to Users on the AD Tenant left pane, and click on ADD +.
- Select Create a User, with parameters:
- Username: bpinst
- Name: SAP Admin User
- First Name: BP
- Last Name: INST
- Auto Generate Password
- Click show password and make note of the password. You will be prompted to change it on the first use.
Configuring SAP Fiori SSO
Now we will go for the first part of the configuration, going to SAP and enabling SSO.
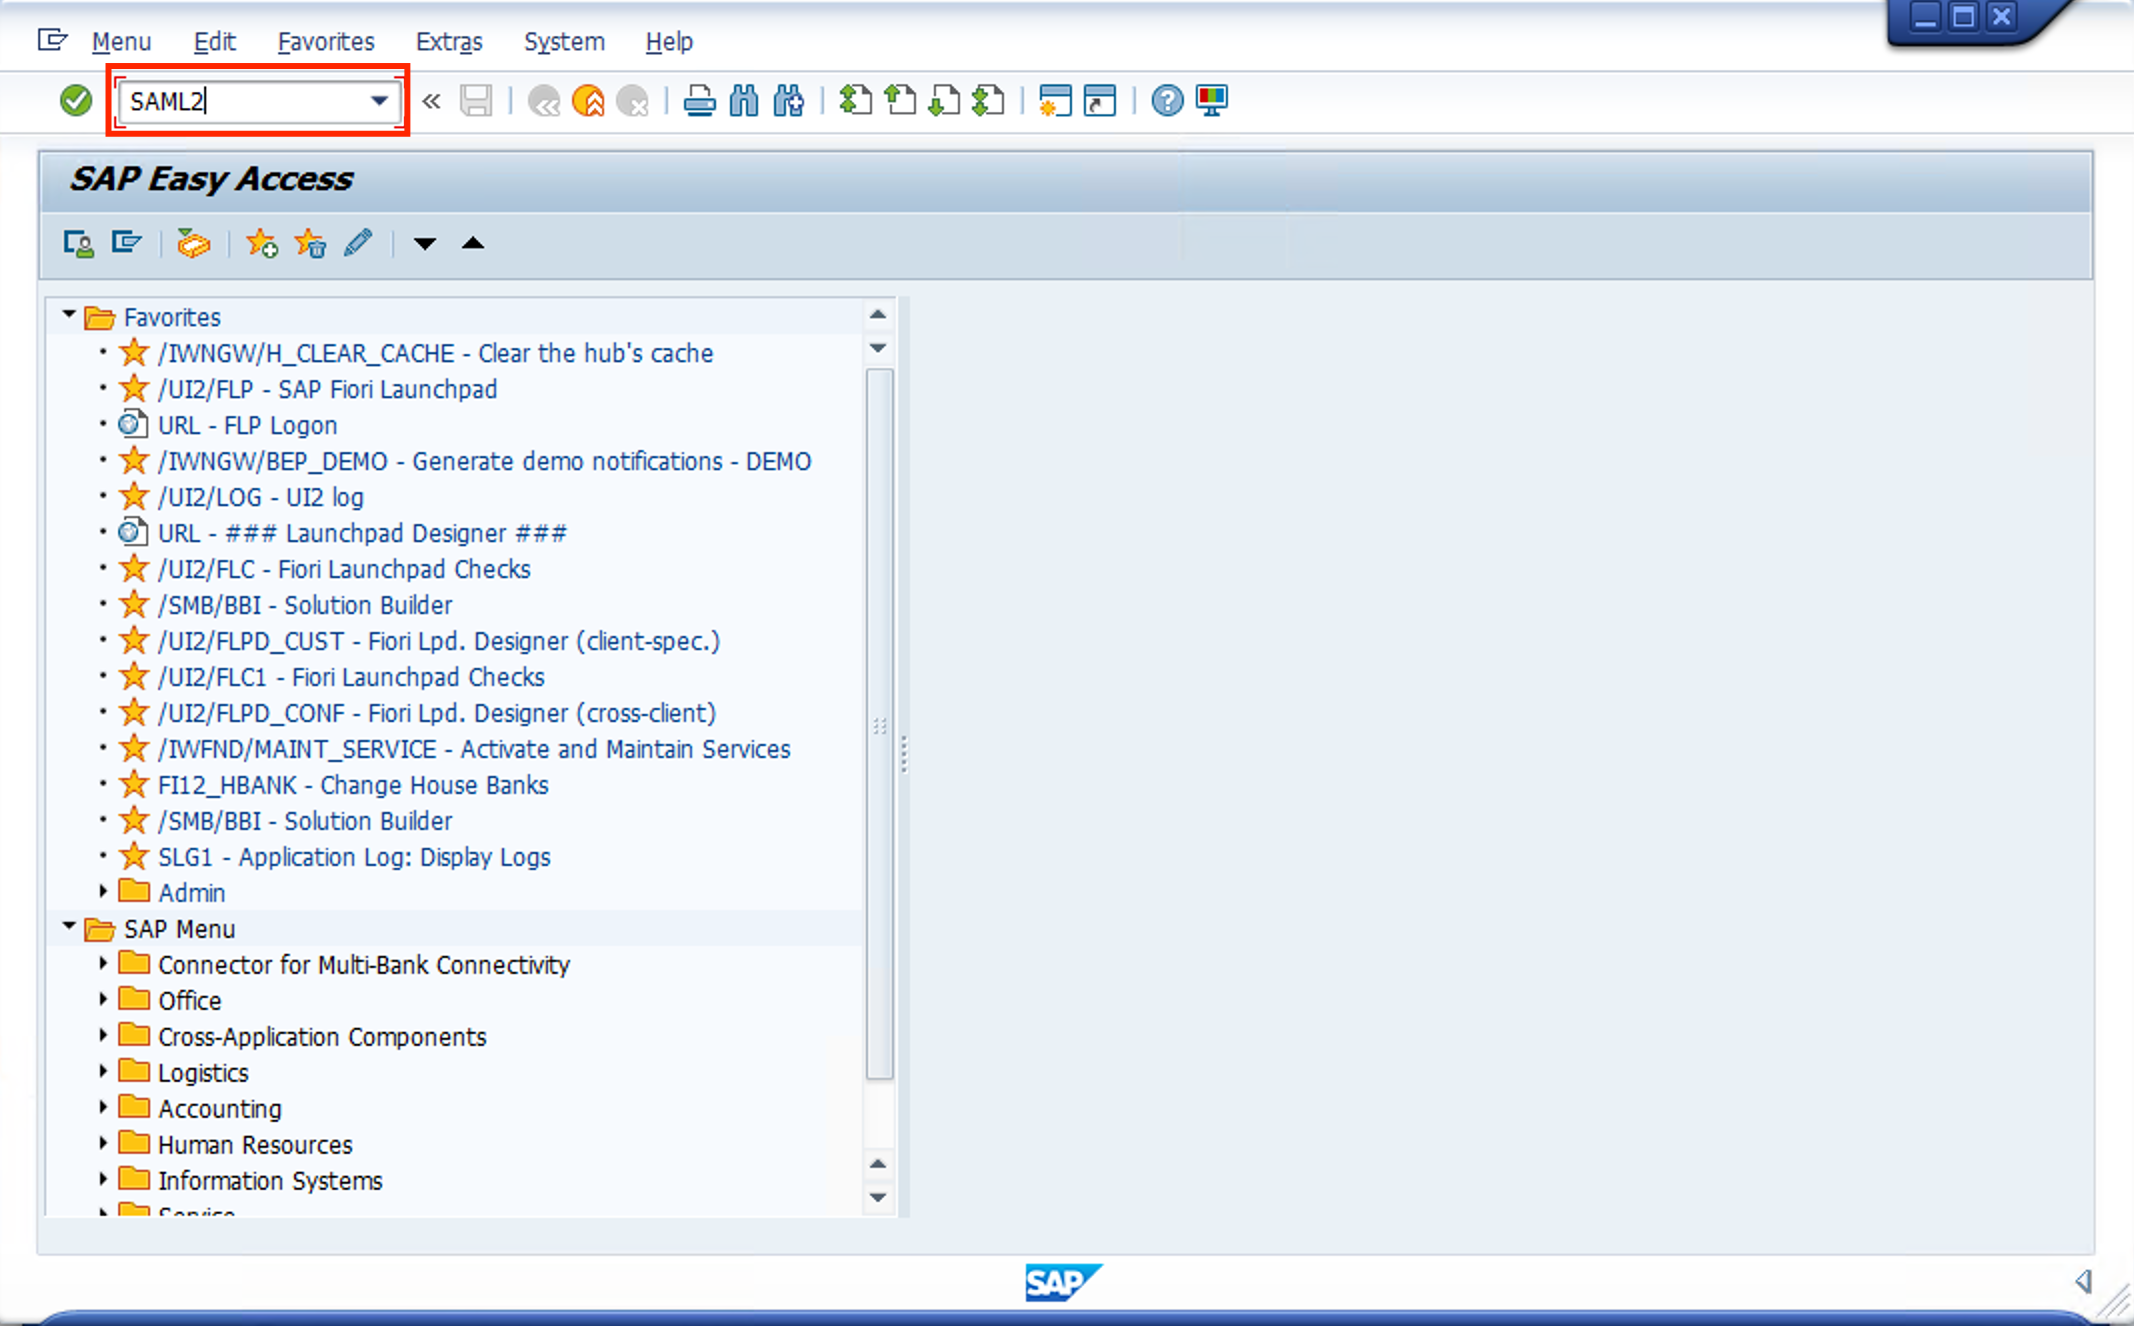
- Go to the SAP Bastion Host, with Remote Desktop, and open SAP GUI. Go to TCODE SAML2. A Browser window will open.
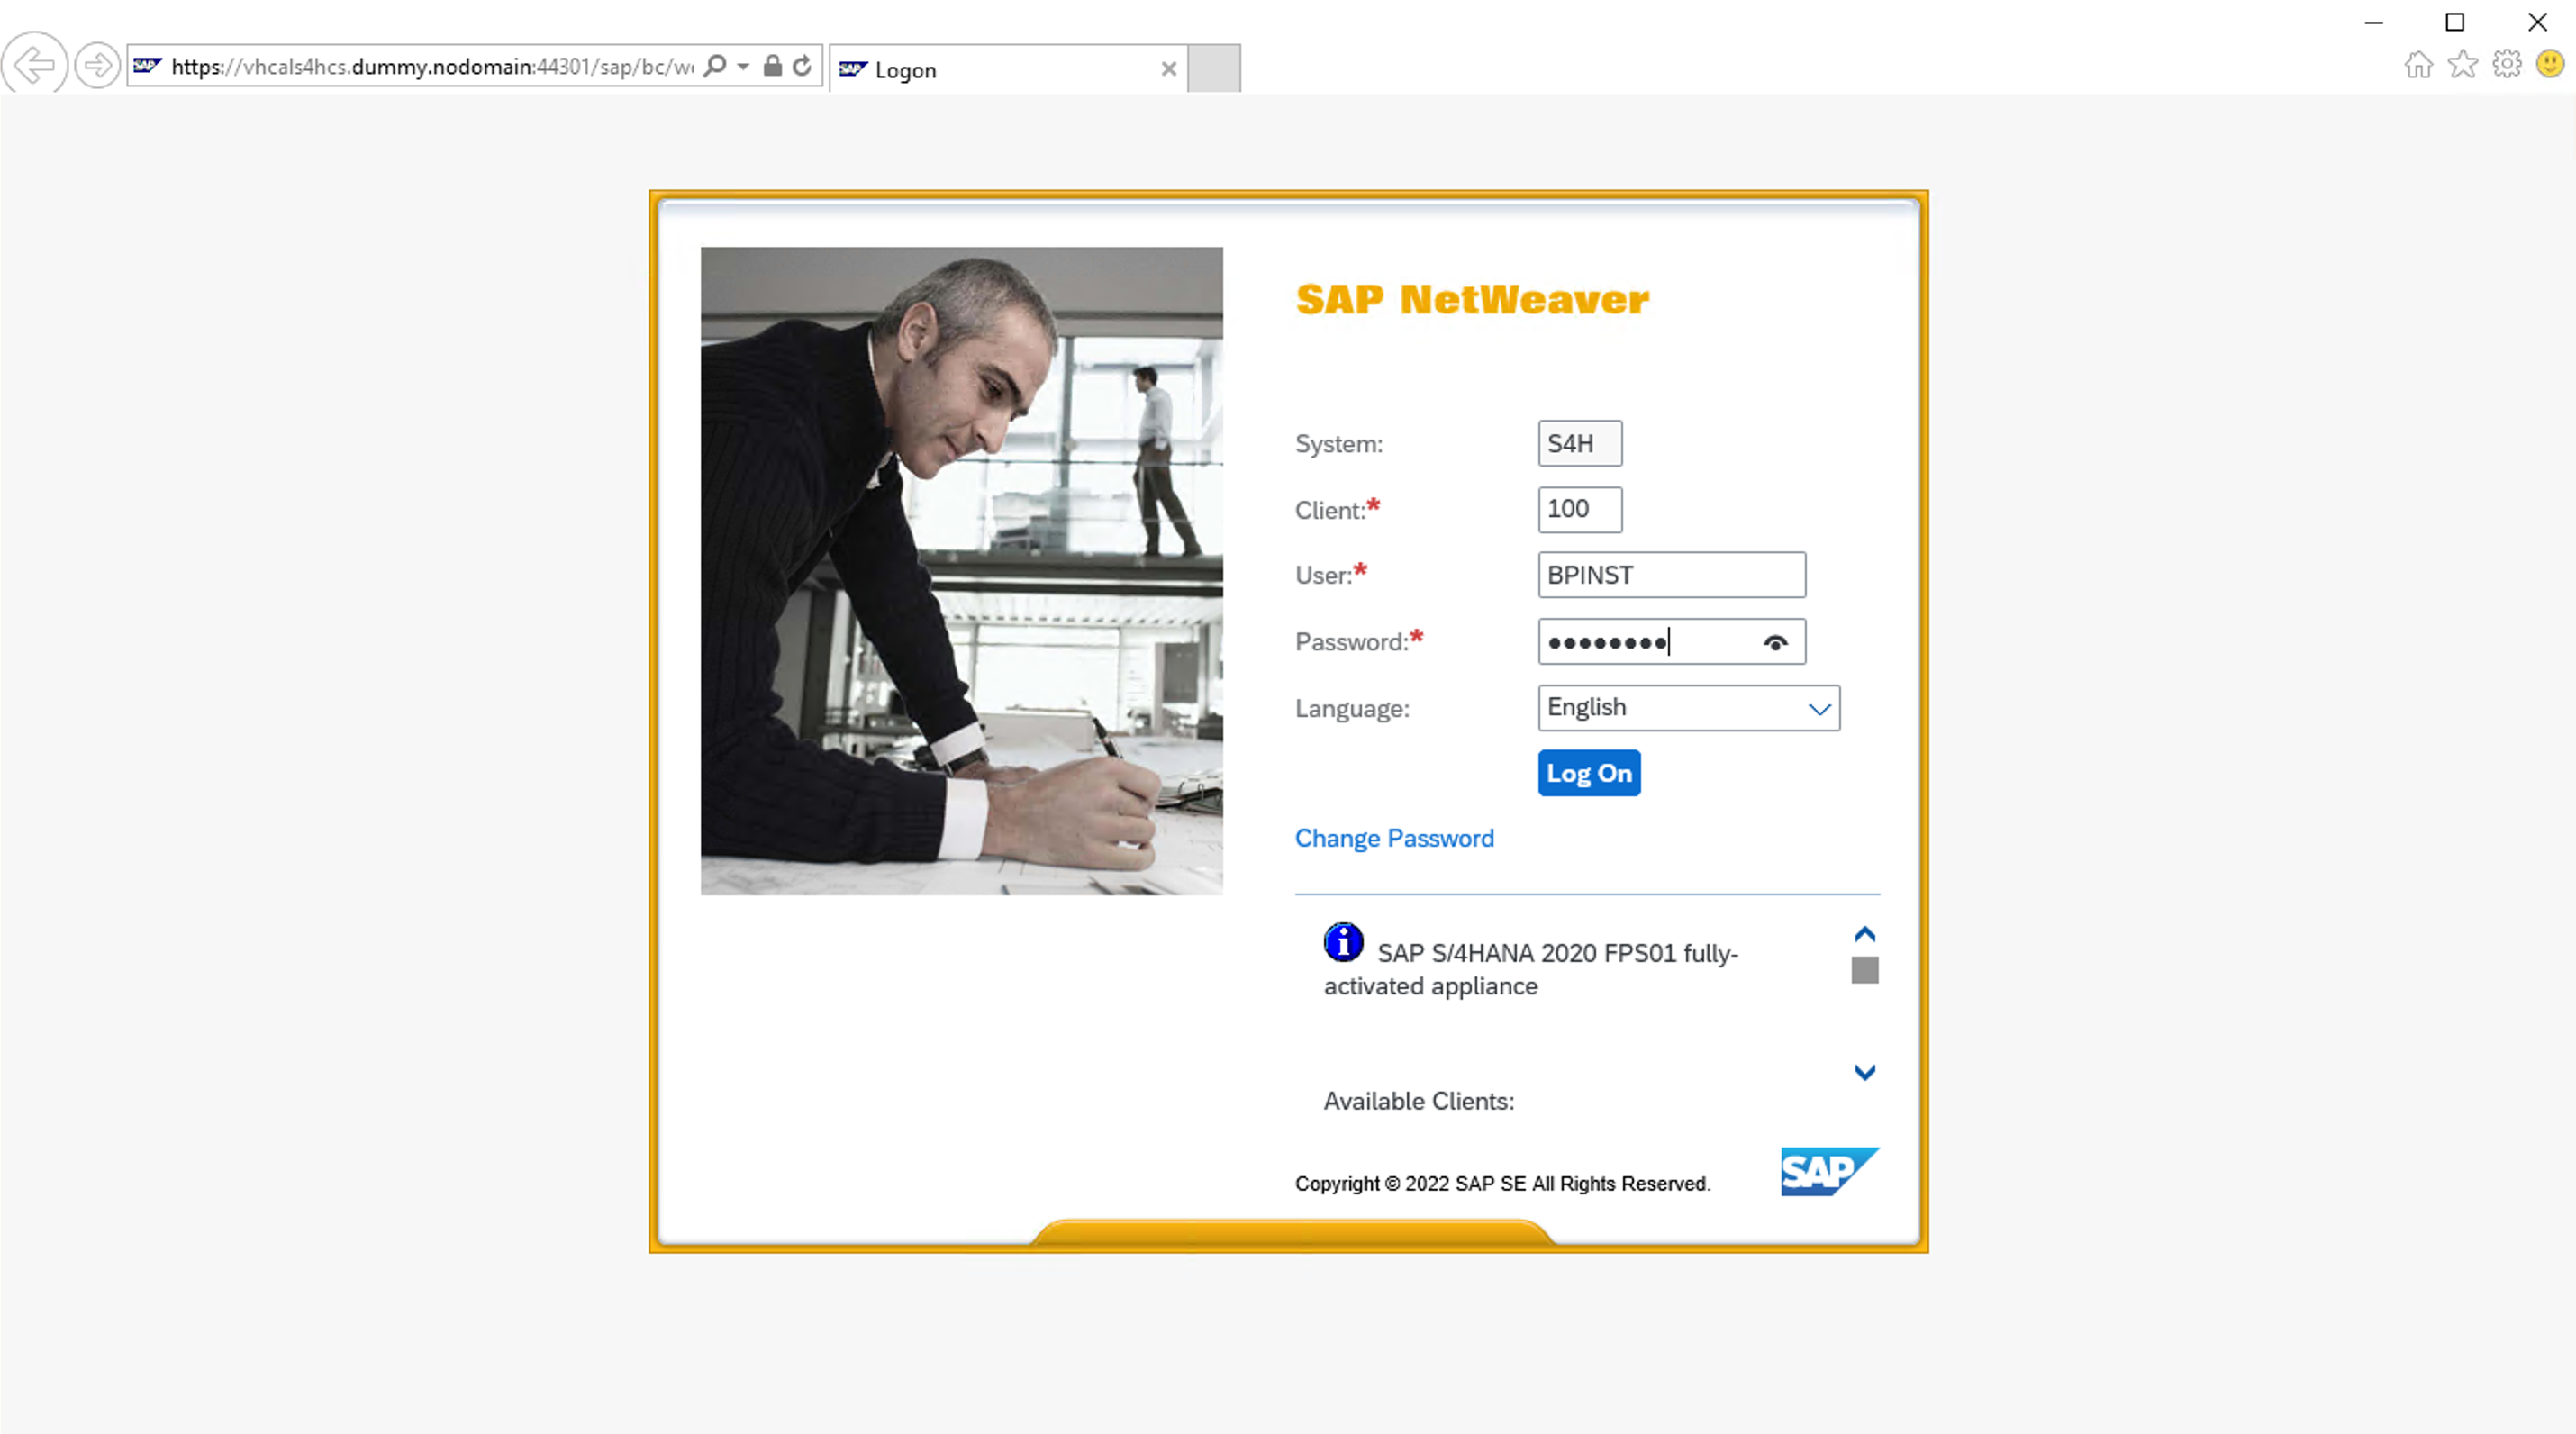
- Logon user BPINST/Welcome1 to the Netweaver WEB. Make sure client = 100.
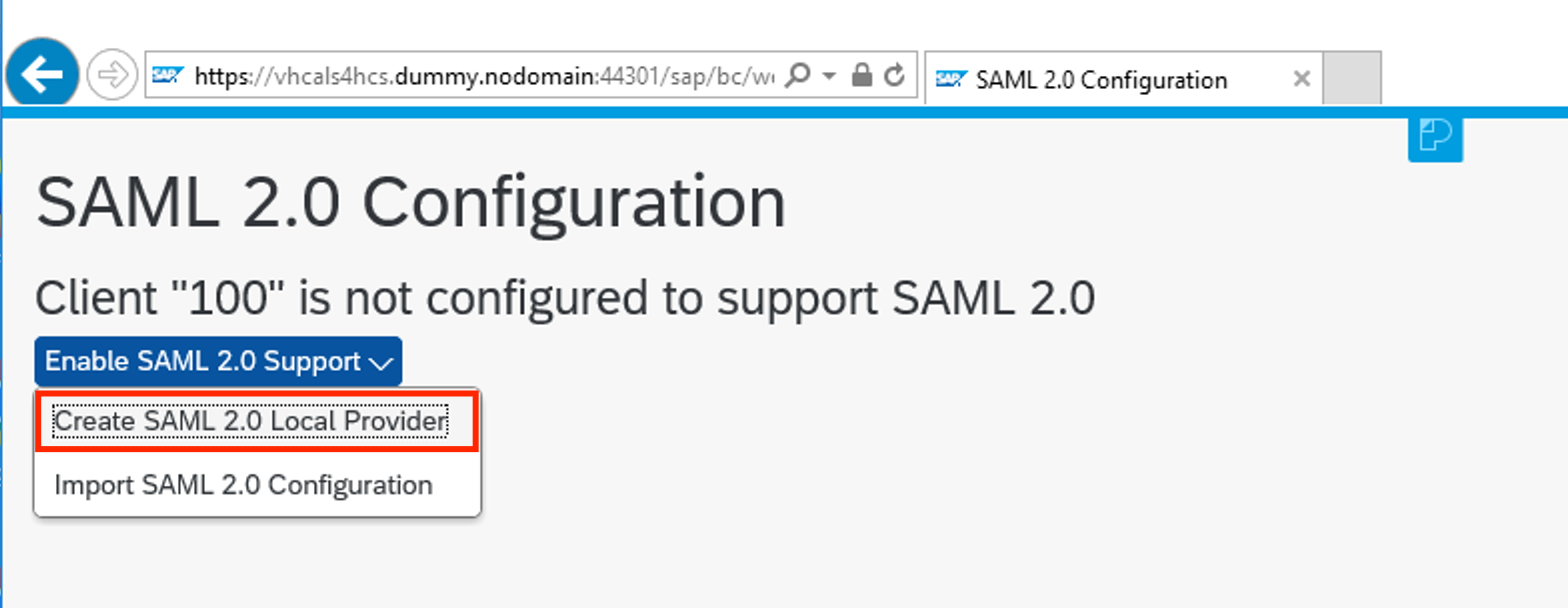
- Click on Create SAML2.0 Local Provider
- Set Provider name to http://S4H100 and lcick Next
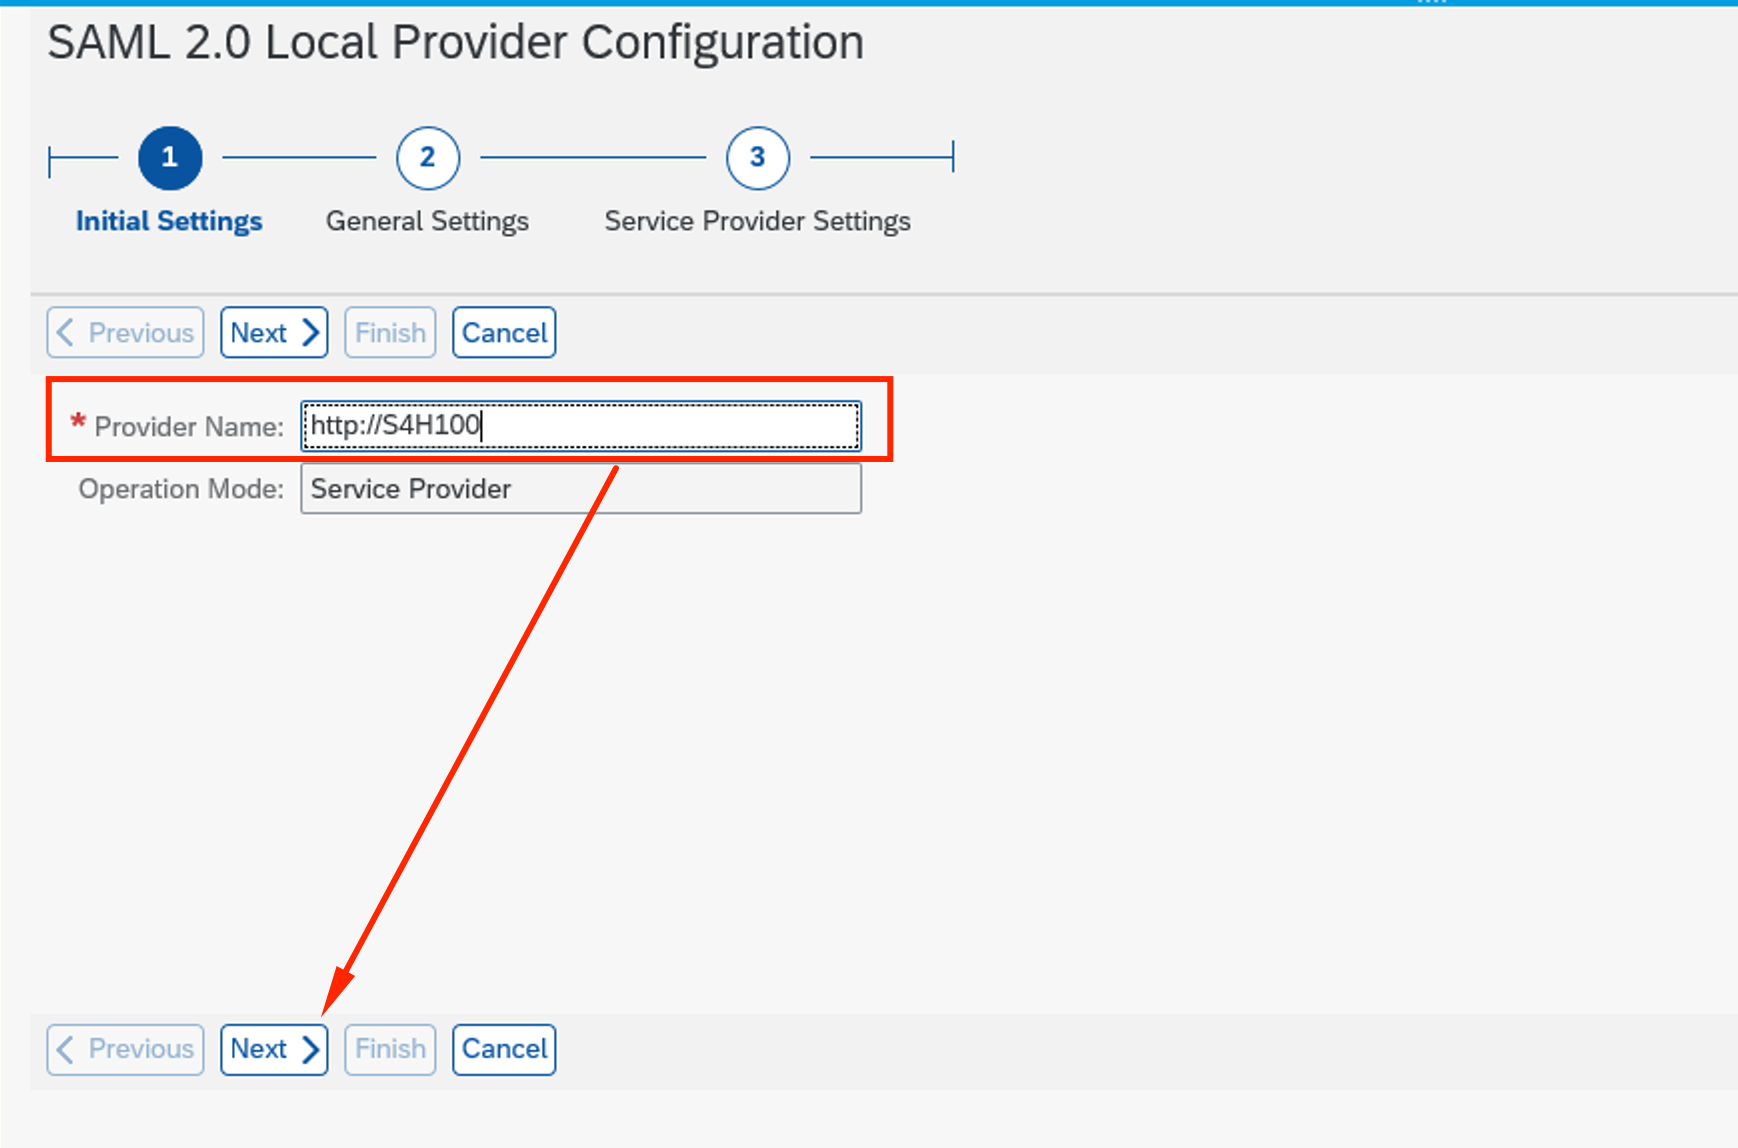
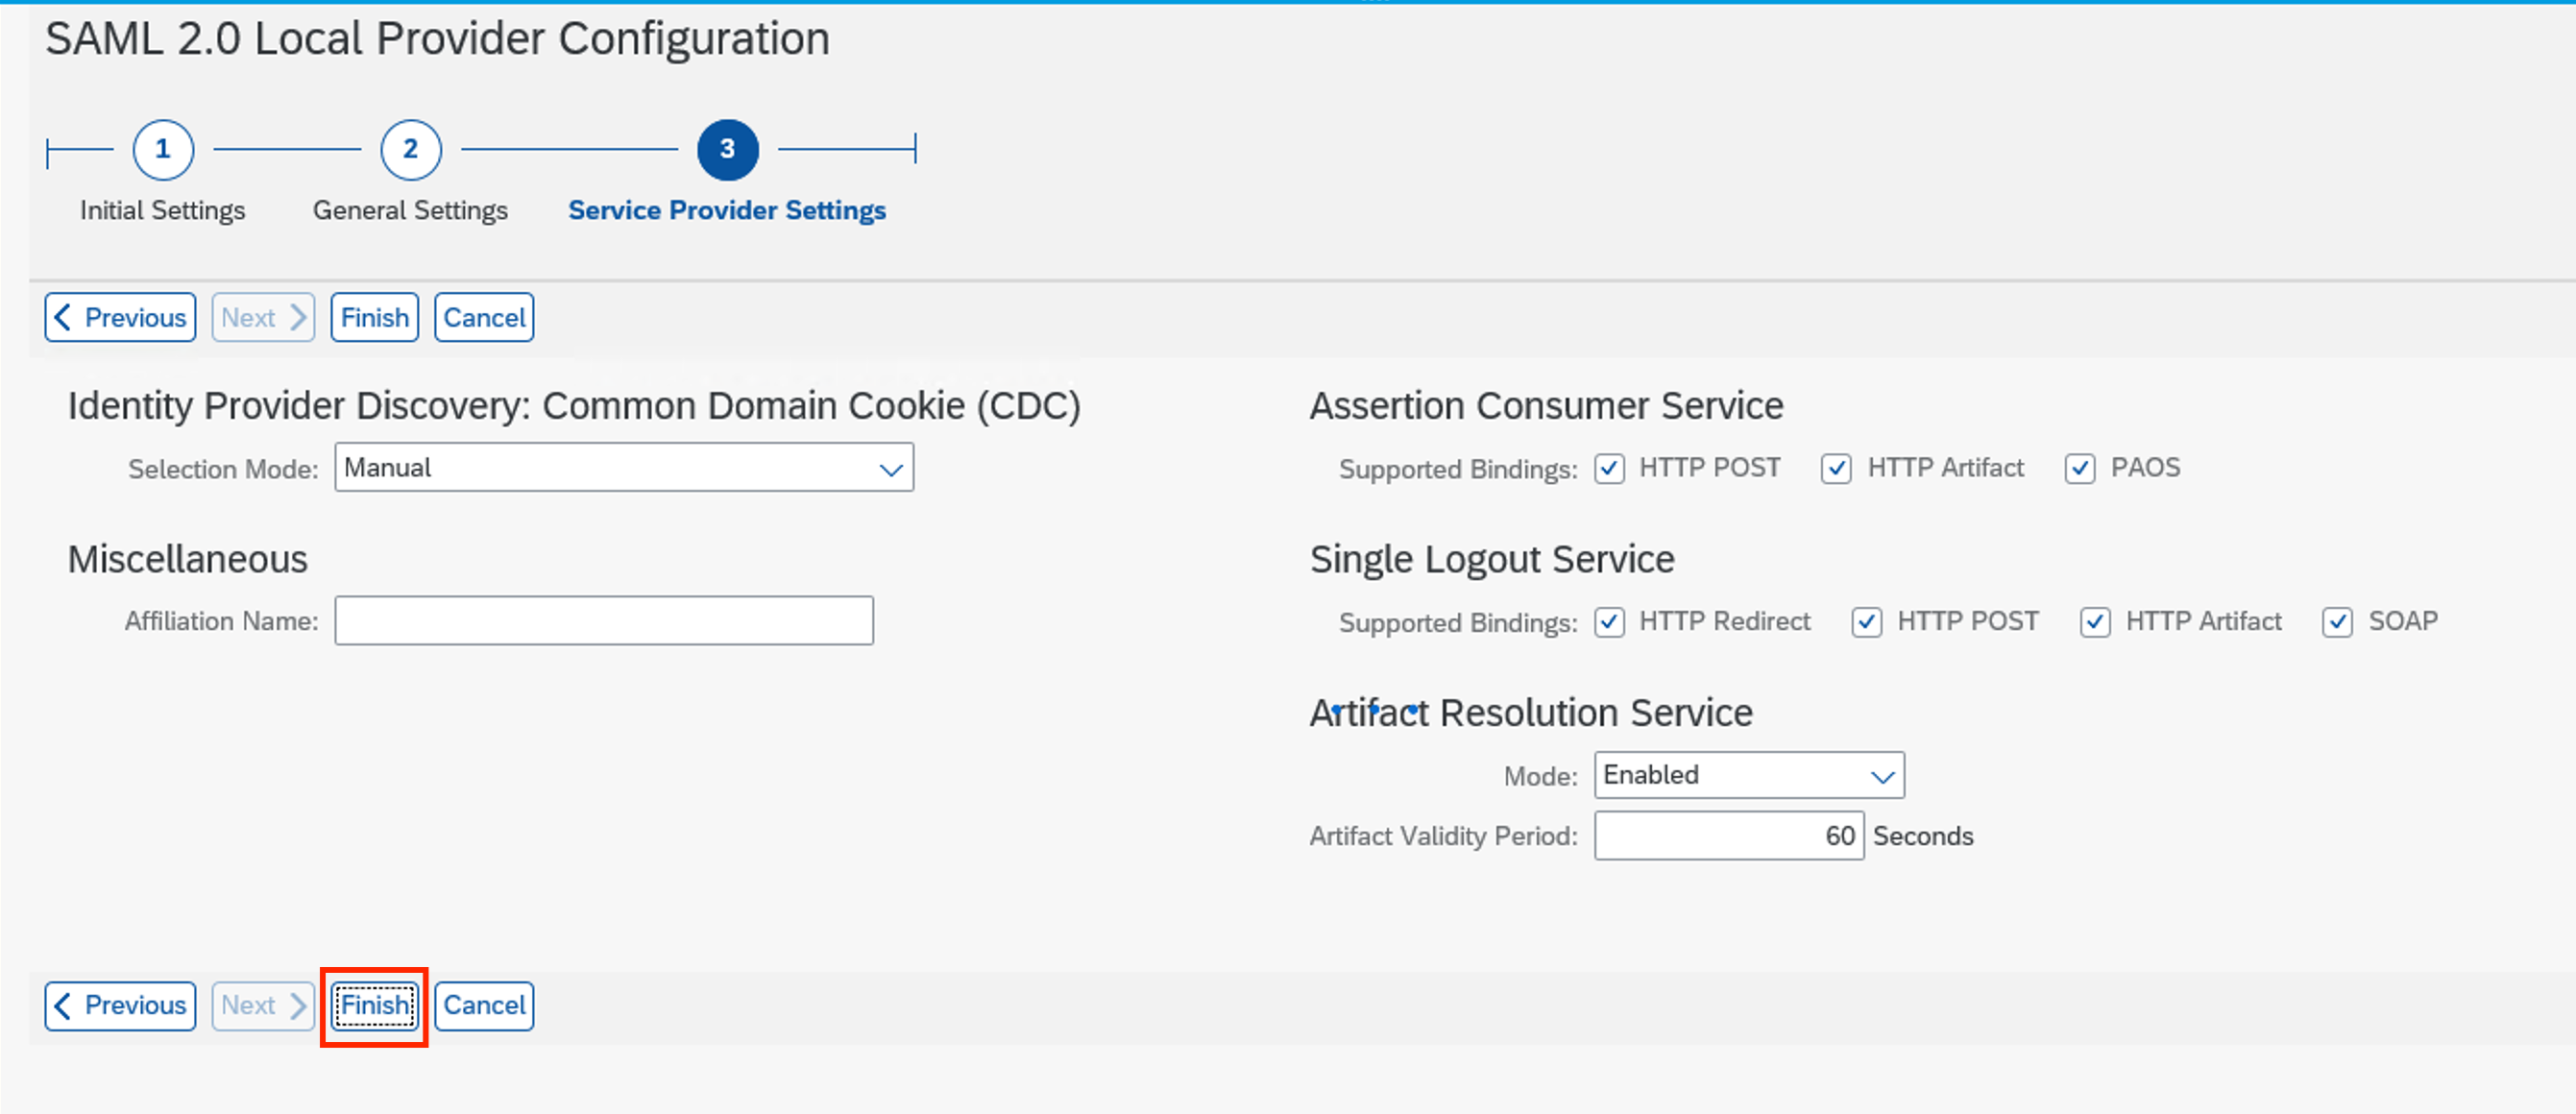
- Click Next again and Finish
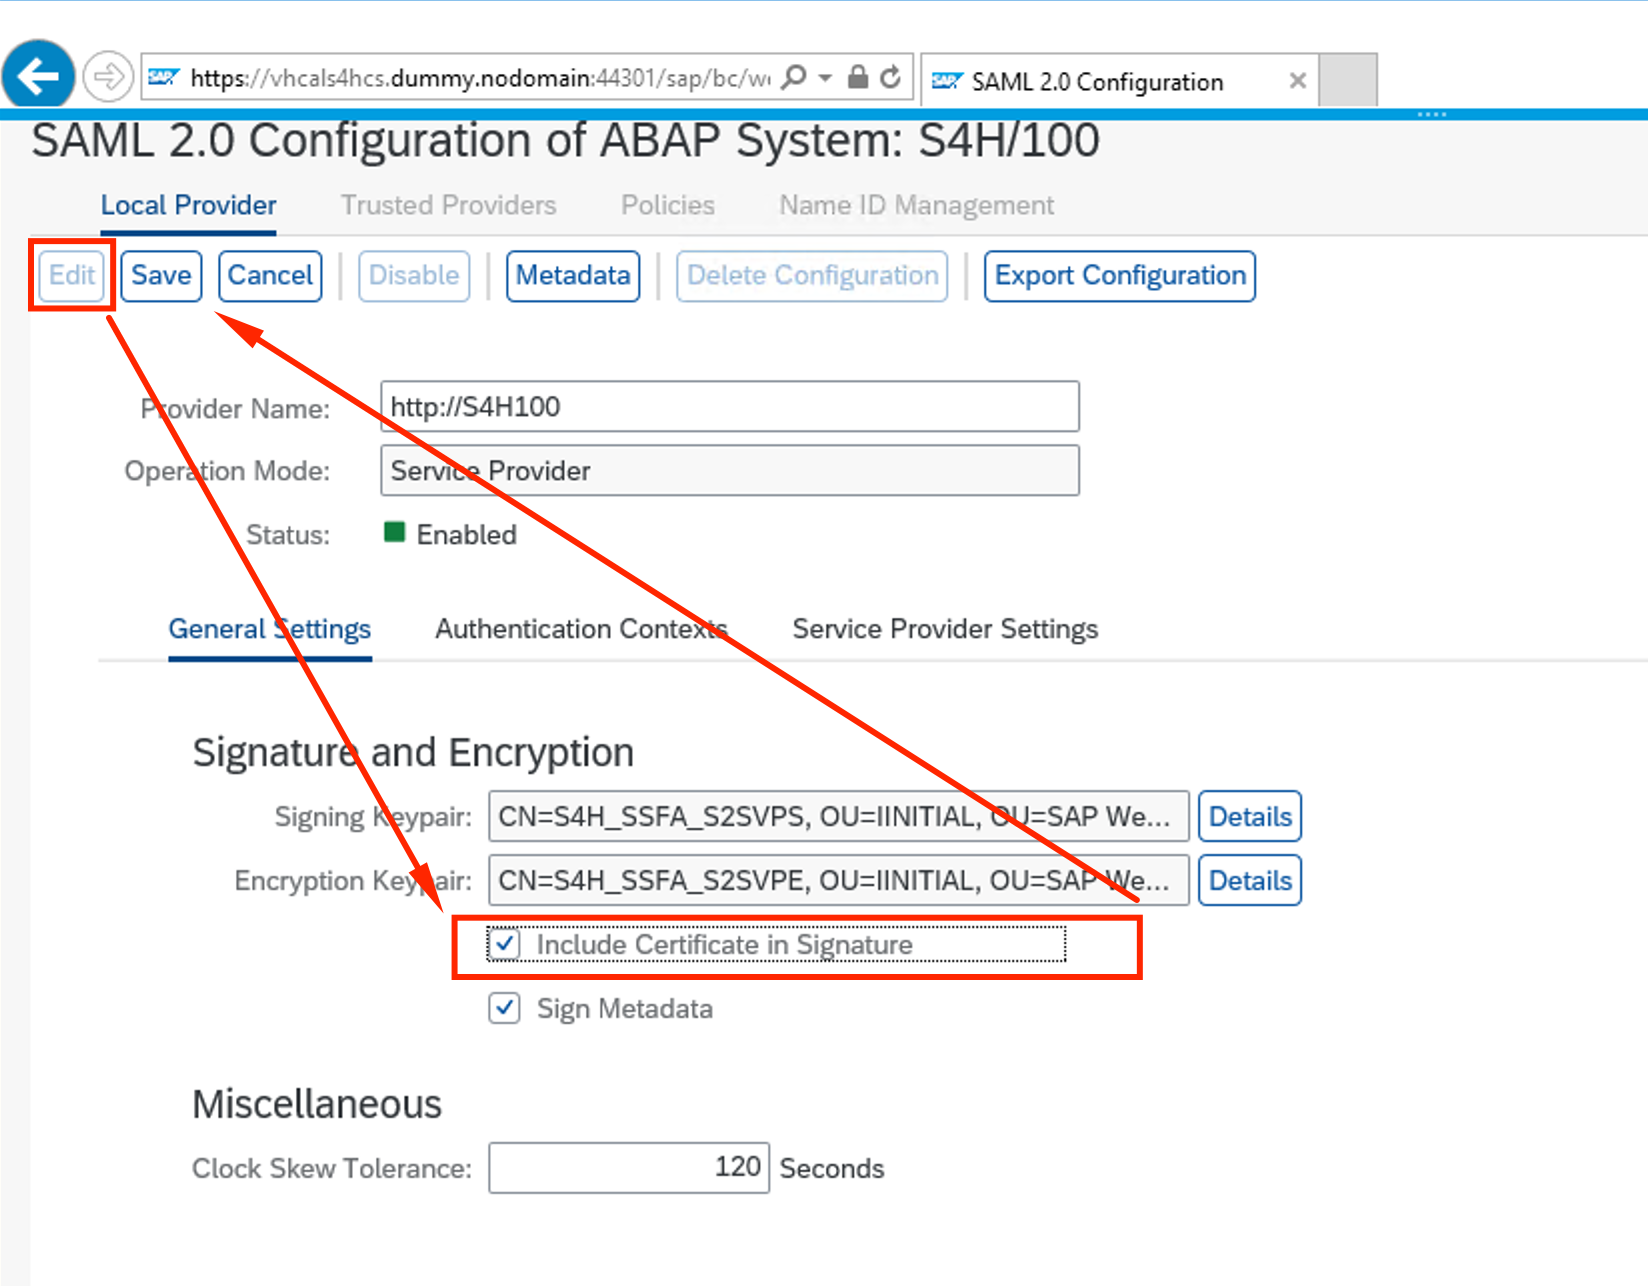
- Once creation is complete, it will show you the default parameters. Click on Edit and check Include Certificate on Signature. Click Save
- Go to METADATA and select Download Metadata
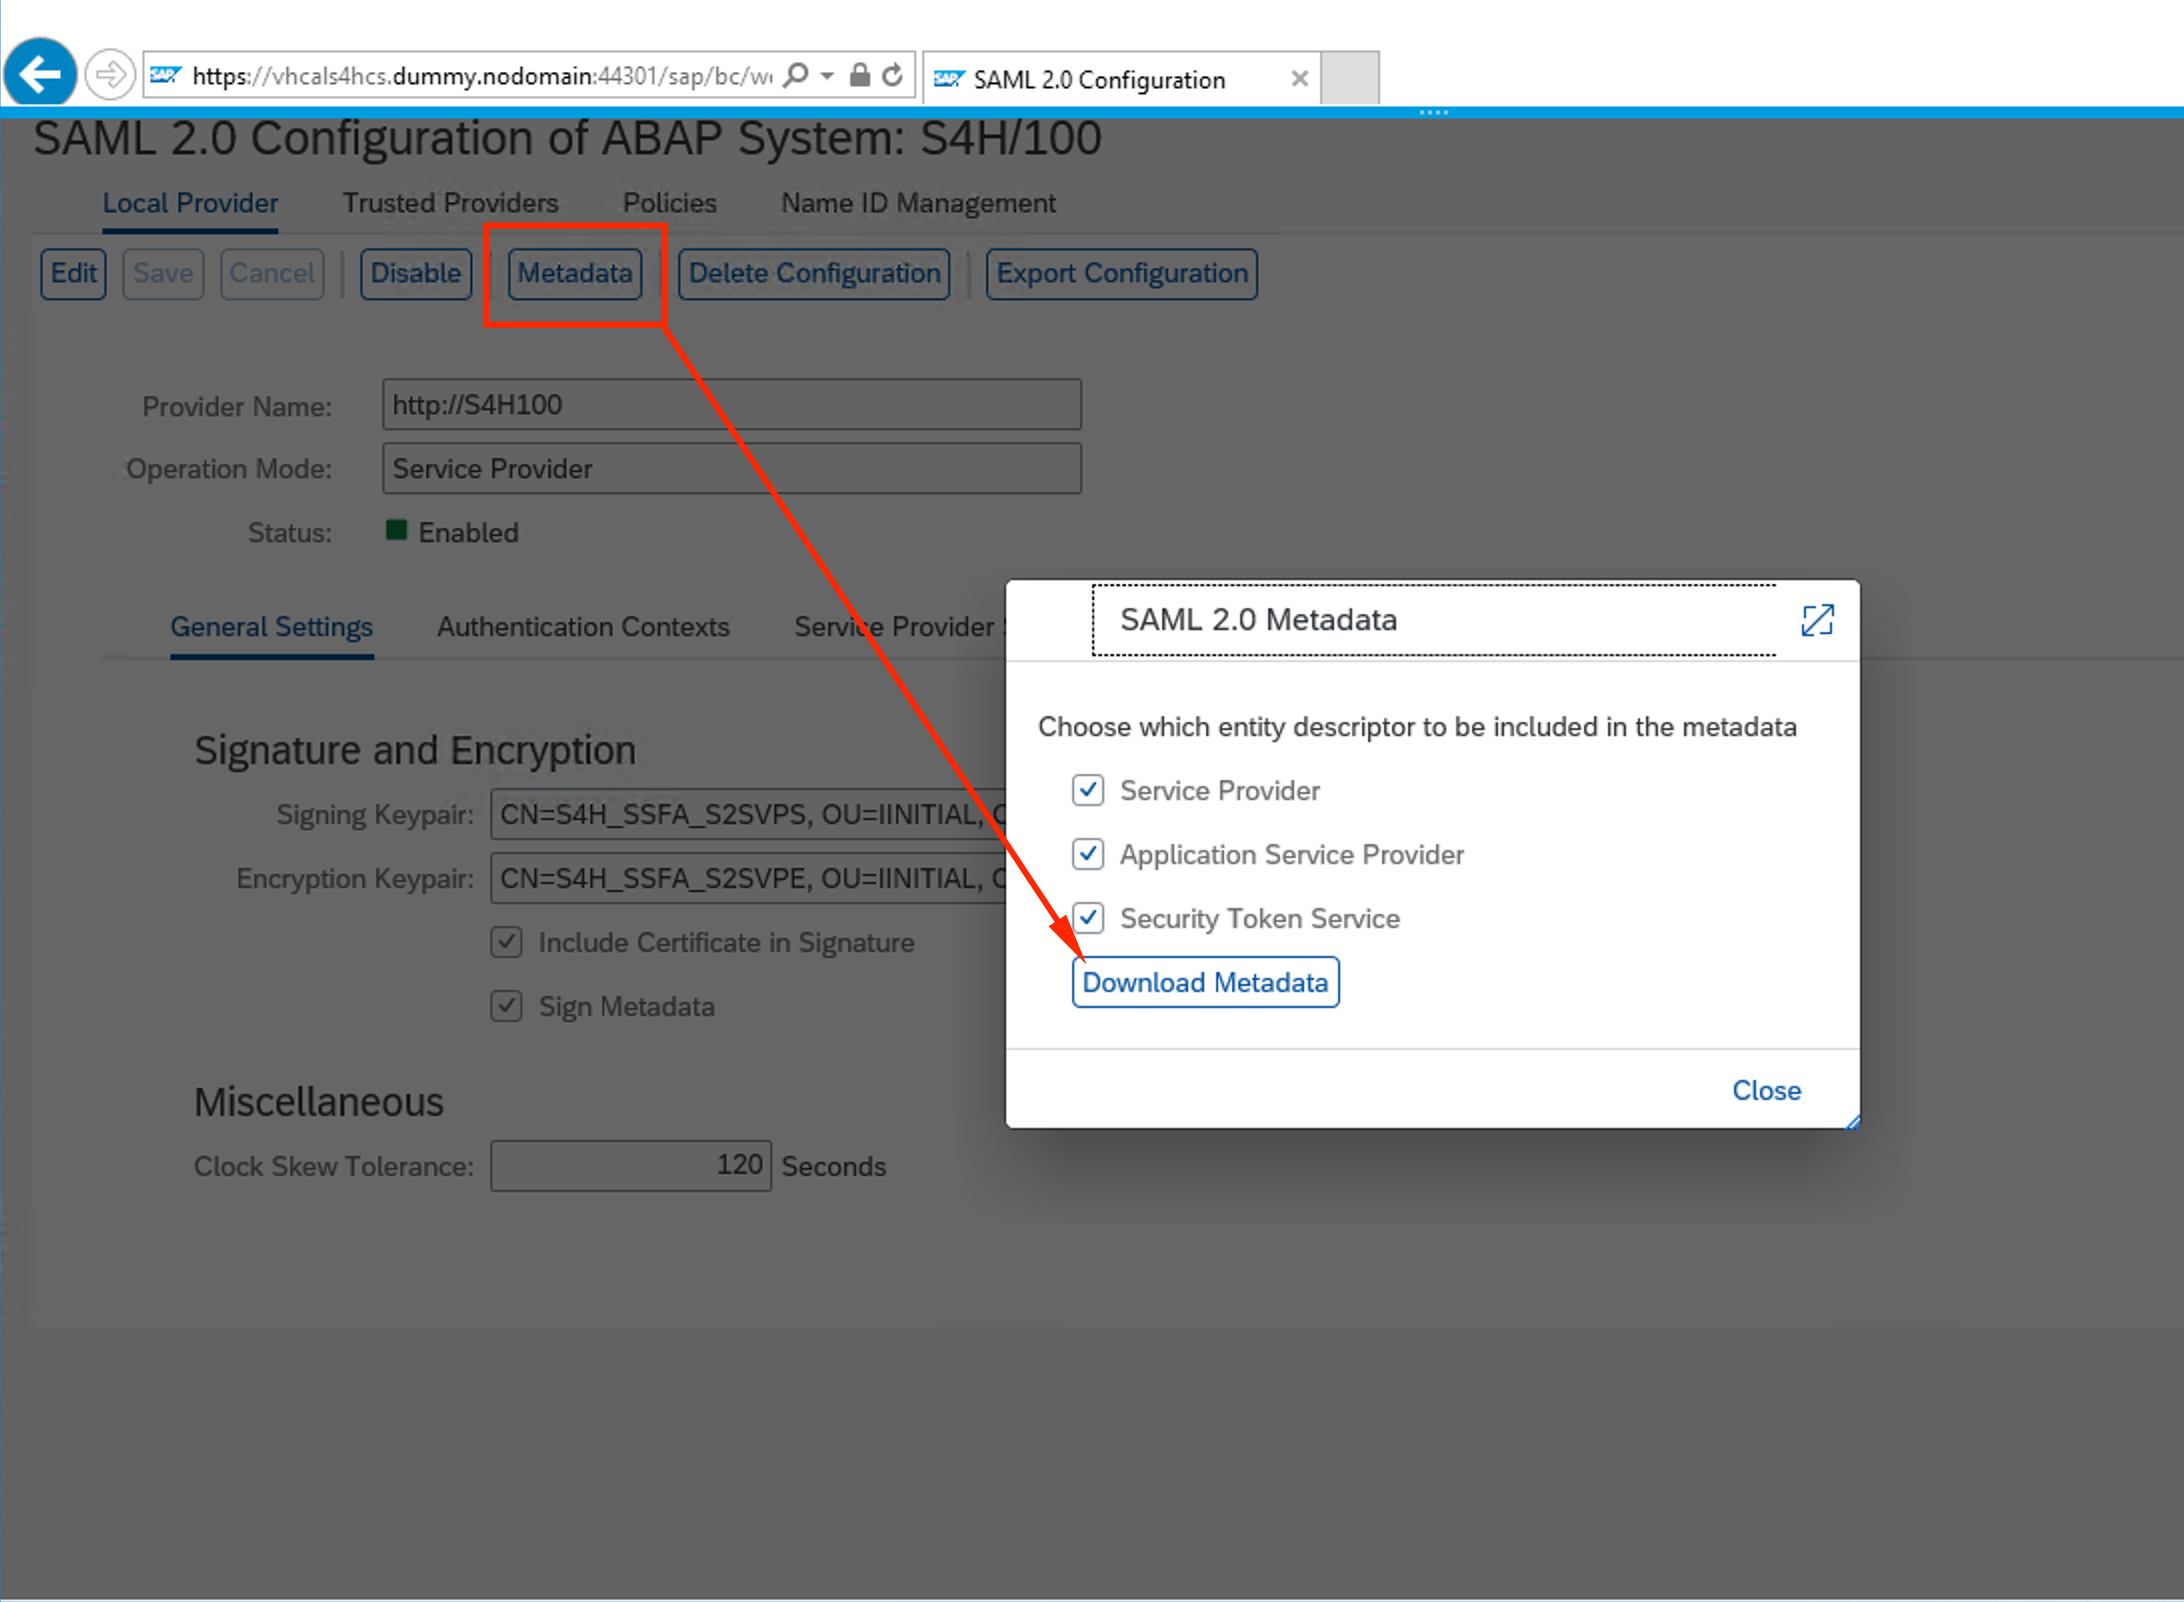
- It will download a file called metadata.xml that will be used to configure Azure AD
Configuring Azure AD app for SAP Fiori SSO
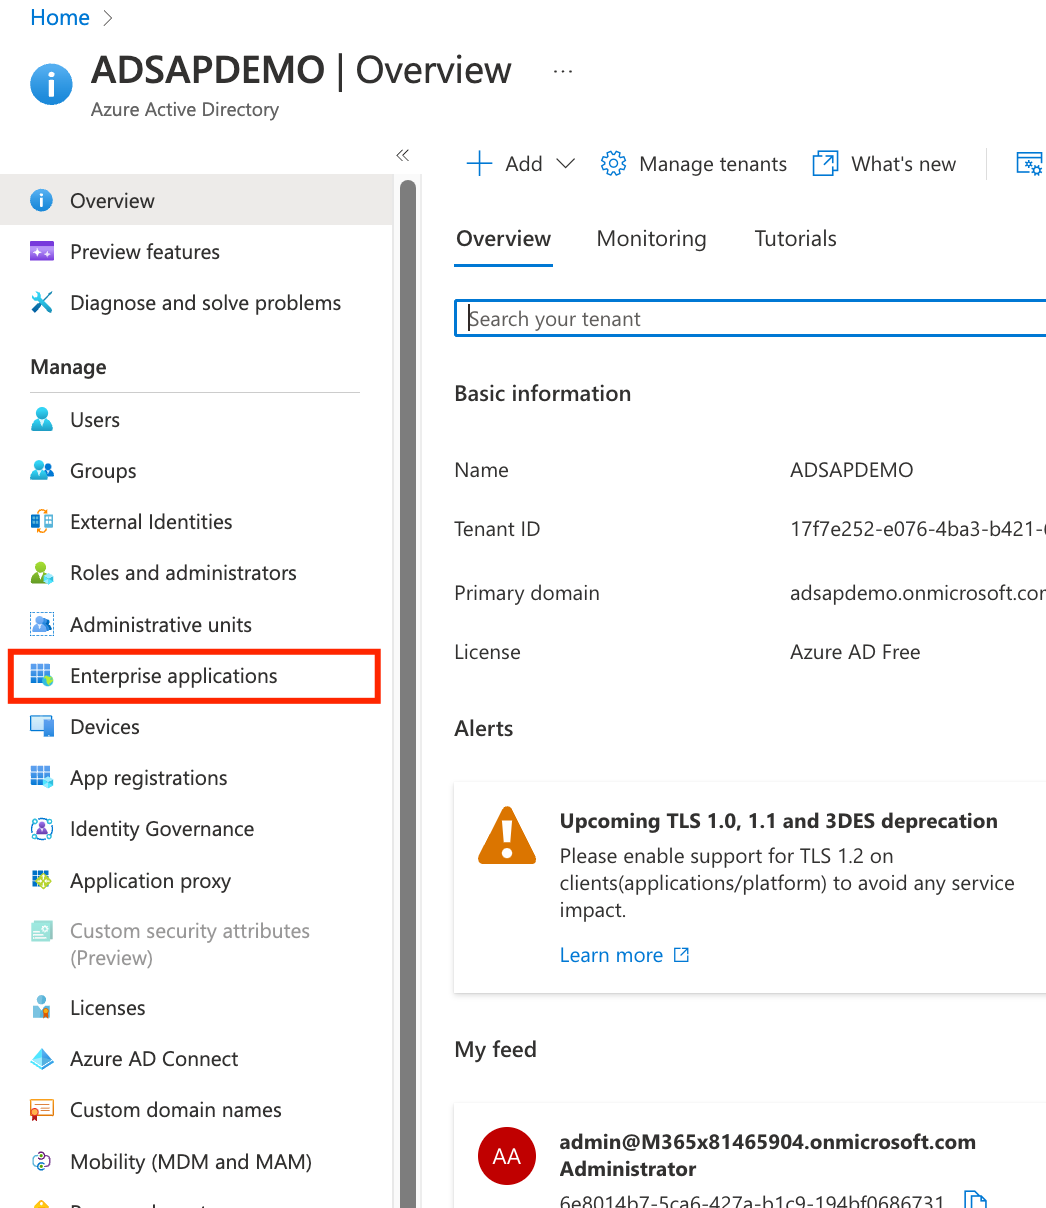
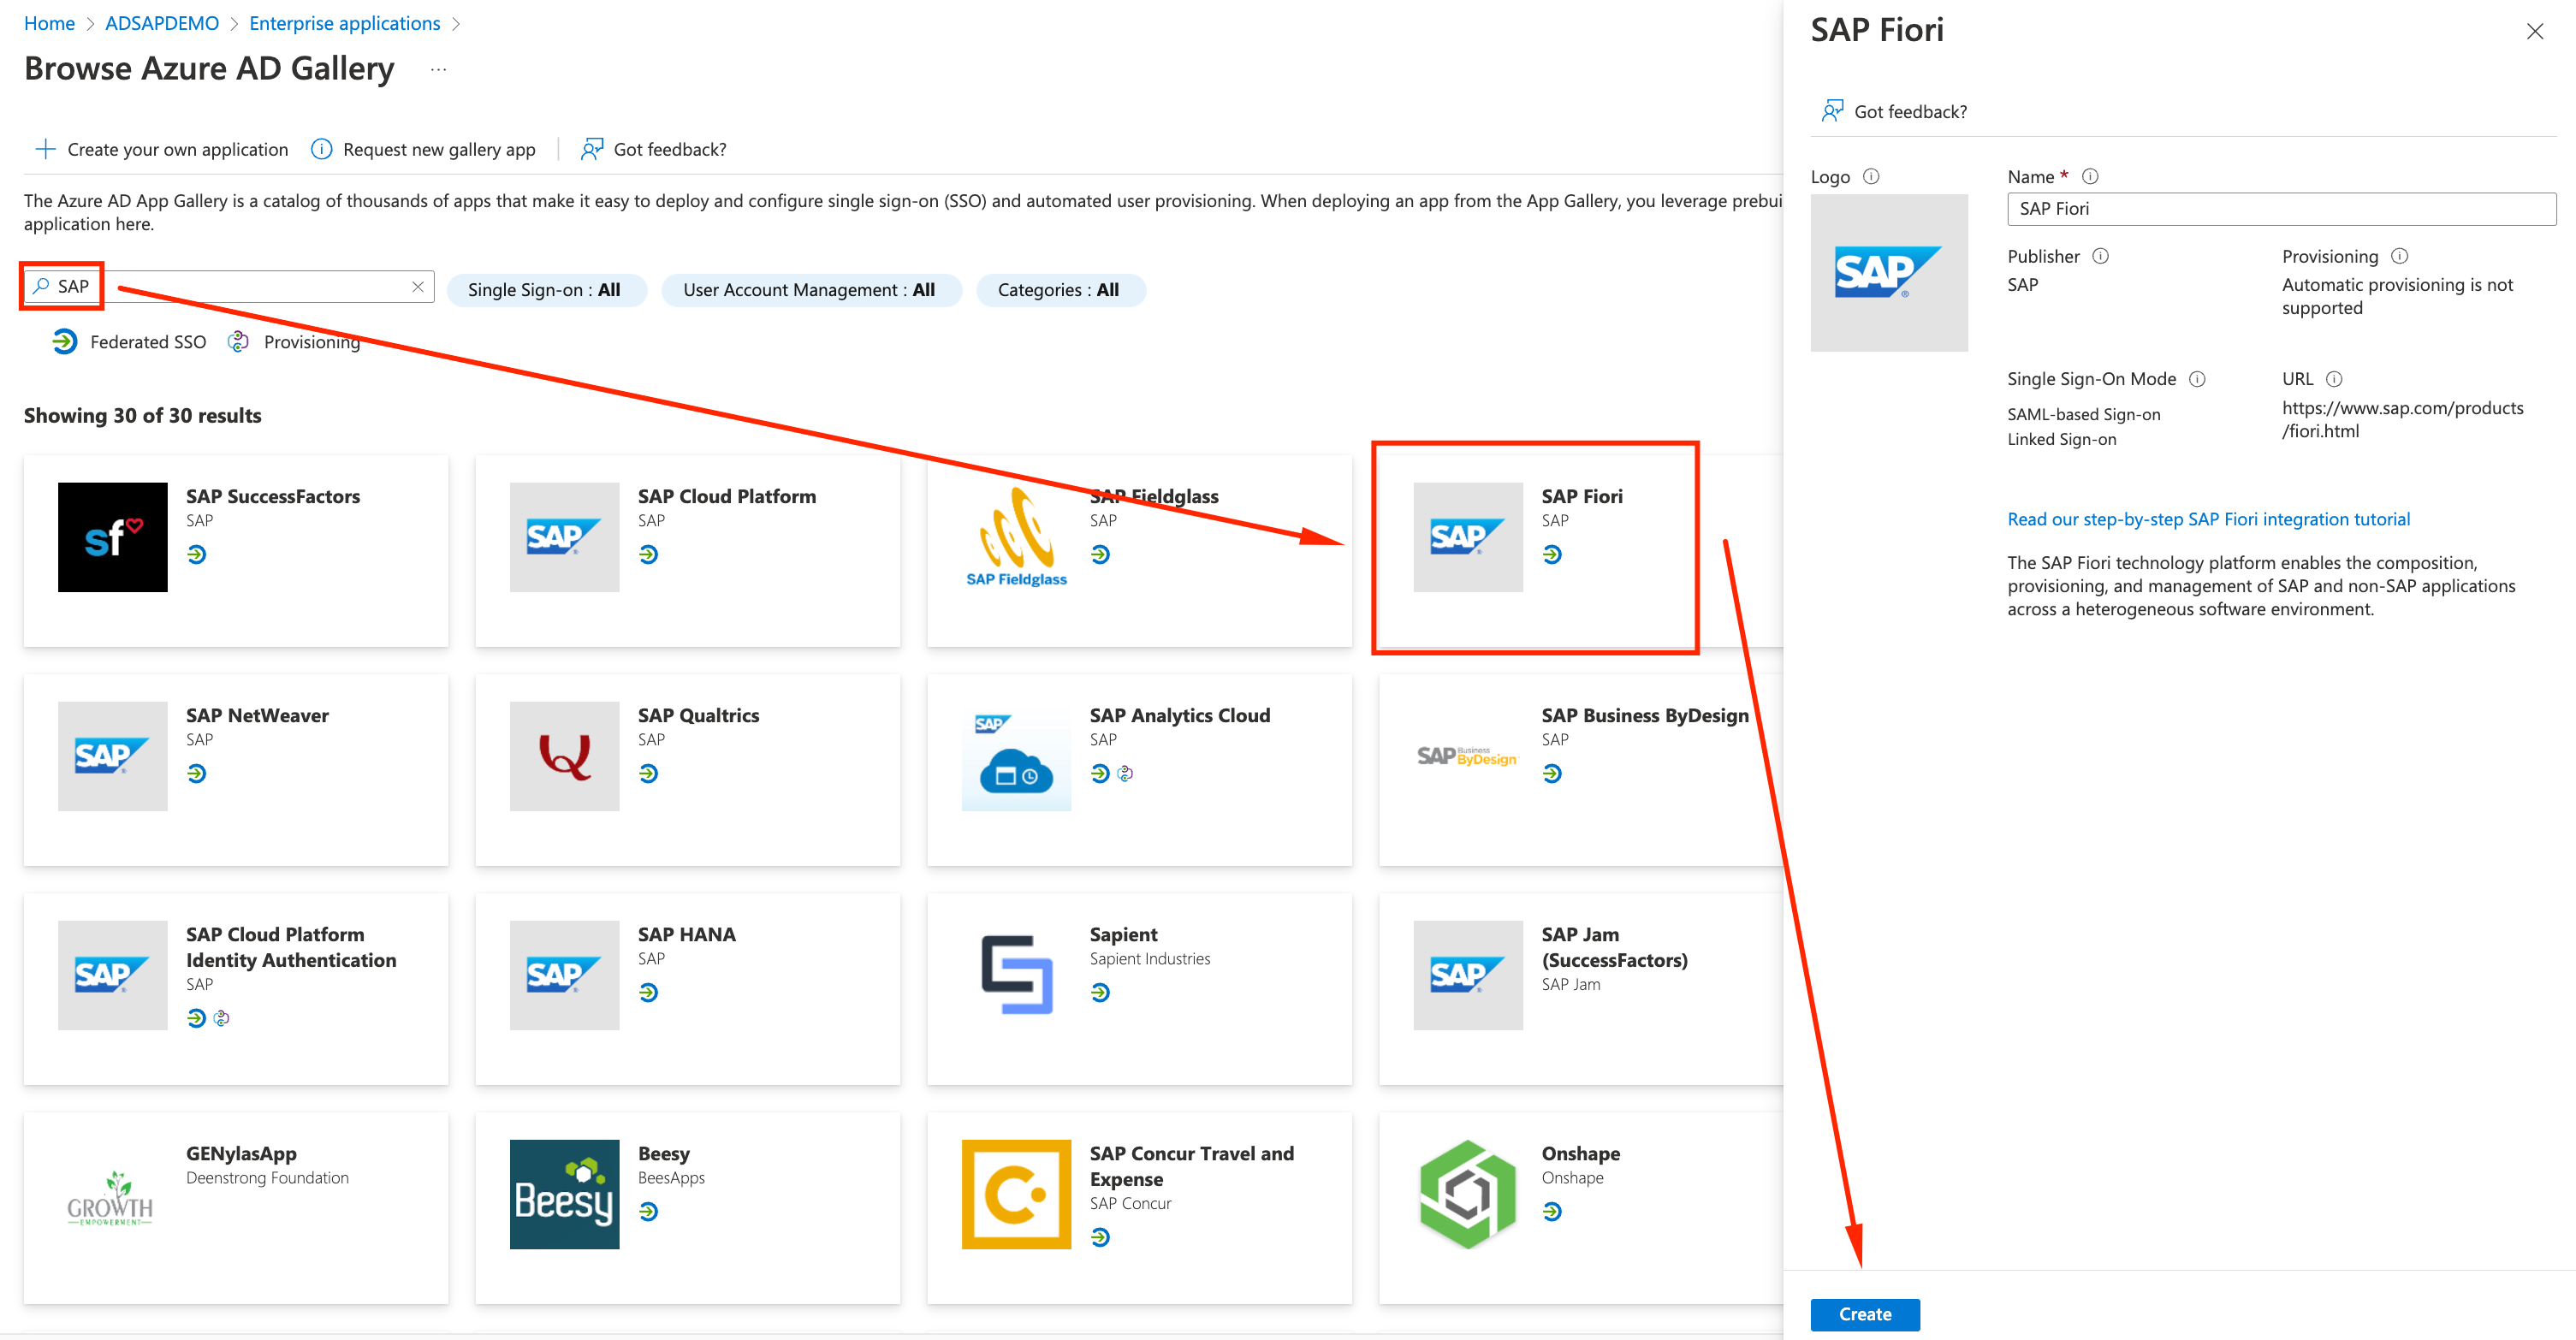
- On Azure portal, on the AD Tenant we created the user, click on Enterprise applications on the left panel and then Add +
- Use SAP as filter and select SAP FIORI App. Accept the default name and click Create
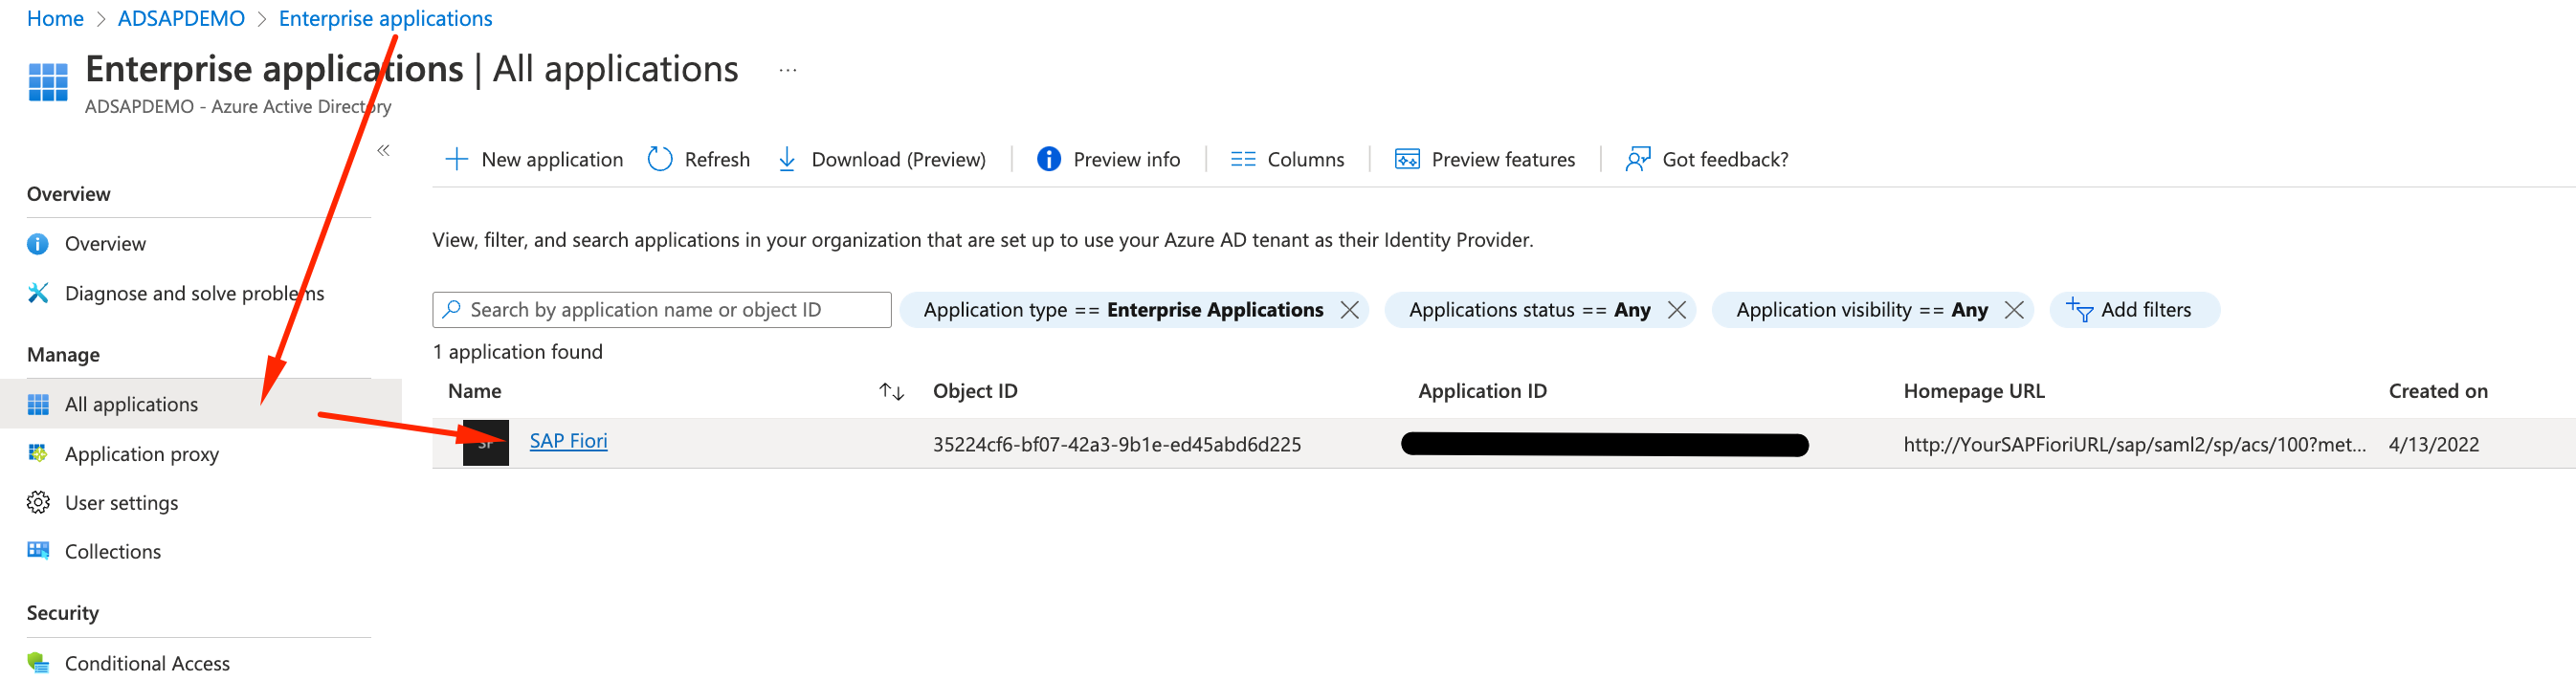
- Click on SAP Fiori under All Applications
- Inside SAP Fiori APP in Azure AD, select Users and Groups on the left panel, followed by + Add User/Group
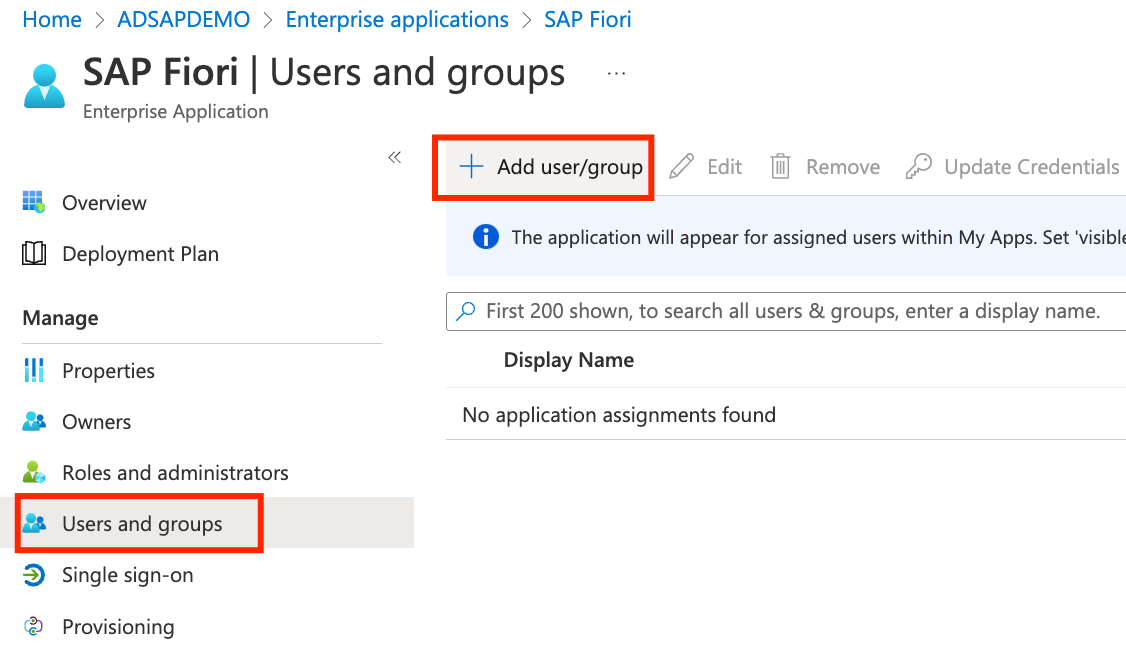
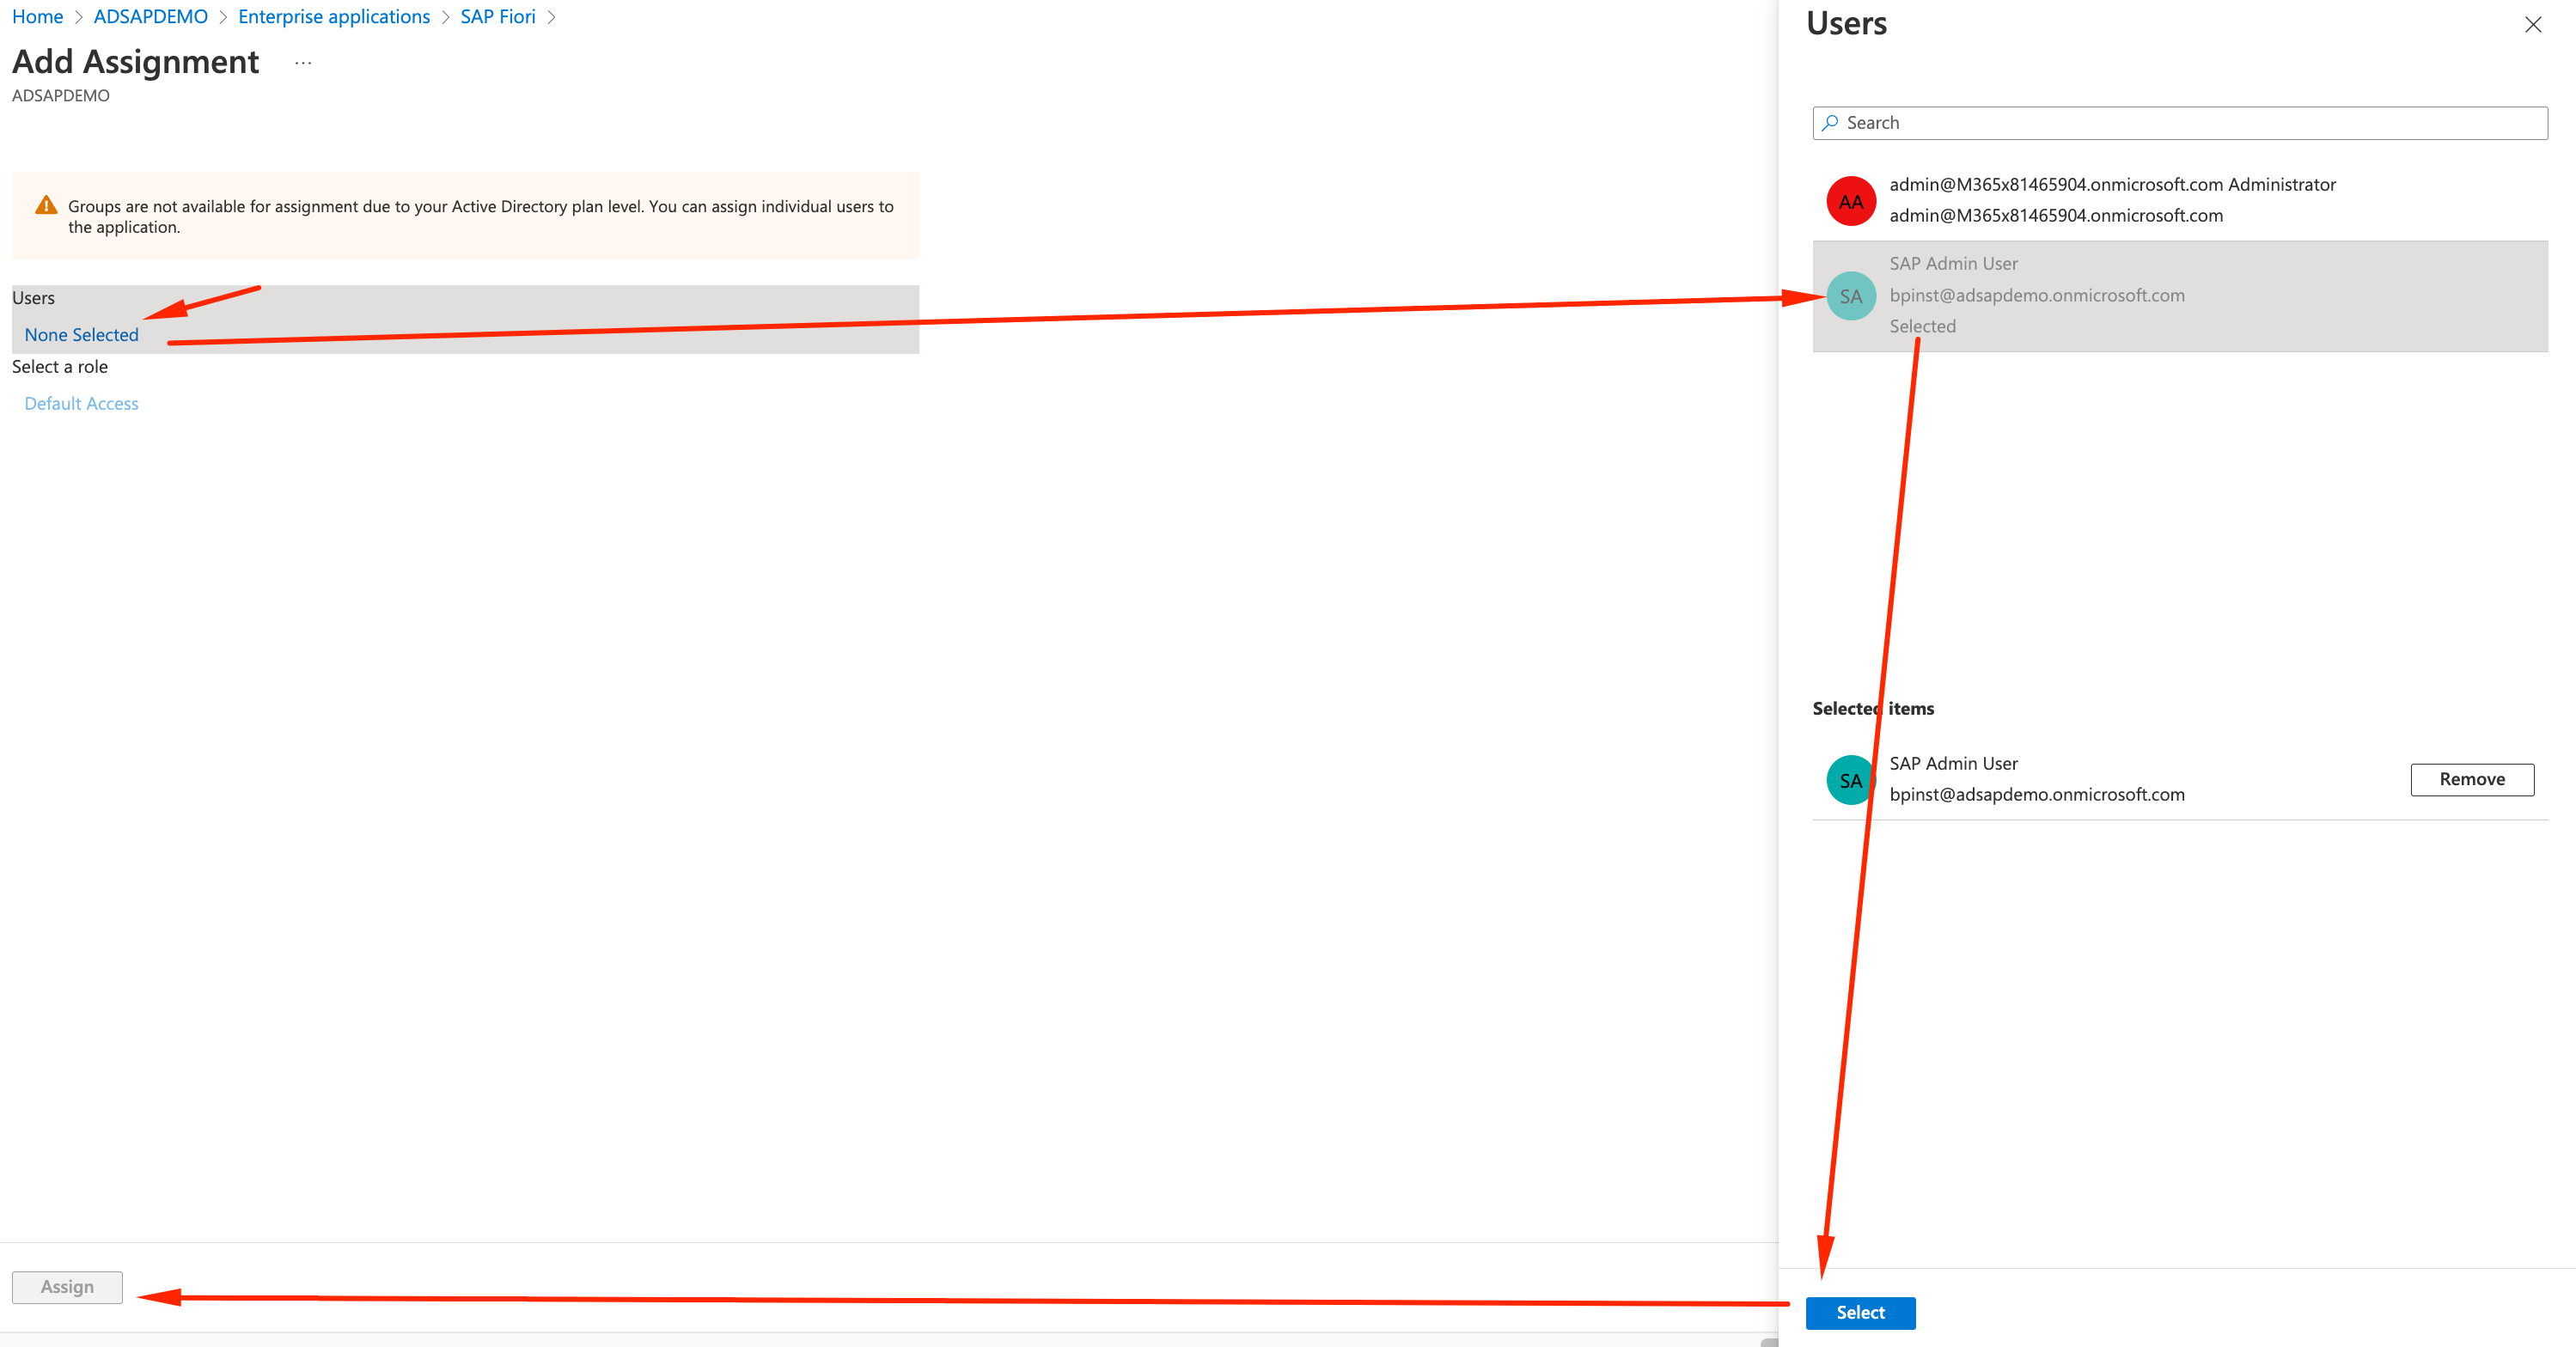
- Let’s select the AD user we created to this app. In Users, click None Selected, pick SAP Admin User, click Select and Assign
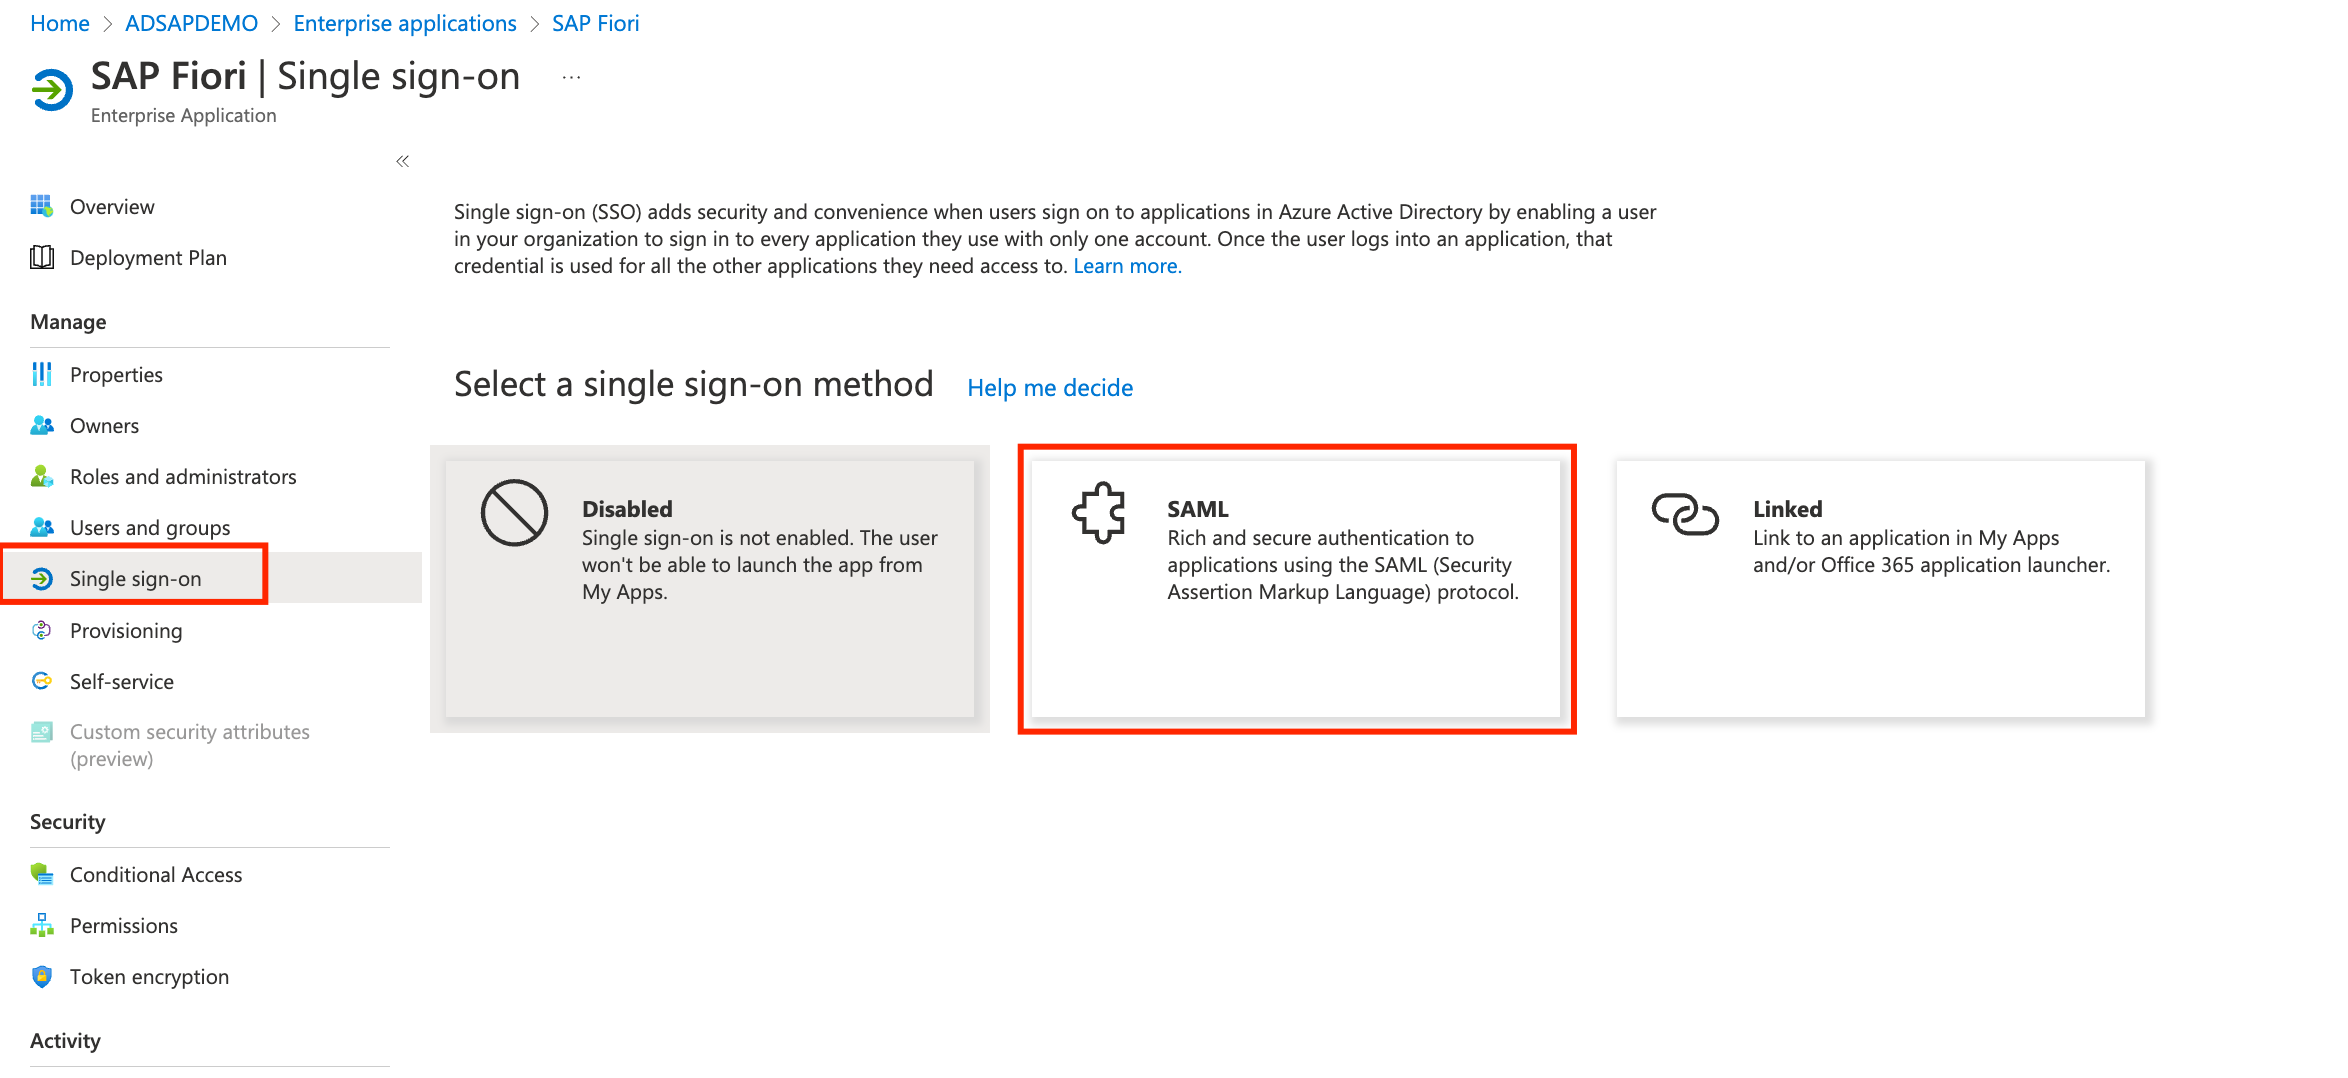
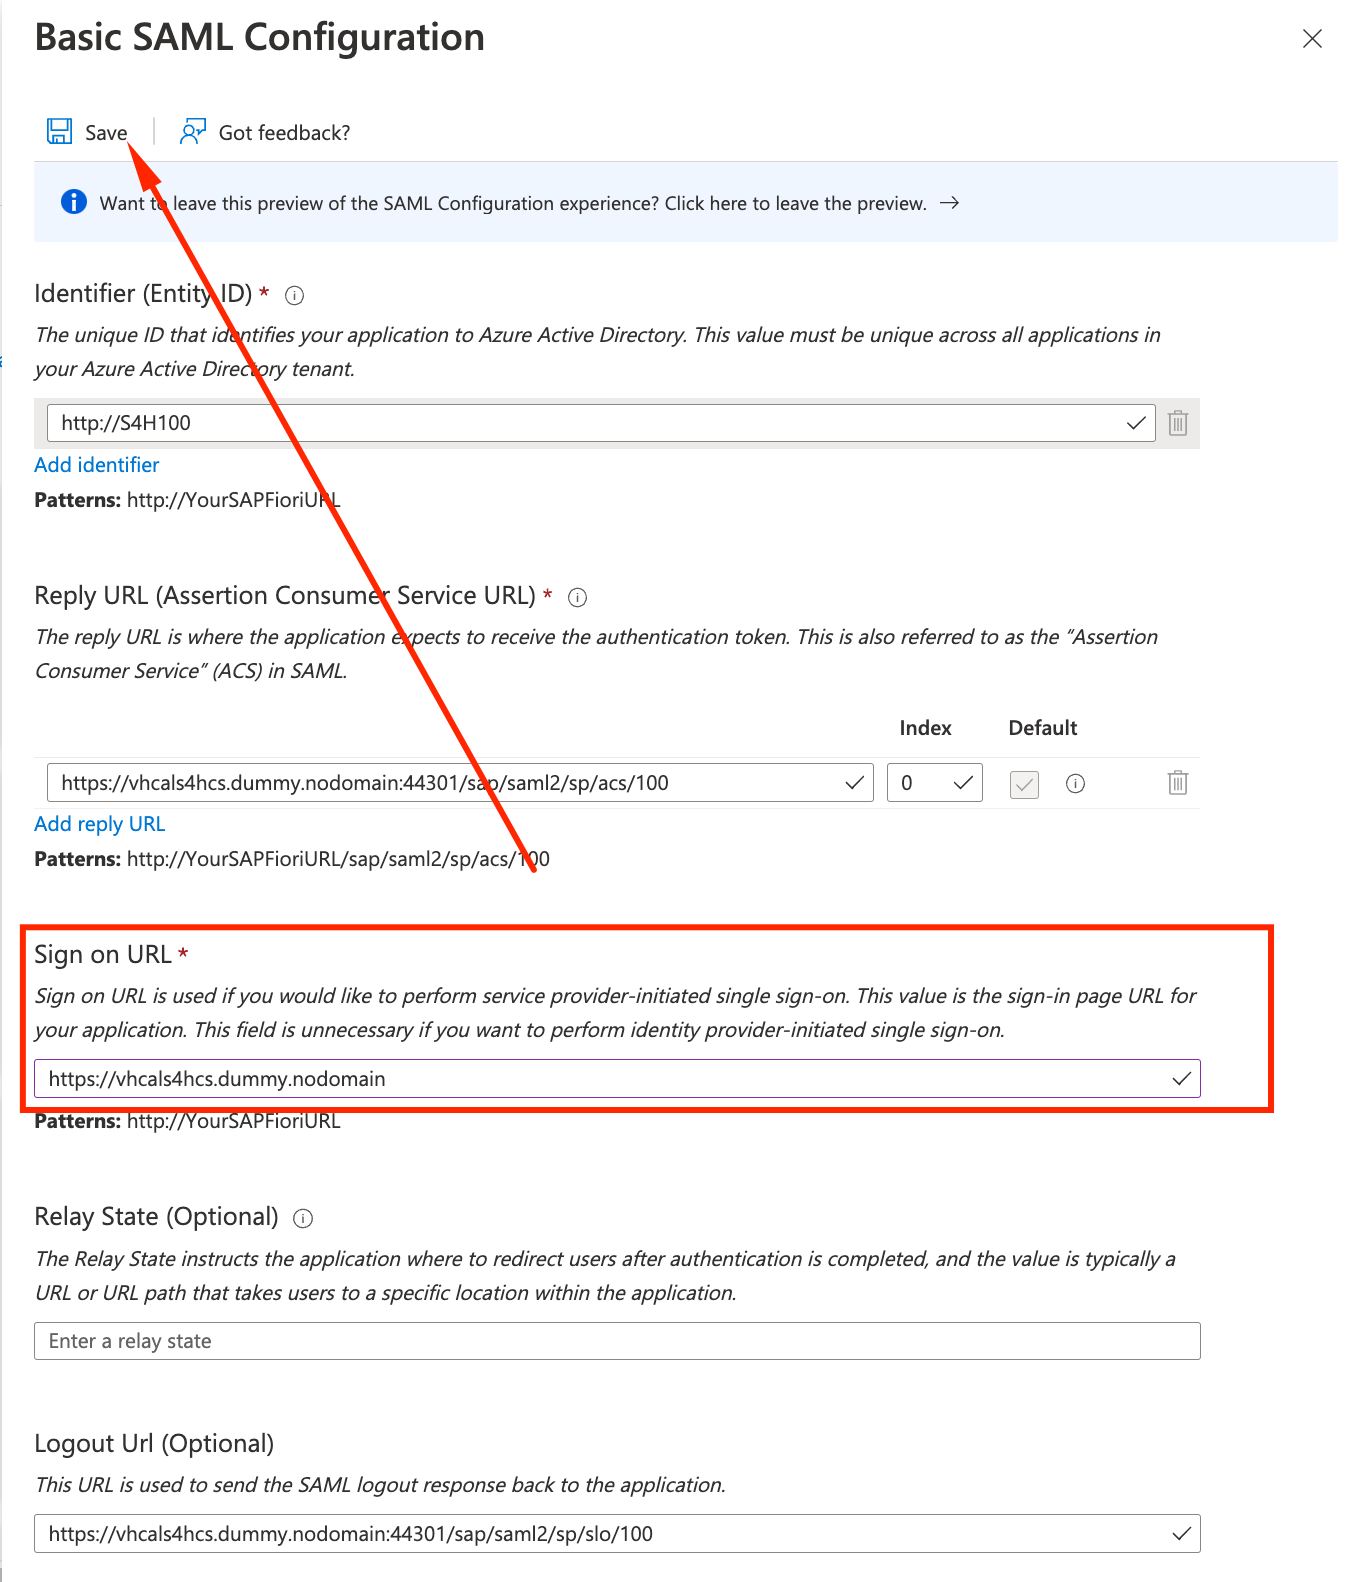
- Now we will start to configure the connection to SAP. On the left panel, select Single sign-on and click on SAML
- Instead of filling all the parameters, we will ise the metadata.xml file SAP generated to us. Click on Upload metadata file and select the metadata.xml.
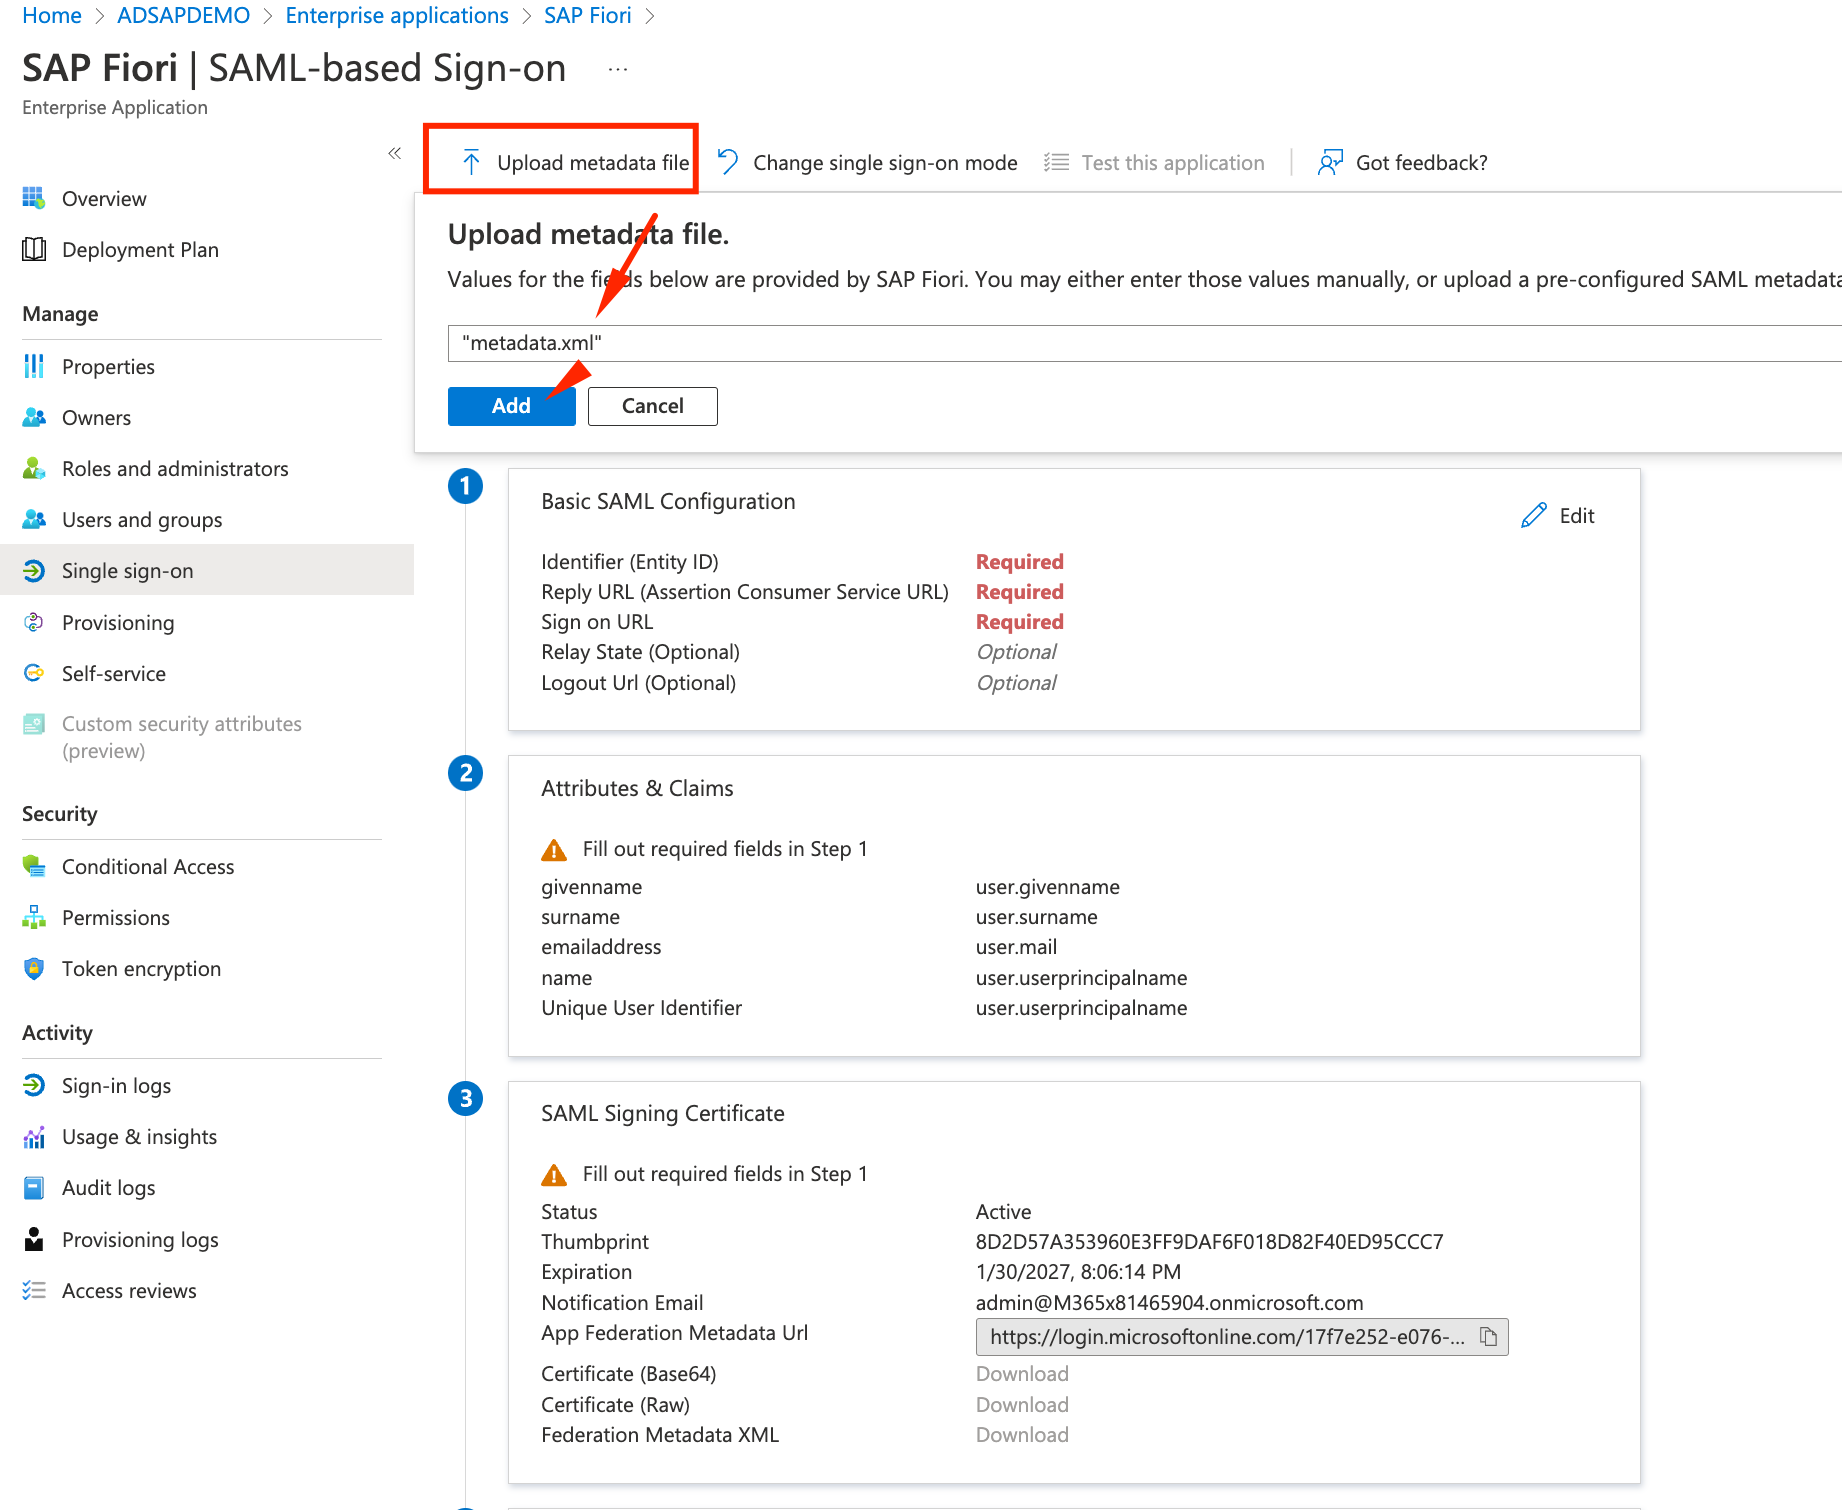
- On the right panel that will open, you just need to configure the Sign on URL to
https://vhcals4hcs.dummy.nodomain and click on Save.
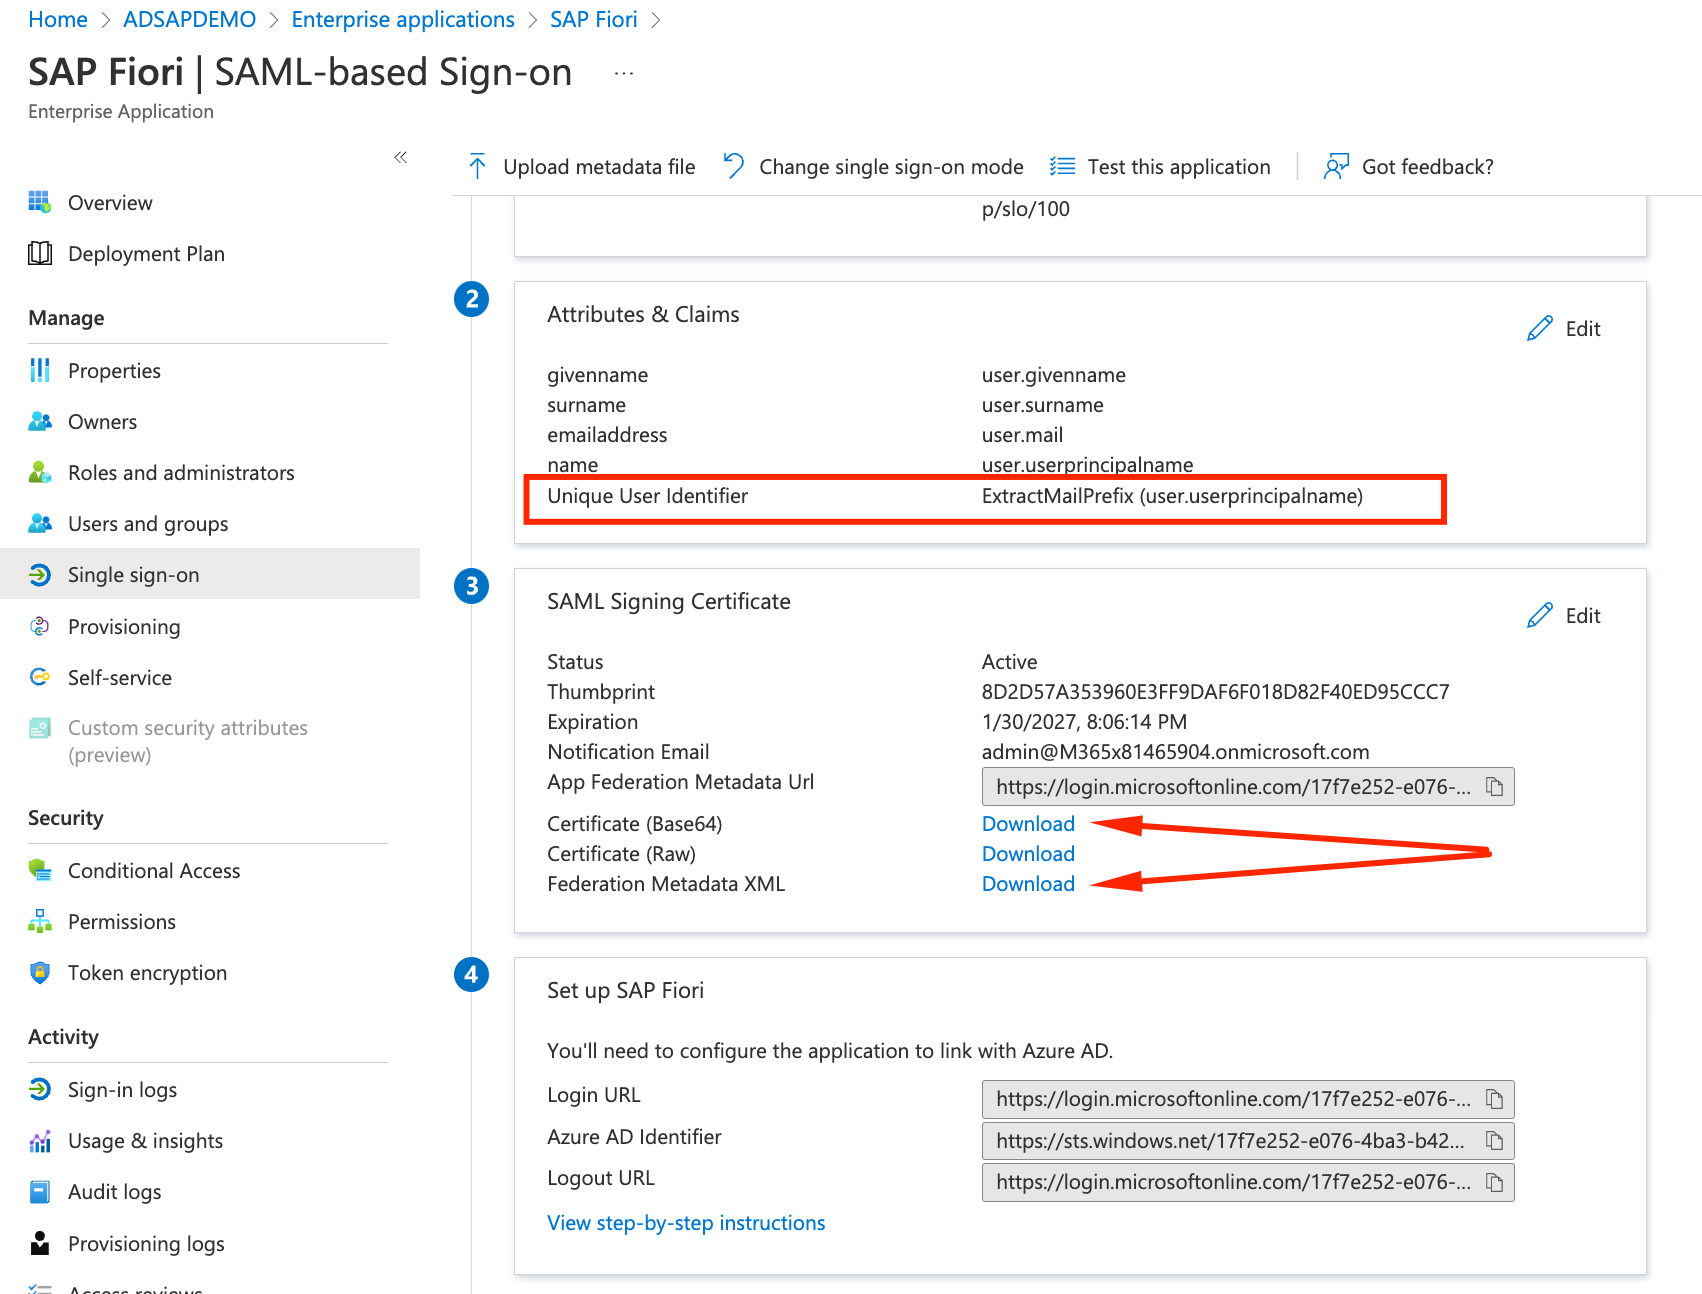
- Next we will tell to Azure AD, how to handle the SAP username conversions (Azure AD bpinst@XXXXXX.onmicrosoft.com to SAP user BPINST). Click on Edit under Attributes and Claims
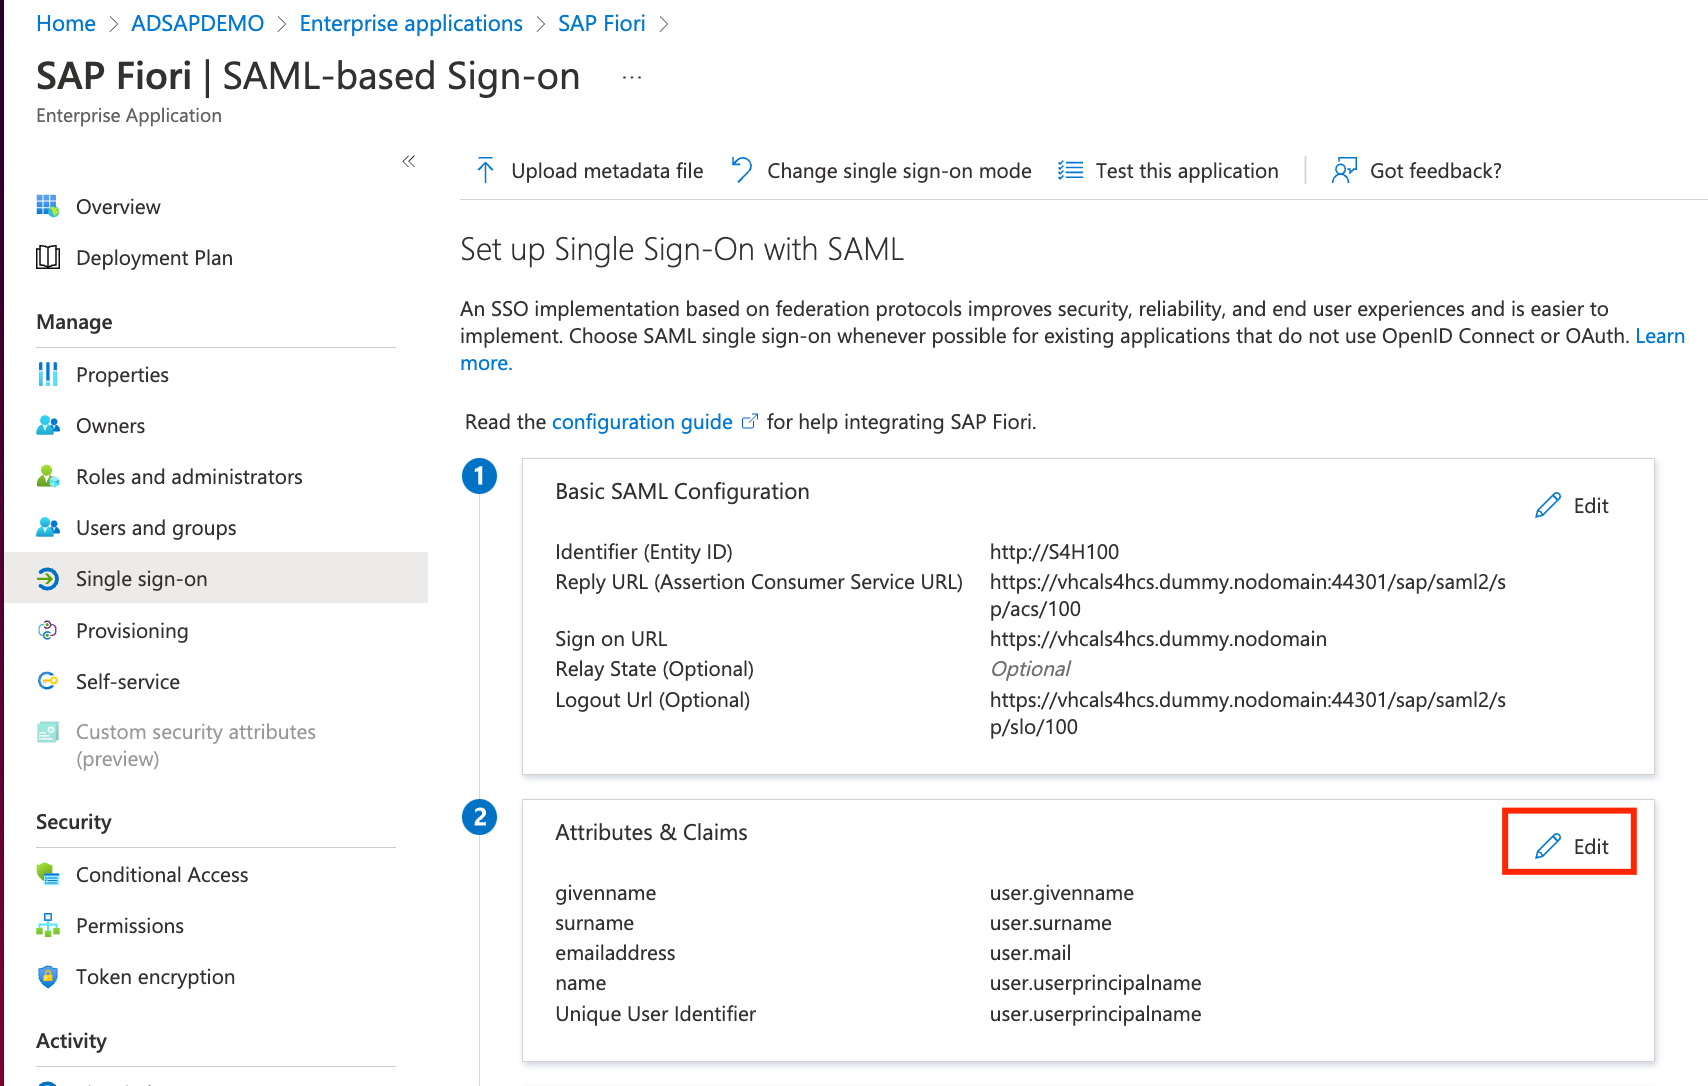
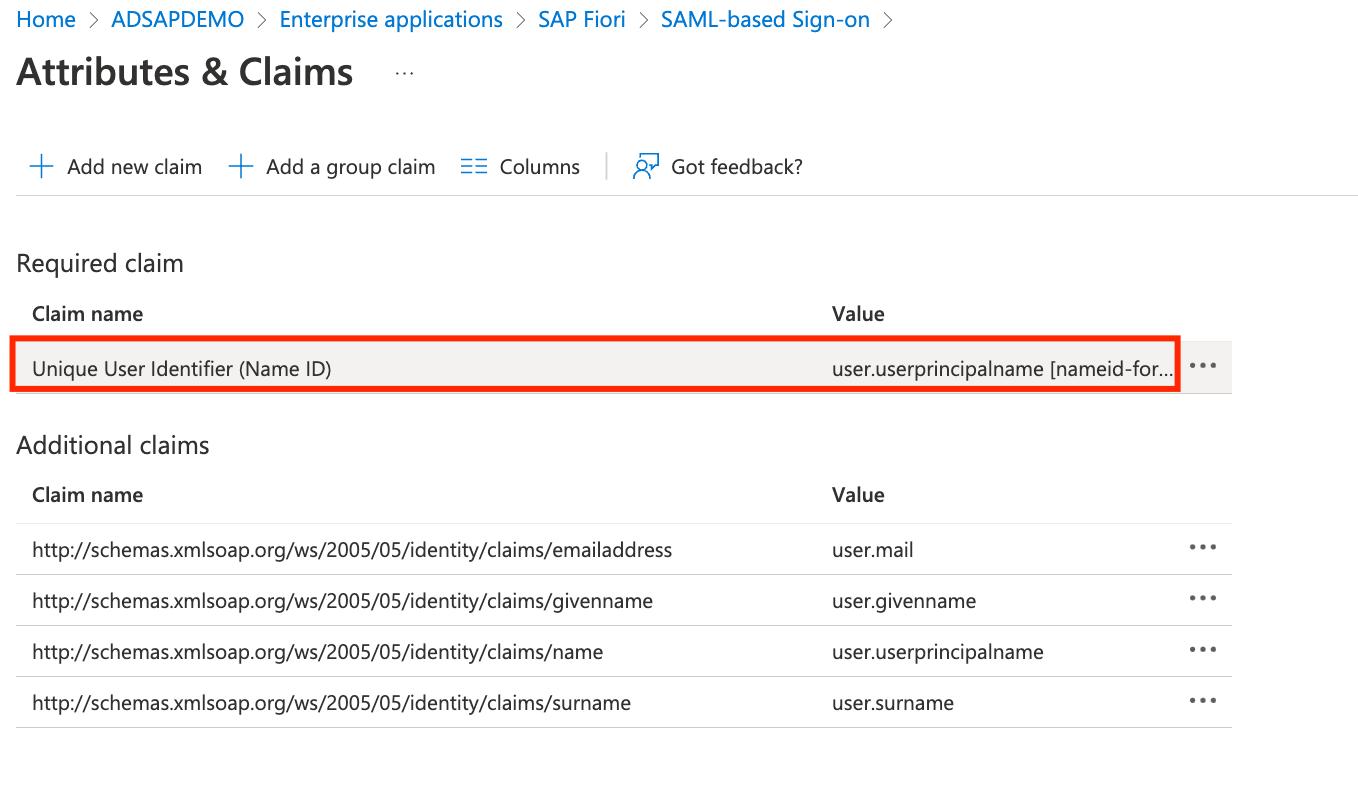
- Click on the Unique User Identifier Claim to change its default configuration
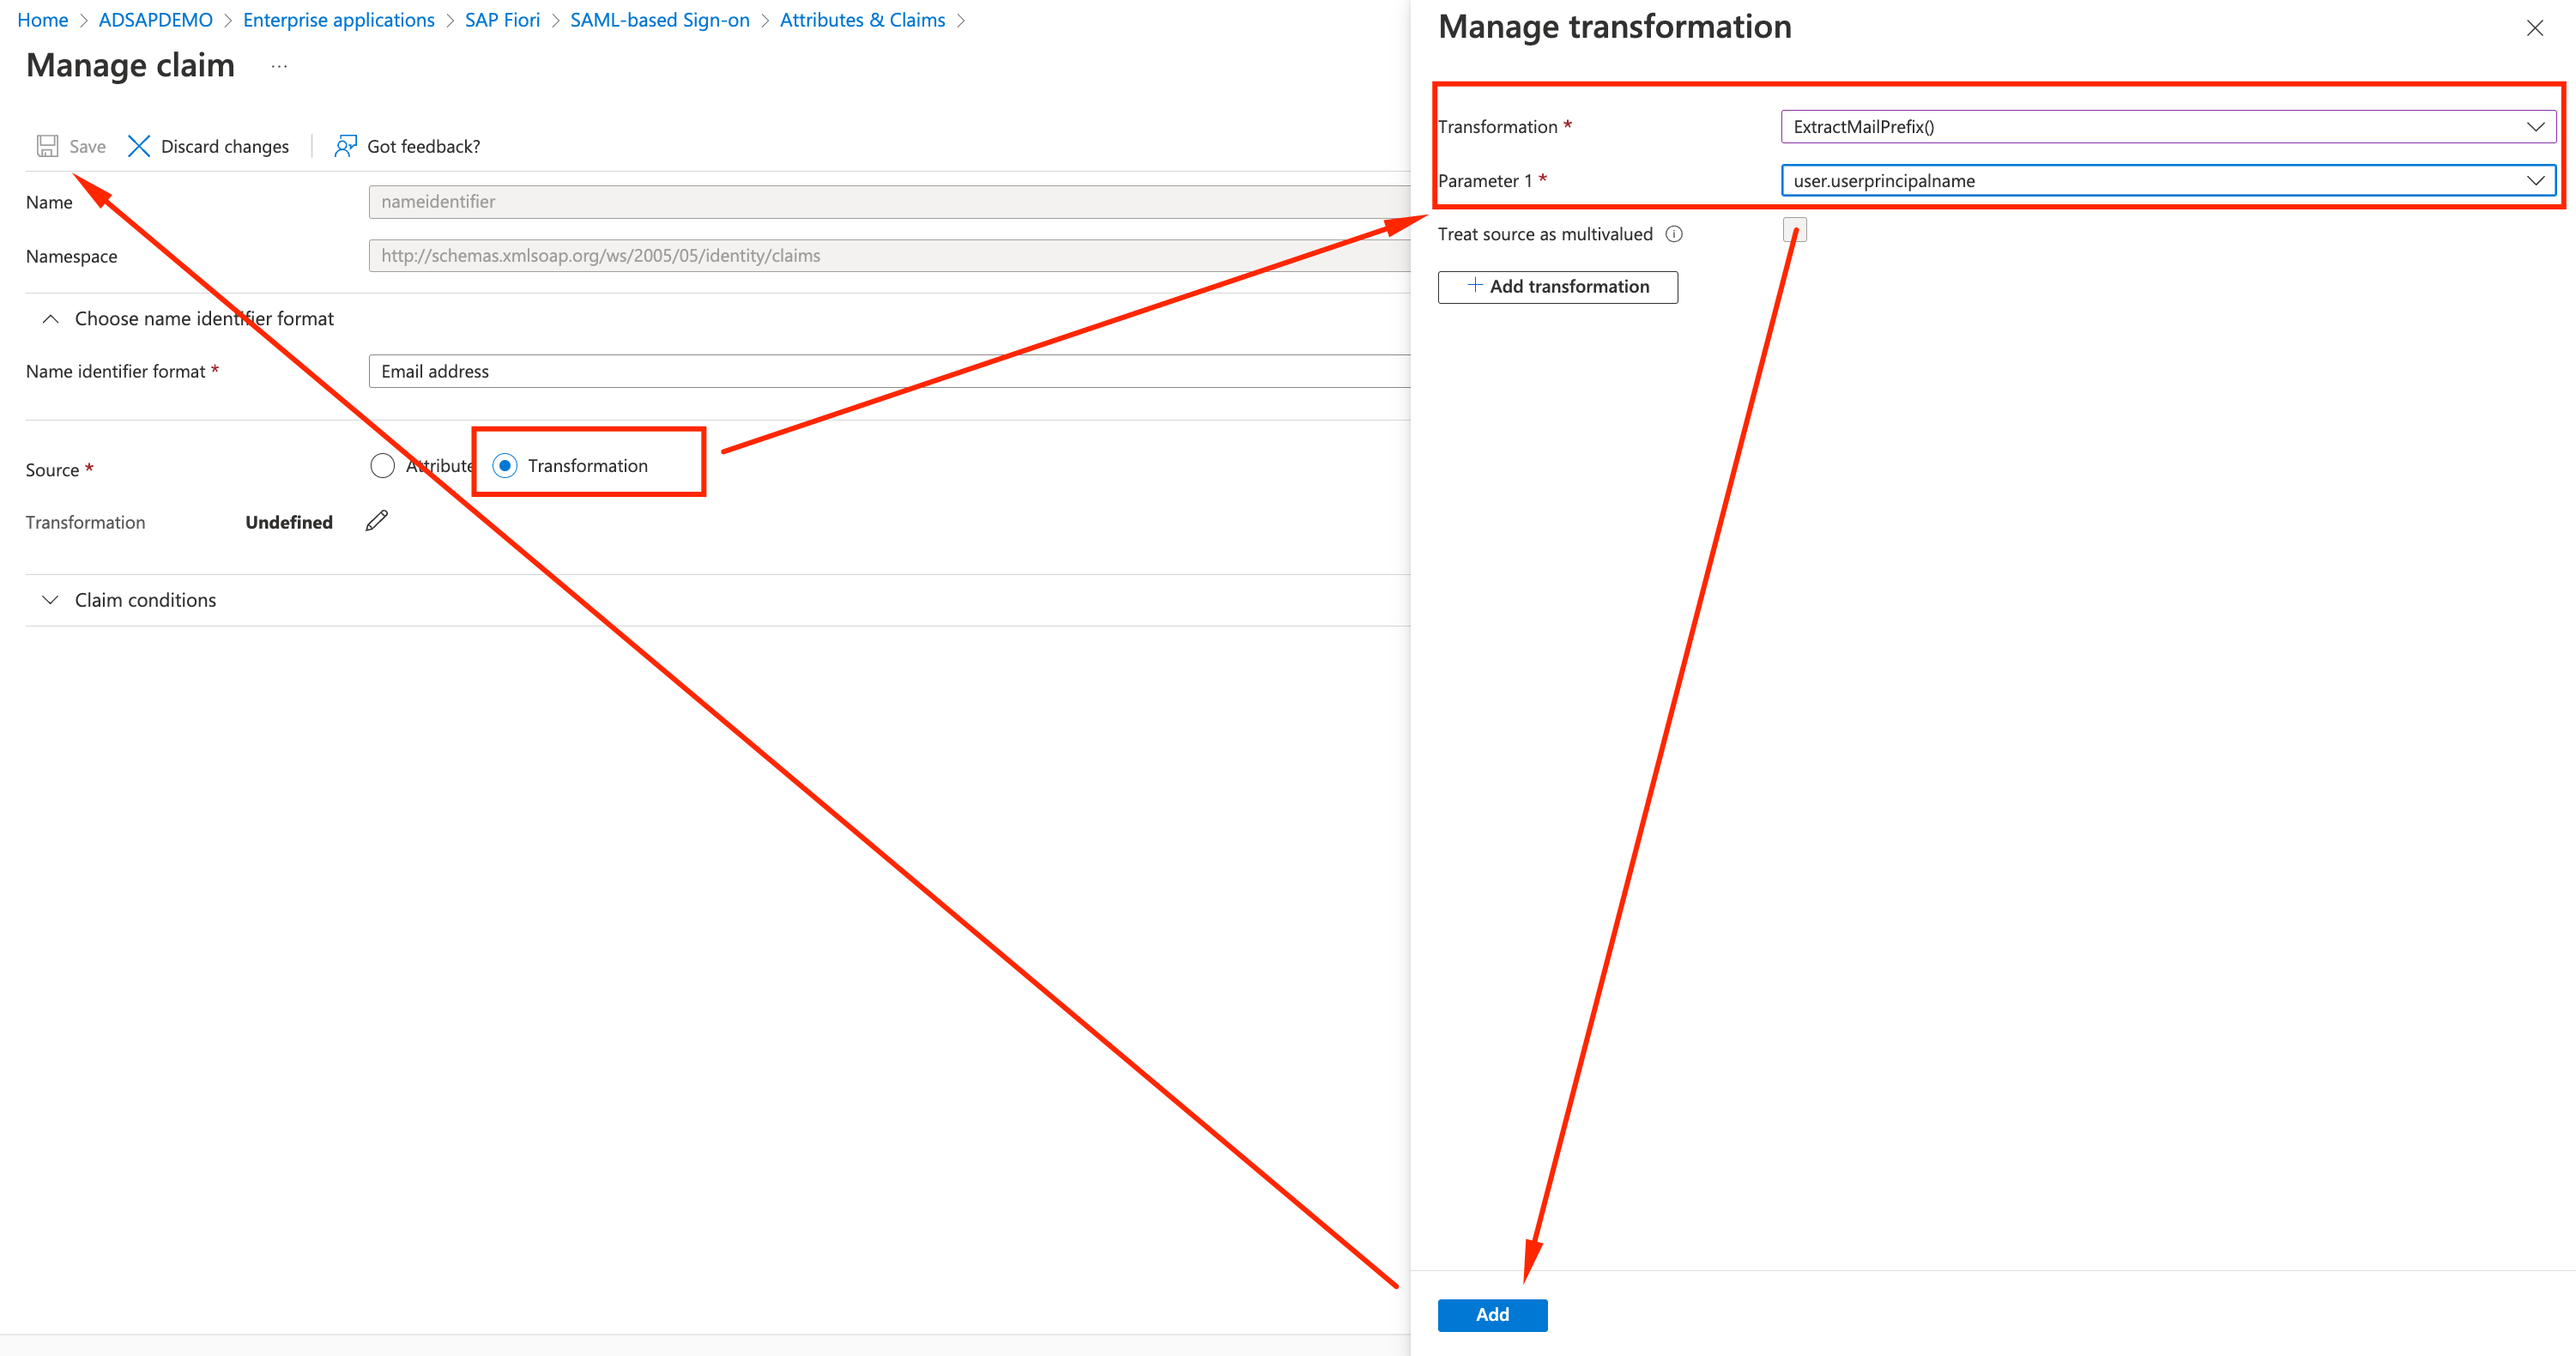
- Setup the following parameters:
- Source: Transformation
- Transformation: ExtractMailPrefix()
- Parameter 1: user.userprincipalname
- Click Add and Save
- Check for the change and download the Base64 certificate (“SAP Fiori.cer”) and the Federation Metadata XML (“SAP Fiori.xml” file)
Configuring SAP Fiori SSO with Azure AD on SAP
Now that we did the Azure AD part, we need to finally go back to SAP to finish configuring the trust between the two authentication providers.
-
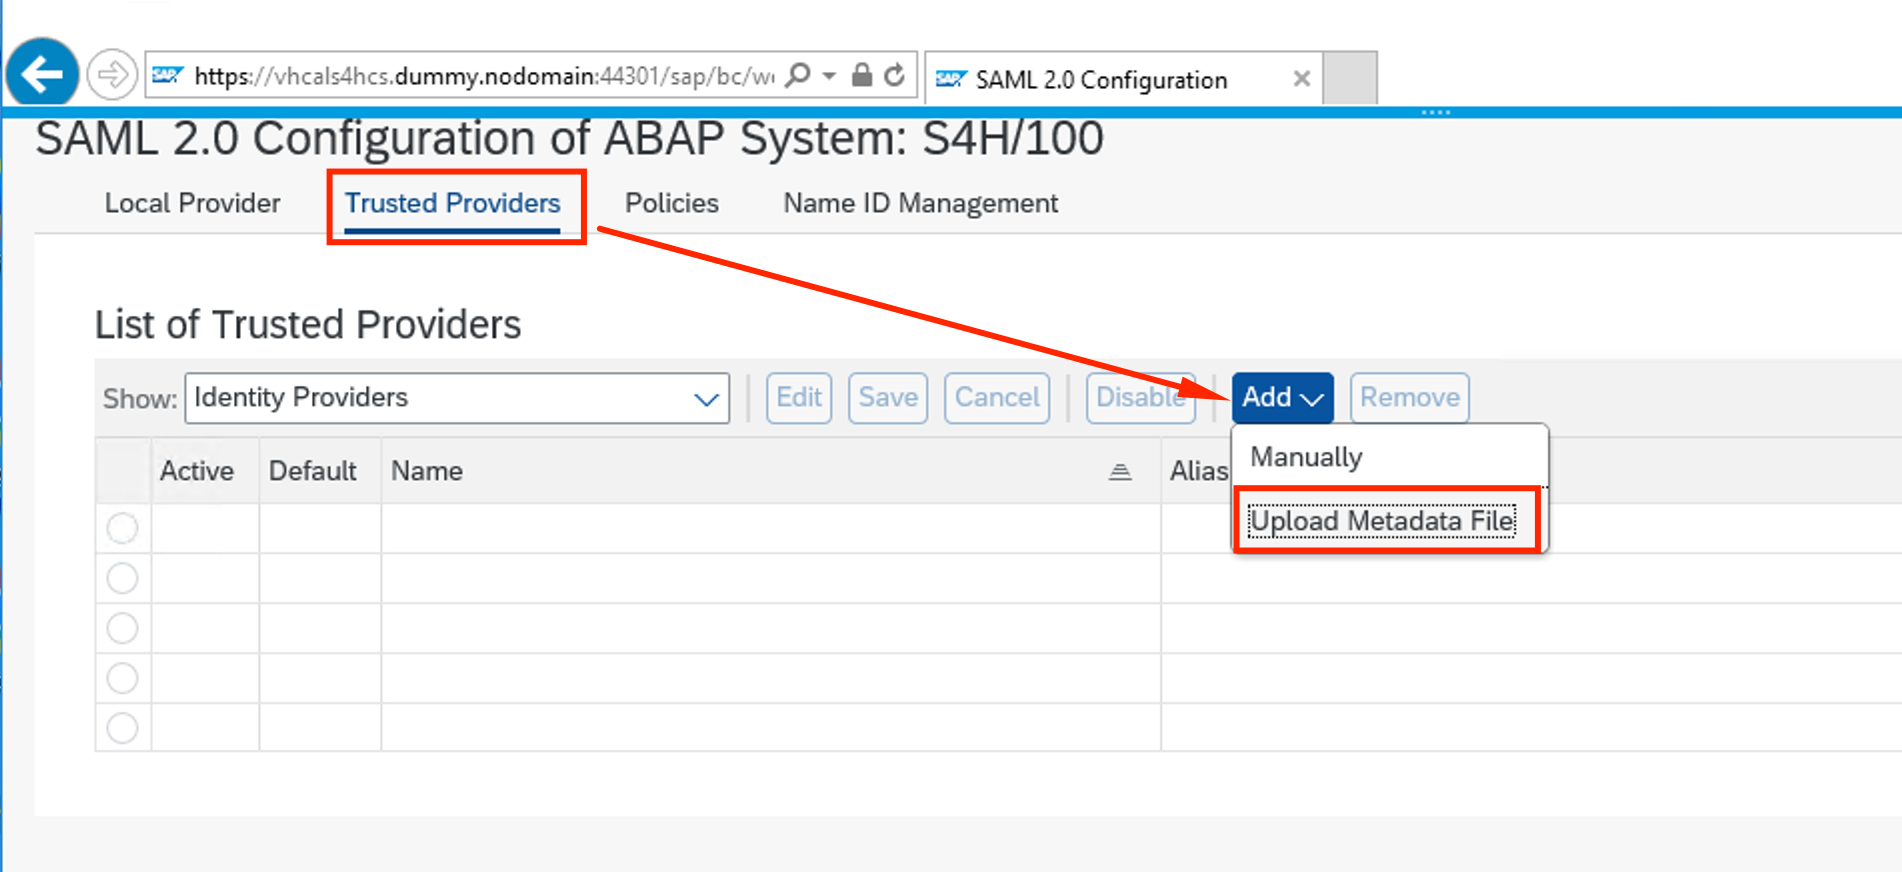
Go back to the Bastion Host, under the SAML configuration webpage. Click on the Trusted Providers tab, and Upload Metadata File from Azure AD.
-
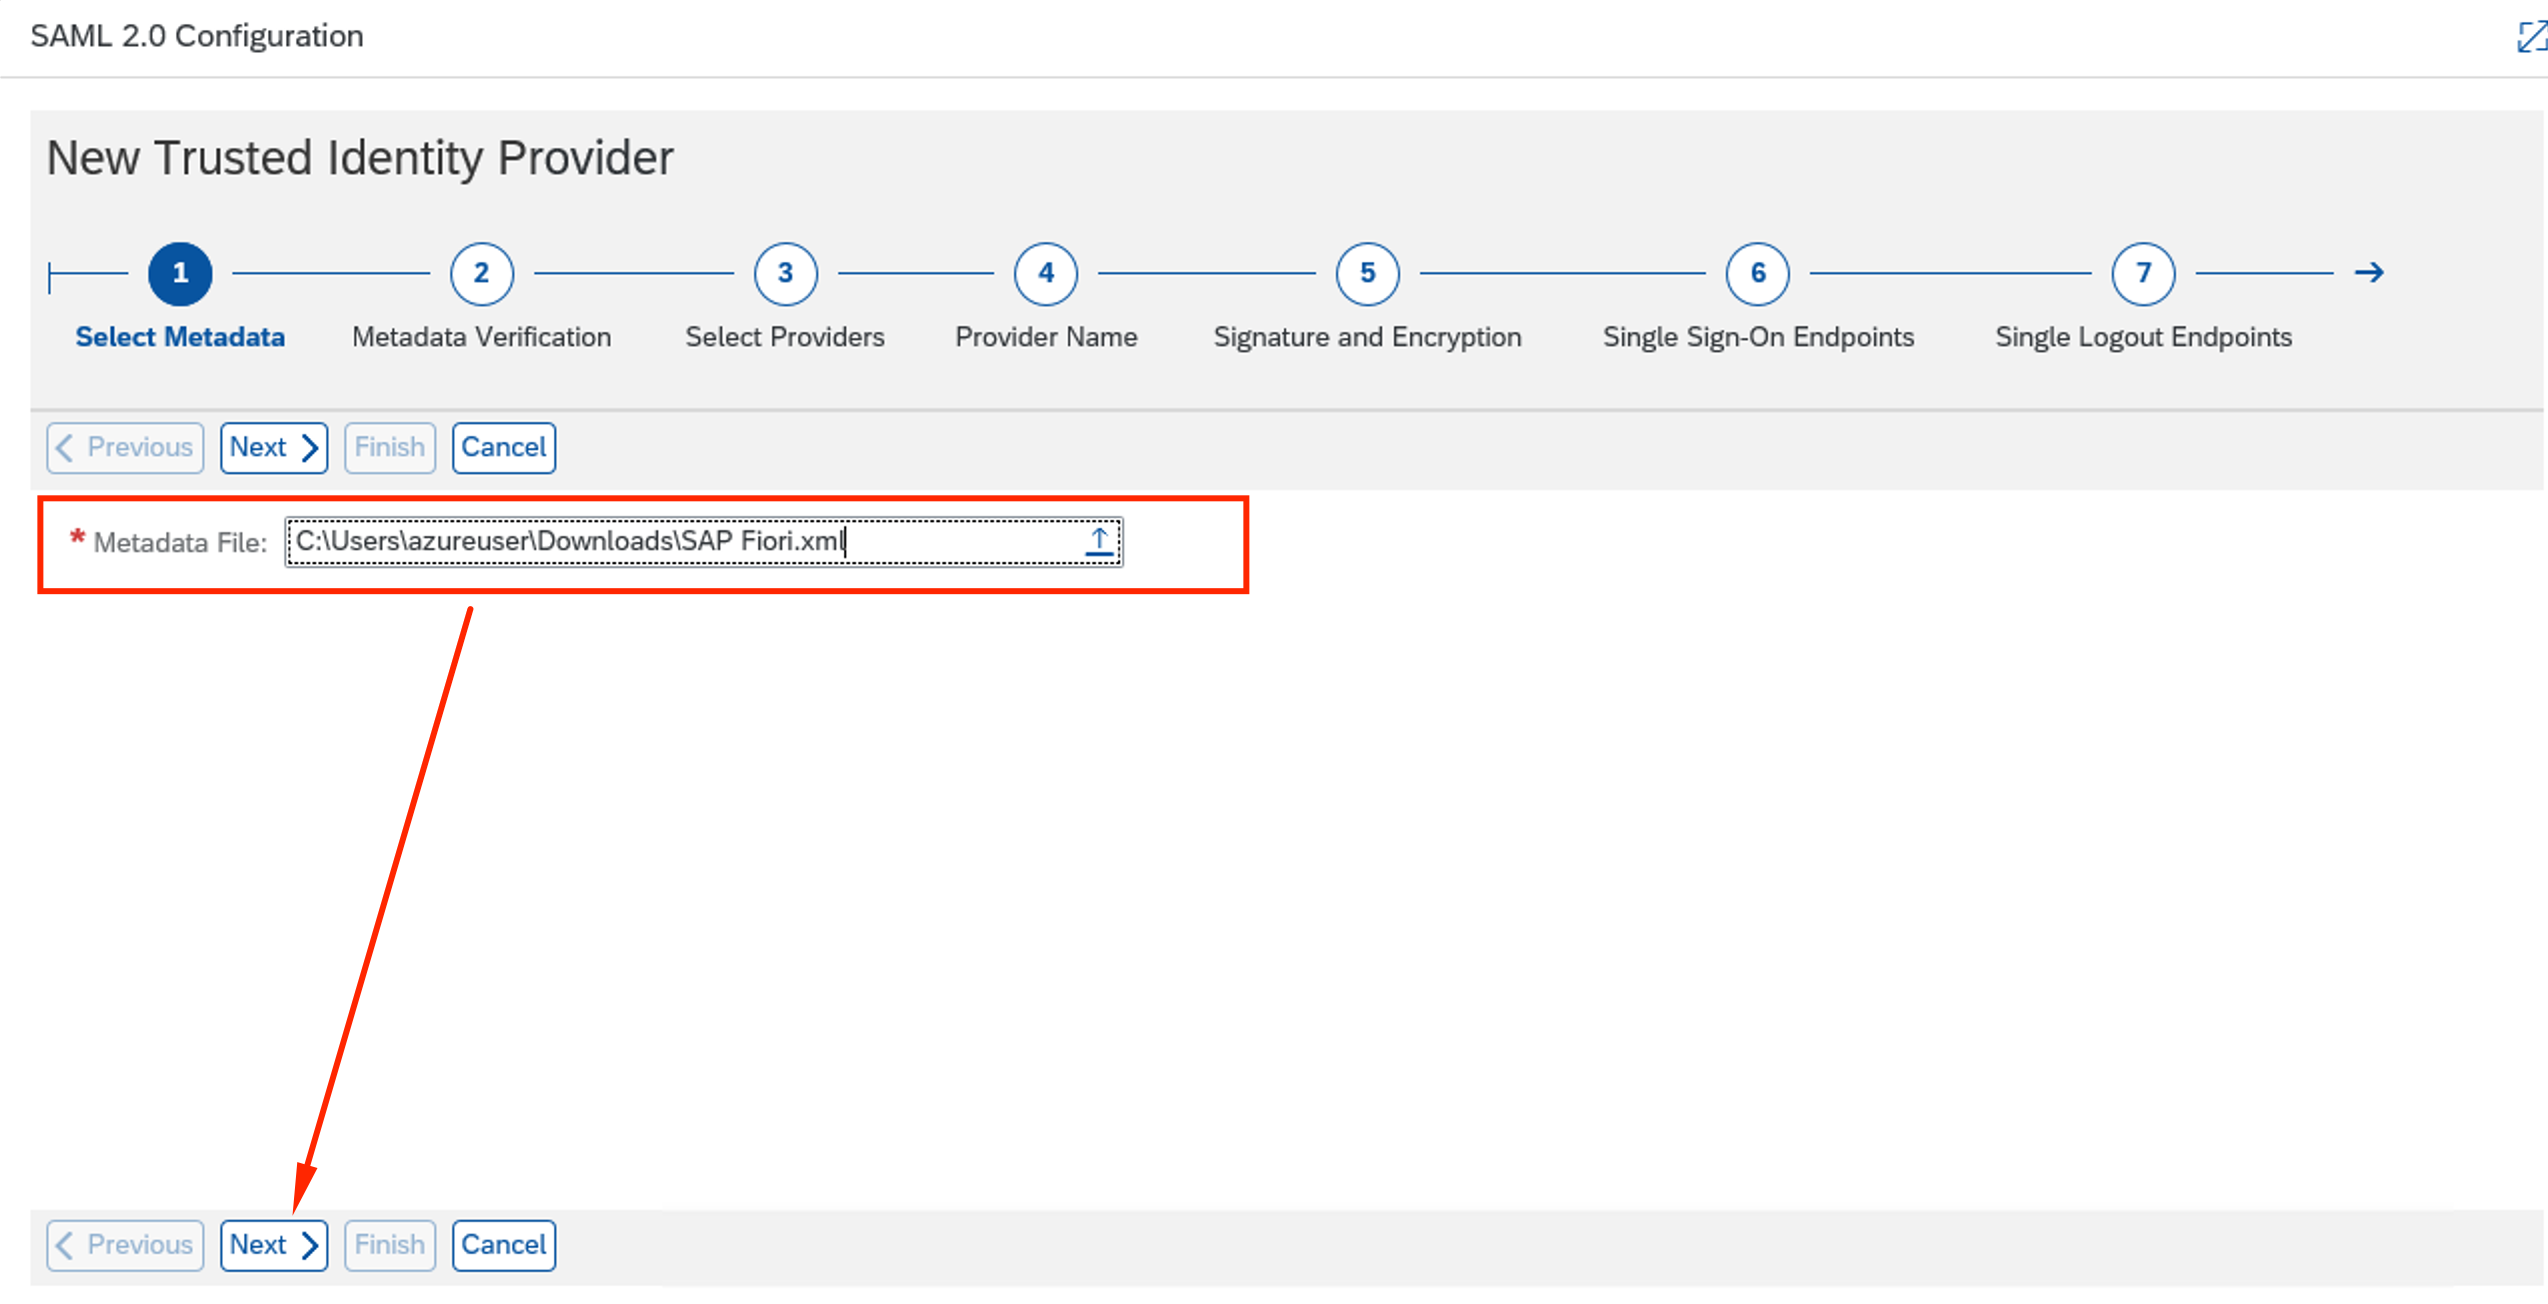
Select the SAP Fiori.xml file from Azure AD. Click Next.
-
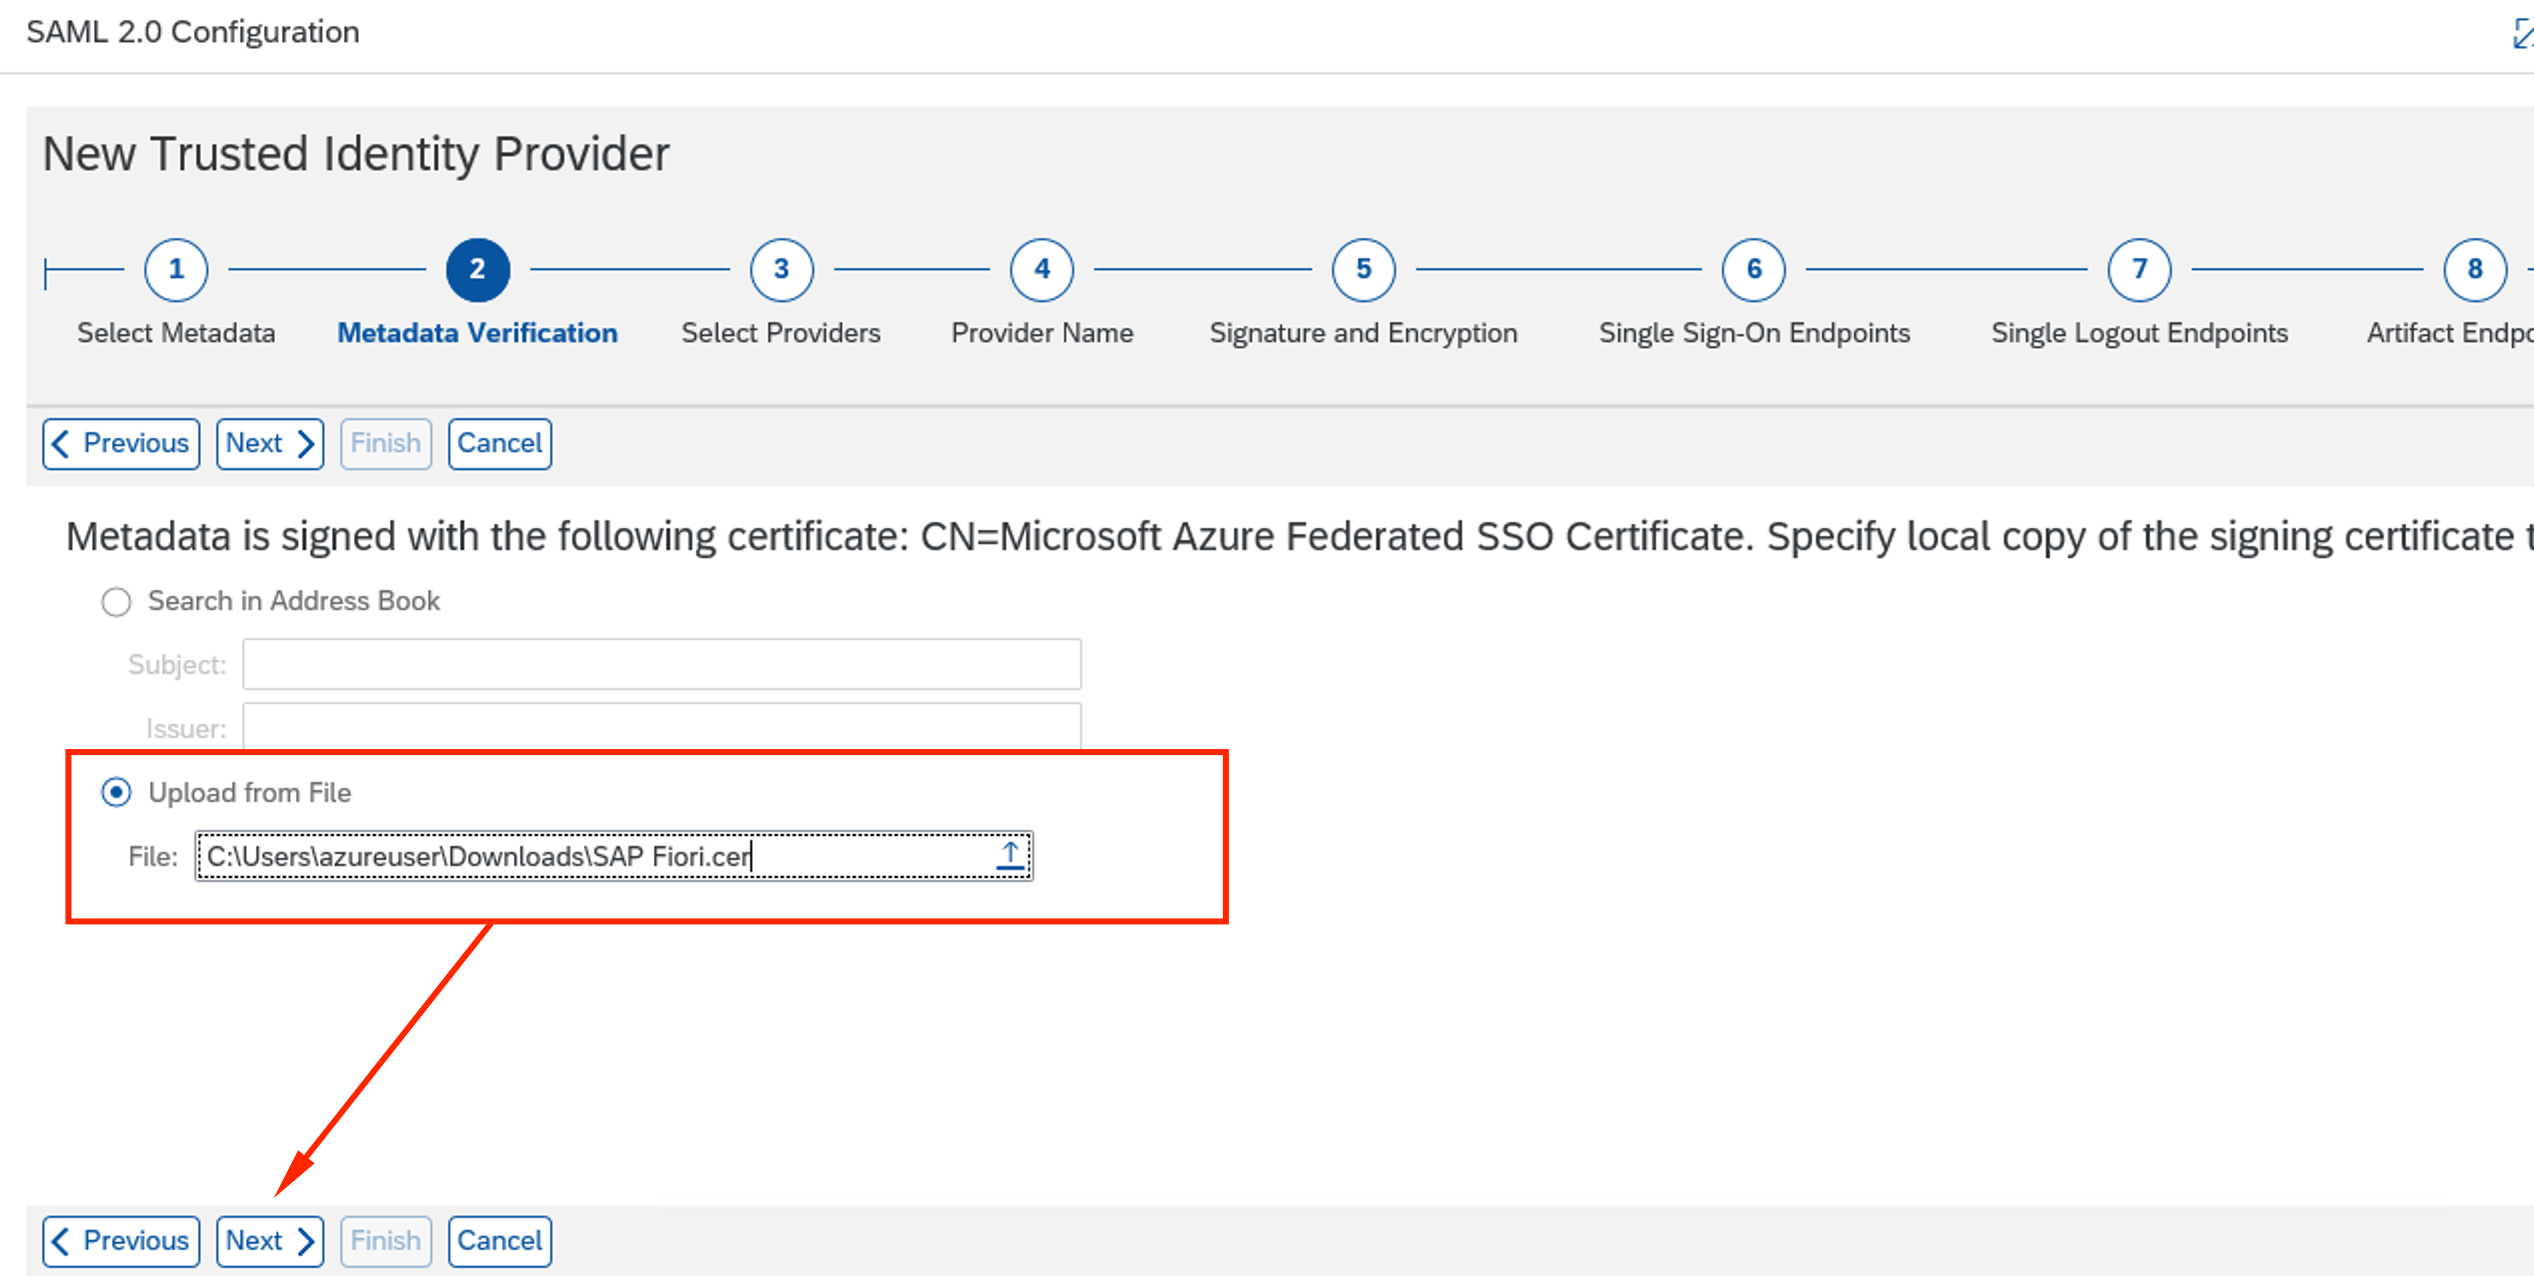
Select the SAP Fiori.cer certificate file from Azure AD. Click Next.
-
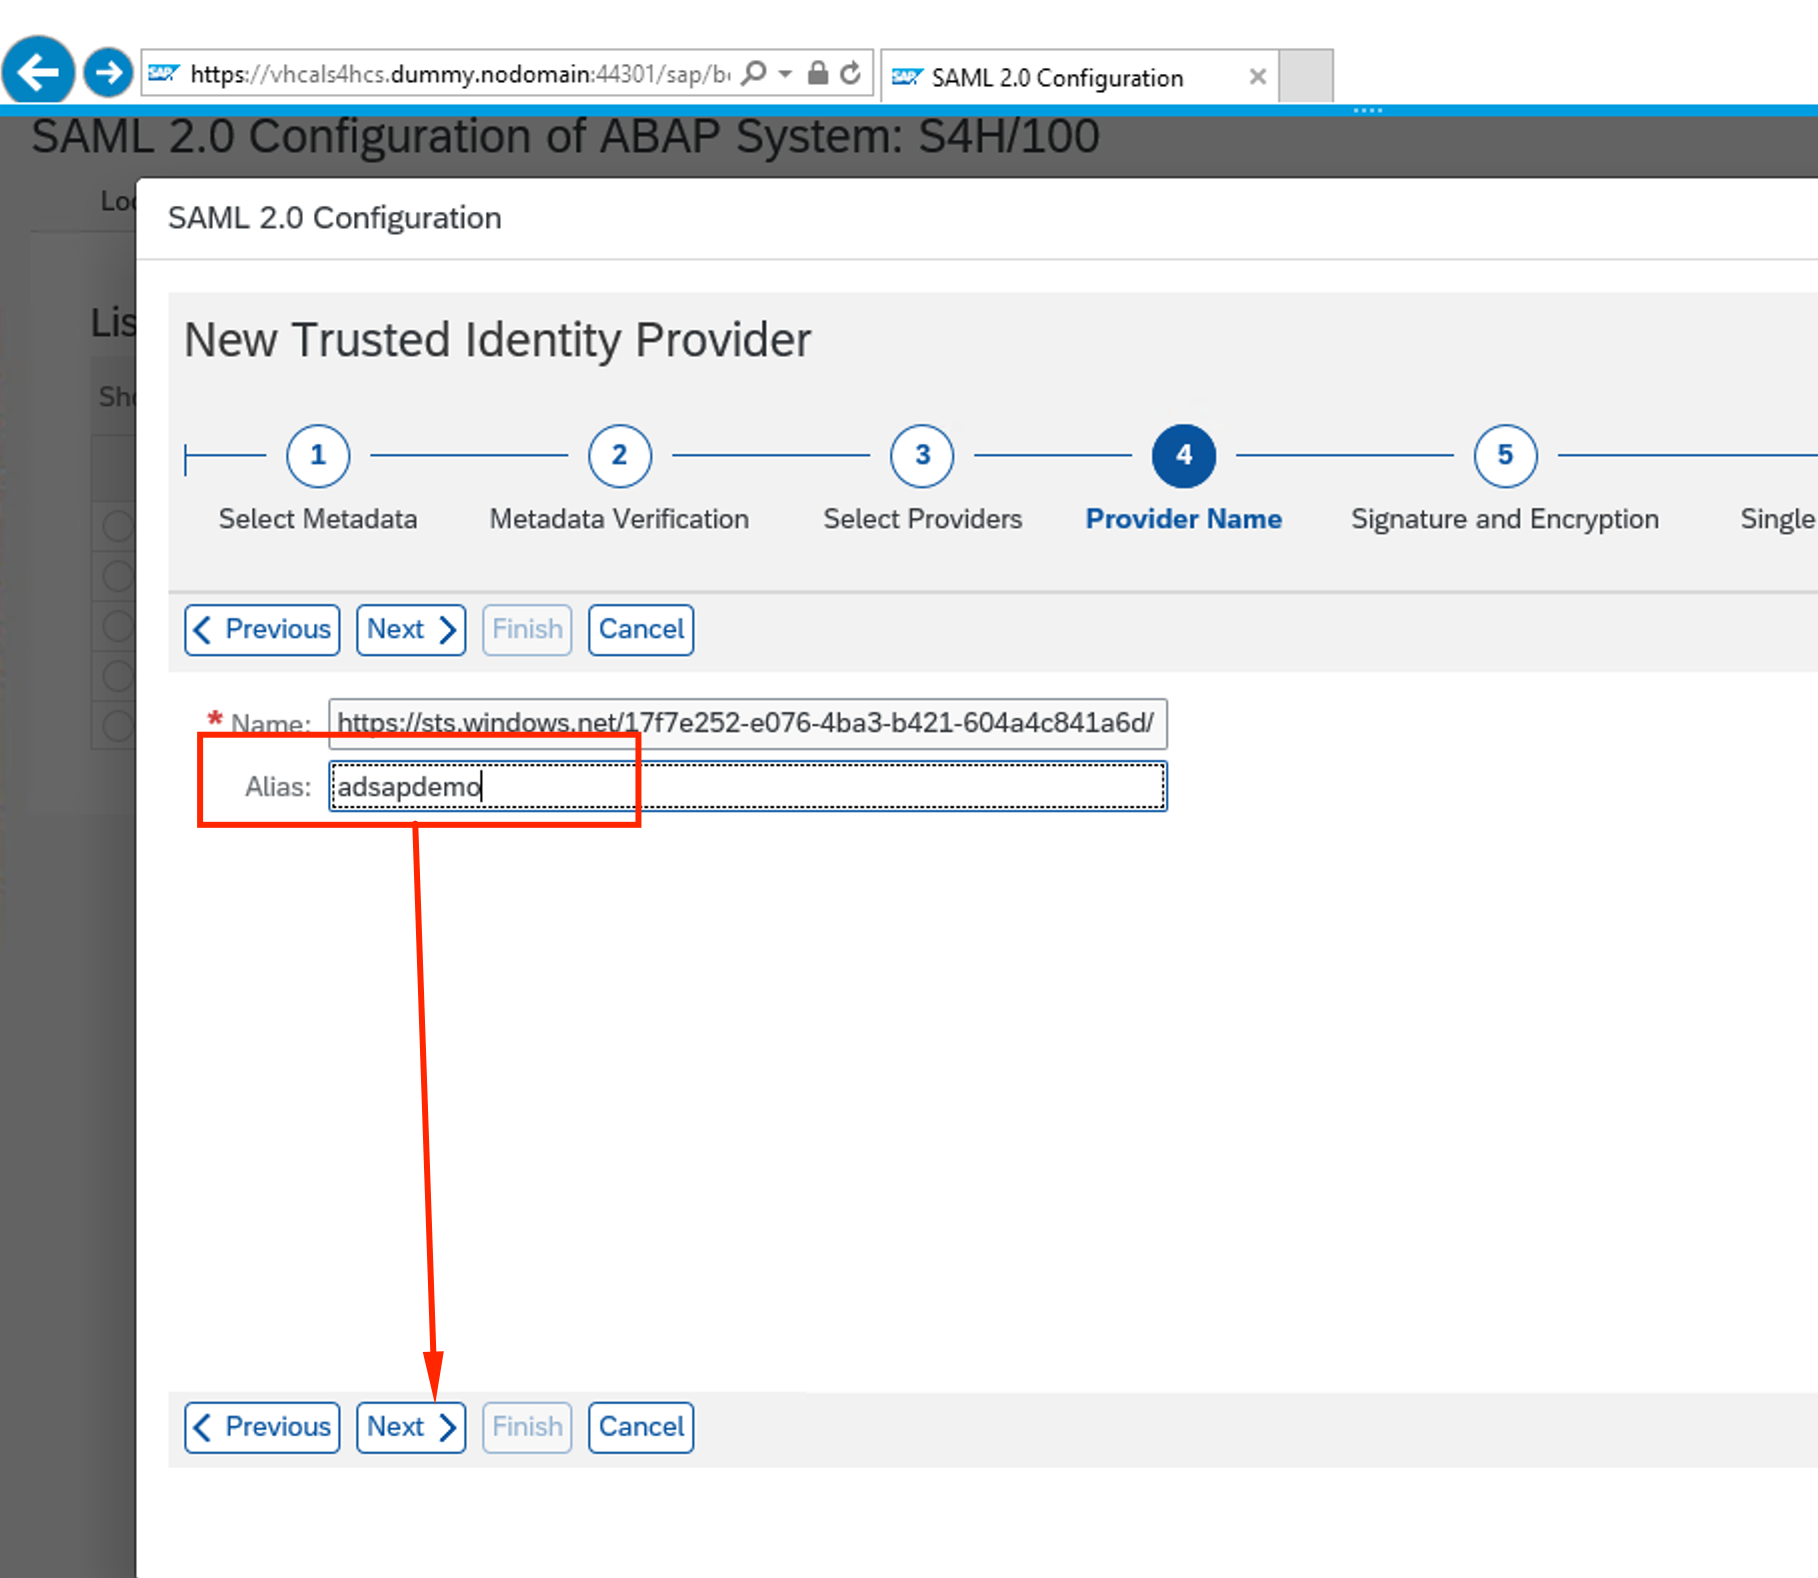
As an alias, use the name of the Azure AD tenant you used. Click Next
-
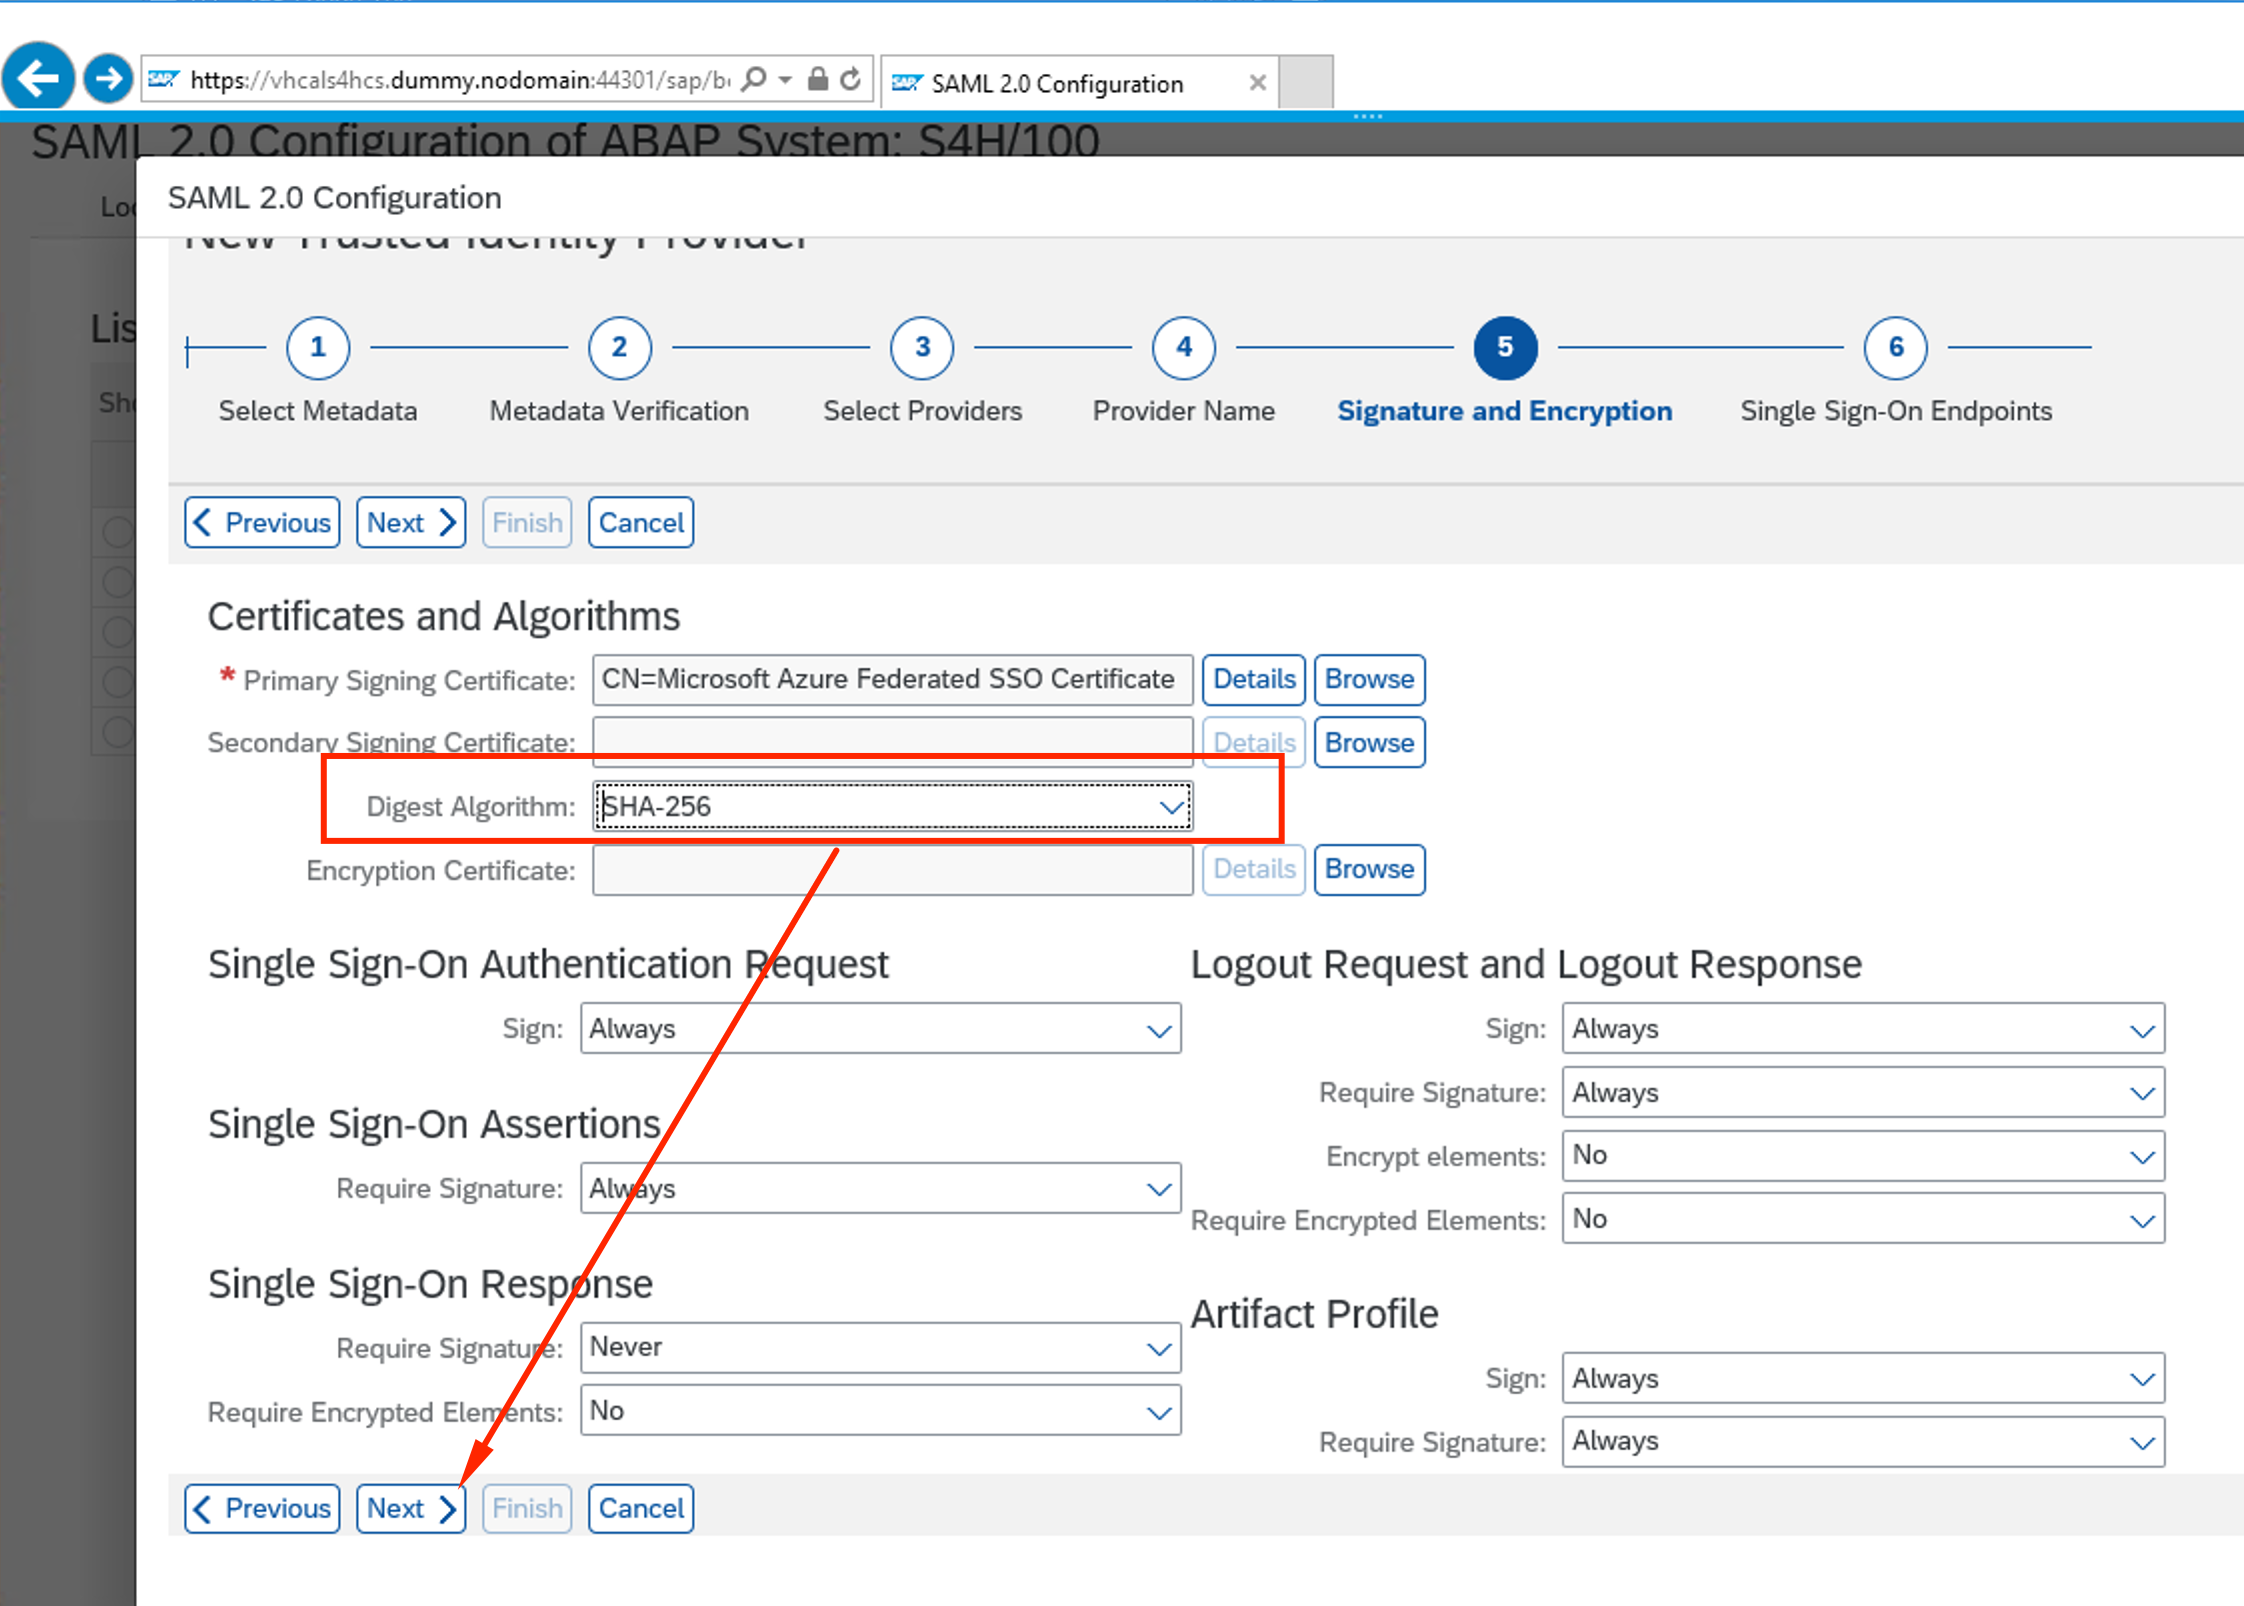
Change Digest Algorithm to SHA-256 and click Next
-
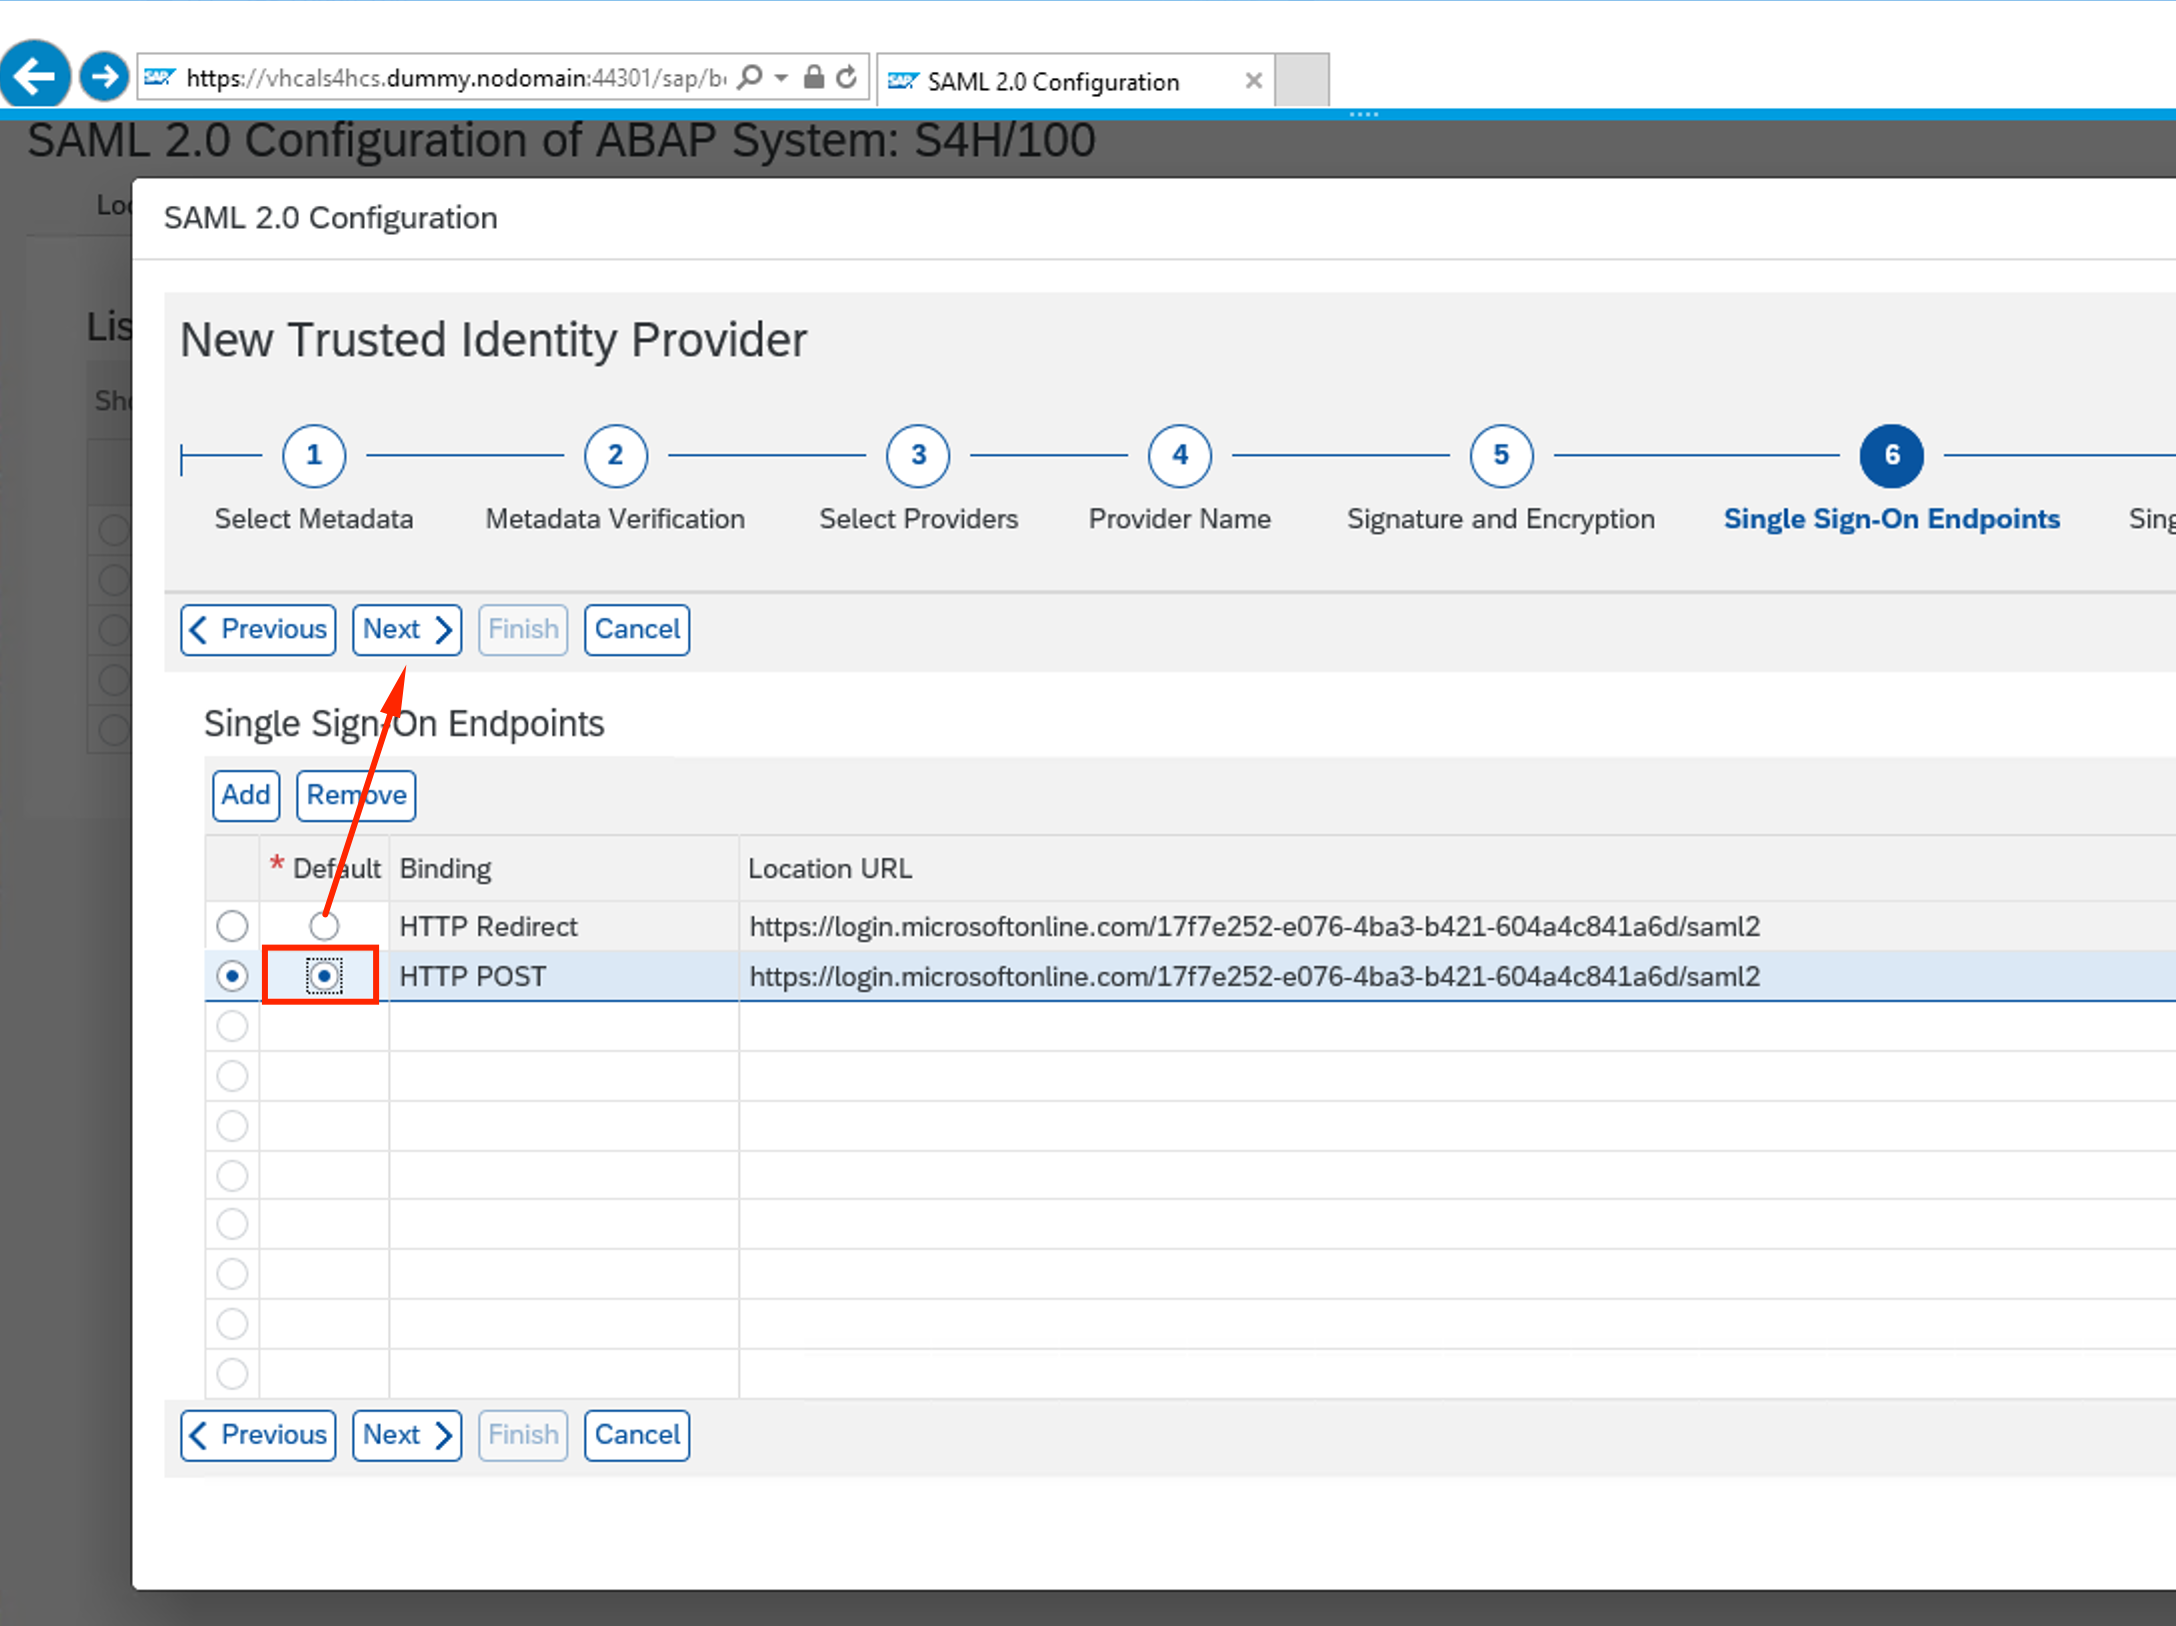
On Single Signon endpoints step, make HTTP POST is the default method. Click Next
-
Click Next until the last step (9) and click Finish

-
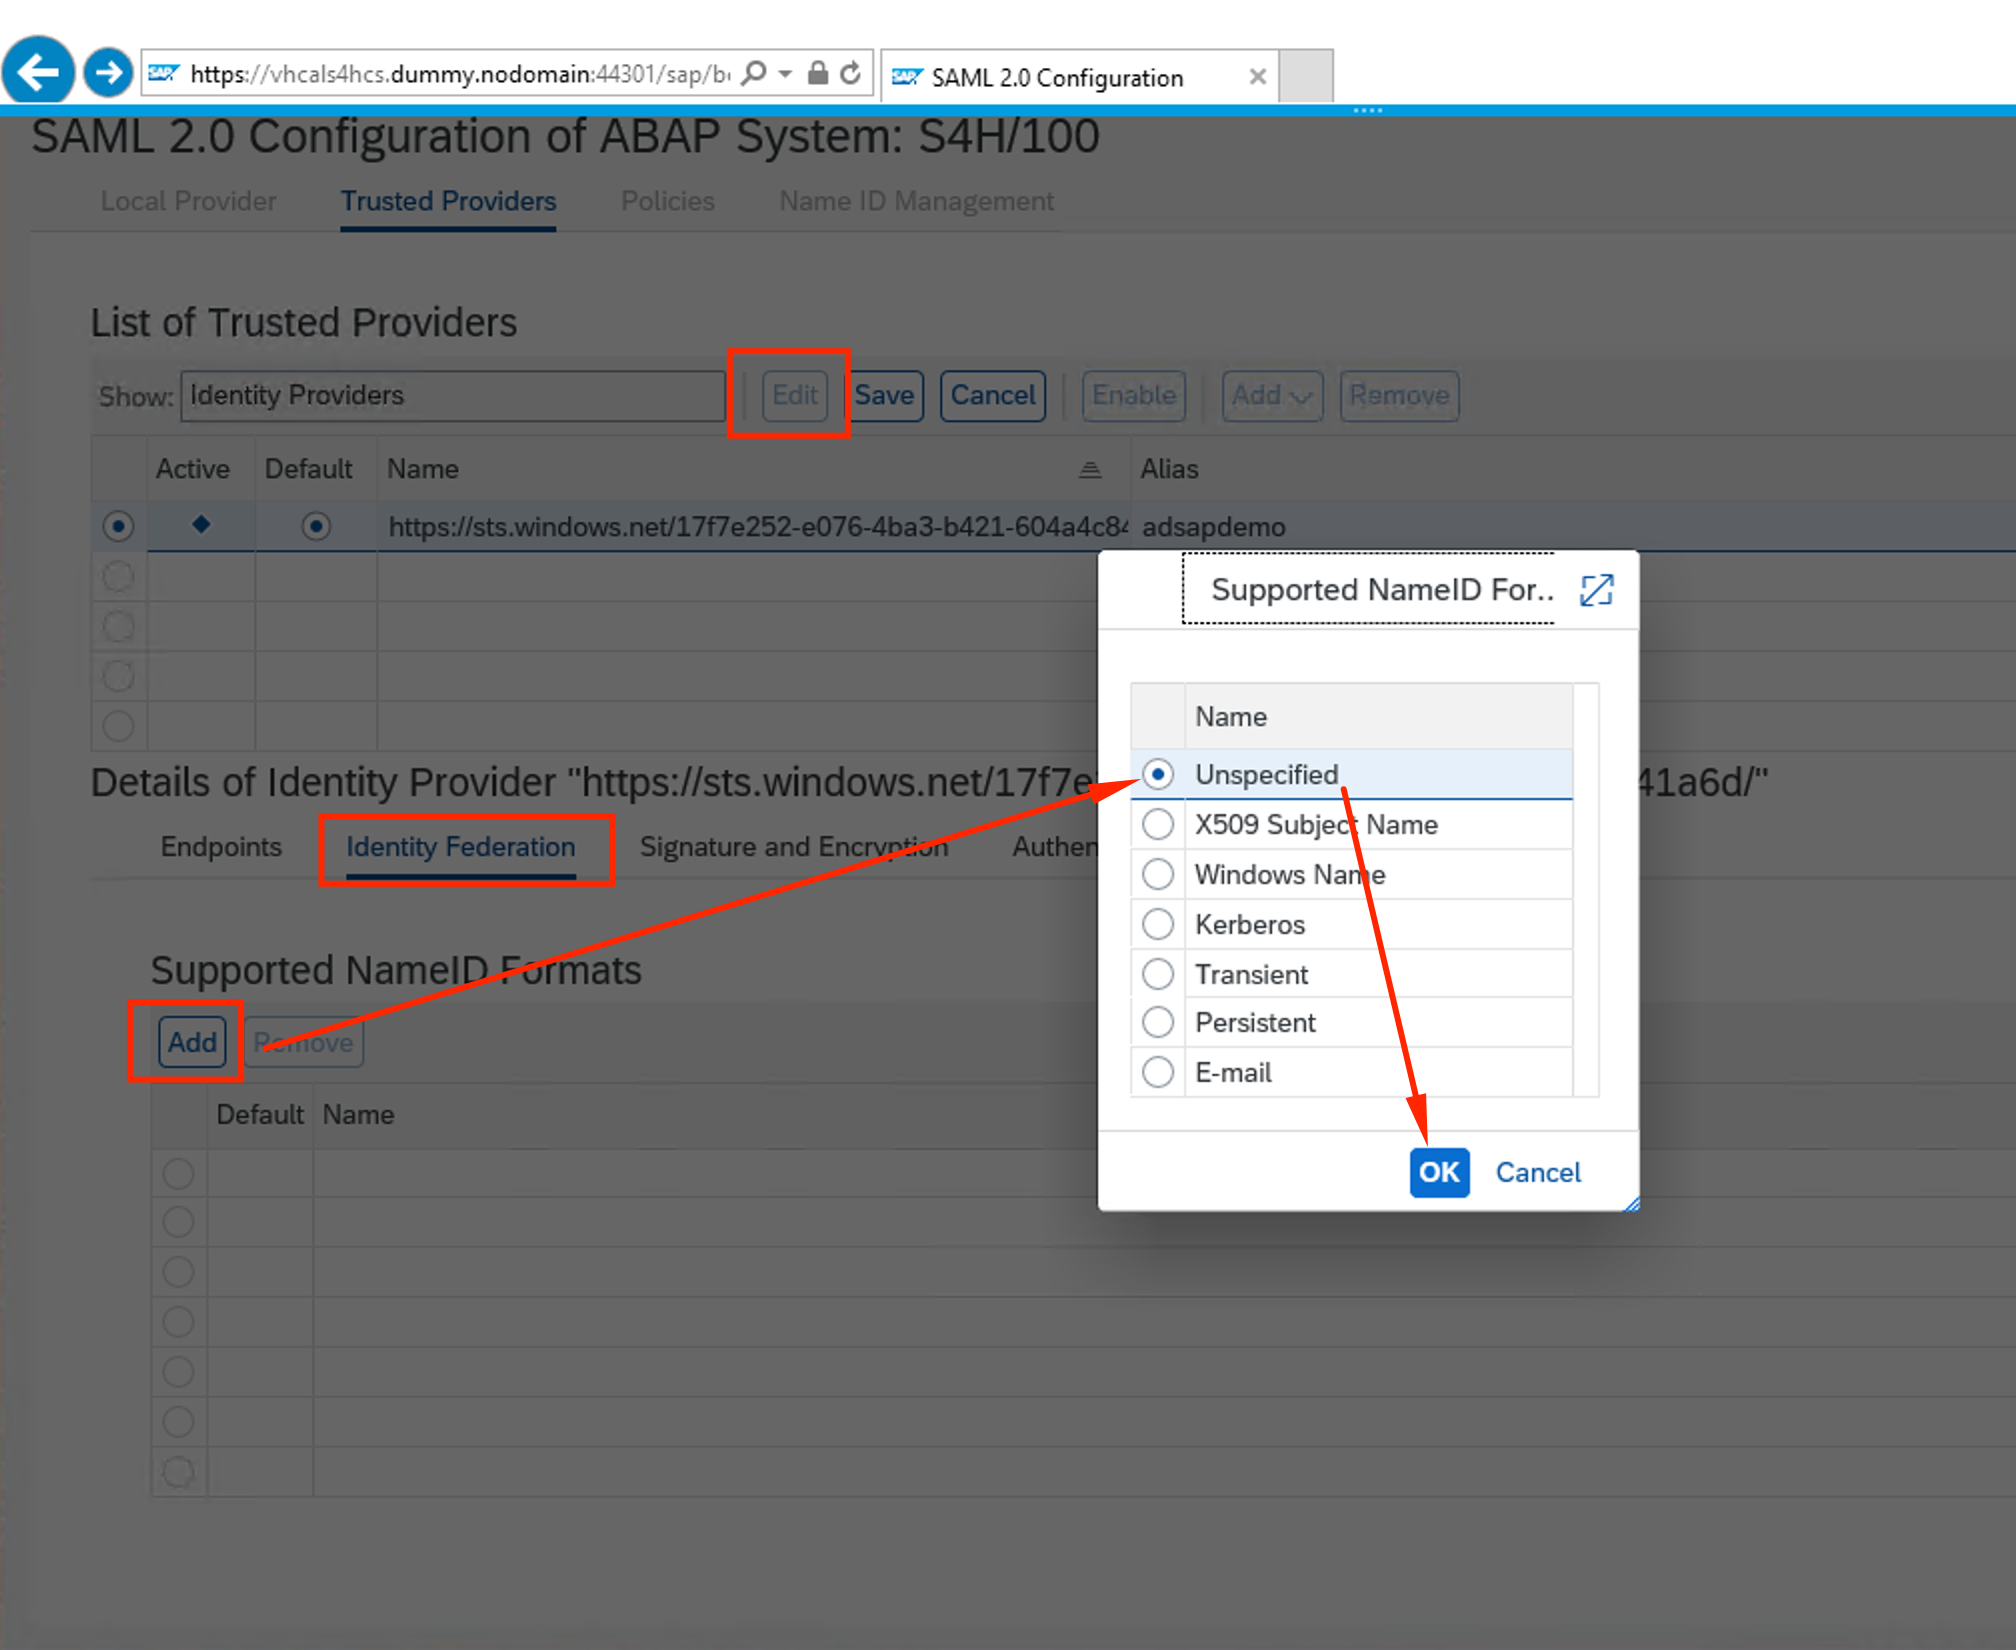
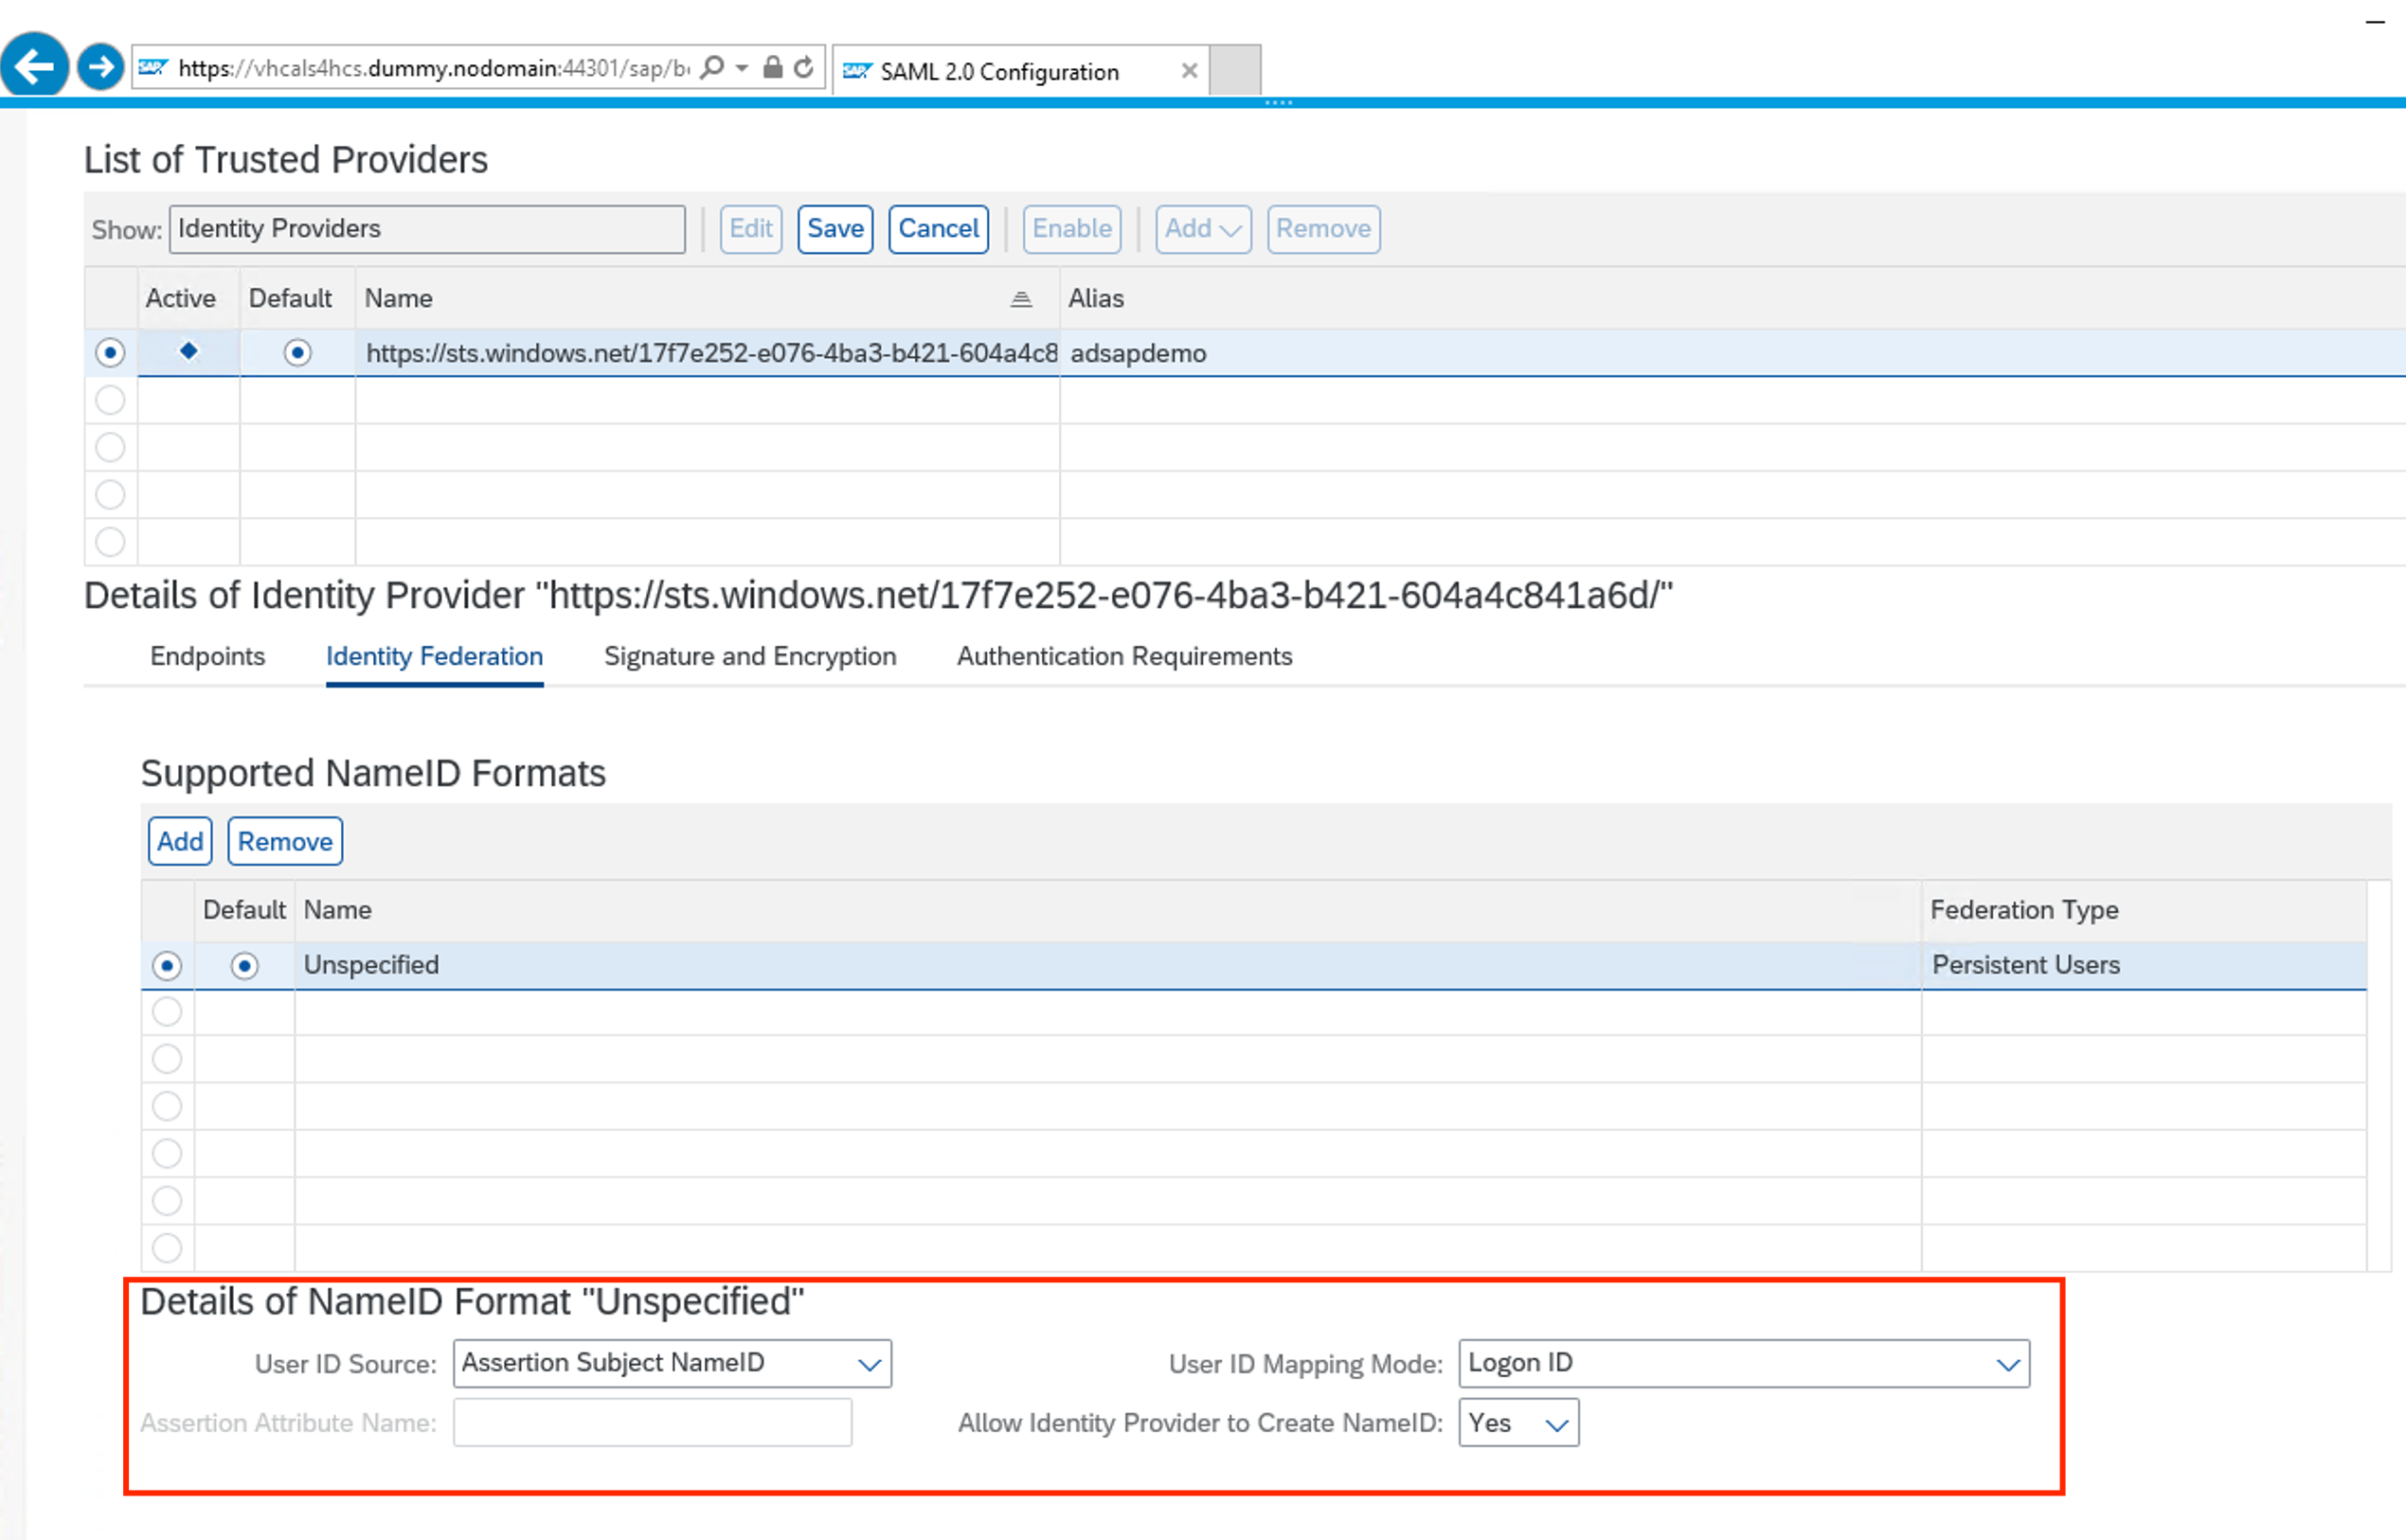
It will now show Azure AD as a Trusted provider. Click on Edit, go to Identity Federation and click Add. Select Unspecified and OK
-
Make sure parameters for Unspecified are as the picture below:
-
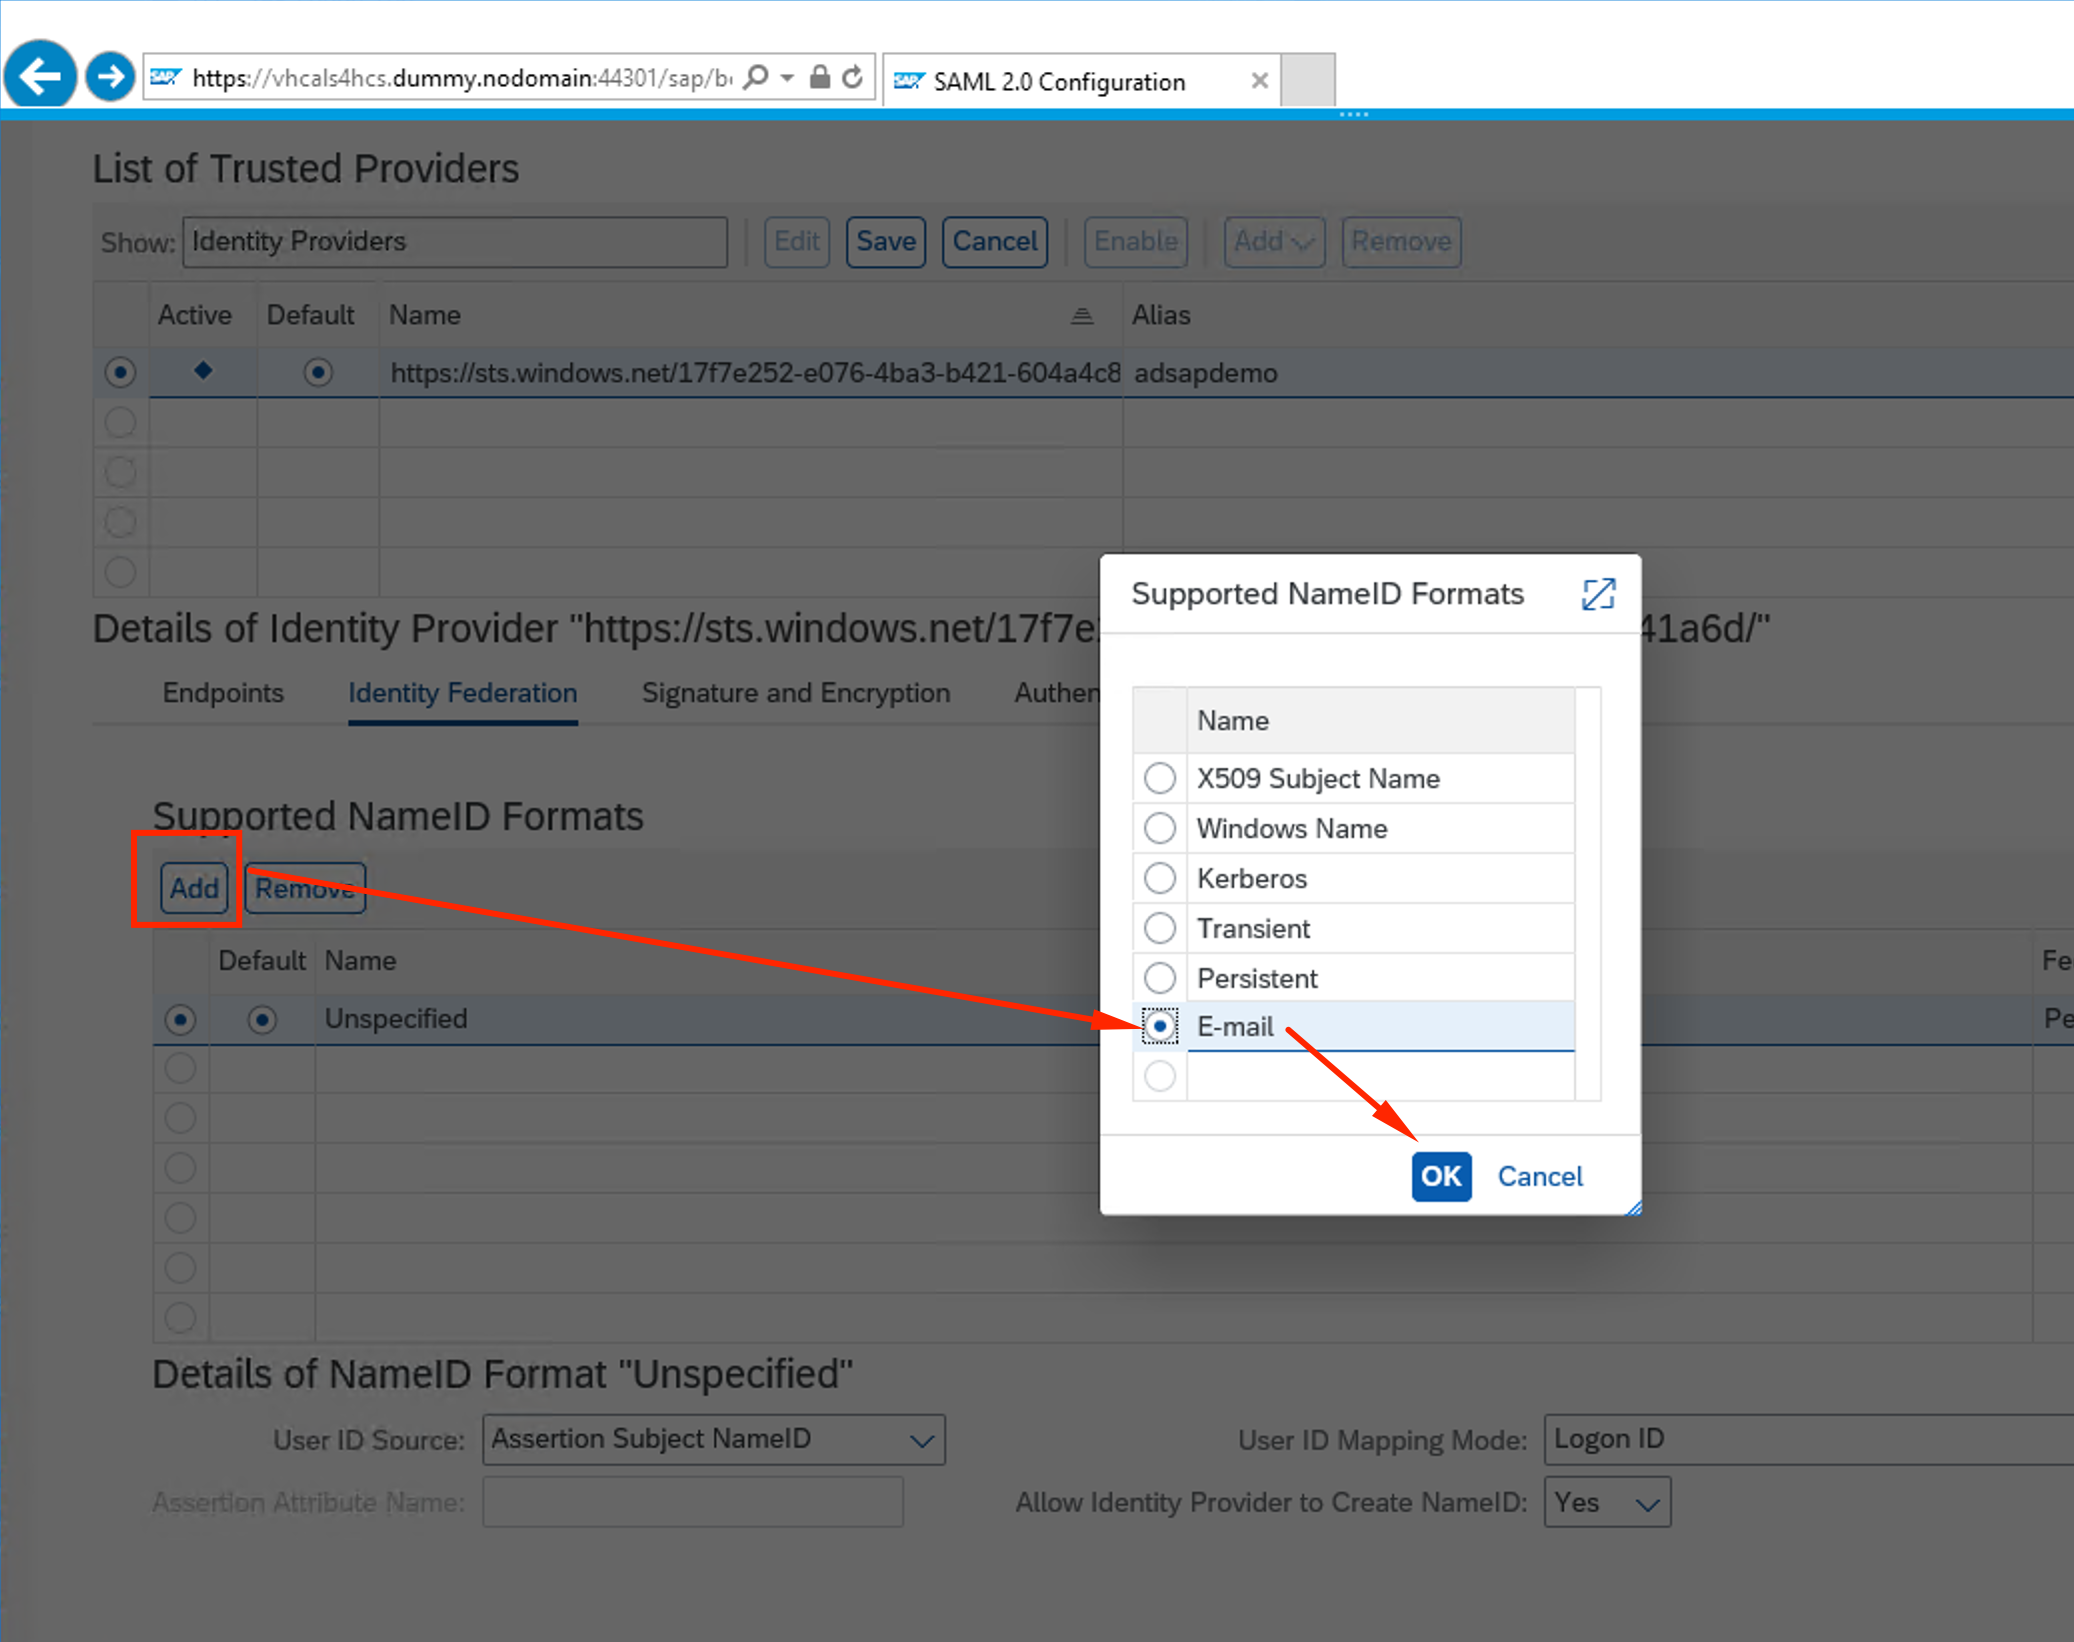
Again, click Add. Select E-mail and OK
-
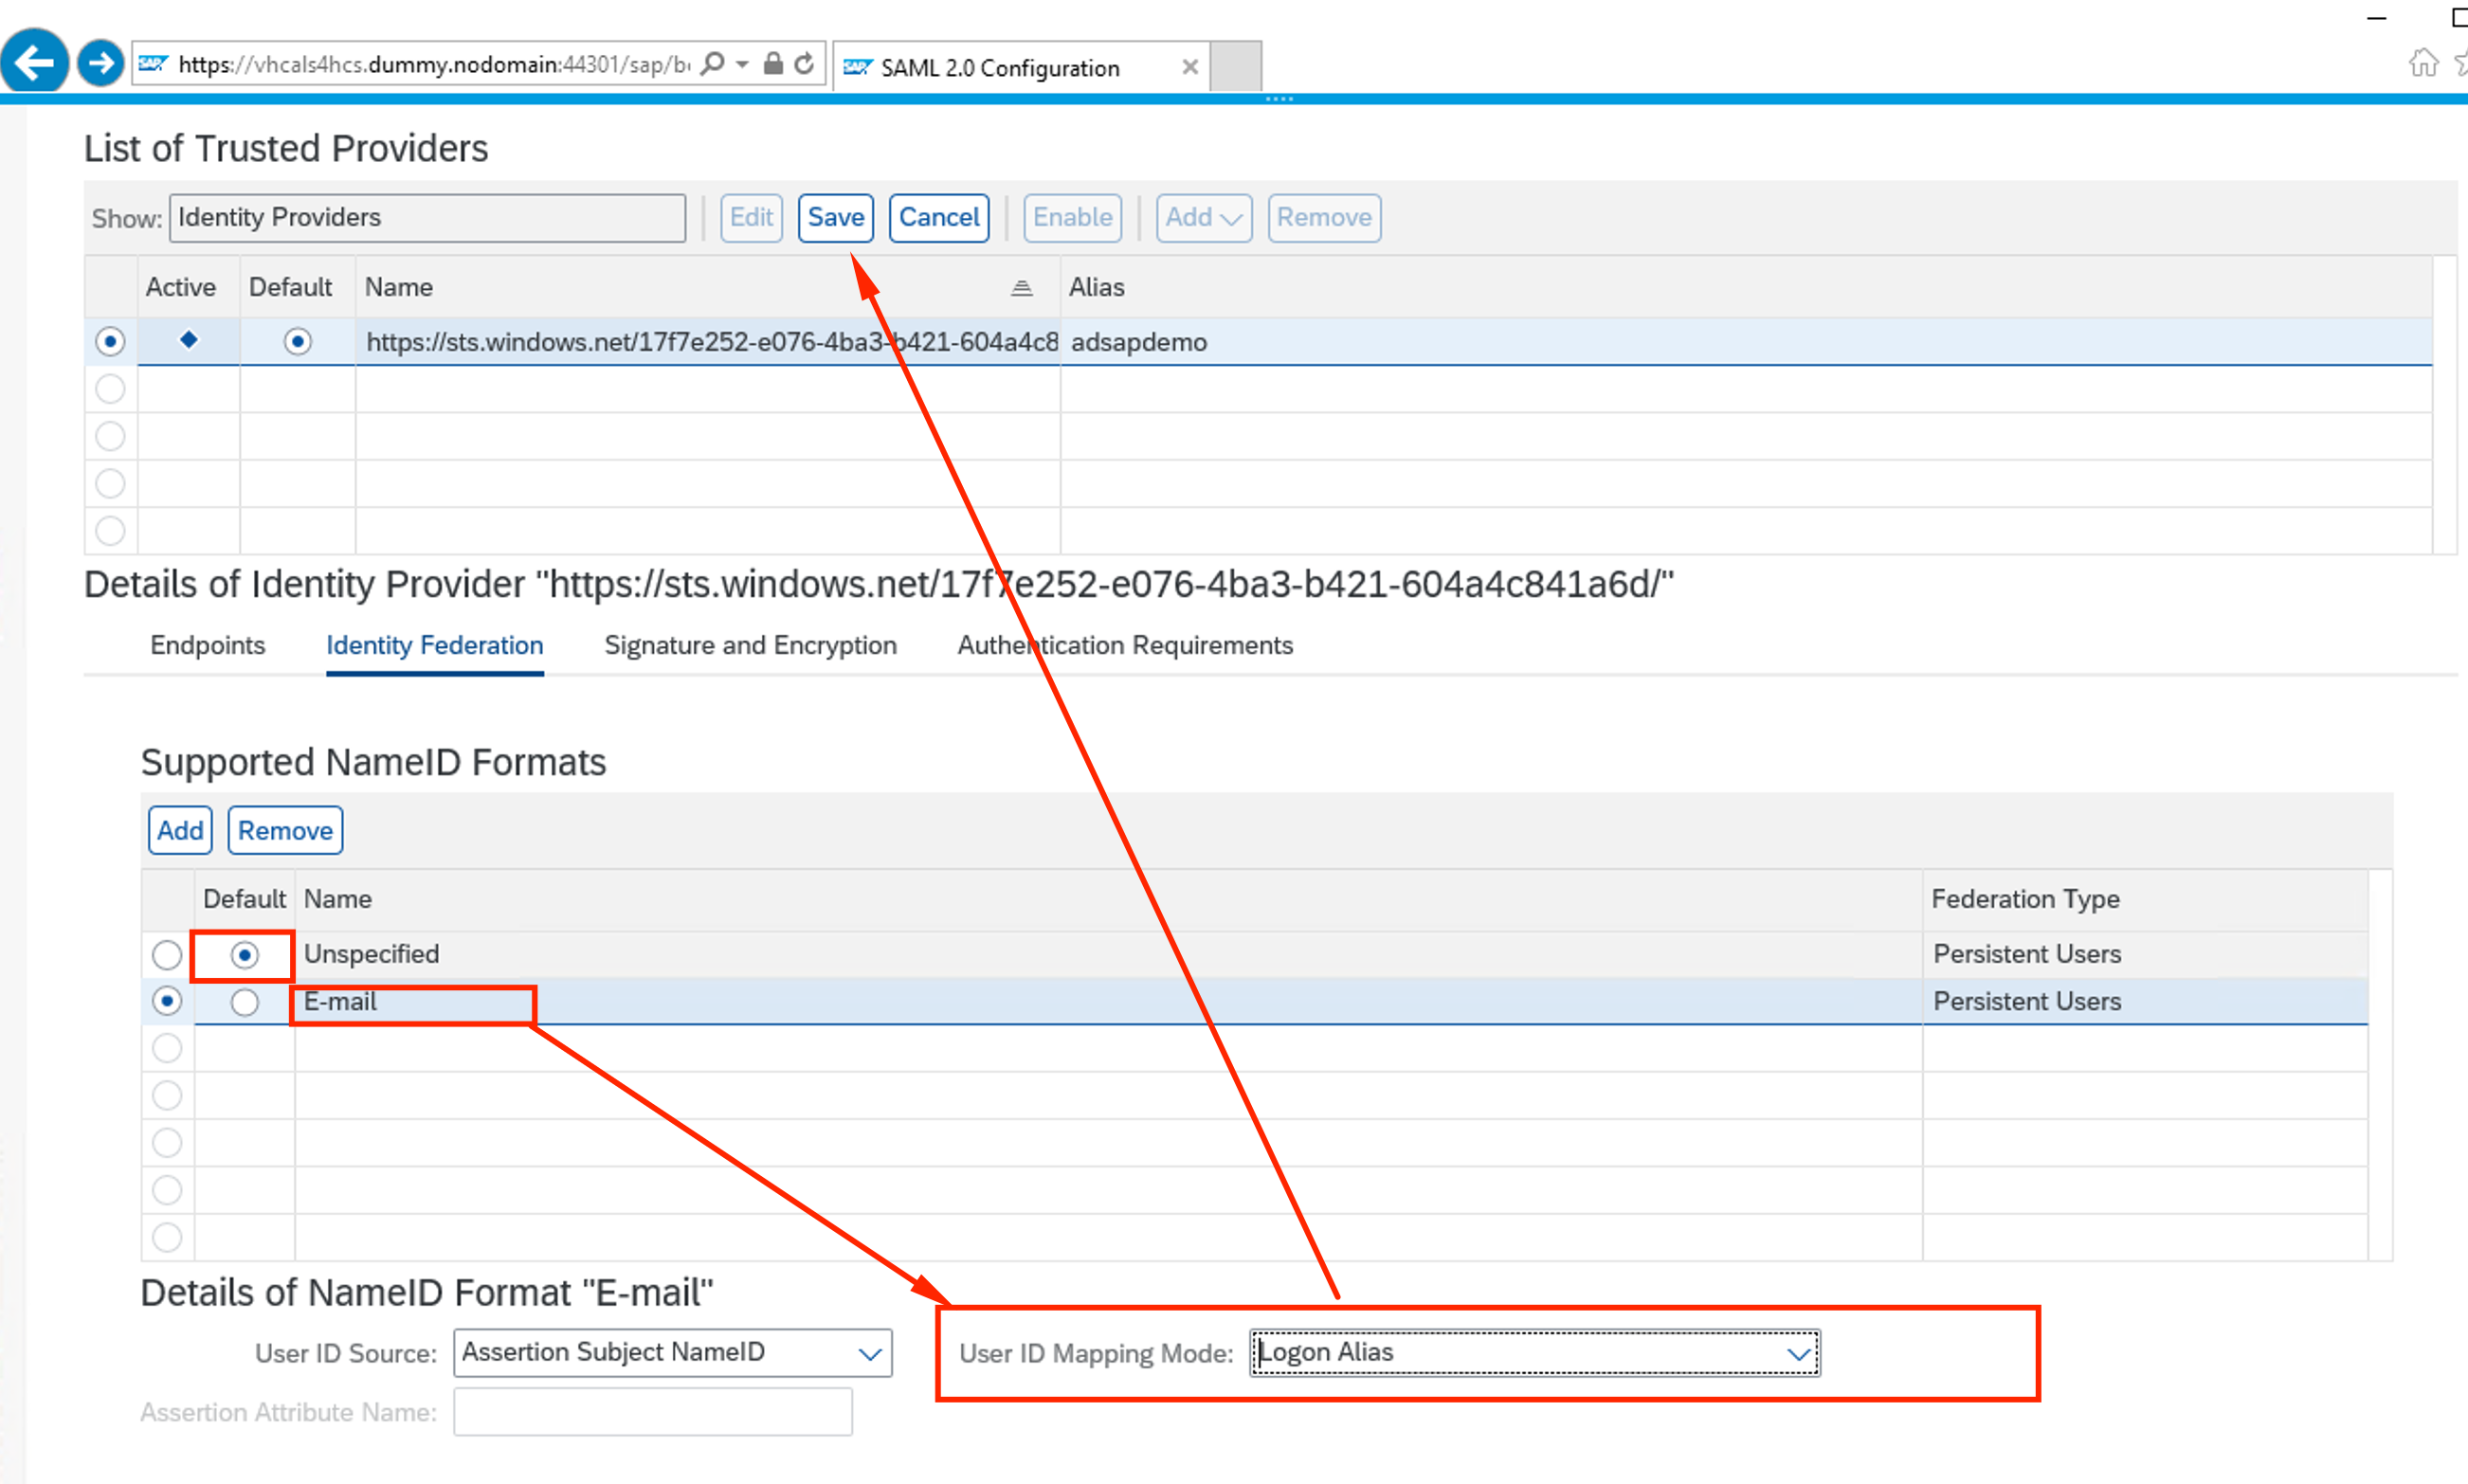
Make sure parameters for E-mail are as the picture below and click Save
-
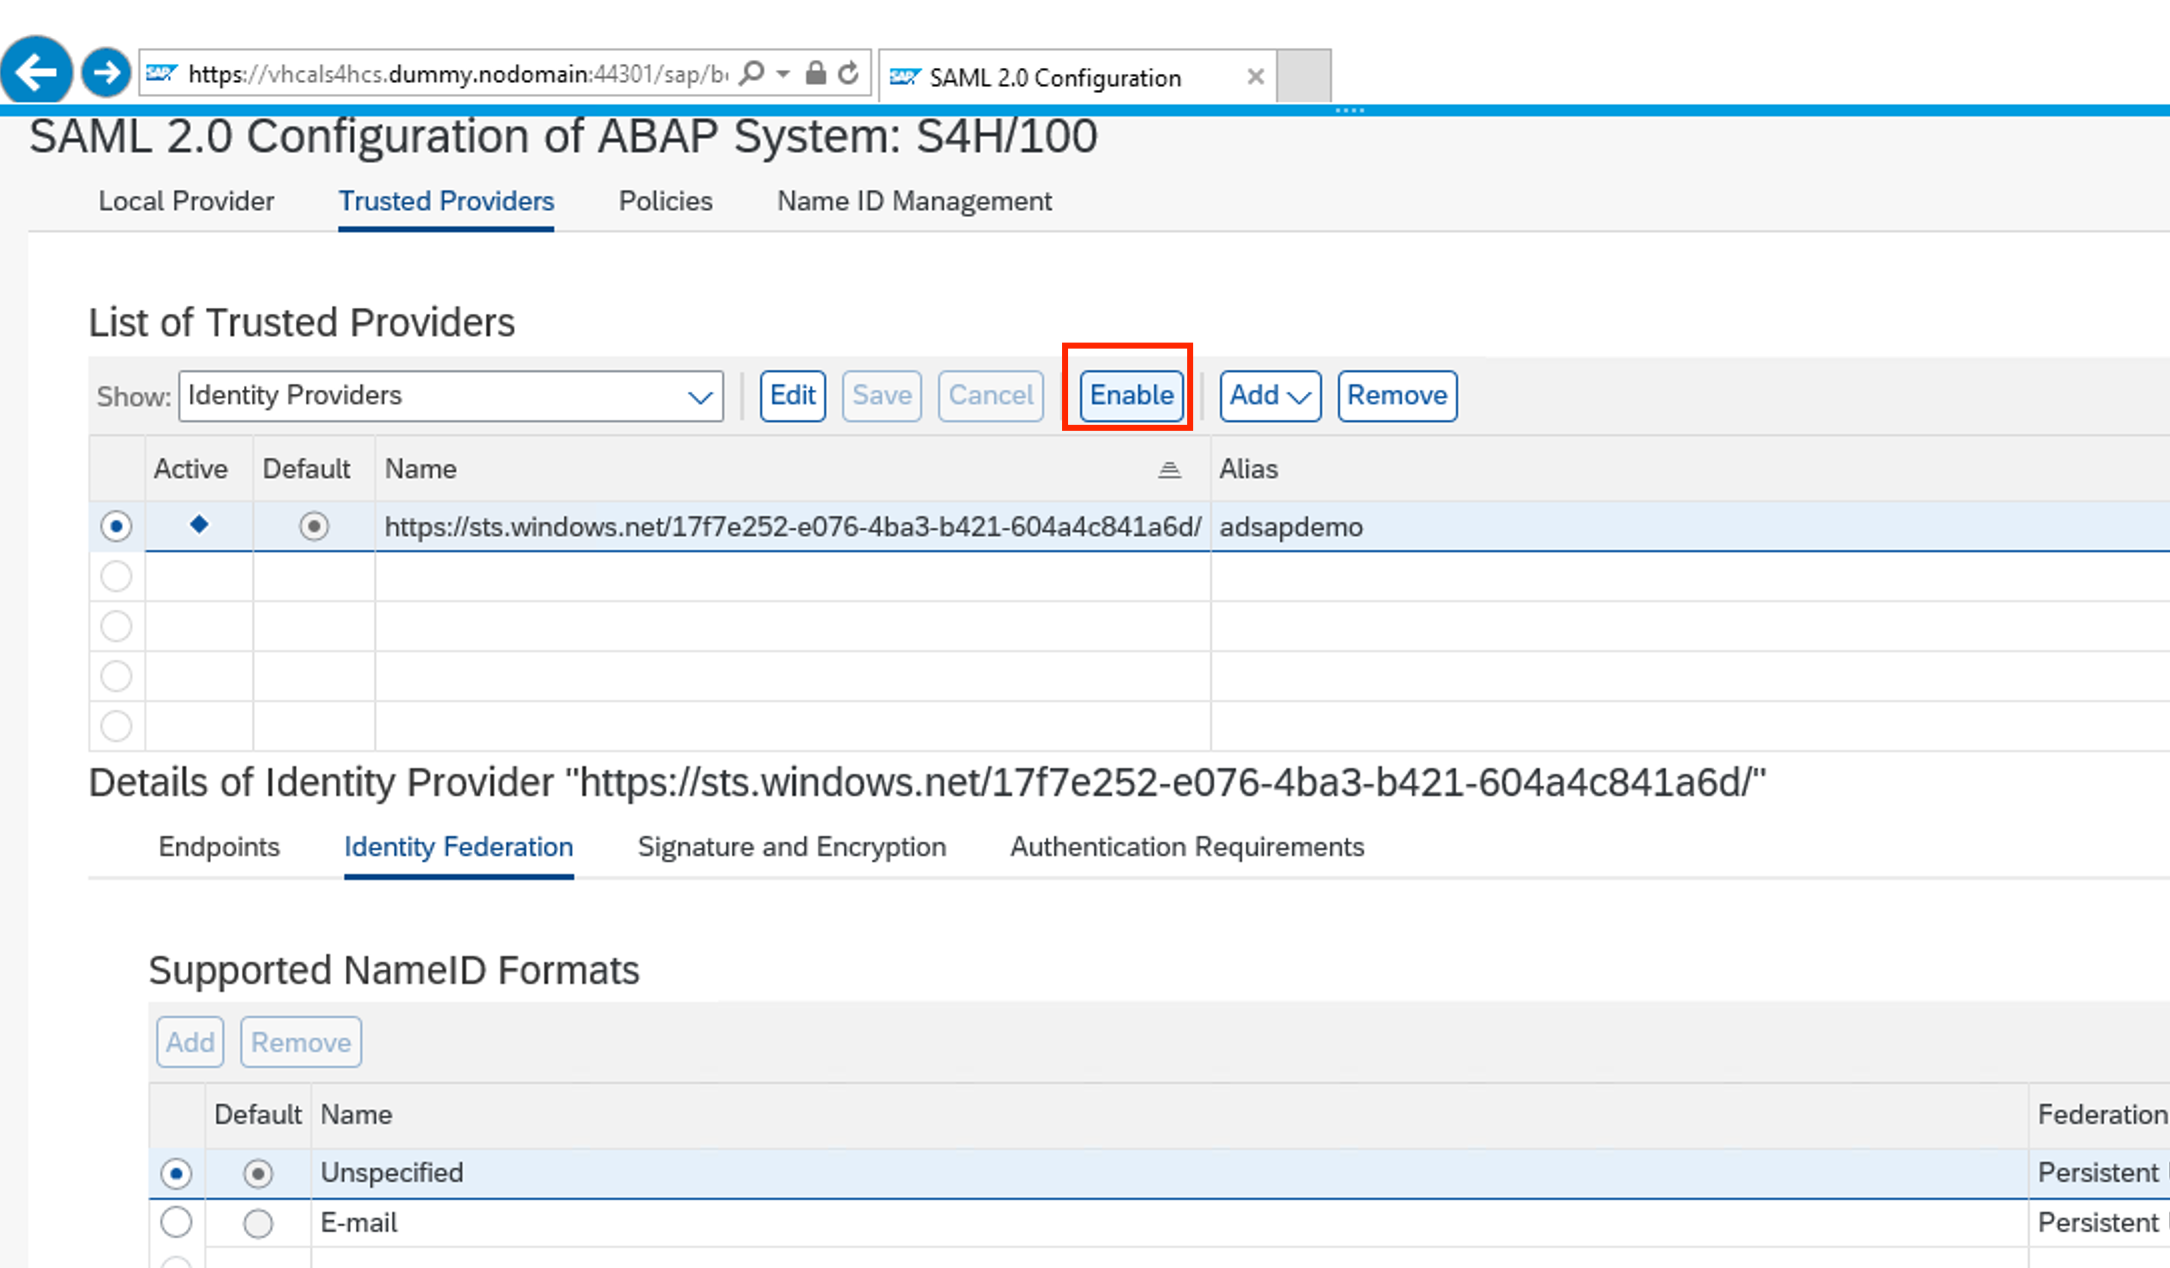
Enable the SSO in SAP Fiori:
Linking Azure AD user and SAP user
As the last step, we will need to tell SAP which SAP users corresponds to the Azure AD user.
In this example we configured it so the Azure AD username (bpinst@XXXXX.onmicrosoft.com) must match SAP user’s email.
Let’s go back to SAP GUI and configure it so we can test the SSO:
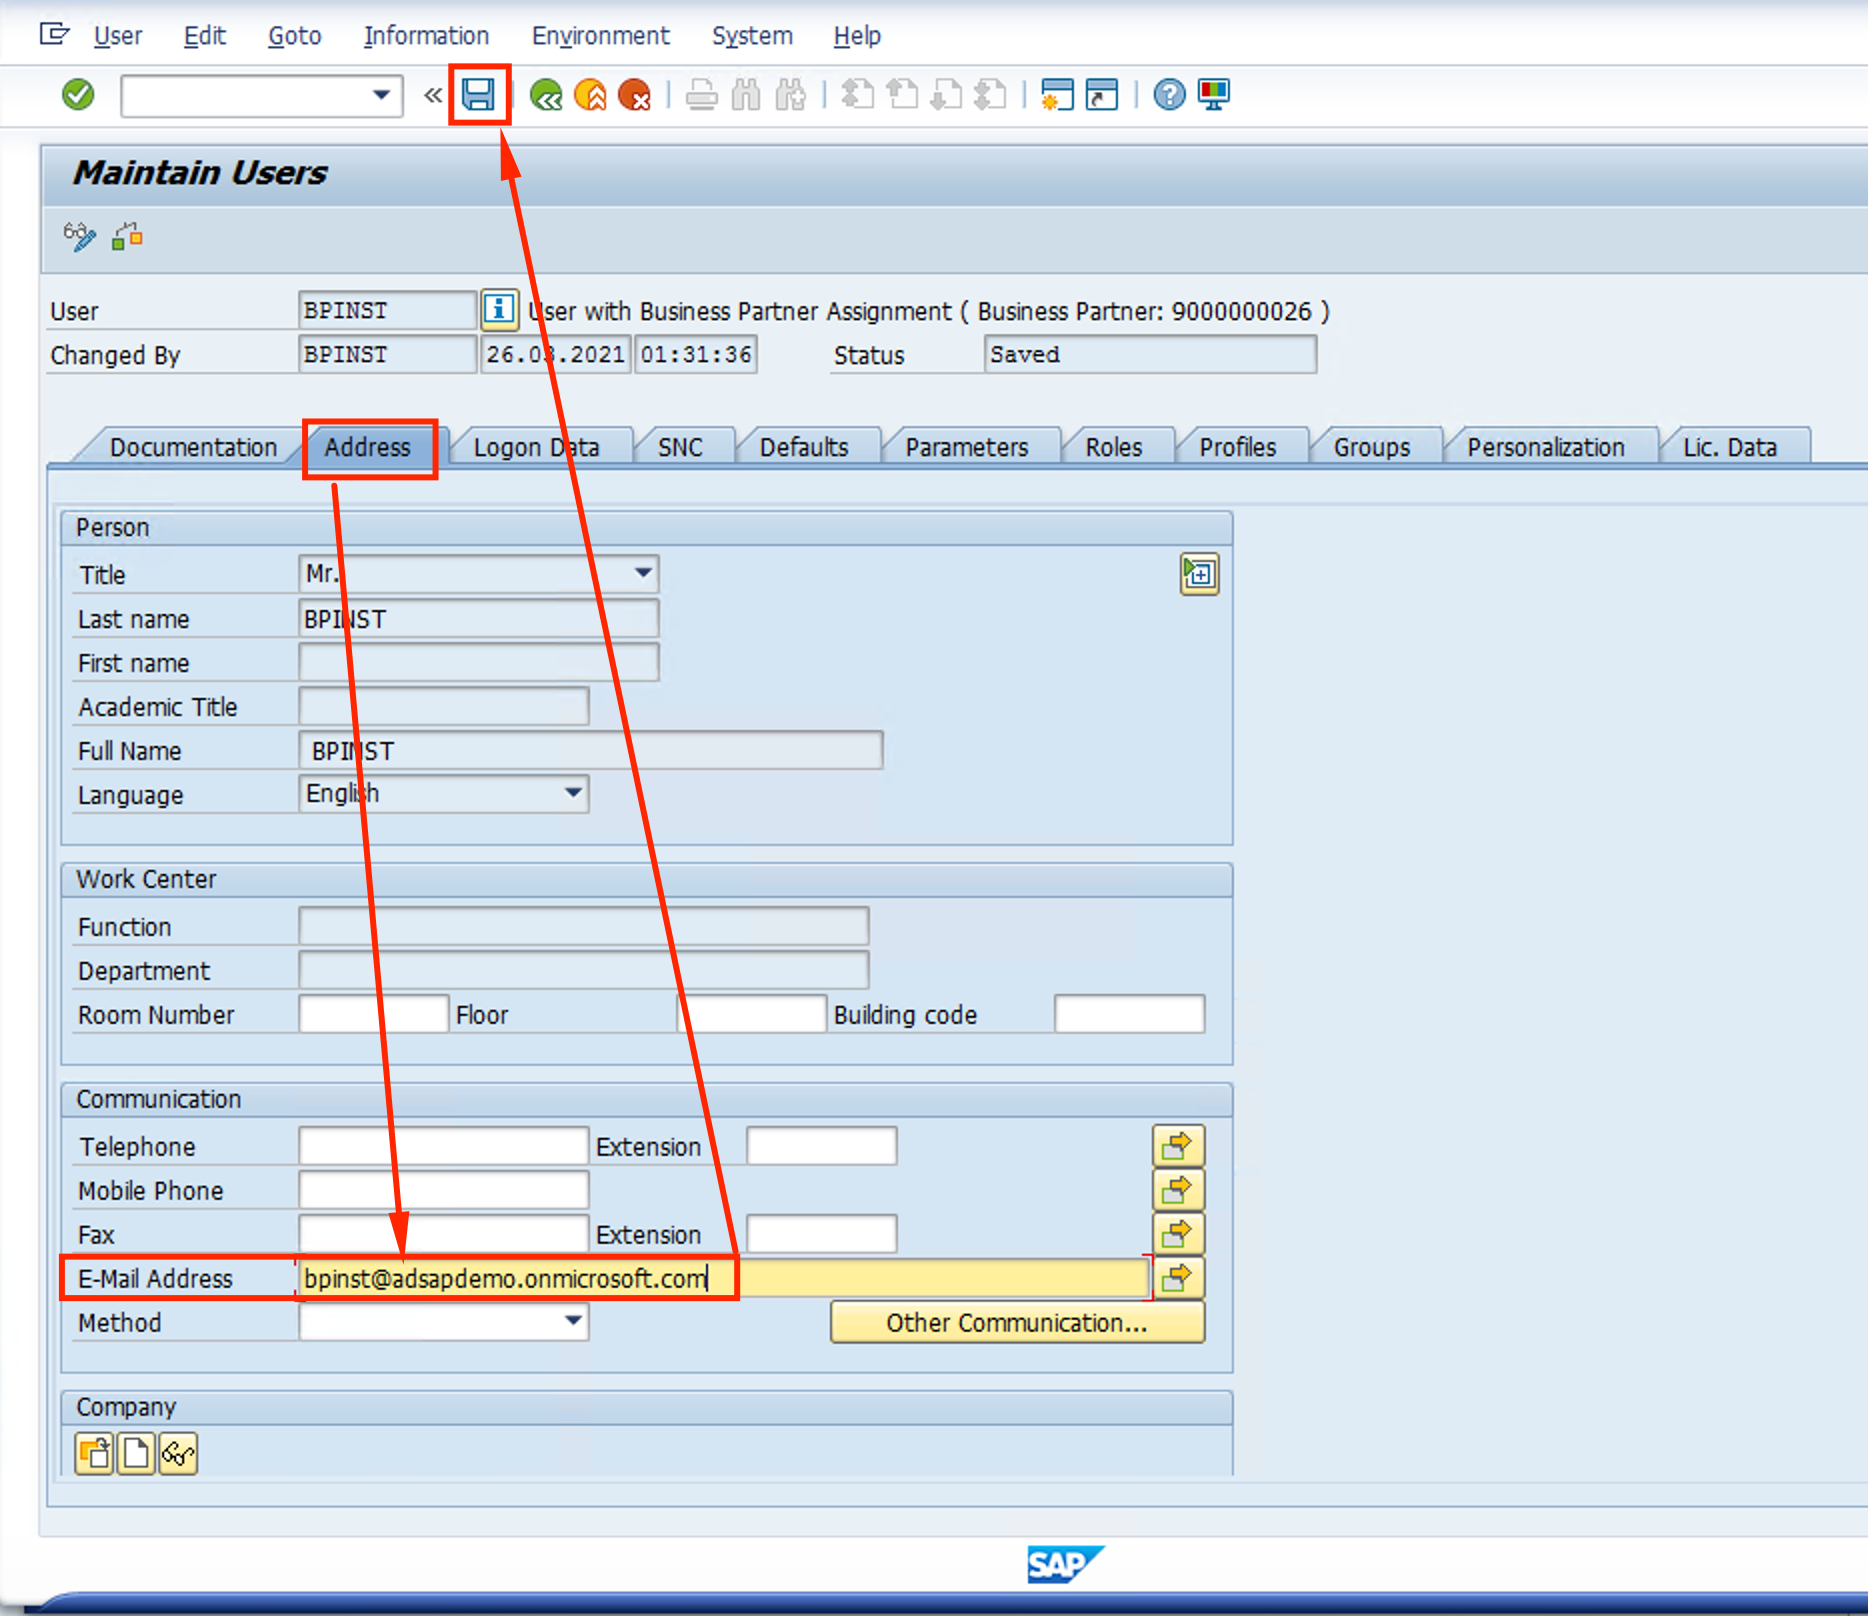
- On SAP GUI, go to TCODE SU01

- Select BPINST user and click the Pencil (change) icon

- Scroll down the user properties under Address tab and include the Azure AD username (email) to the E-mail Address field. Click the Save icon (floppy disk)
PHEW ! That was a long one !
Now we have setup the trust between SAP Fiori and Azure AD, and taught SAP how to match Azure AD users for authentication.
Let’s go test it !