Schedule Automation
With Azure Automation configured, the VMs tagged, and the Runbooks tested, we can schedule their execution for scheduled automation.
This section will show the steps required for that to be accomplished:
In this example we will show you how to schedule the Stop-SAPSystem runbook. You can follow the same steps for other runbooks and SIDs.
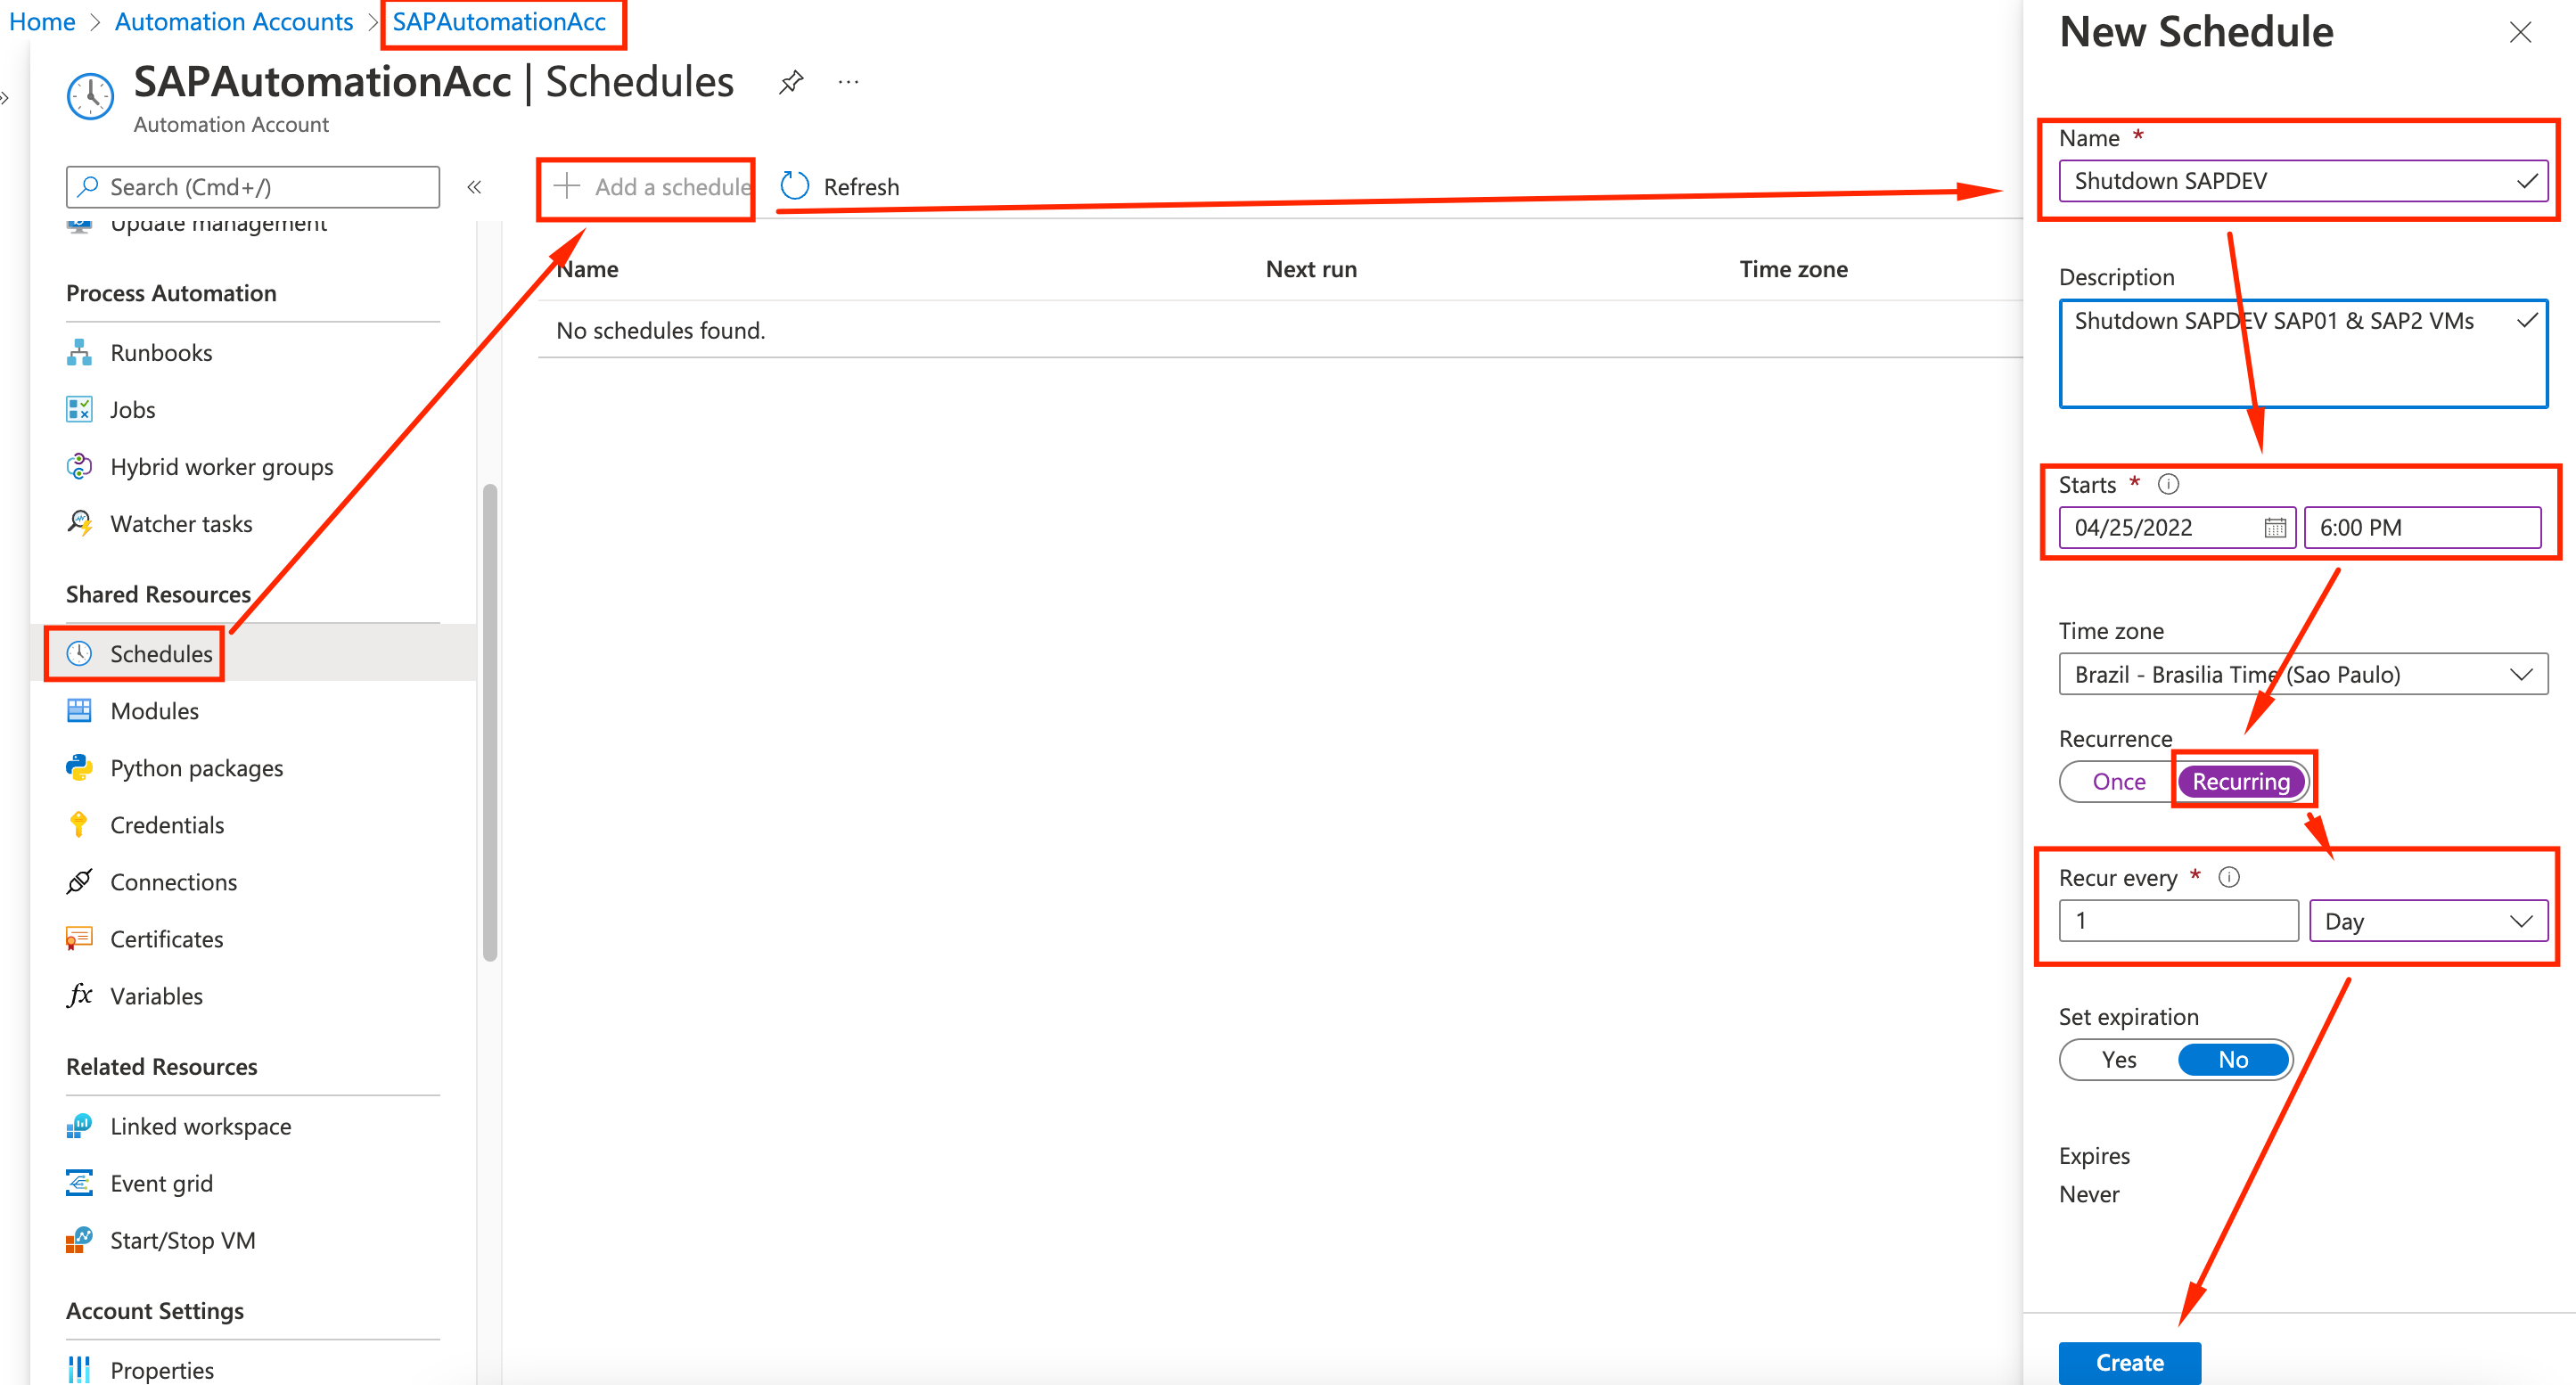
- Go to the Azure Automation Account SAPAutomationAcc and select Schedules on the left panel. Click on Add a schedule. Provide the following parameters:
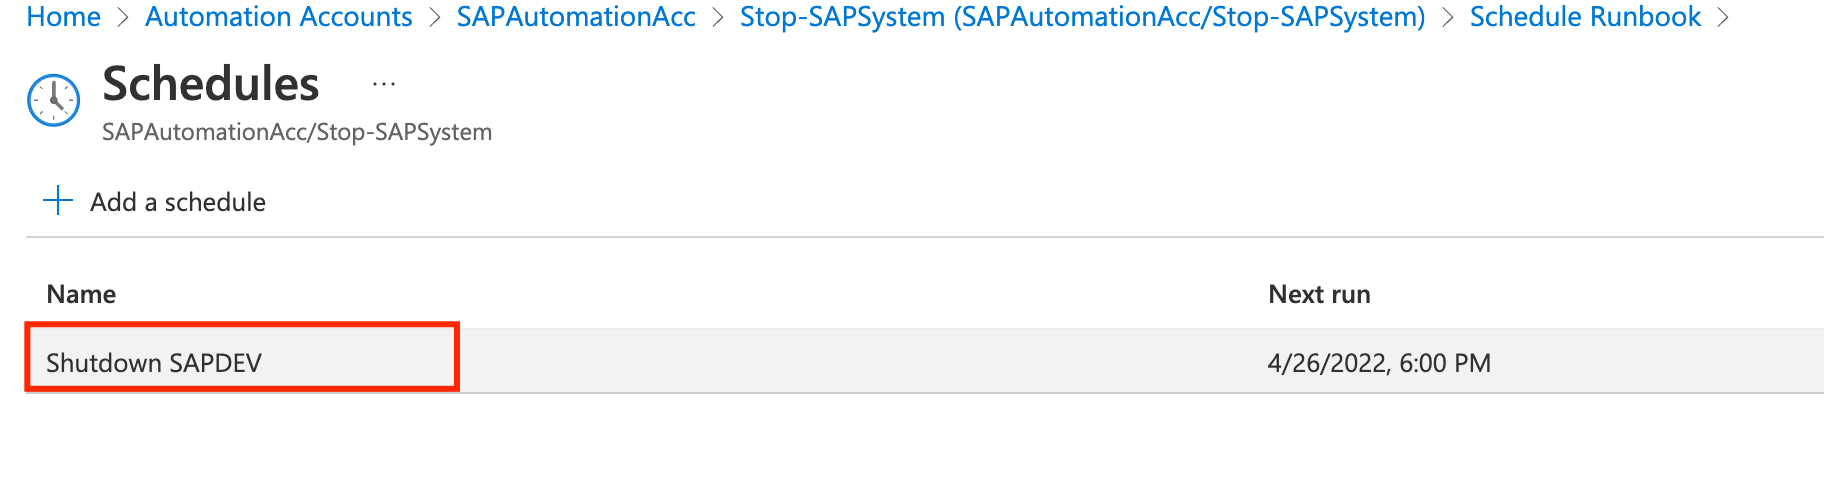
- Name: Shutdown SAPDEV
- Description: Shutdown SAPDEV
- Starts: Tomorrow @ 6:00PM
- Timezone: Your timezone
- Recurrence: Recurring
- Recur Every: 1 Day
- CLick Create
-
Ok, so far we created the schedule but we haven’t specified the runbook to be executed. Once the Schedule is created, click on Runbooks on the left panel.
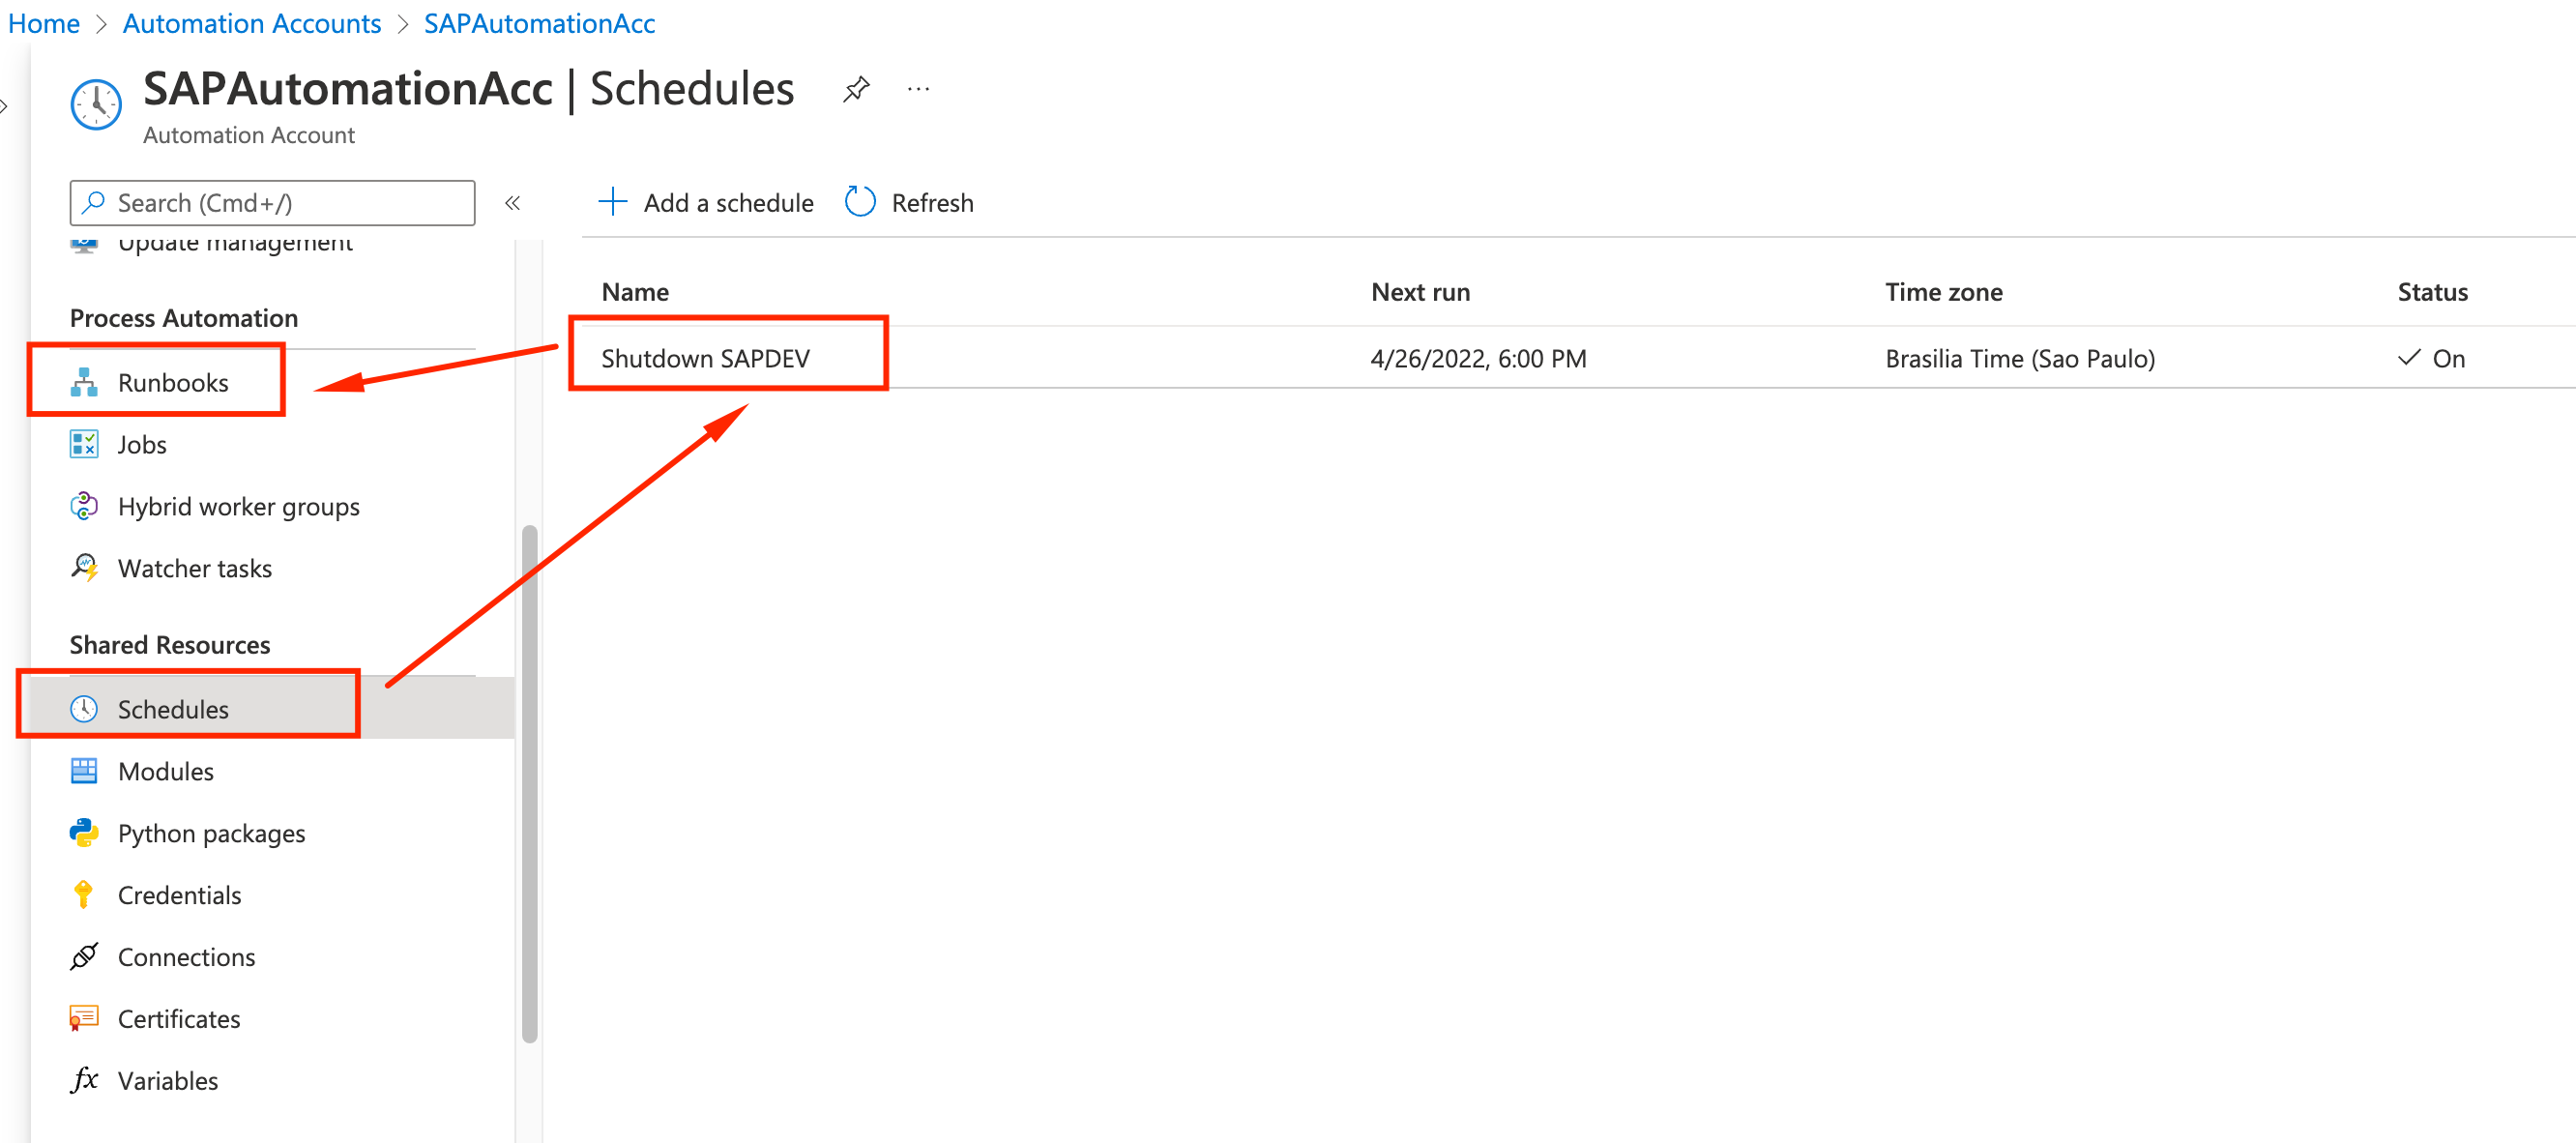
-
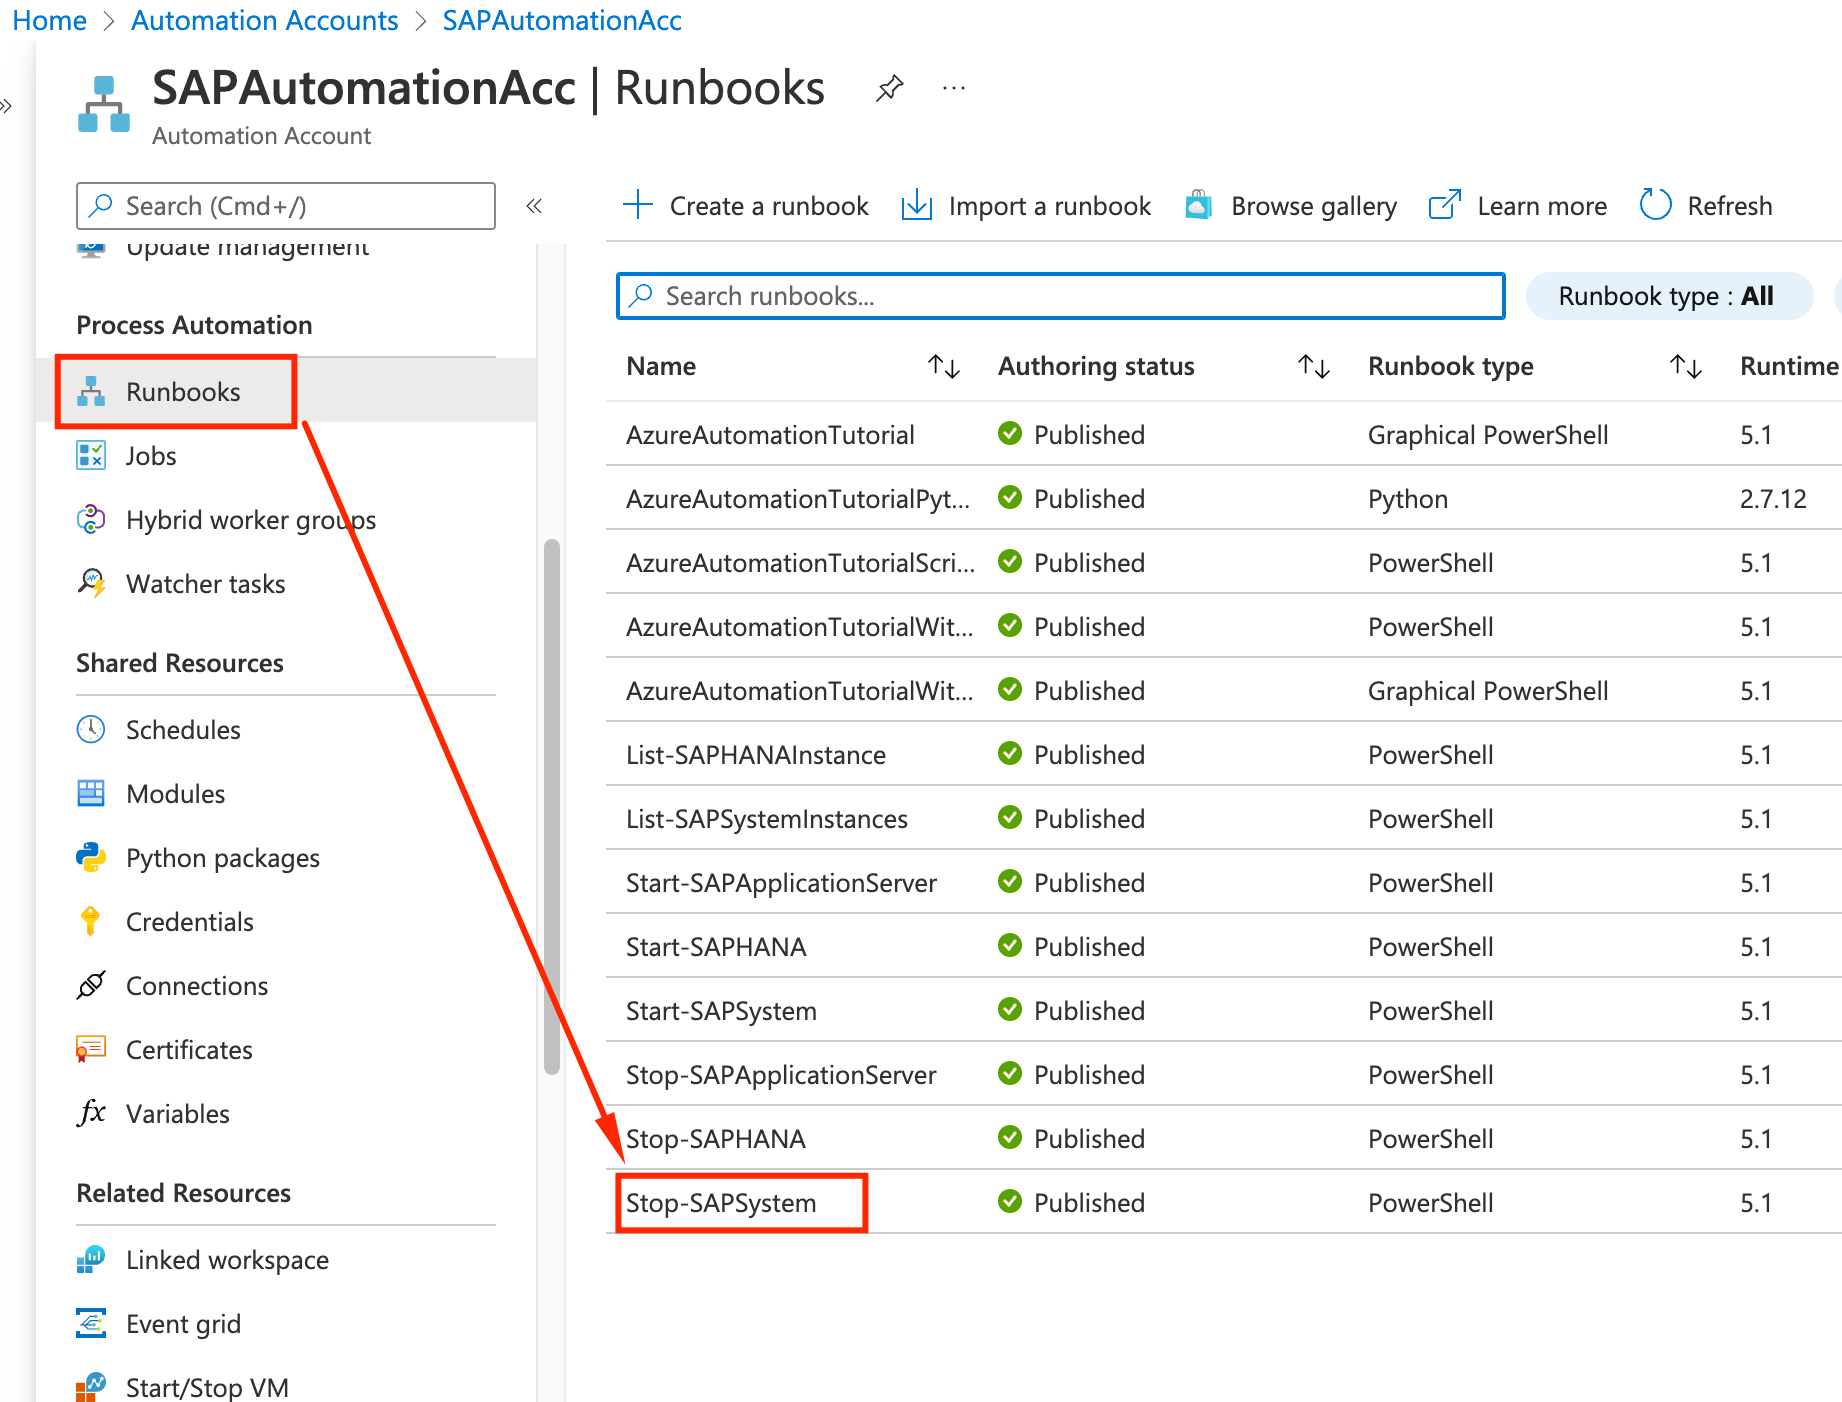
Pick the Stop-SAPSystem Runbook.
-
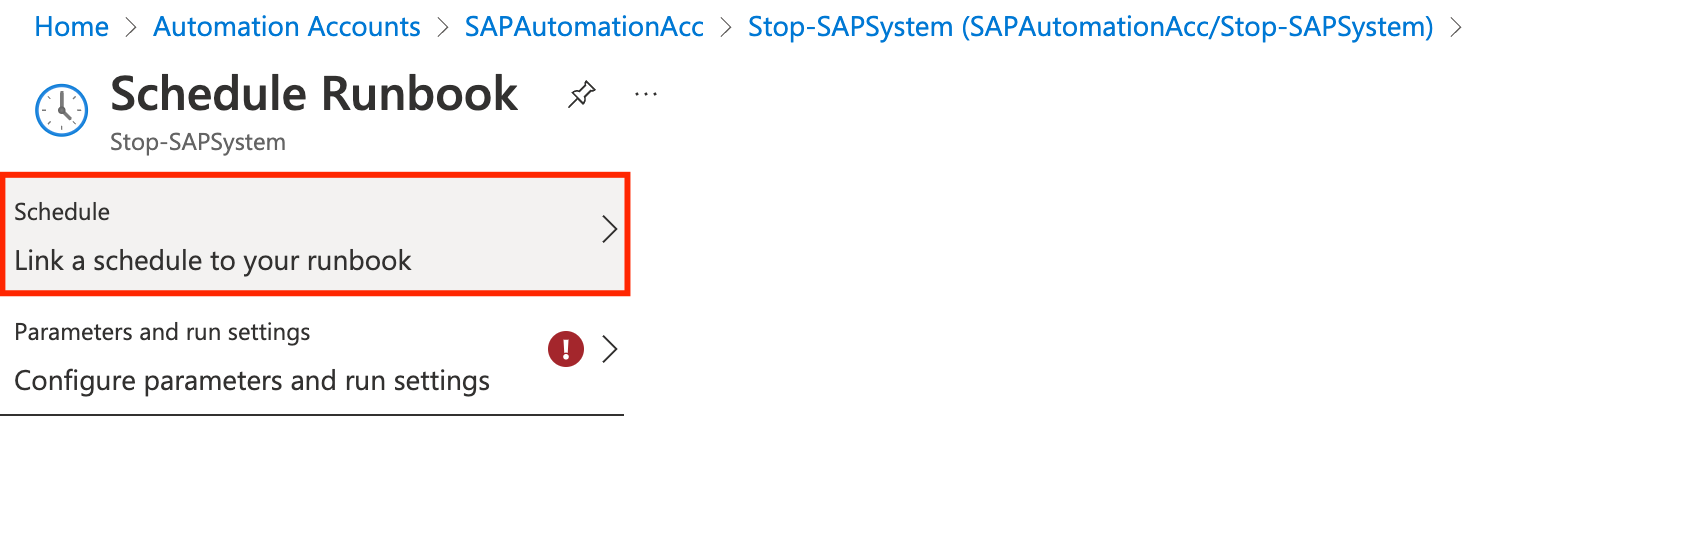
On Overview click on Link to schedule.

-
Click on Link a schedule to your Runbook
-
Pick the Shutdown SAPDEV schedule we just created.
-
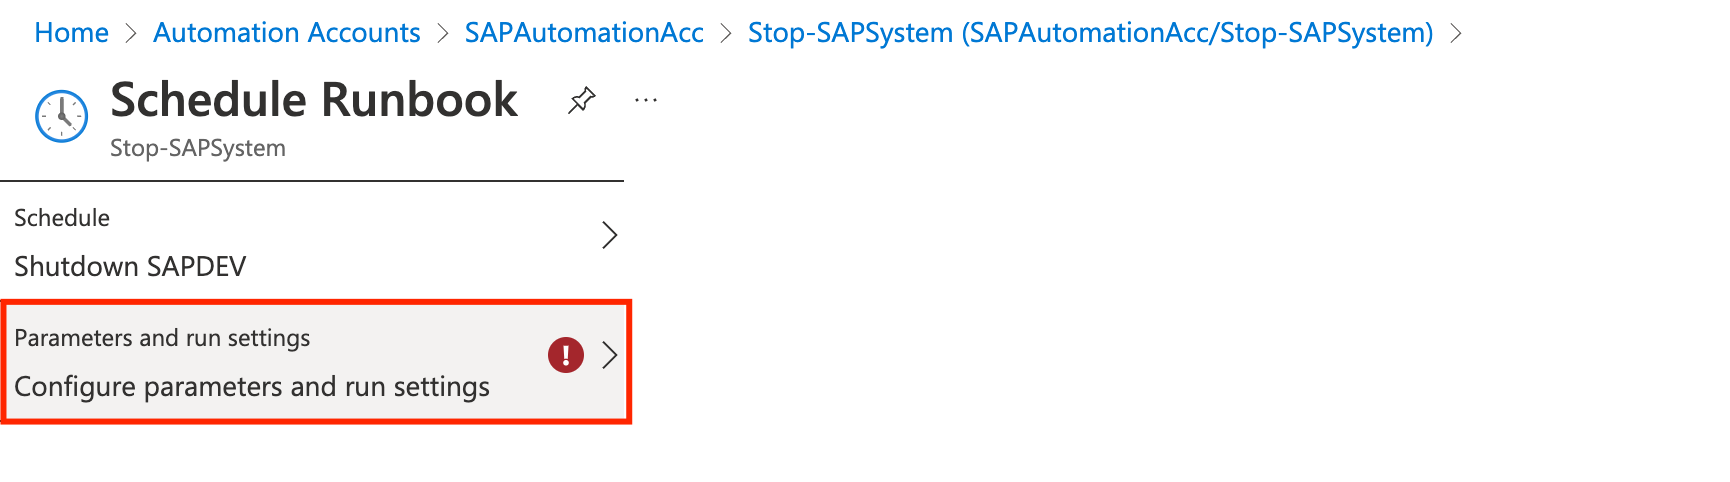
Click on configure parameters and run settings
-
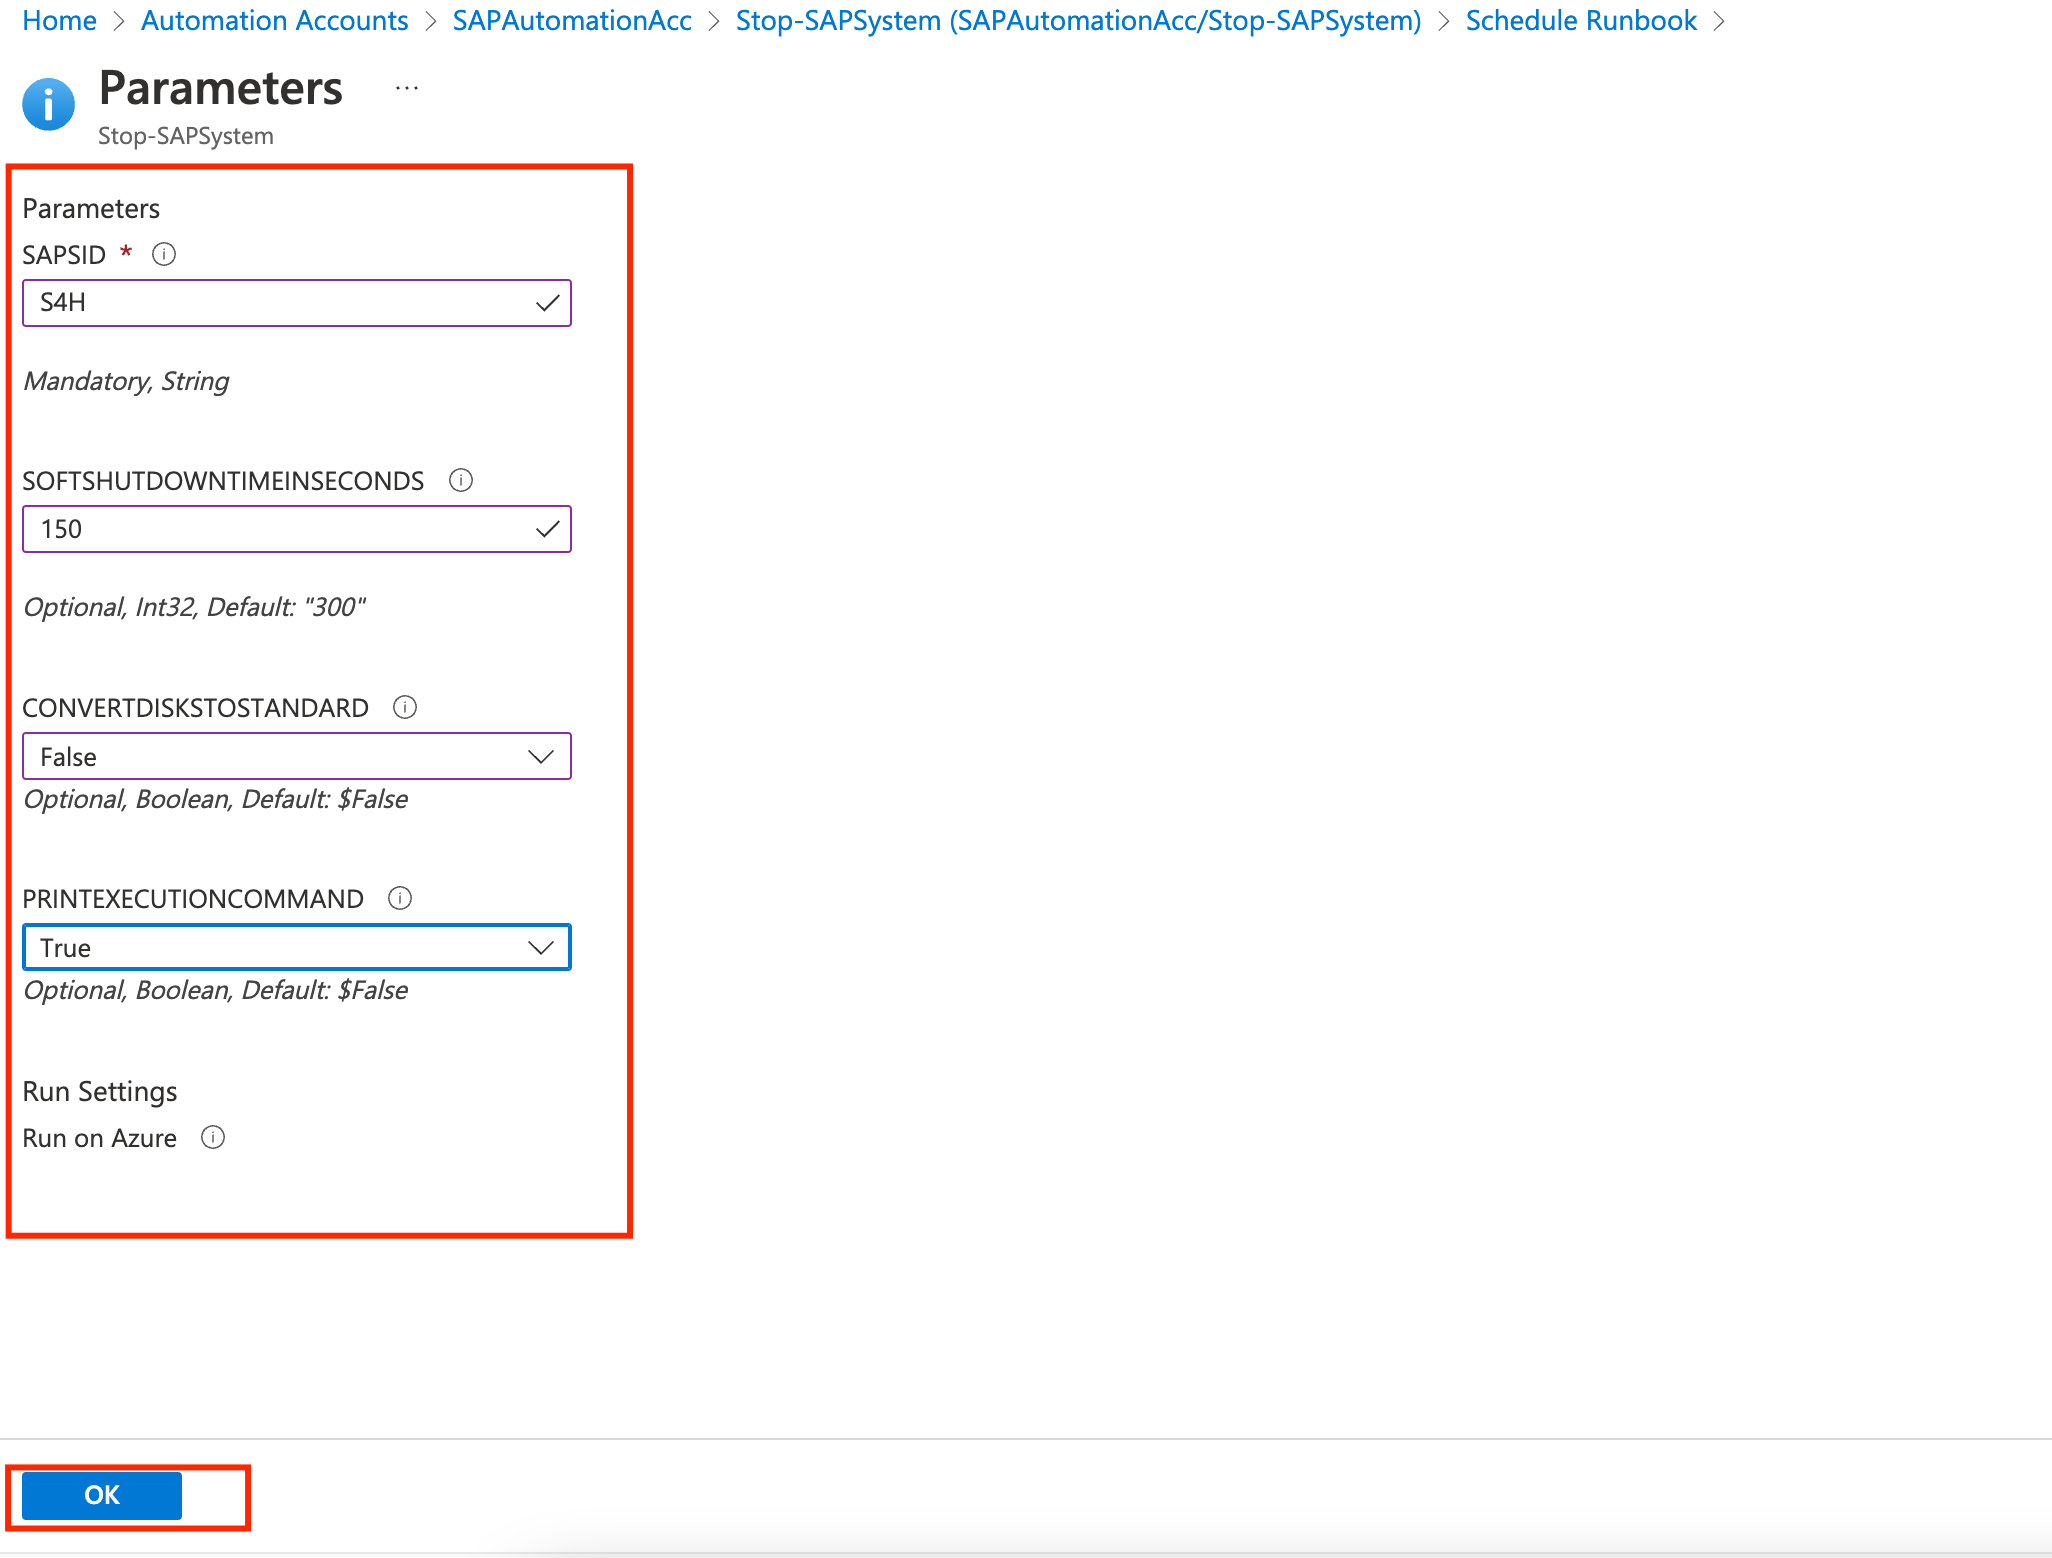
Set the following parameters, just we did on the manual execution:
- SAPSID: S4H
- SOFTSHUTDOWNTIMEINSECONDS: 150
- CONVERTDISKTOSTANDARD: False
- PRINTEXECUTIONCOMMAND: True
- Click OK
All set ! At 6PM tomorrow (and every day after that) Azure Automation will run the runbook with the provided parameters.
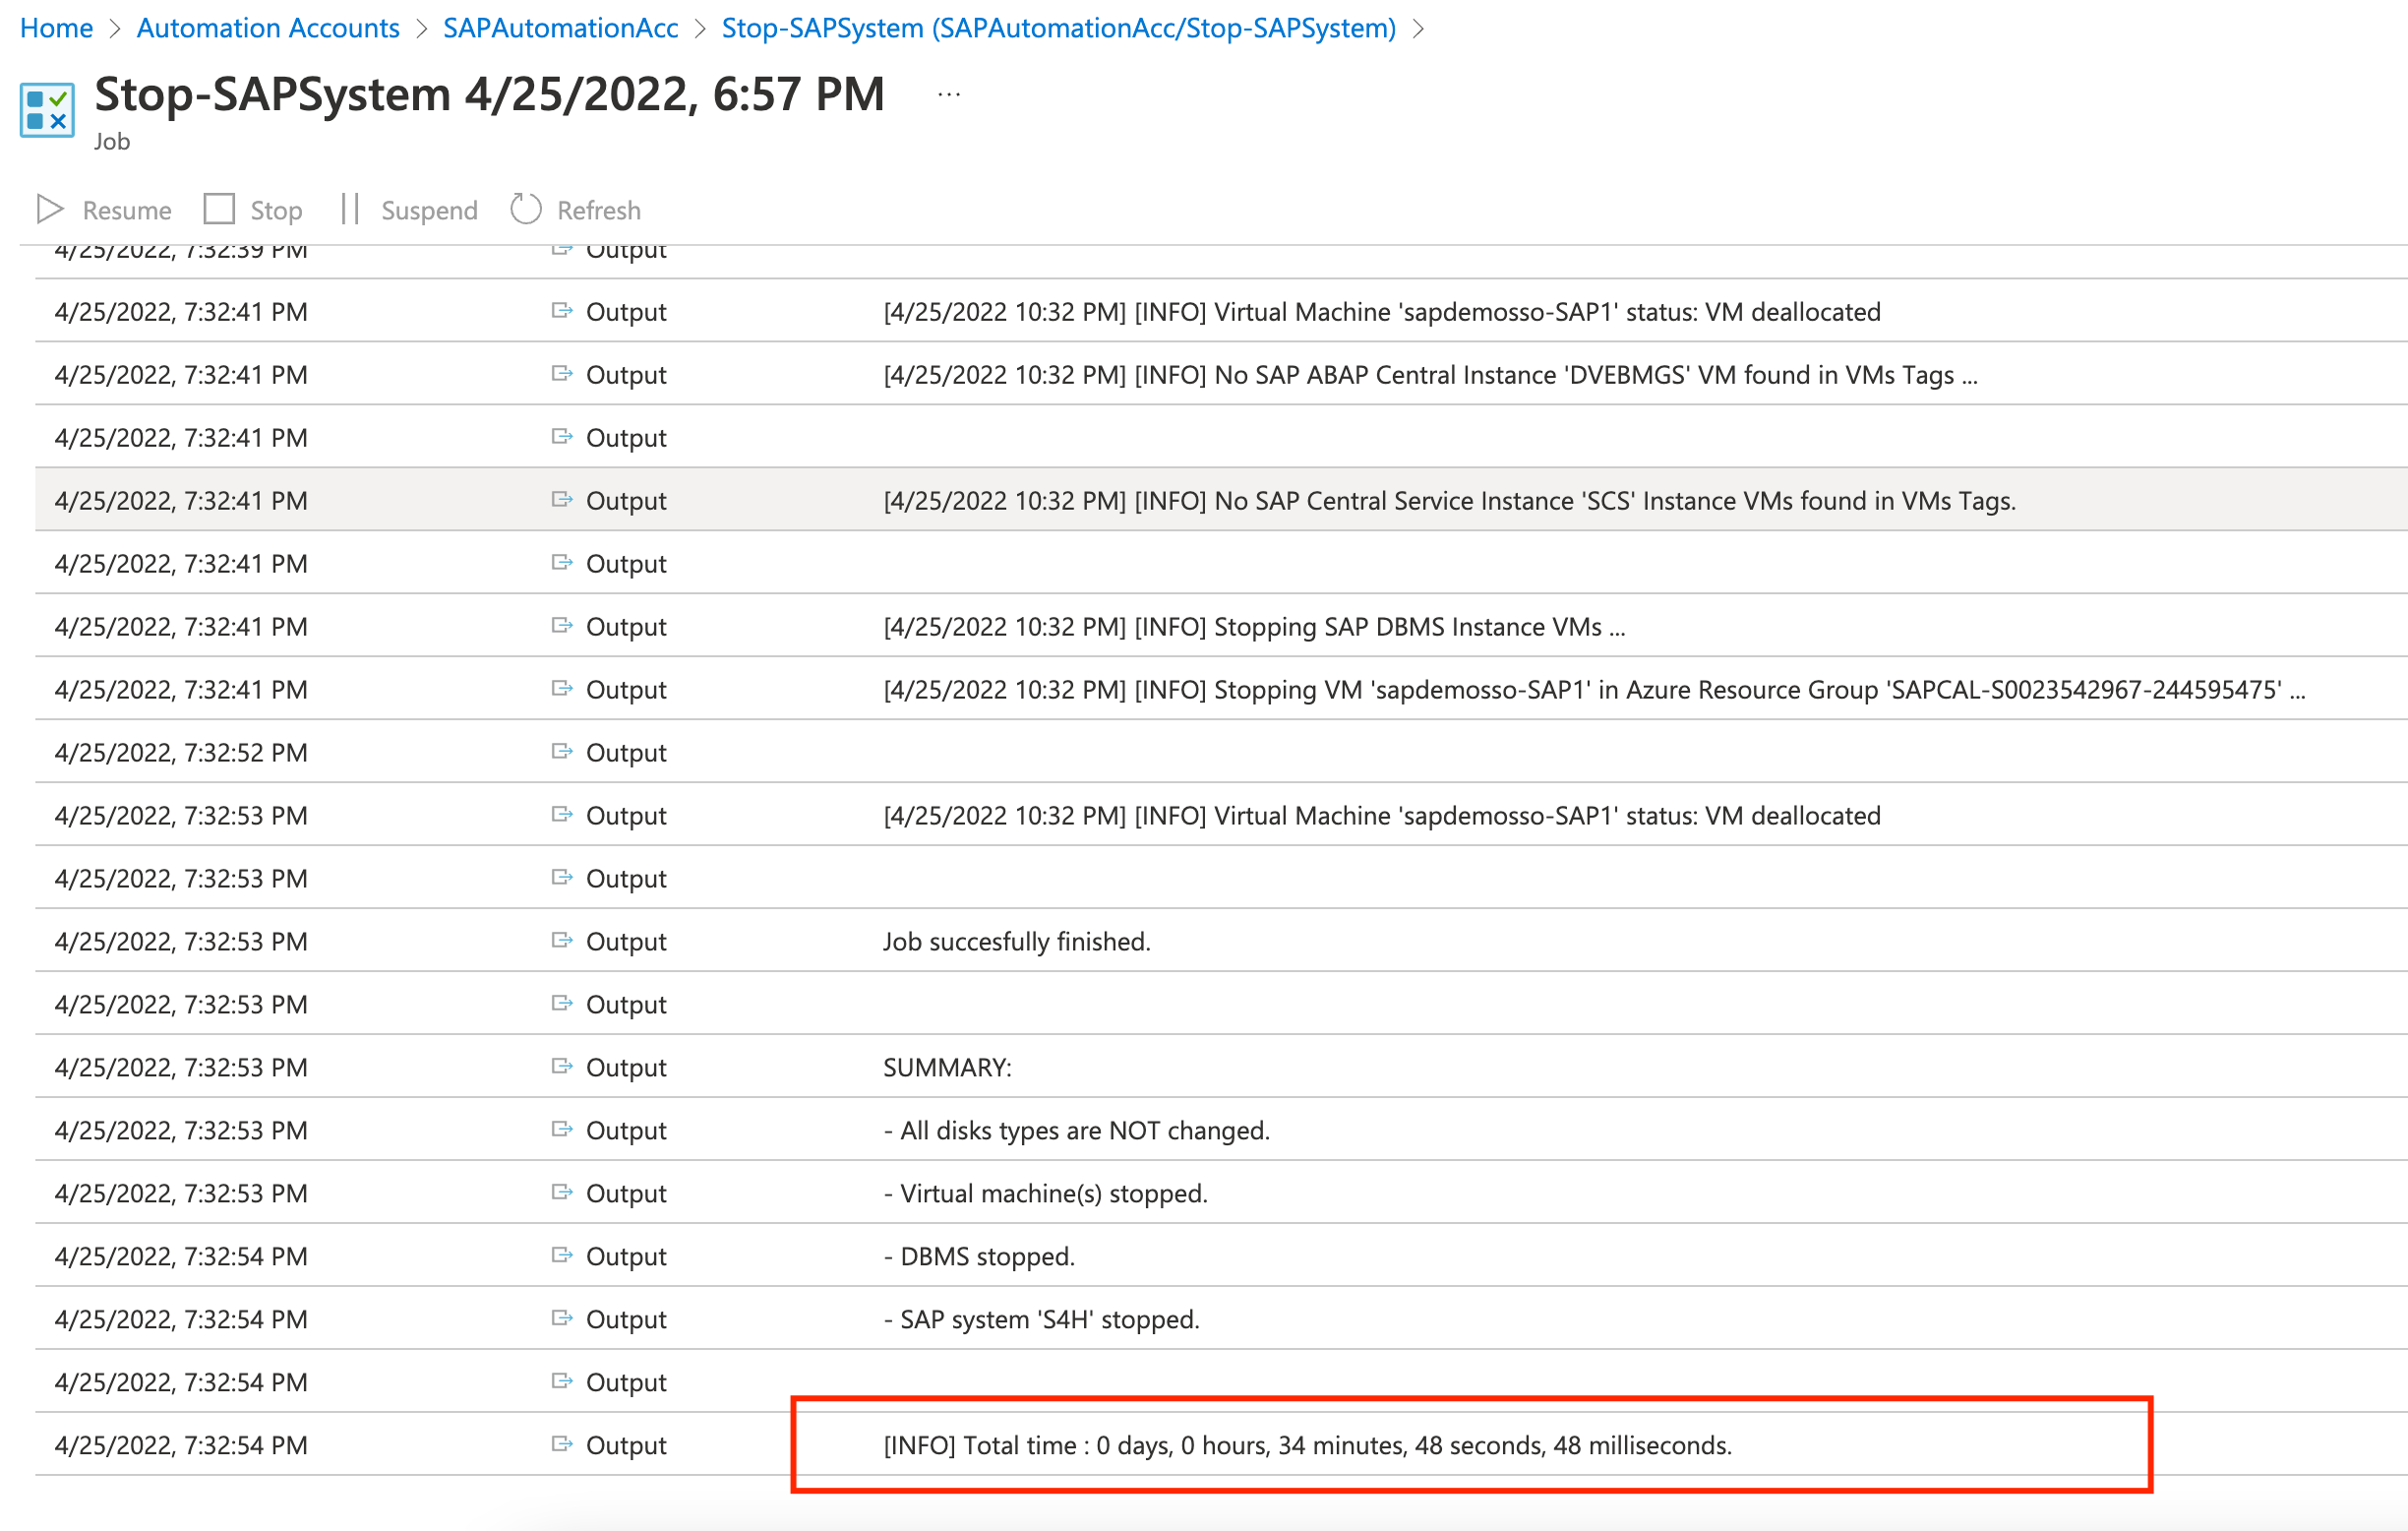
You can check the Job executions by clicking on the Automation Account SAPAutomationAcc and selecting Jobs on the left panel.
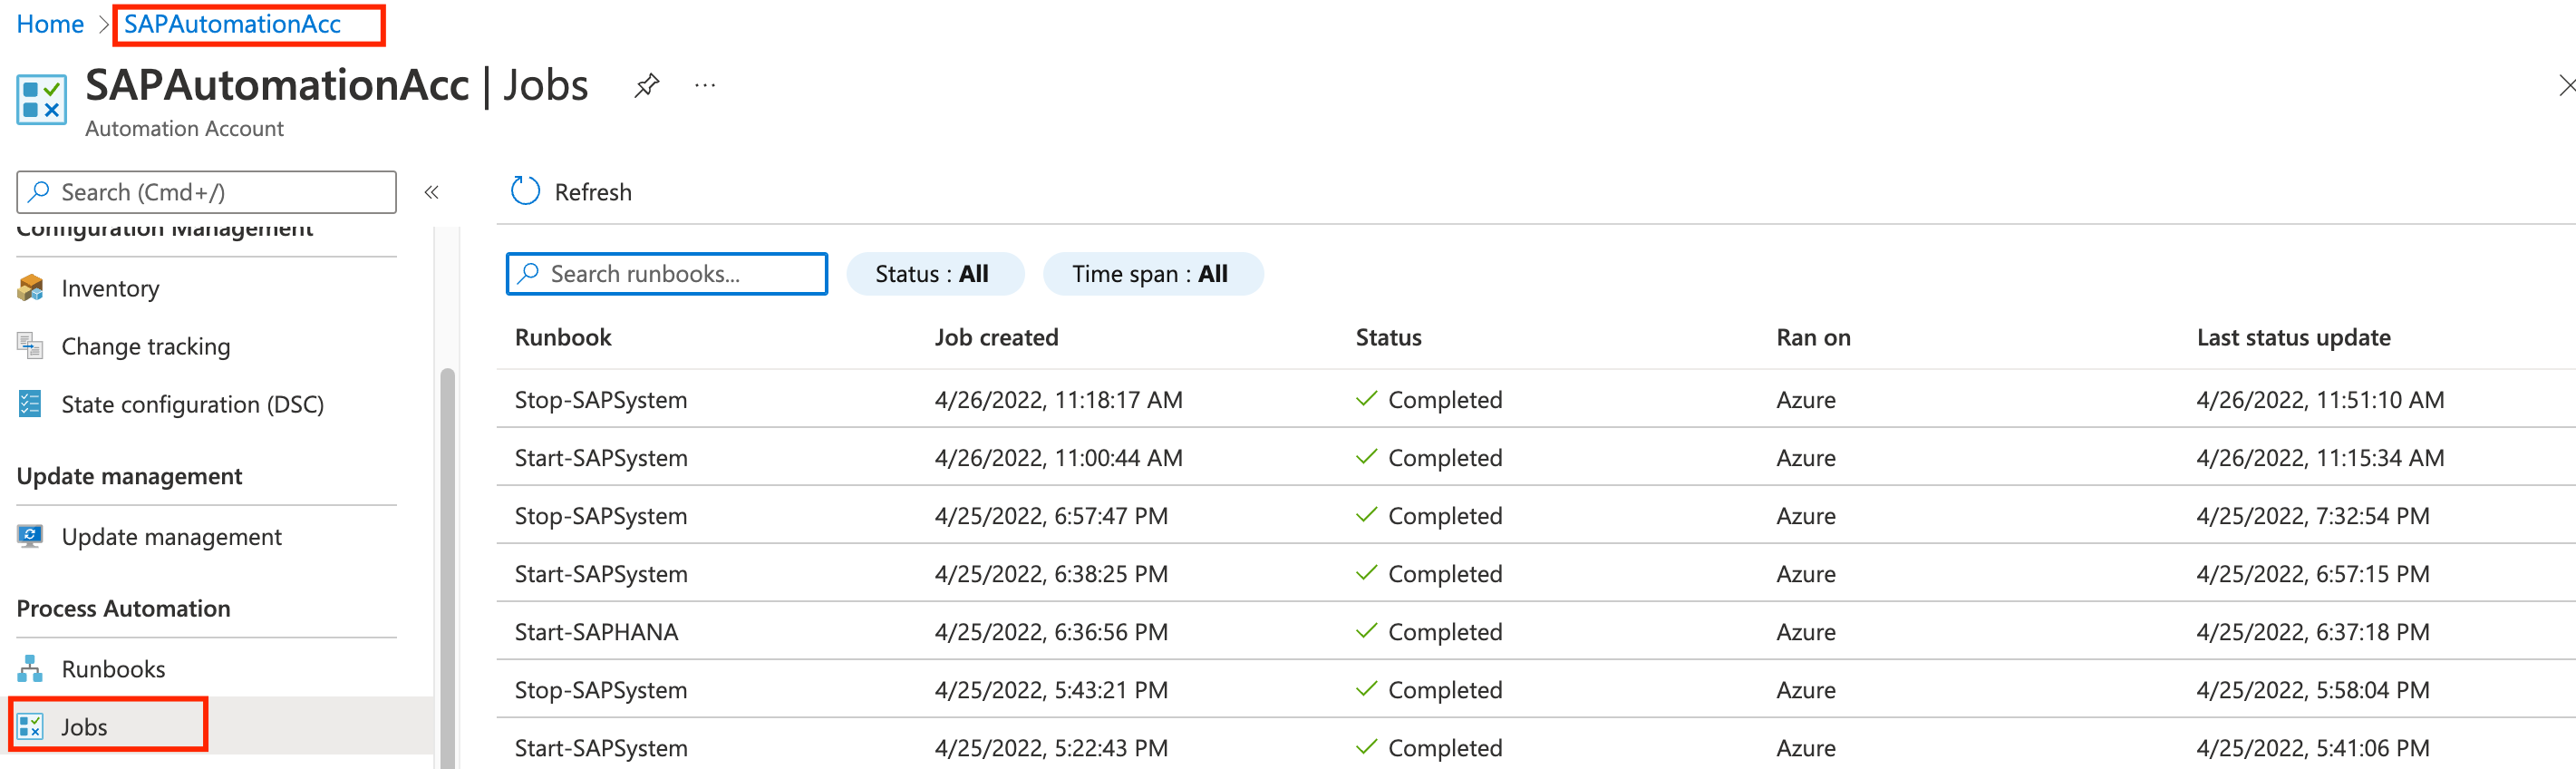
Once you pick the desired execution, you can see the details just like we did on the manual execution.
Congratulations, you have scheduled your SAP to be stopped automatically using a Runbook!