Enhance the App
In this step we will add some filtering functionality to the app and consume data from related Suppliers API based on the selected item.
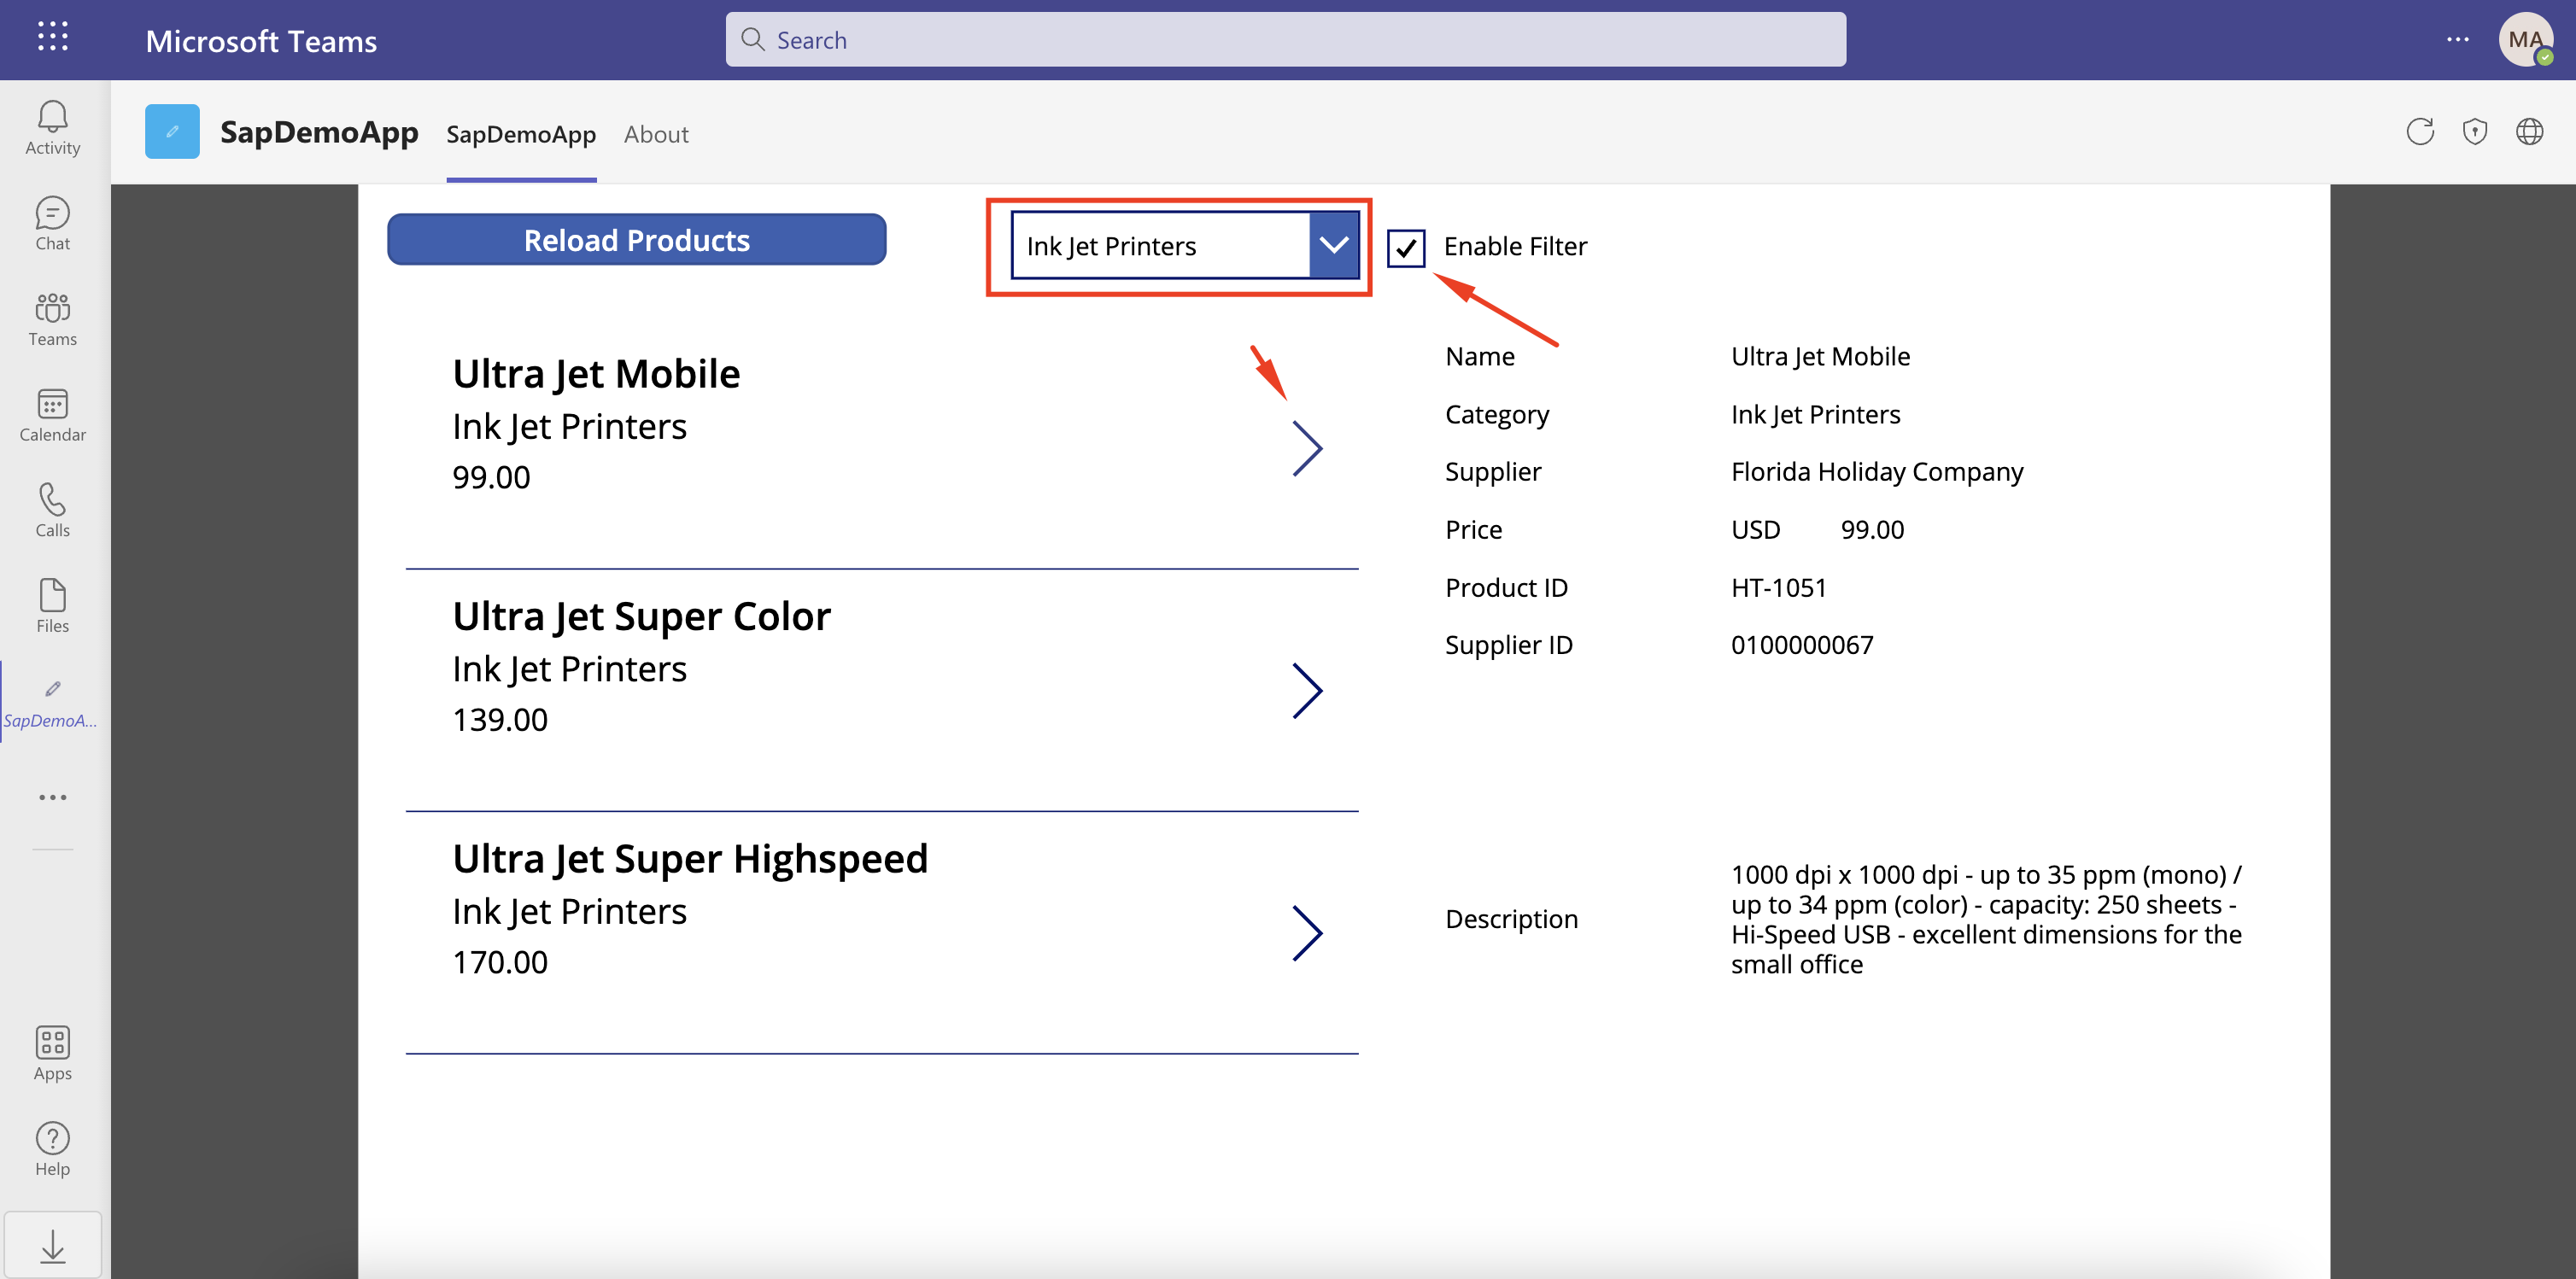
Adding a Category Filter
-
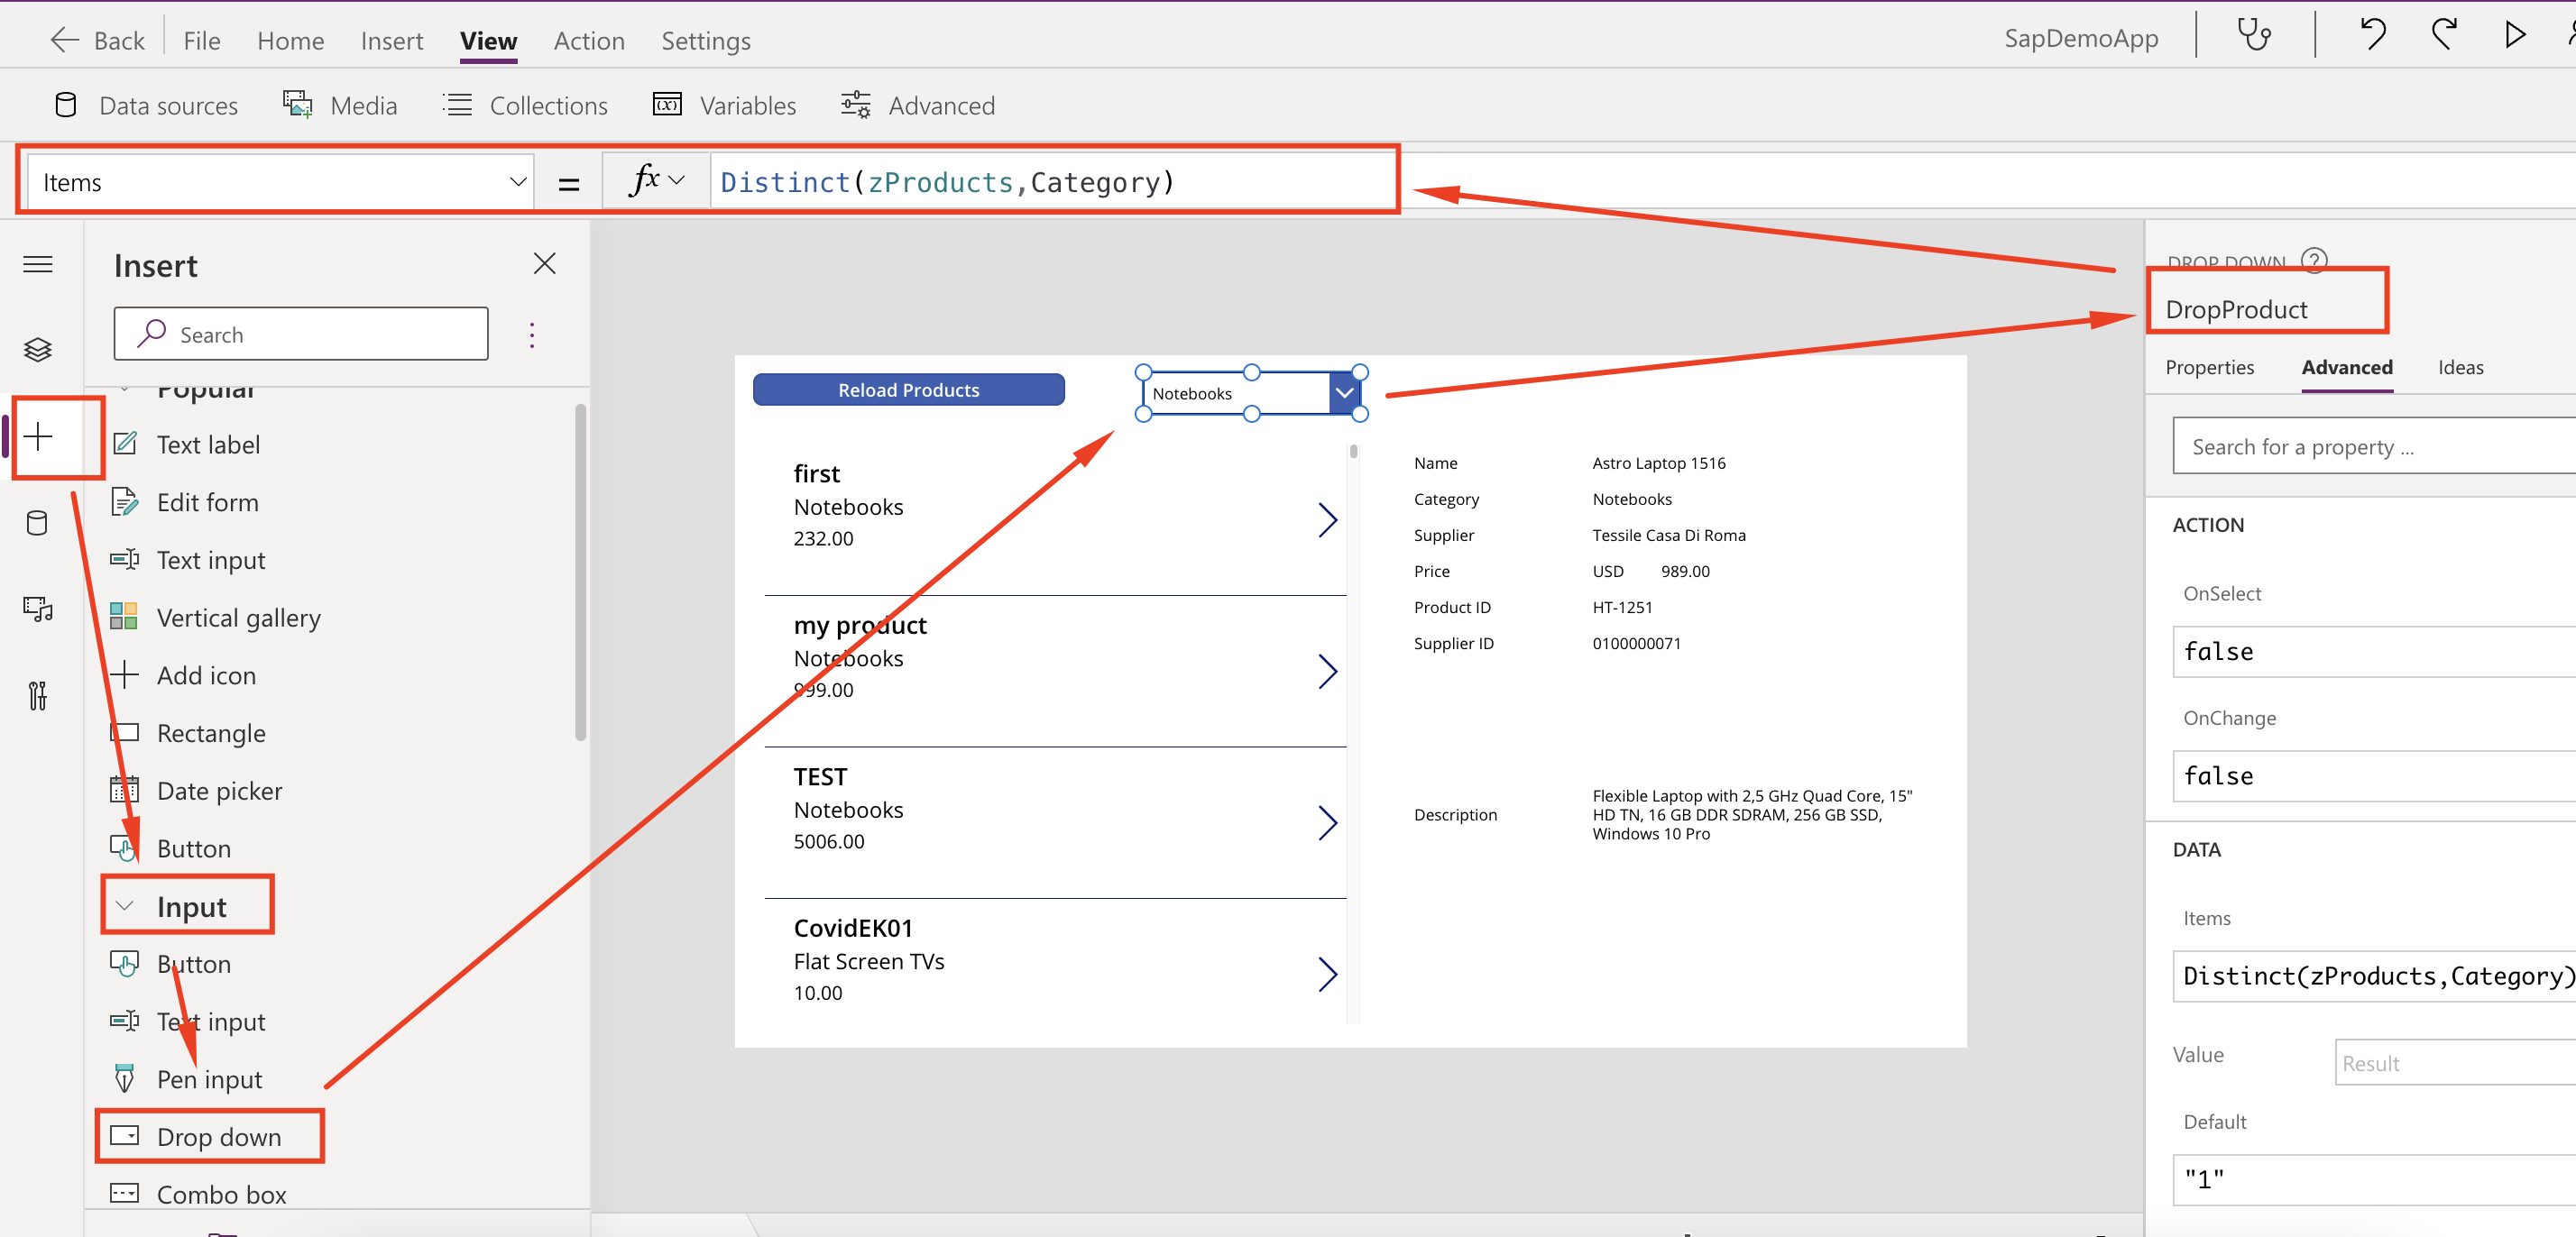
Click on the + icon, open Input, drag and drop the Drop down component to the canvas, resize it and set the required parameters:
- Name = DropProduct
- Items = Distinct(zProducts,Category)
The Items property is the content we want the component to have. In this example we will be selecting unique Category values from the zProduct collection. You can ALT+CLICK or OPTION+CLICK the button to test it.
-
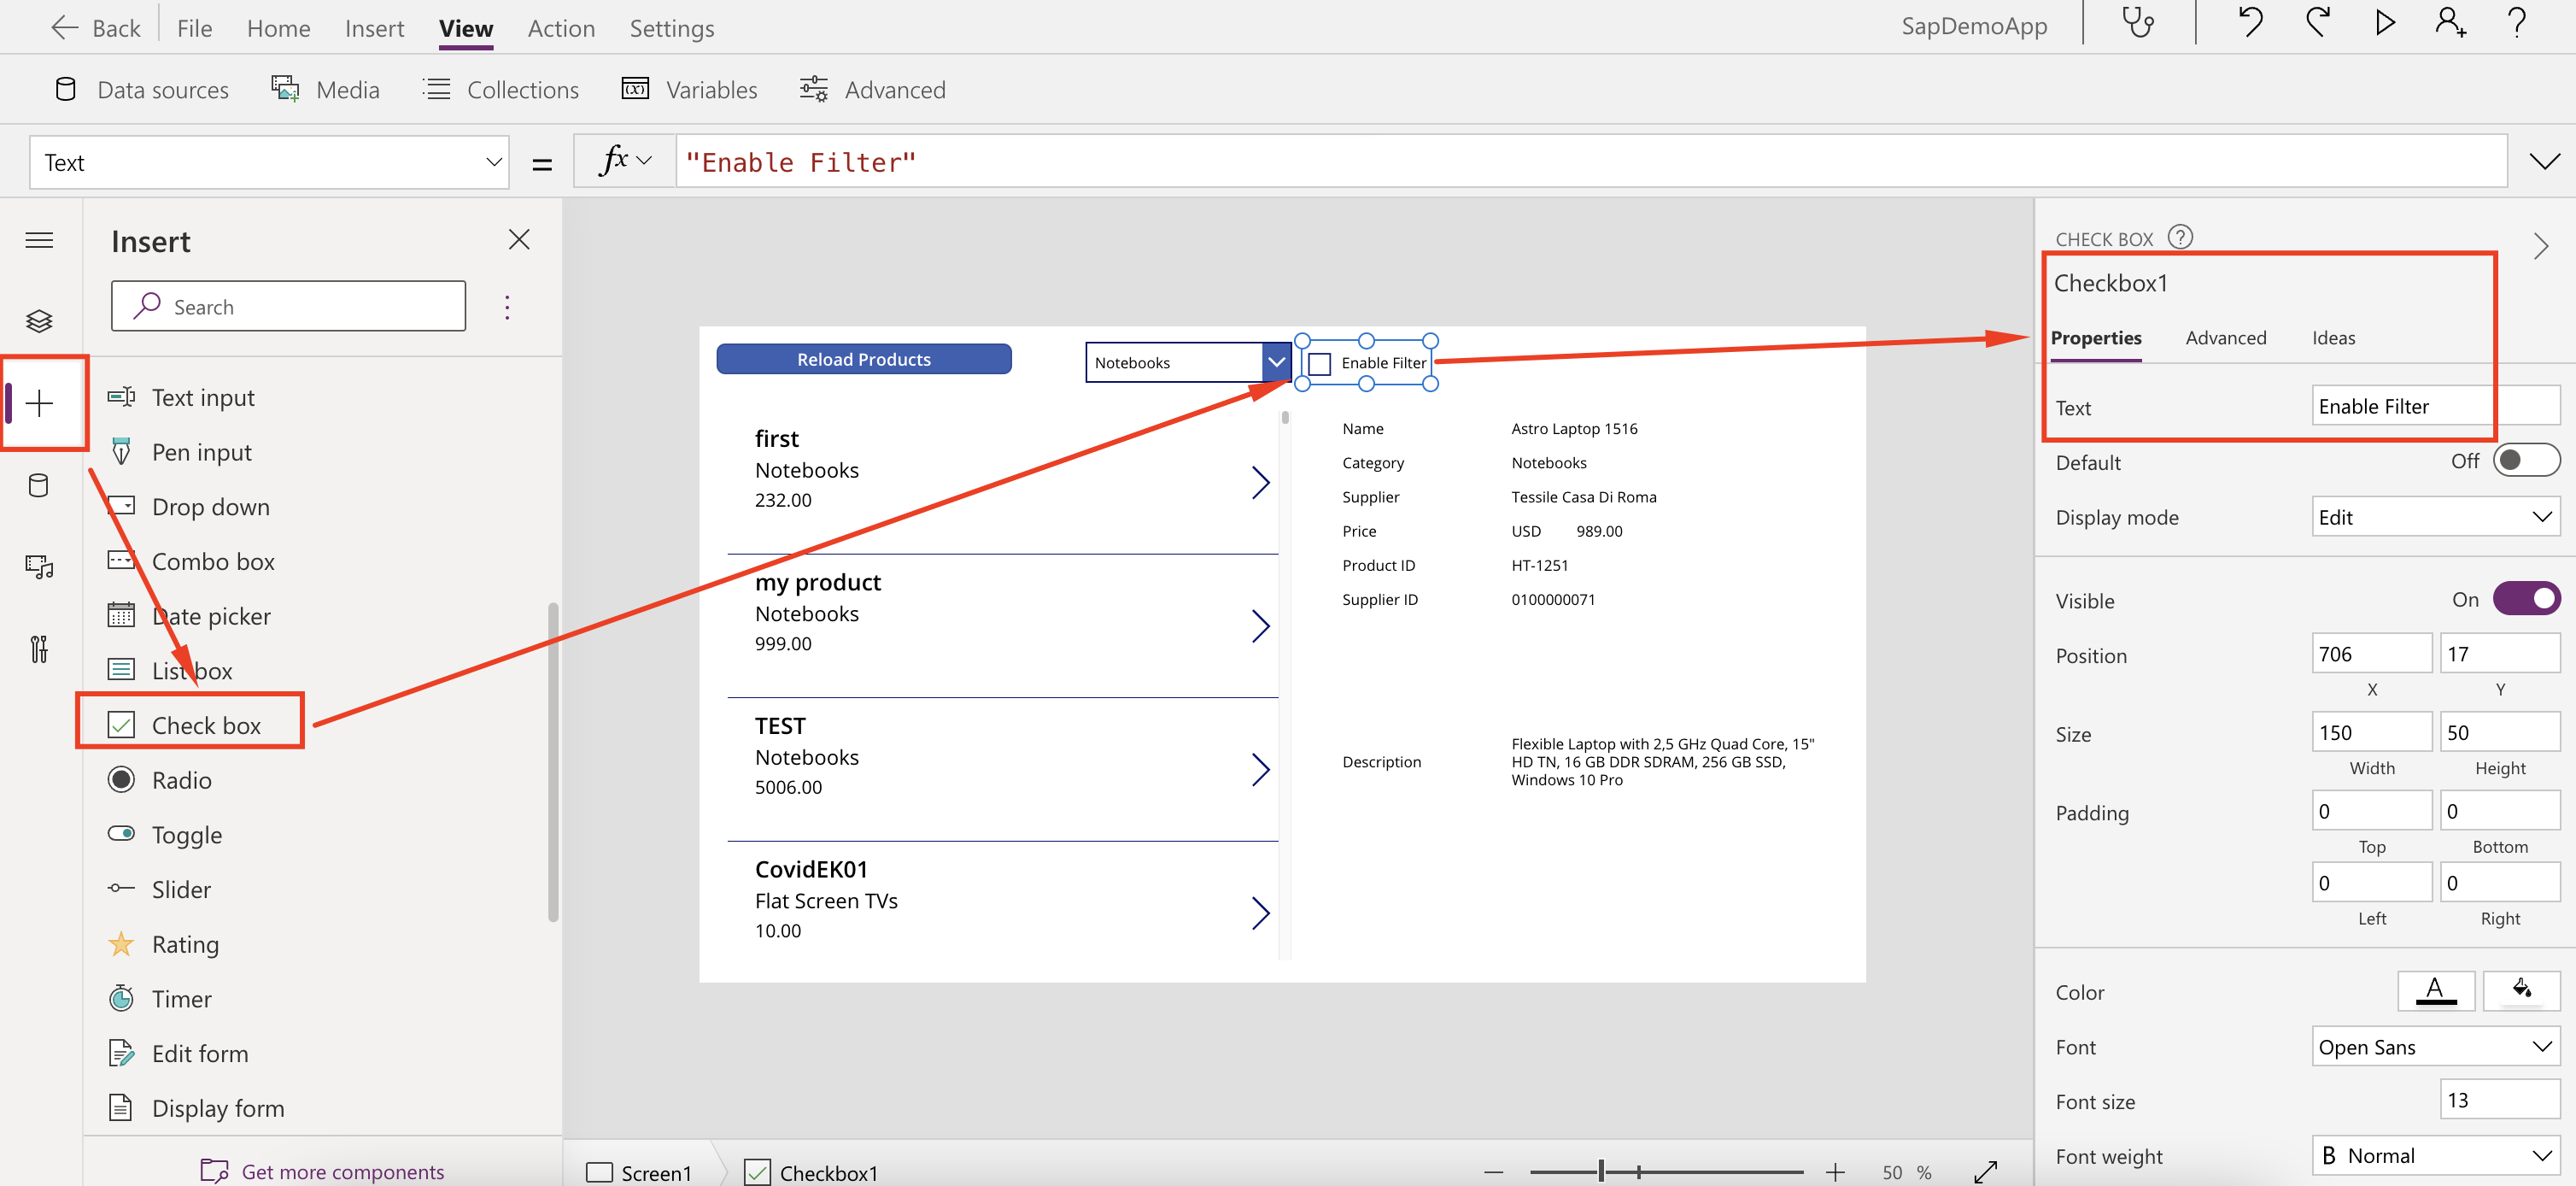
Click on the + icon, open Input, drag and drop the Check box component to the canvas, name it Checkbox1 and set its Text to Enable filter
-
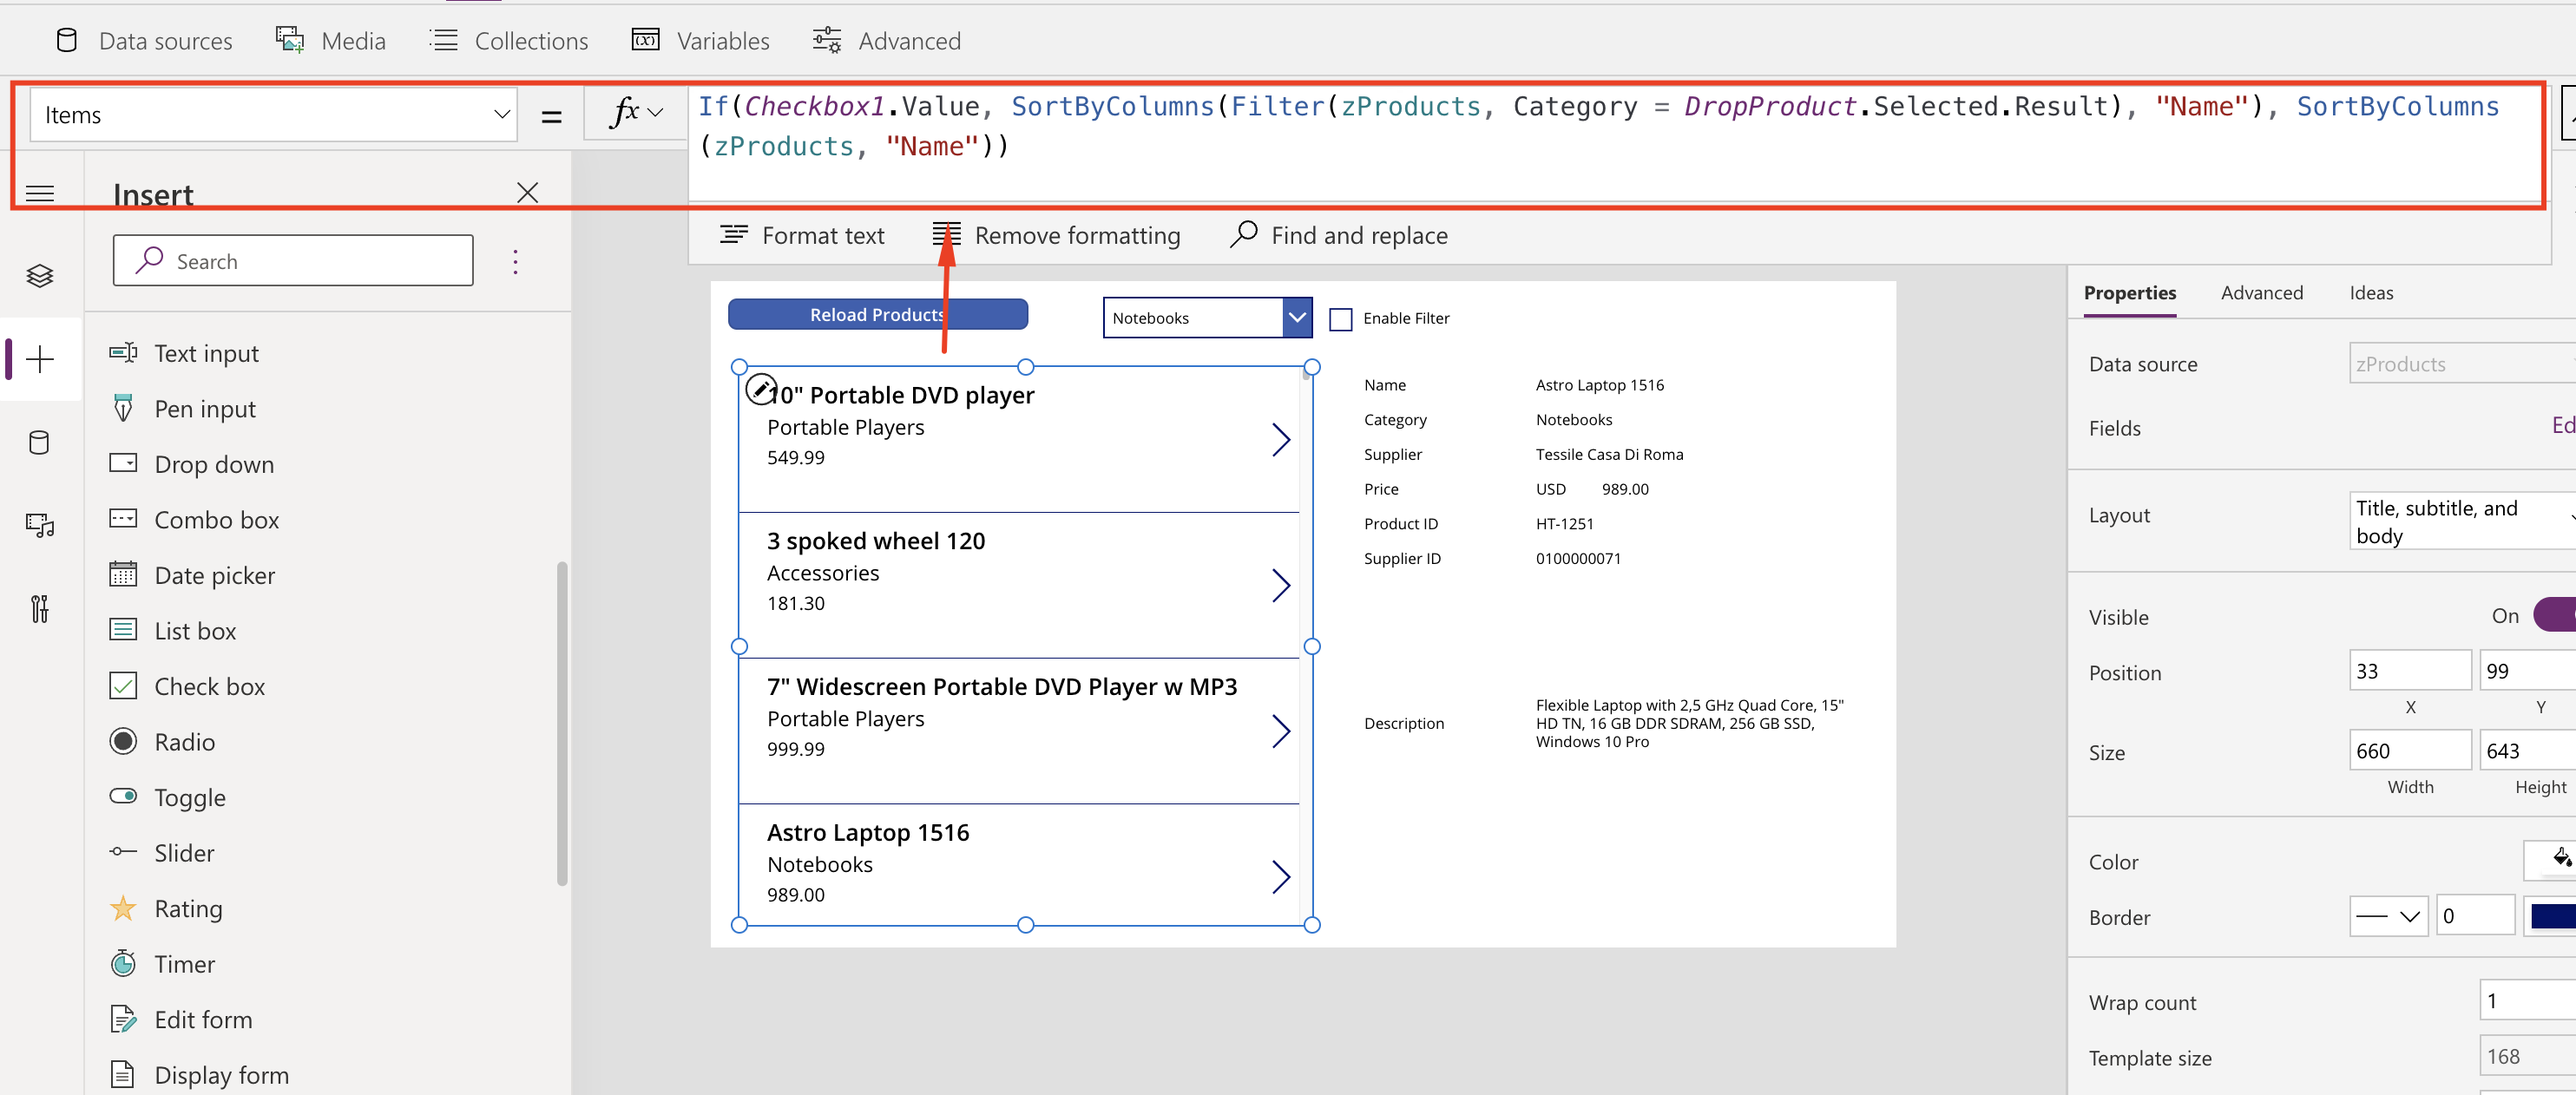
Now let’s change the Items property of ther Gallery1 to display all items or only display filtered Items, depending on the selections for the checkbox and the dropdown:
- Items = If(Checkbox1.Value, SortByColumns(Filter(zProducts, Category = DropProduct.Selected.Result), “Name”), SortByColumns(zProducts, “Name”))
Here we are running a little script with a conditional statement. If checkbox is checked, it will filter zProduct based on the dropdown selected. Otherwise, it will display all items.
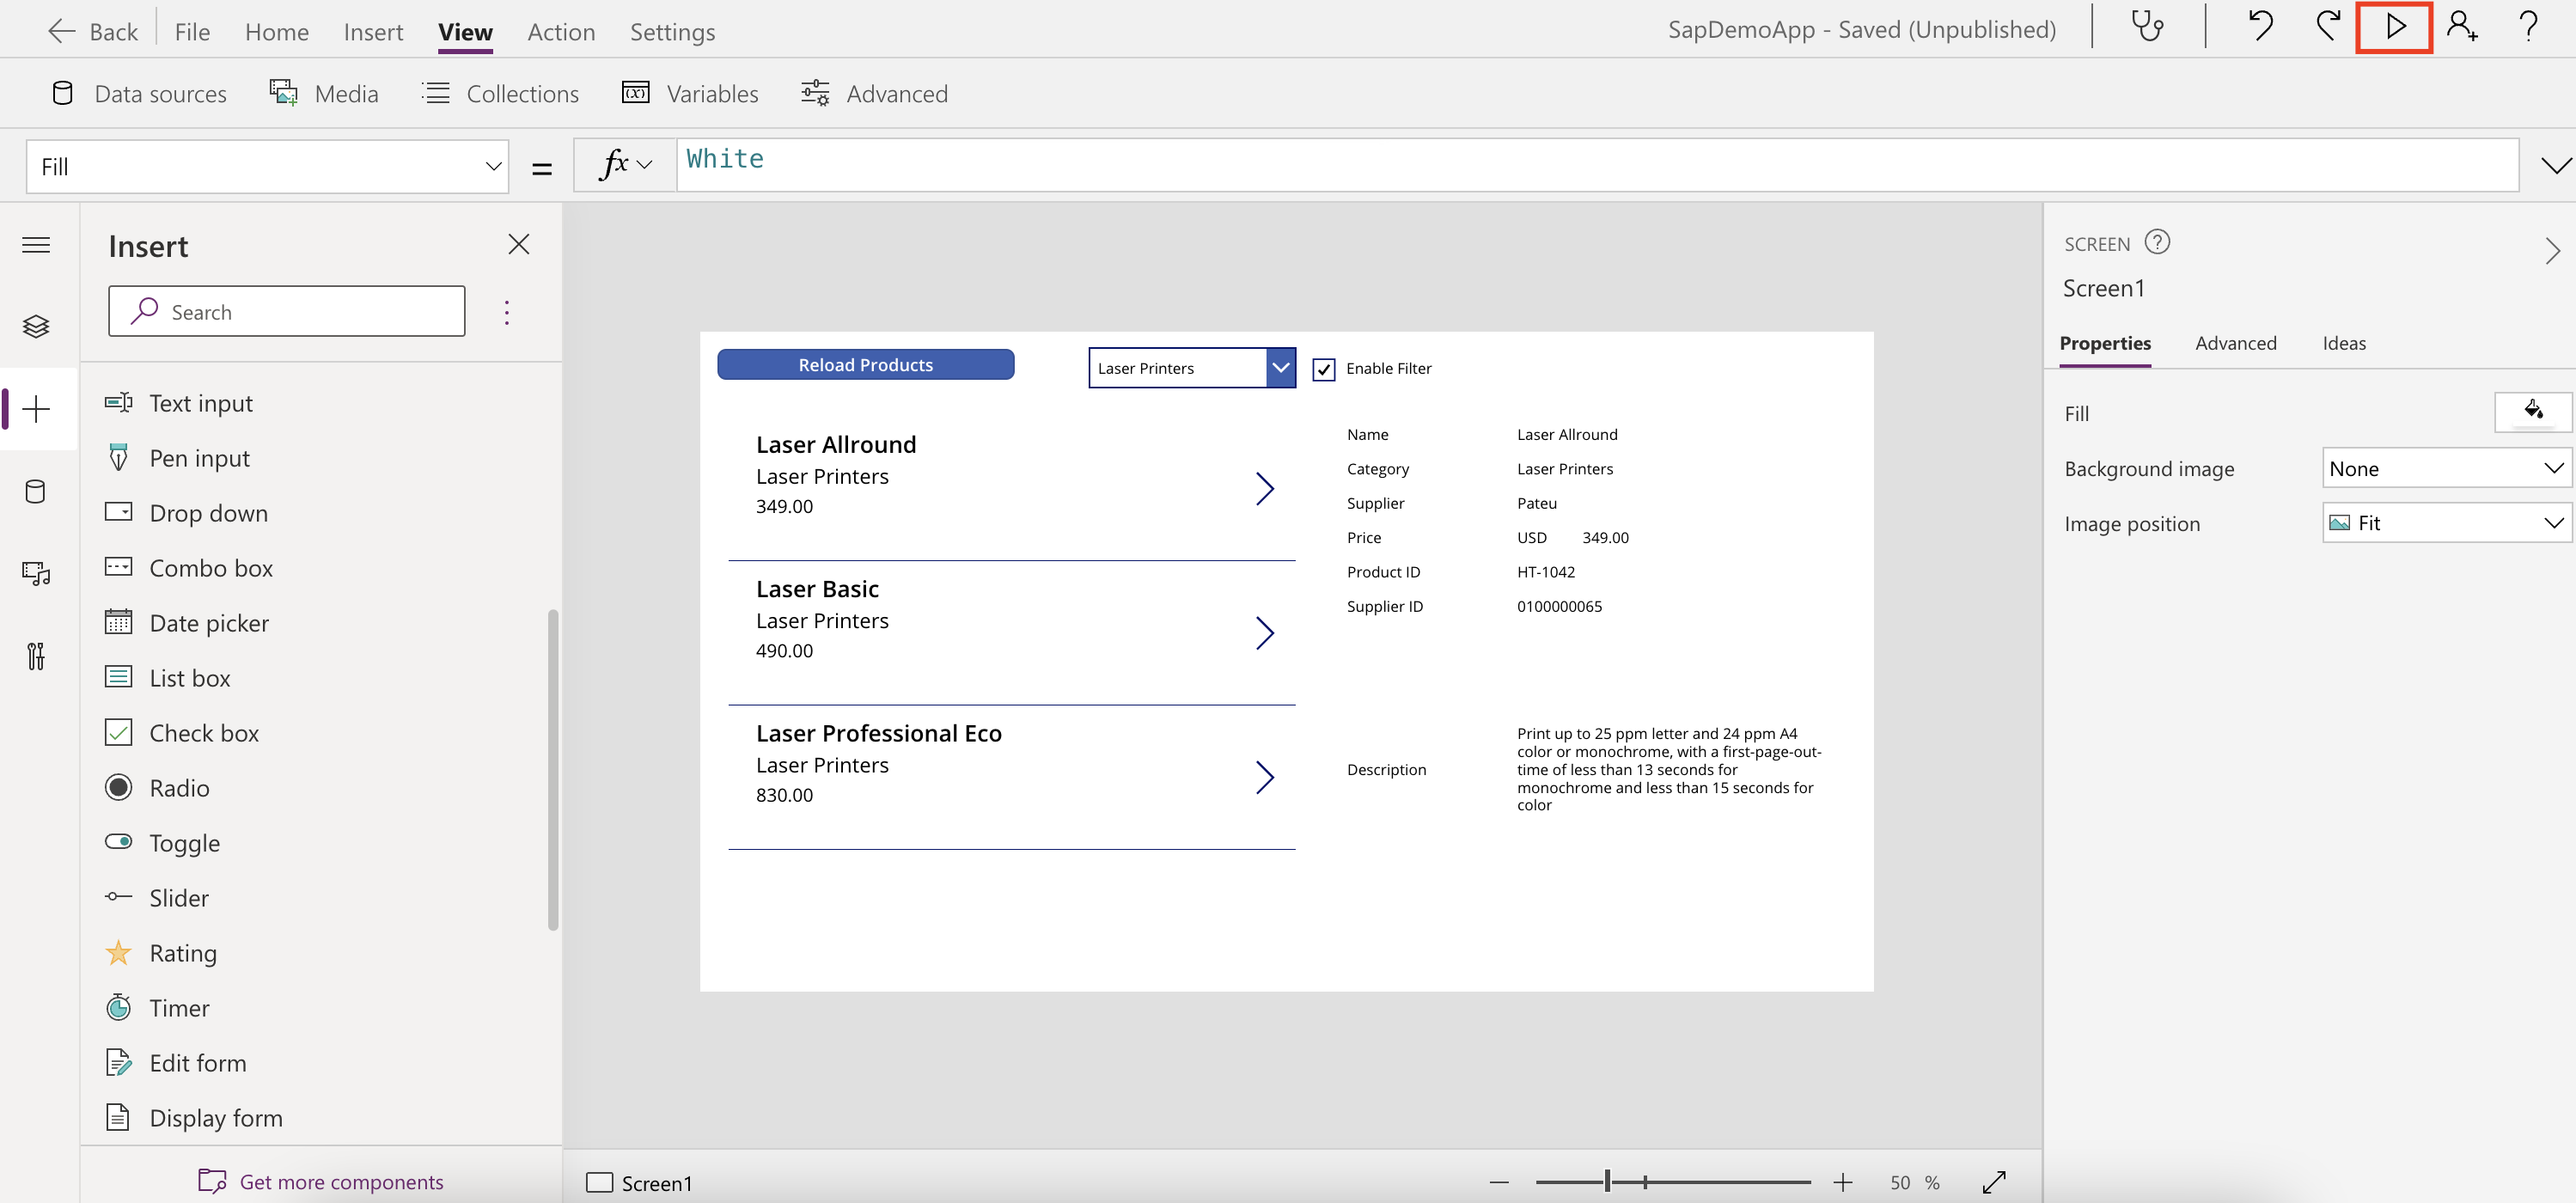
We just added Filtering with almost no code at all. Click on the Play button to run the App and try the new components
Adding More Data
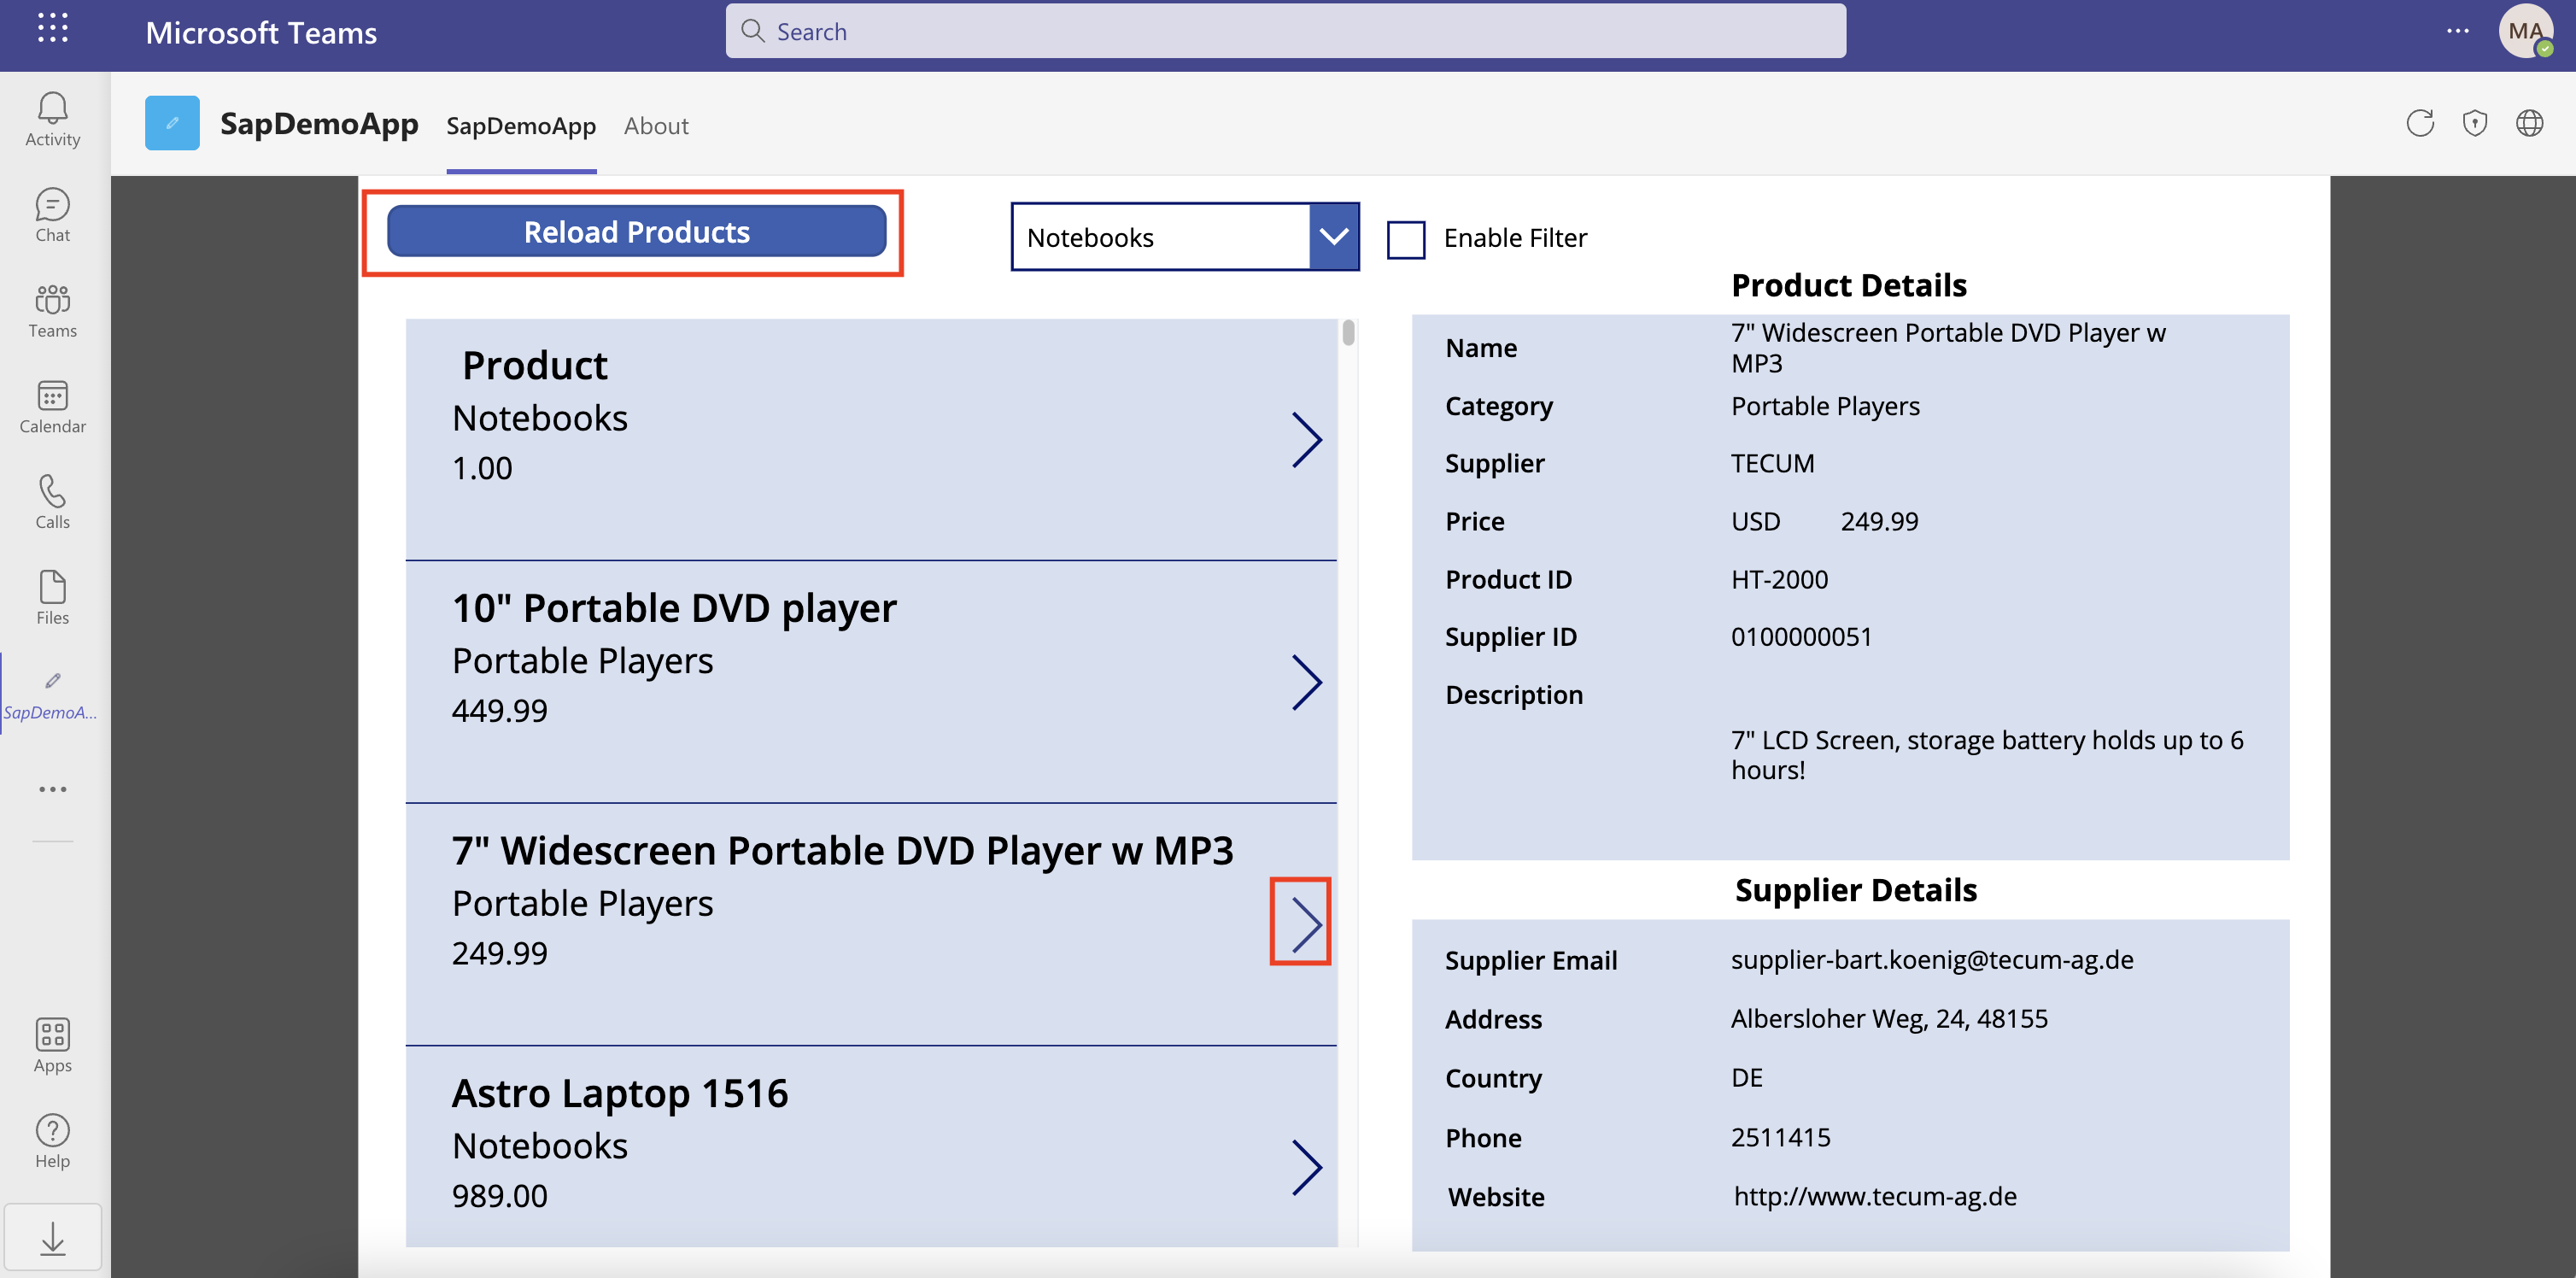
Now that the app is running with Products data, let’s add Suppliers Data to the app.
The leyout used on this example is a suggestion but feel free to rearrange the components and customize layout of your app.
-
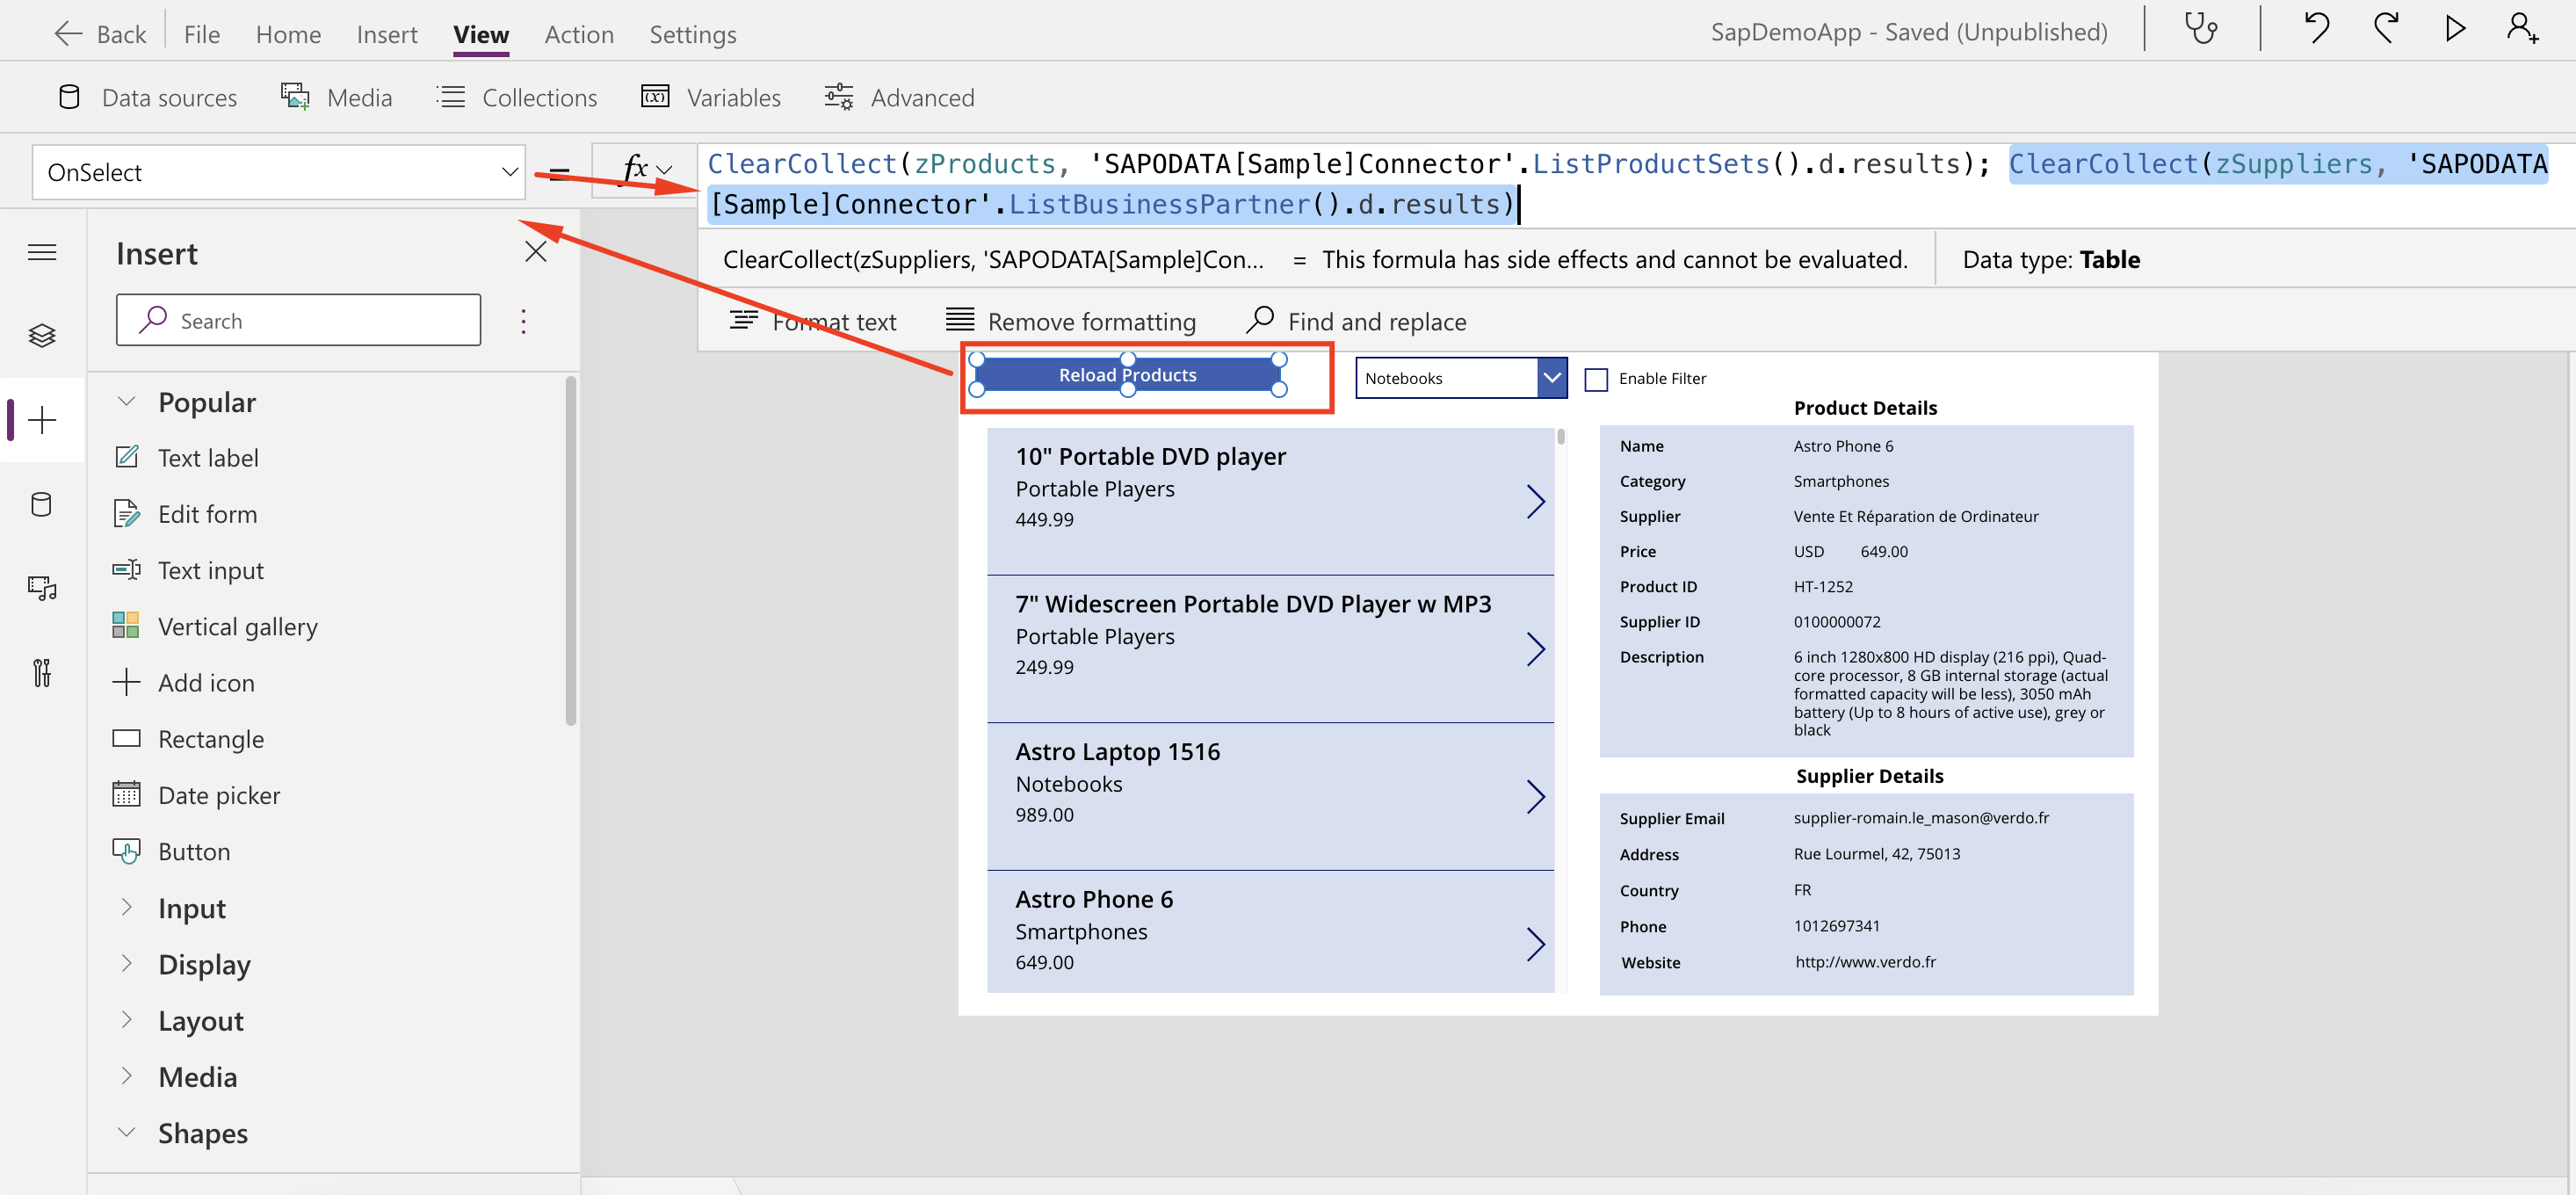
We will start by loading more data on the Reload Products button. Change the OnSelect property to the value below. It will create a new collection called zSuppliers with data from the BusinessPartners API.
- OnSelect = ClearCollect(zProducts, ‘SAPODATA[Sample]Connector’.ListProductSets().d.results); ClearCollect(zSuppliers, ‘SAPODATA[Sample]Connector’.ListBusinessPartner().d.results)
- OnSelect = ClearCollect(zProducts, ‘SAPODATA[Sample]Connector’.ListProductSets().d.results); ClearCollect(zSuppliers, ‘SAPODATA[Sample]Connector’.ListBusinessPartner().d.results)
-
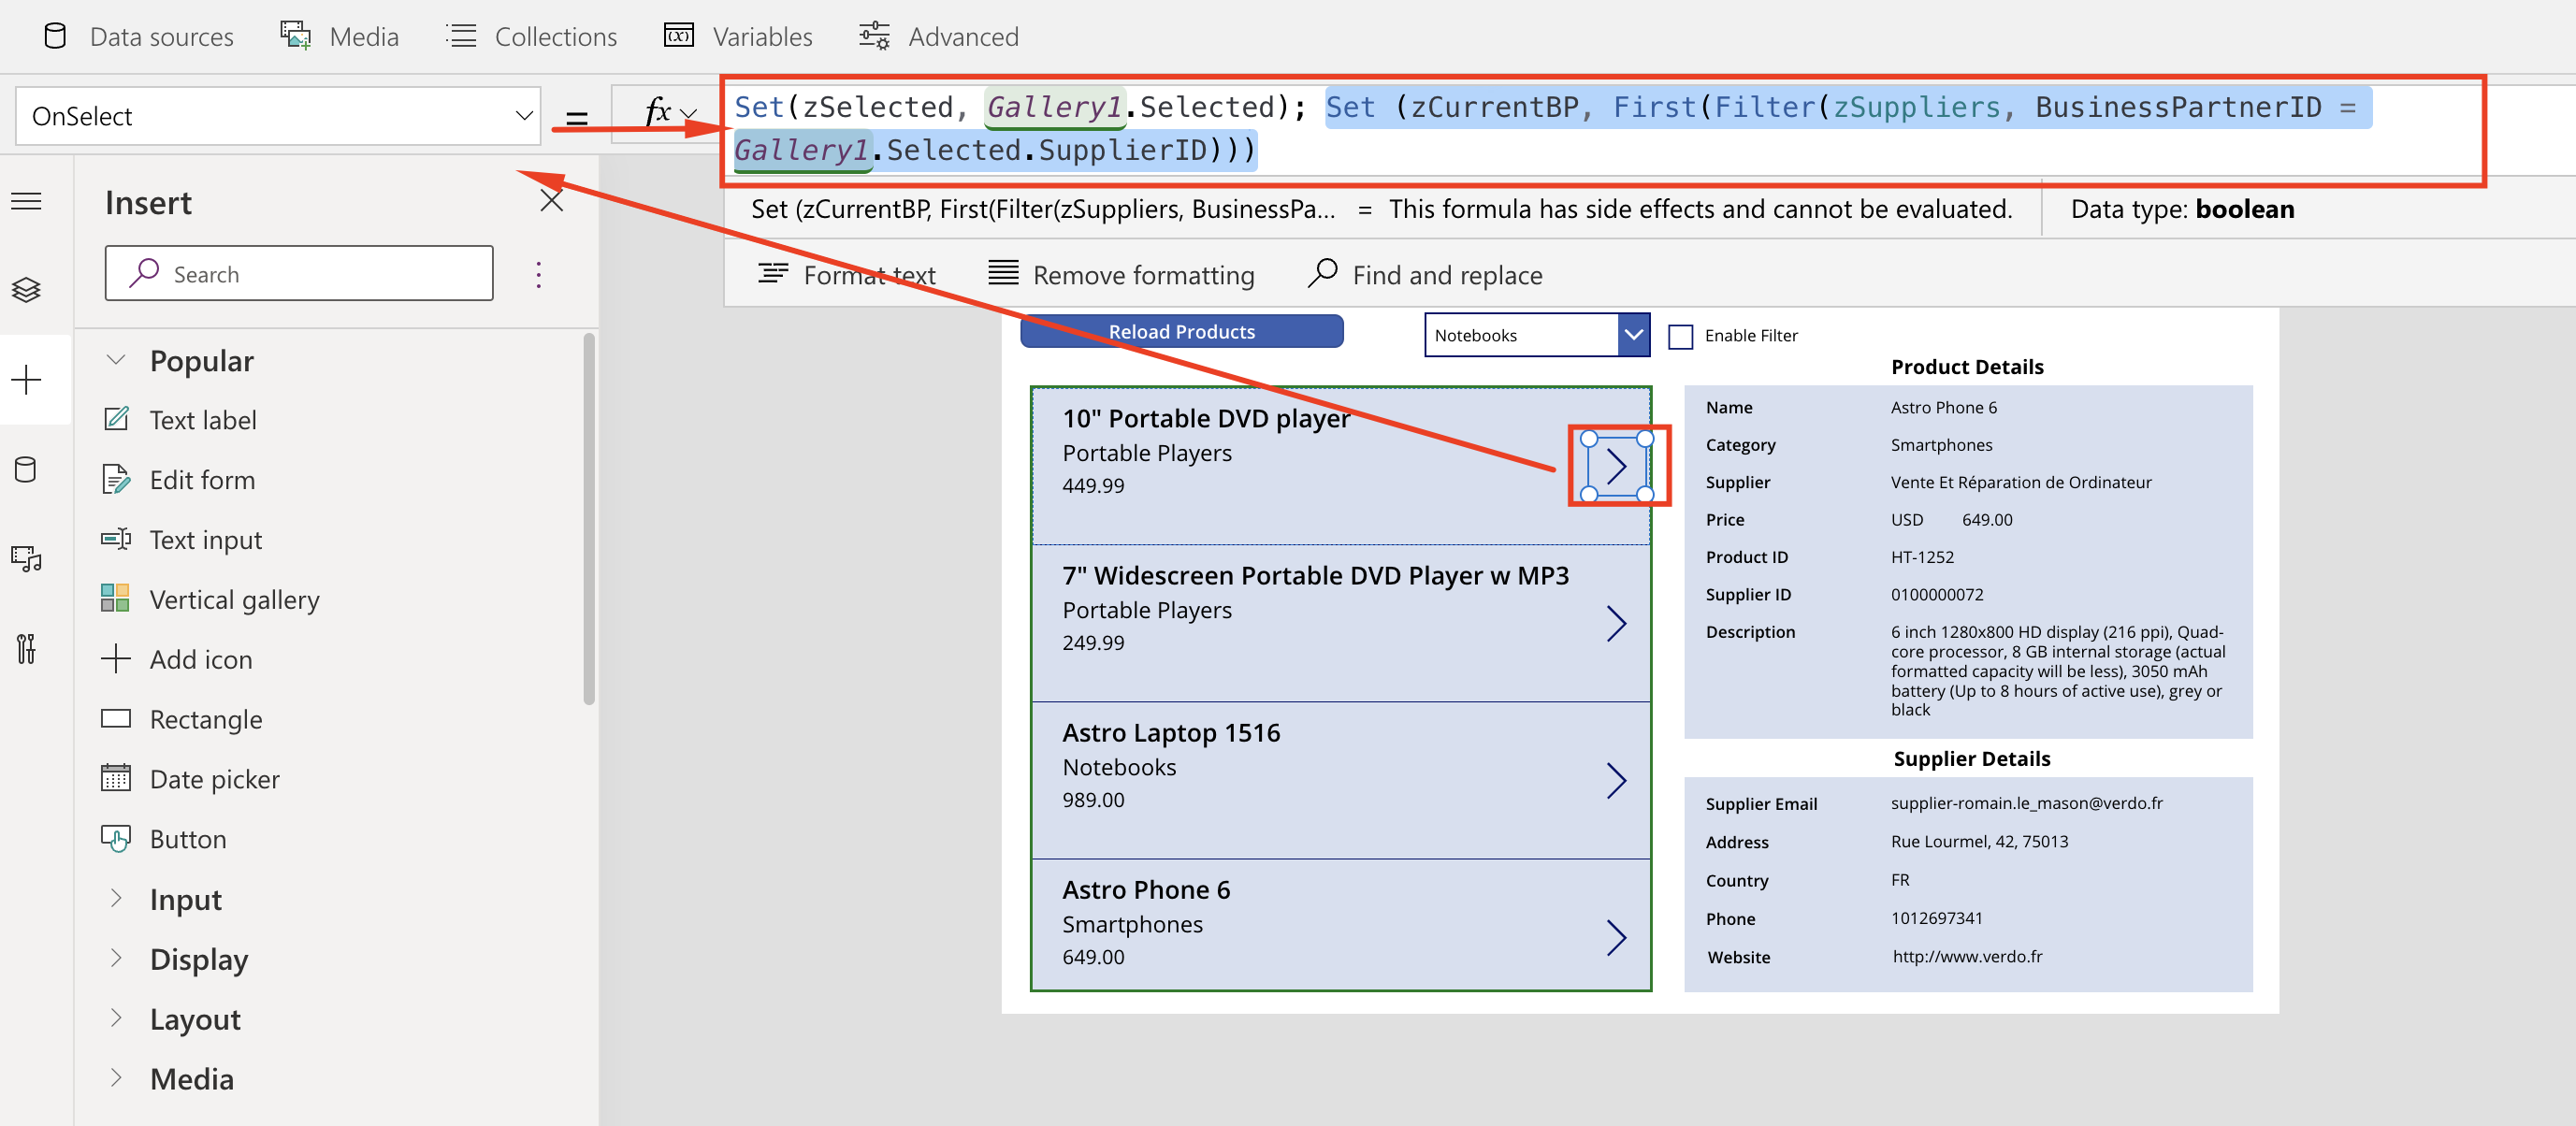
In the same way we loaded more data on the step above, we will filter more data when selecting a product. Click on the arrow inside Gallery1 and change the OnSelect property to the value below. This will set a variable called zCurrentBP with the data from zSuppliers with the same SupplierID that the one in the product.
- OnSelect = Set(zSelected, Gallery1.Selected); Set (zCurrentBP, First(Filter(zSuppliers, BusinessPartnerID = Gallery1.Selected.SupplierID)))
- OnSelect = Set(zSelected, Gallery1.Selected); Set (zCurrentBP, First(Filter(zSuppliers, BusinessPartnerID = Gallery1.Selected.SupplierID)))
-
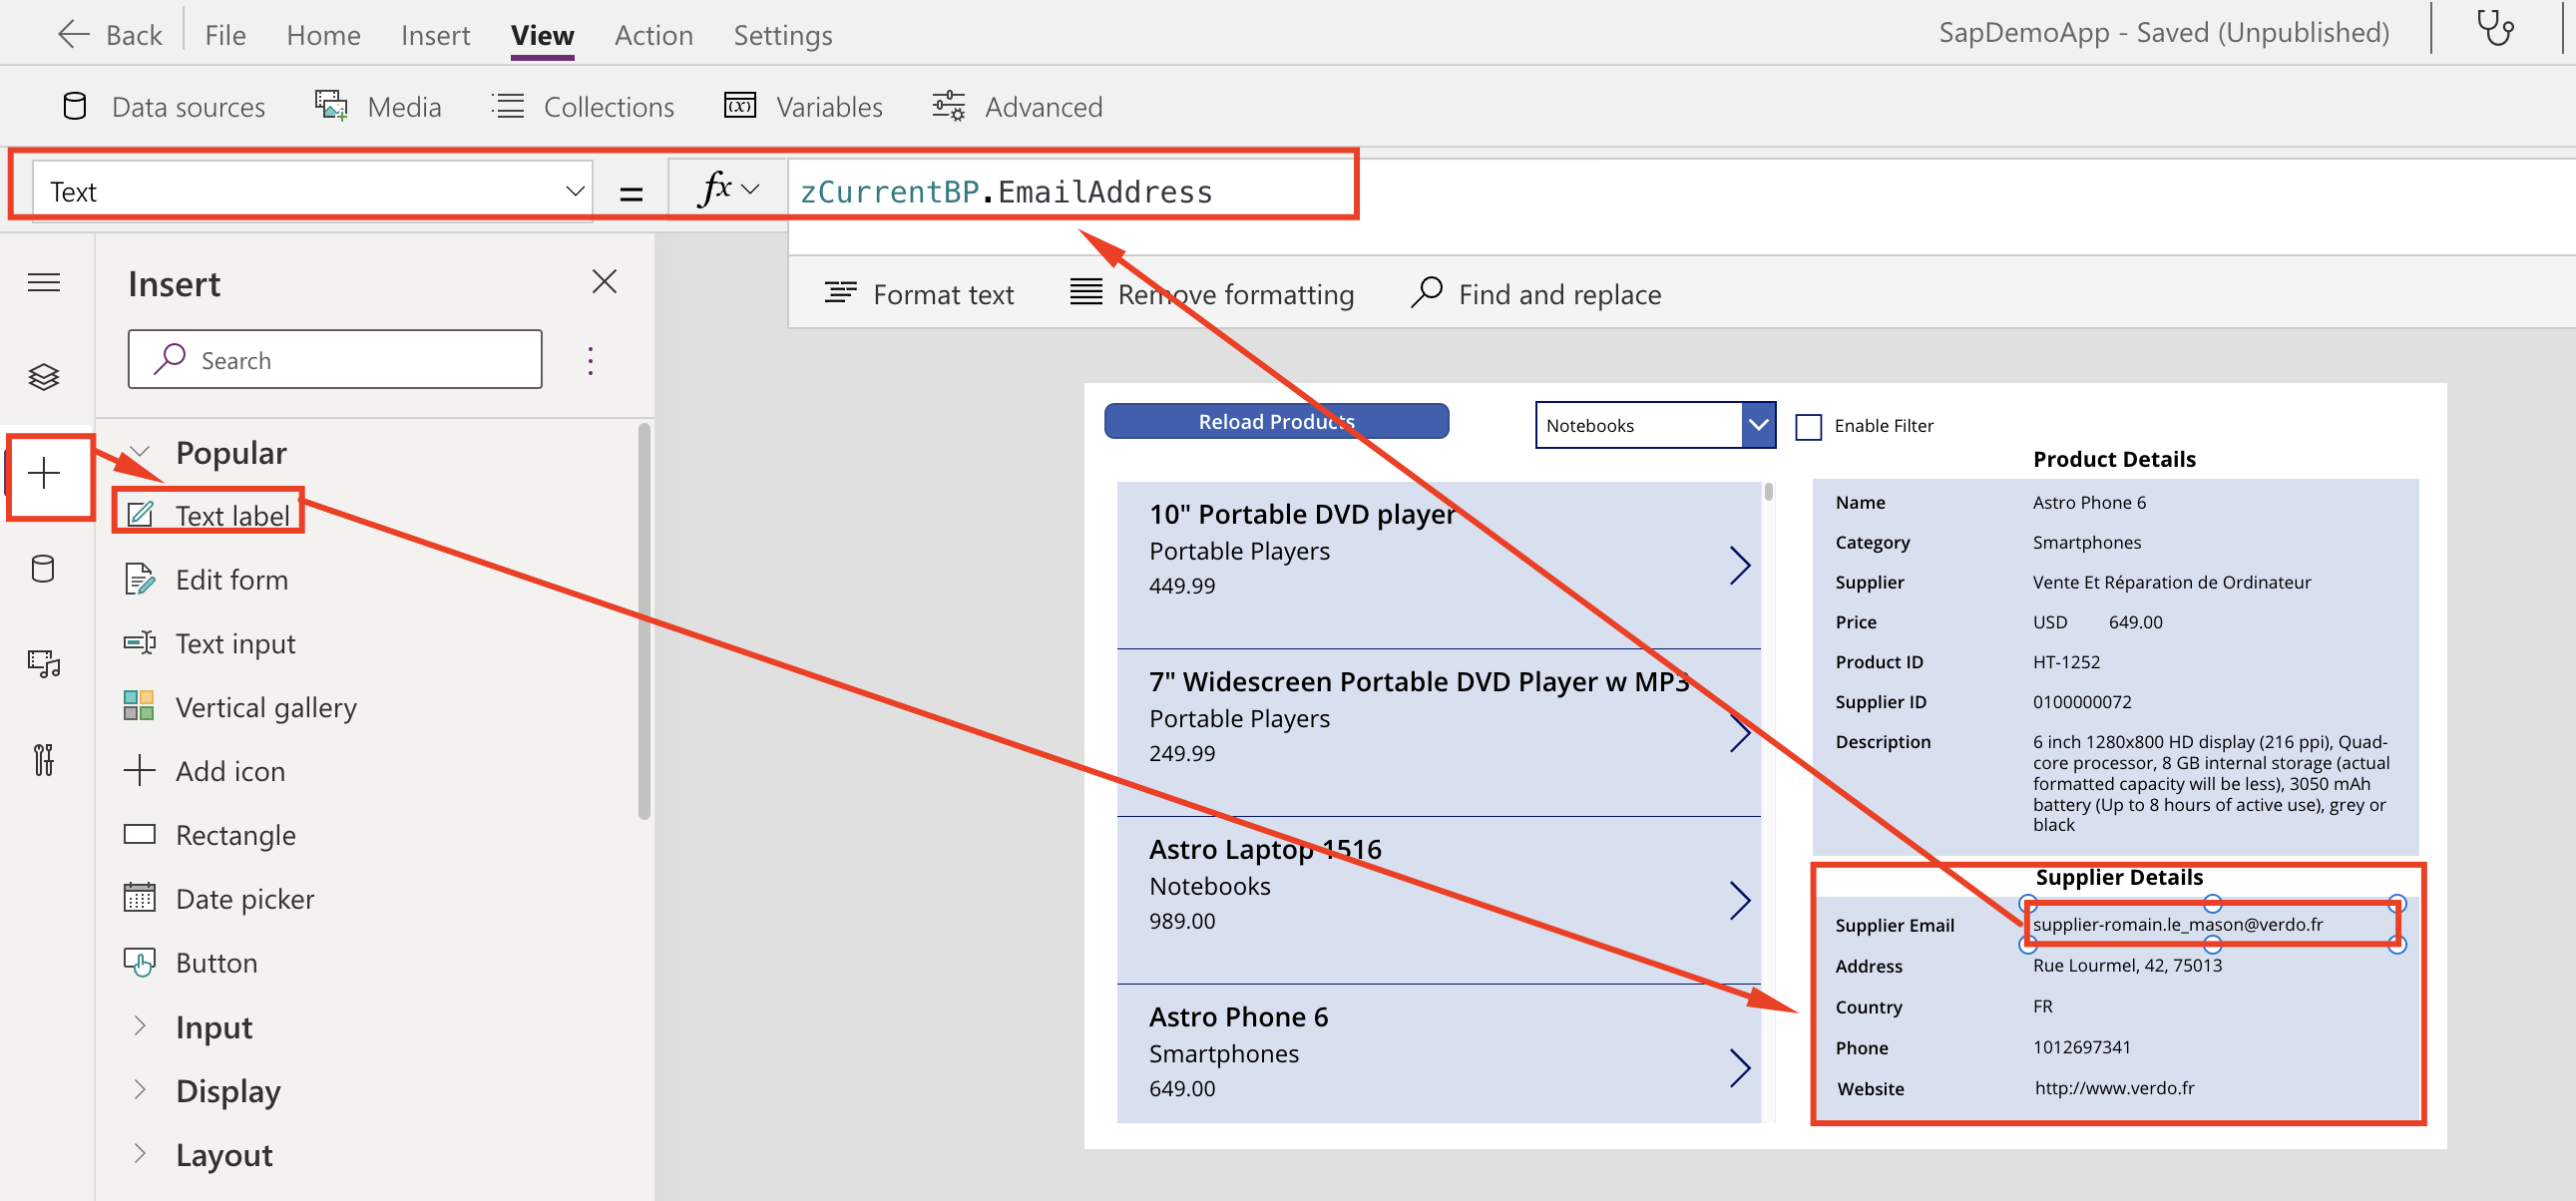
Add more labels like we did on the app creation and set its Text property to:
- Supplier Email = zCurrentBP.EmailAddress
- Address = zCurrentBP.Address.Street&", “&zCurrentBP.Address.Building&”, “&zCurrentBP.Address.PostalCode
- Country = zCurrentBP.Address.Country
- Phone = zCurrentBP.PhoneNumber
- Website = zCurrentBP.WebAddress
You can click on the play button on the top right to run the app. Reload the product and see it getting data from distinct APIs in a single screen.
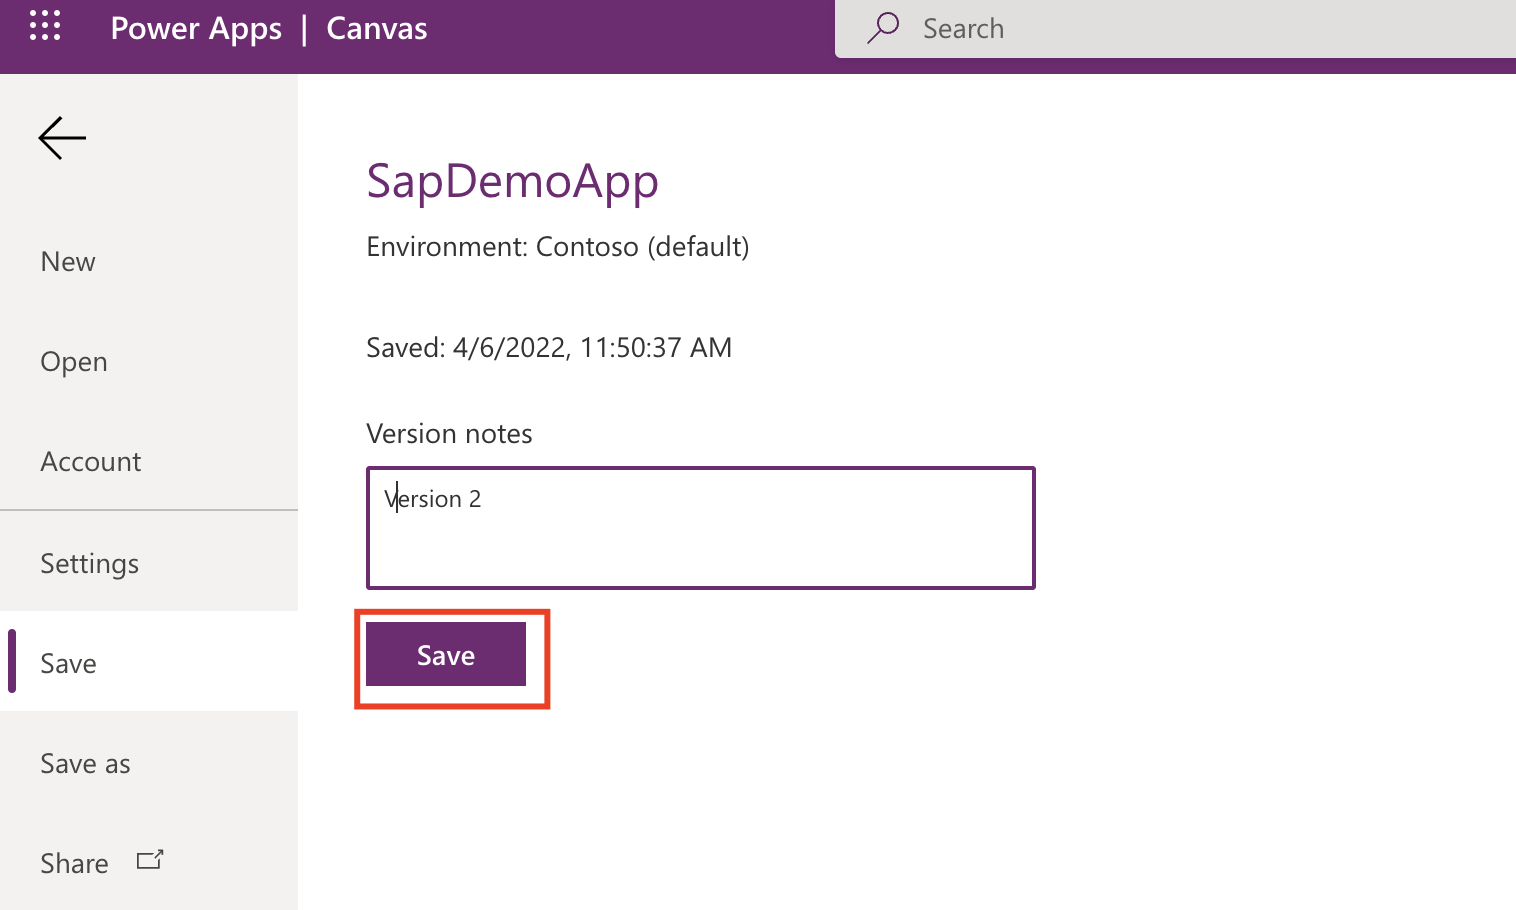
Let’s SAVE the App Click on the File menu:
Congratulations, on the next section we will publish the app to Teams.