Create a Workflow
In this step we will create the Workflow on Azure Portal.
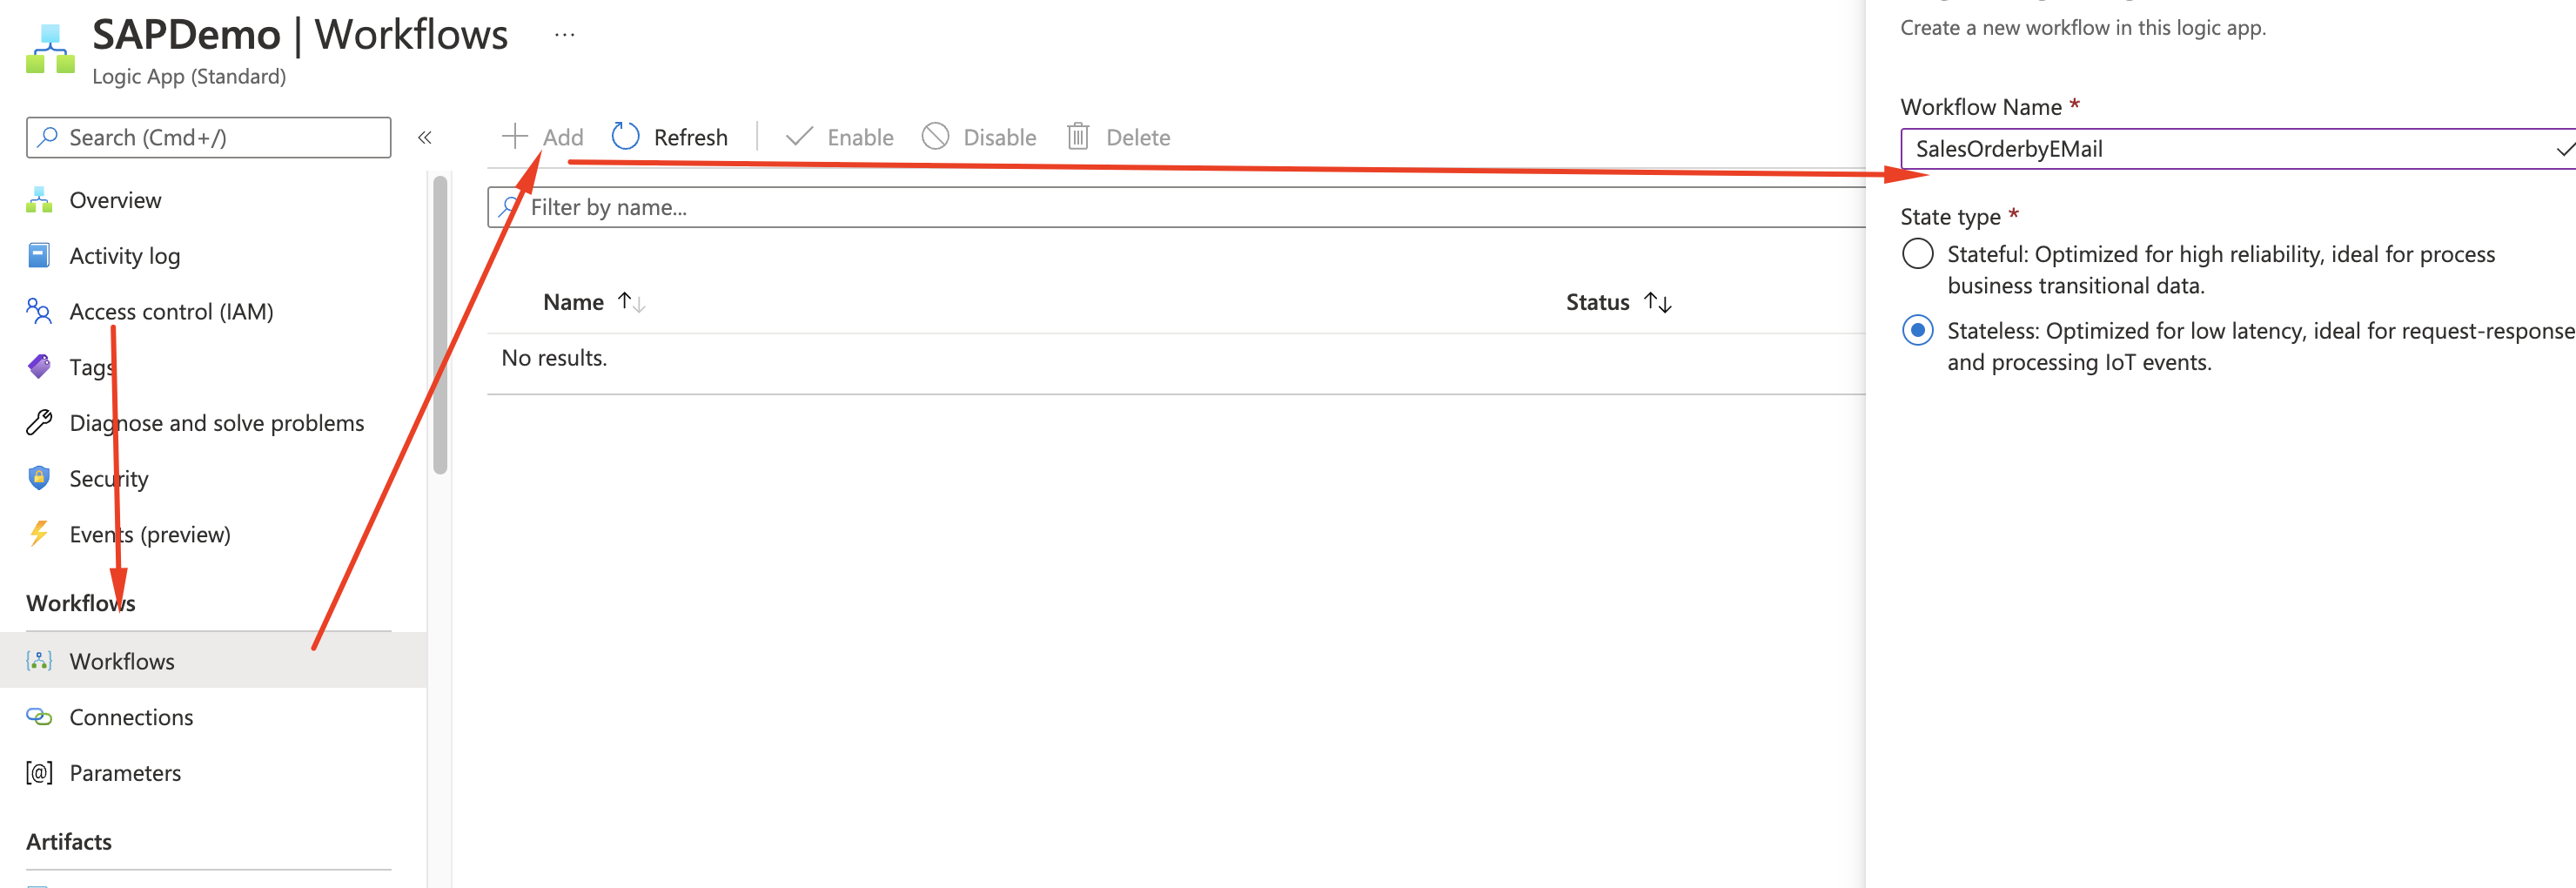
- Go to Logic Apps
- Click on your Logic App SAPDemo
- Go to Workflows and Add a new one as the parameters below:
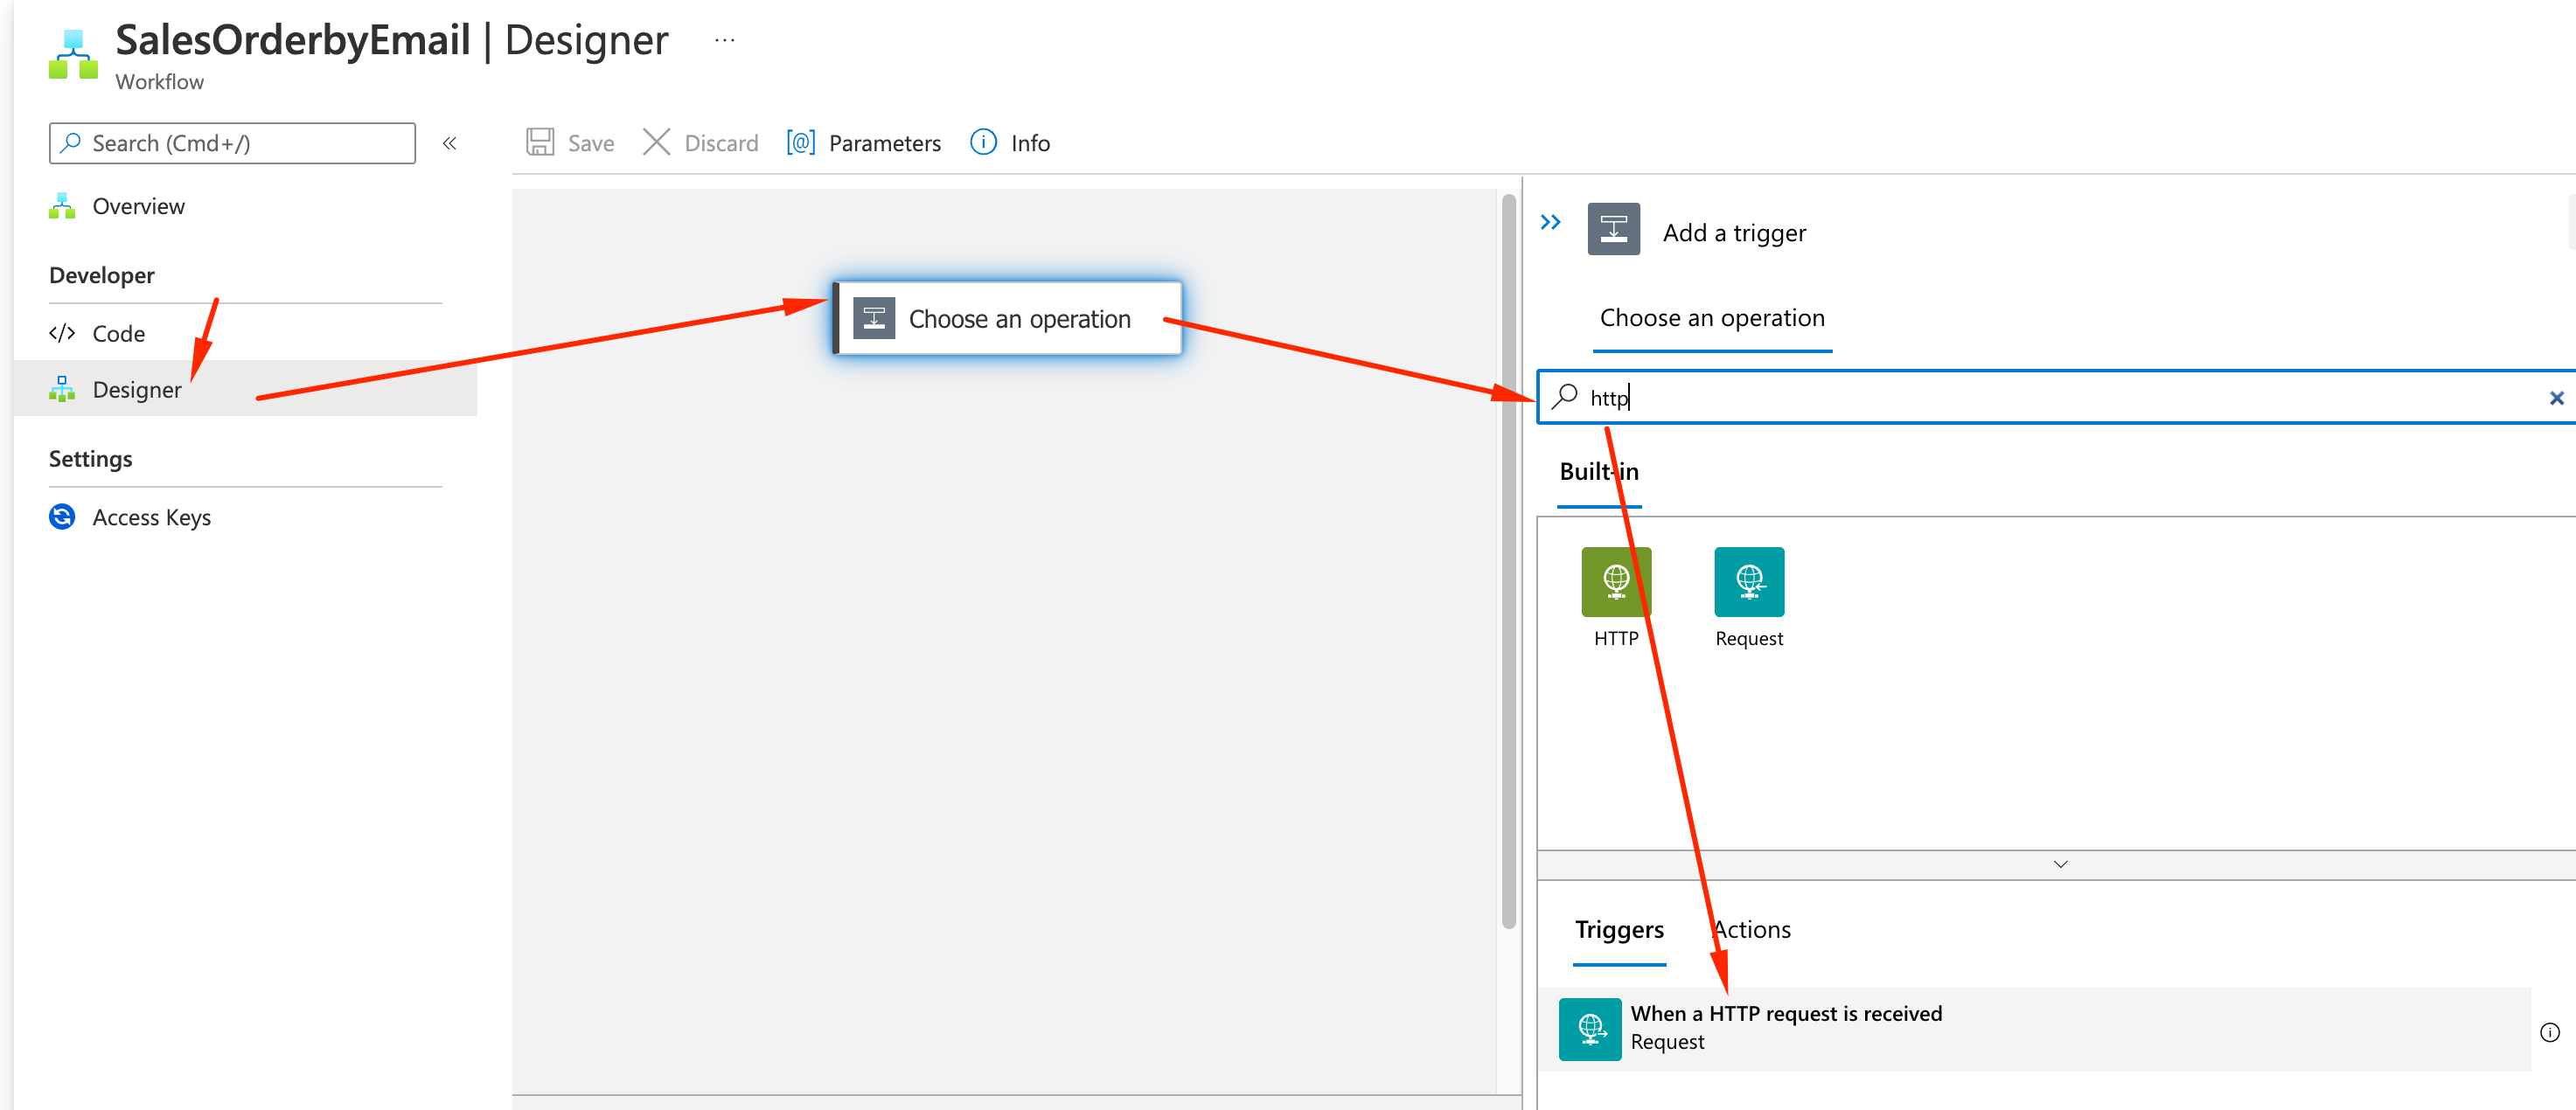
- Click on Designer and let’s start building the Workflow!
- As the first operation, which starts the flow, we will pick When a HTTP request is received
- In order to customize the payload we expect, let’s Use a sample payload to generate schema
- Sample payload:
{"id": "0000000728"}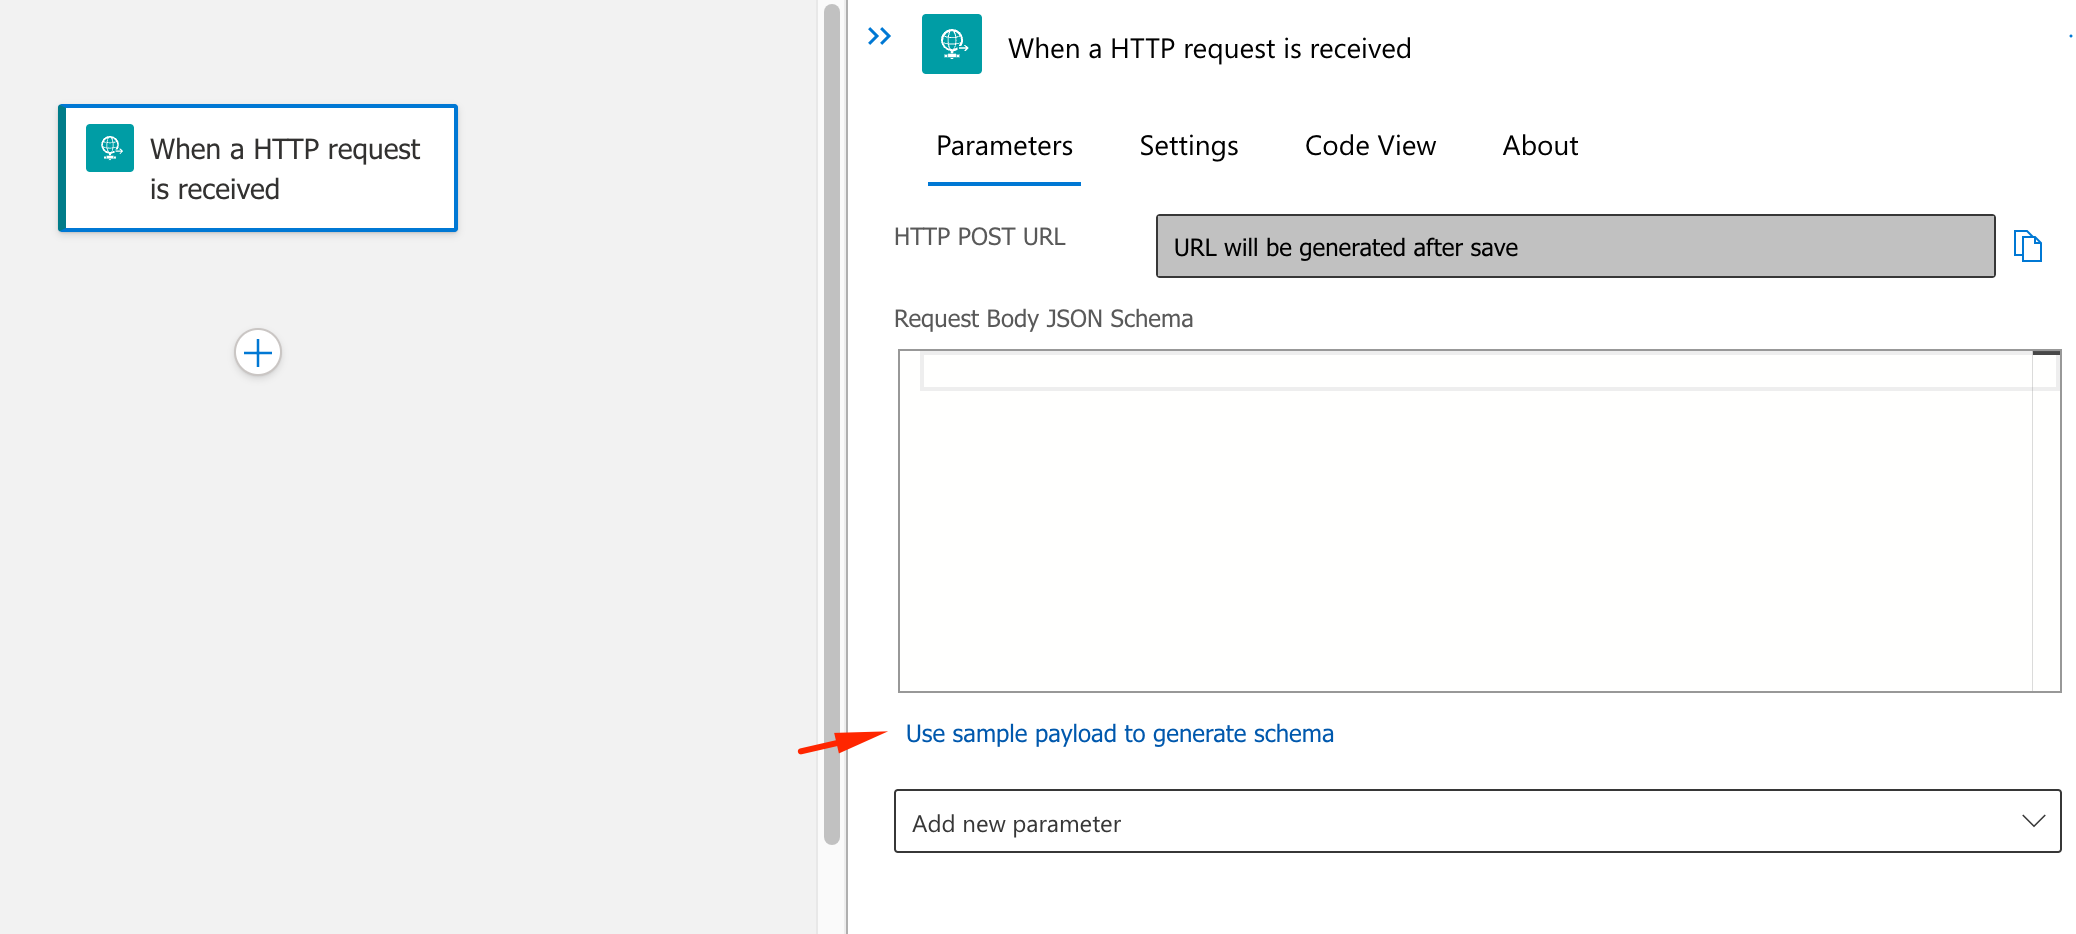
- Sample payload:
- This will generate a schema for the trigger

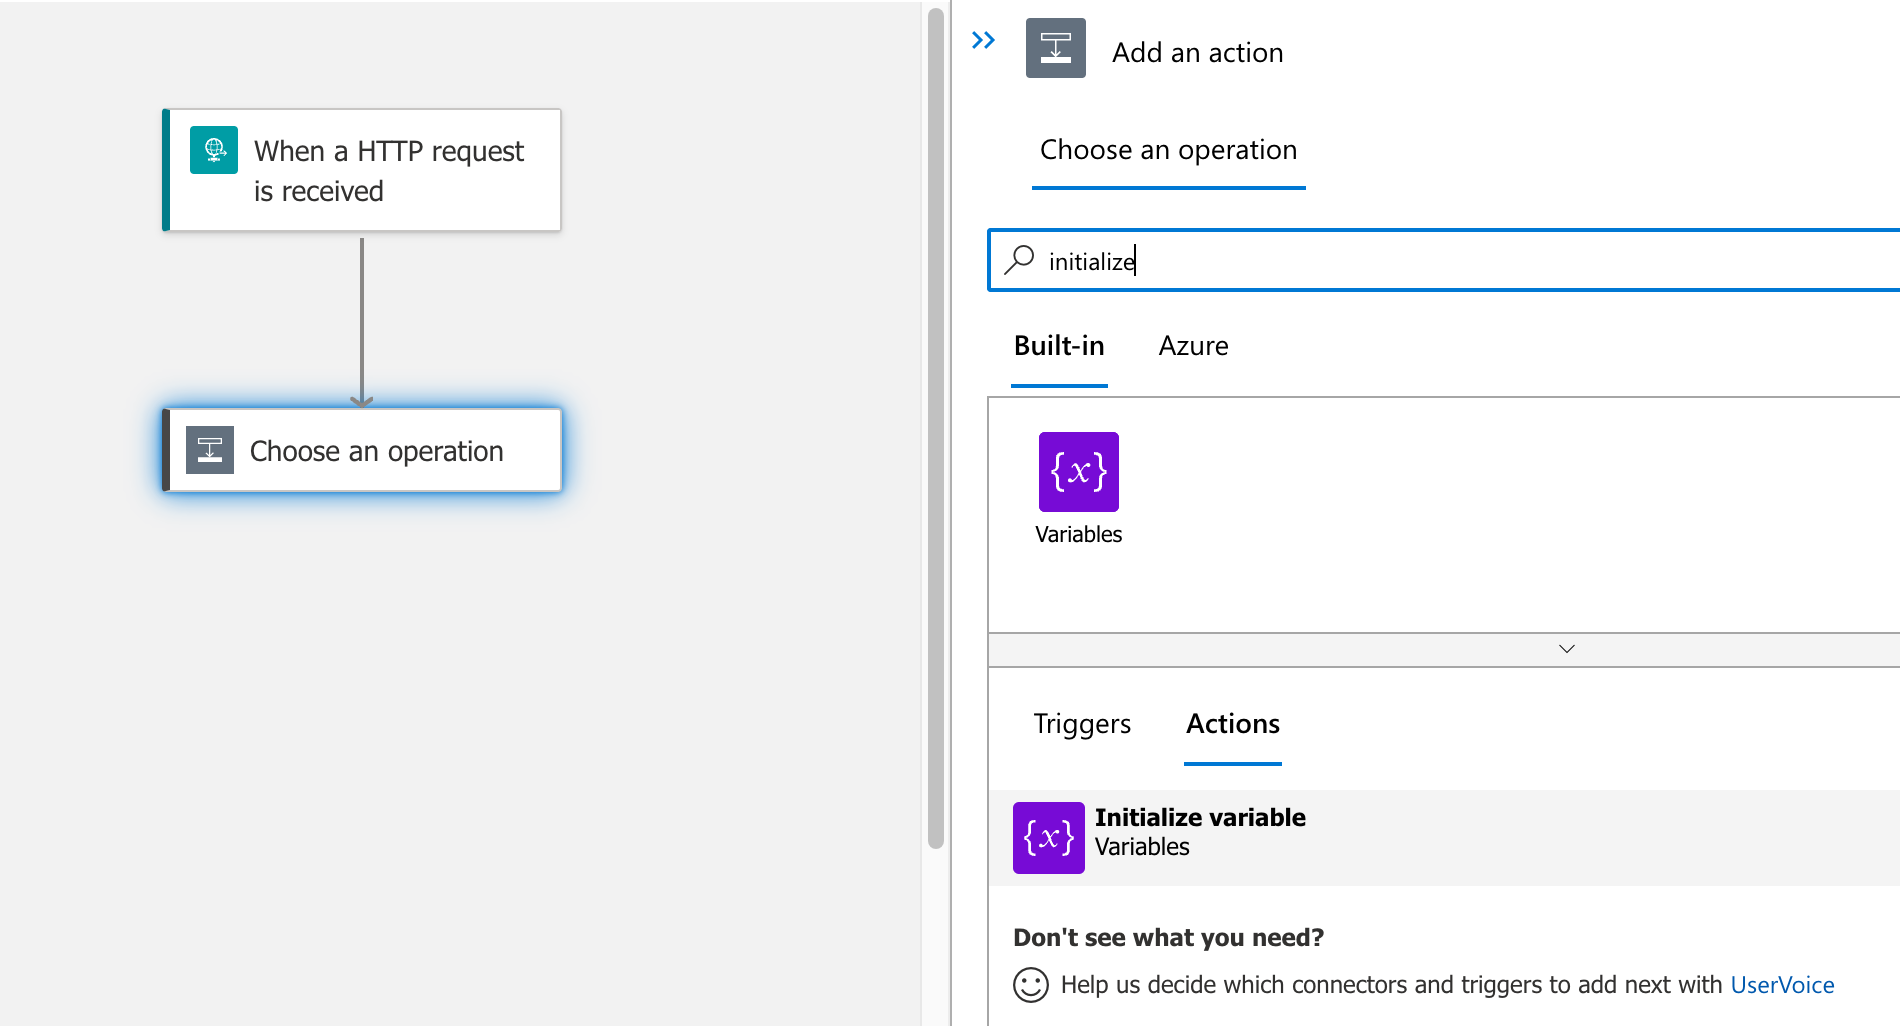
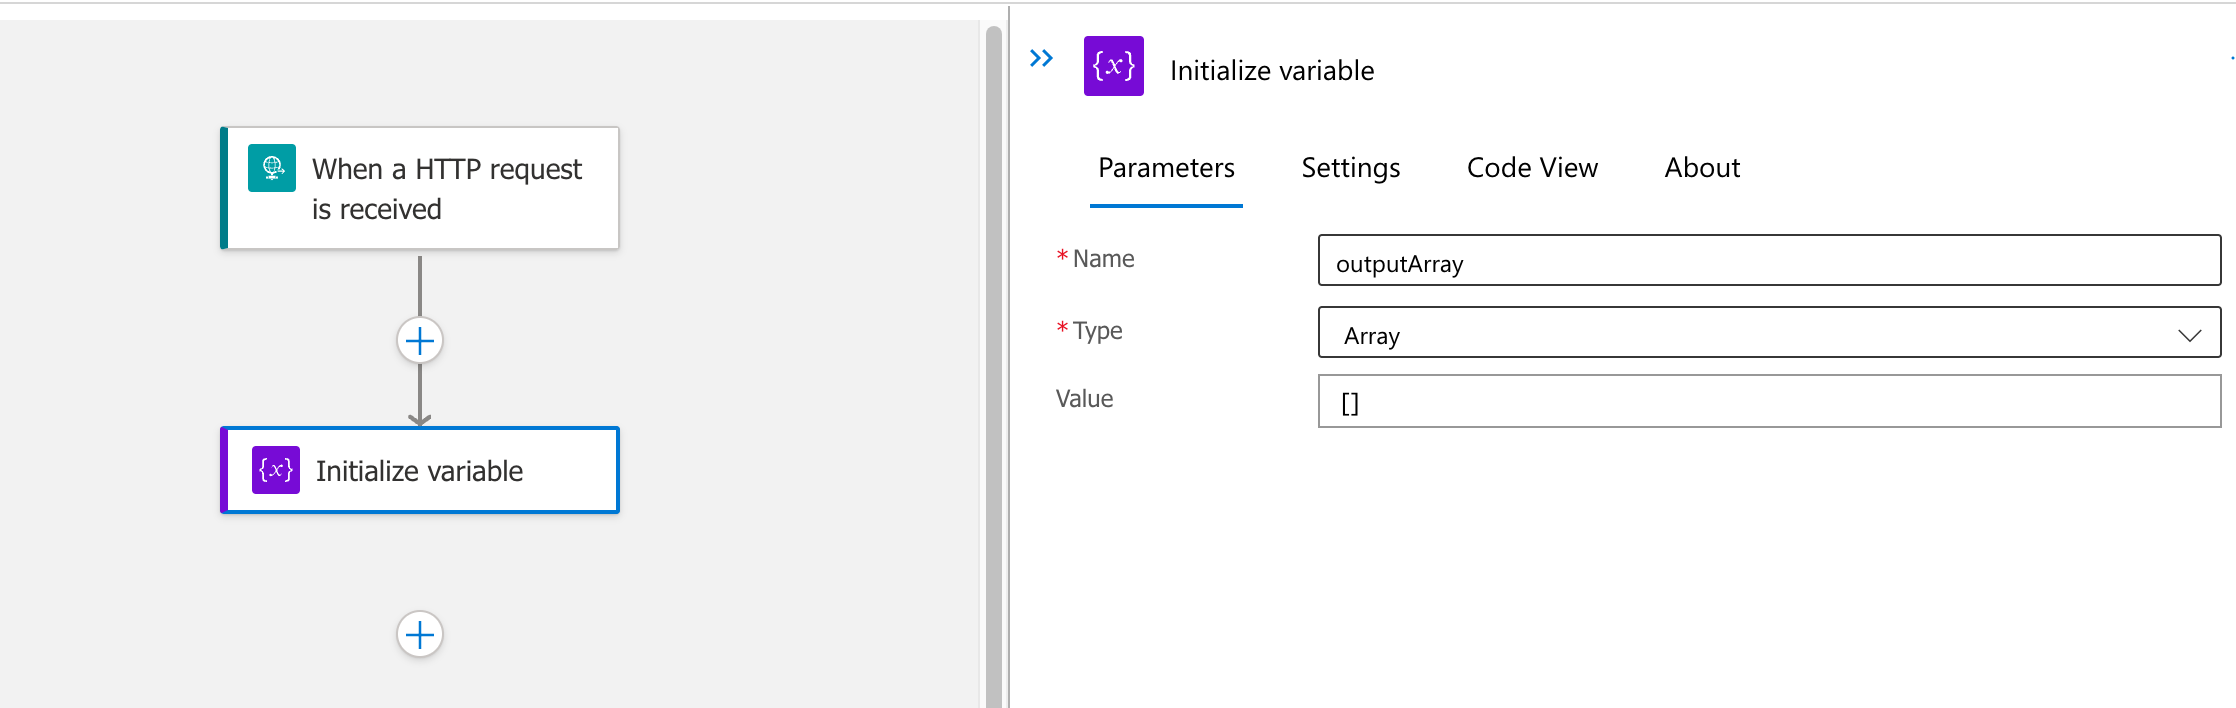
- Now we will create our temp variable to hold the desired part of the SAP reponse. Add a new action and type “initialize” on the search box. Select Initialize Variables
- In this step, we will create na empty array to store the data:
- Name: outputArray
- Type: Array
- Value: []
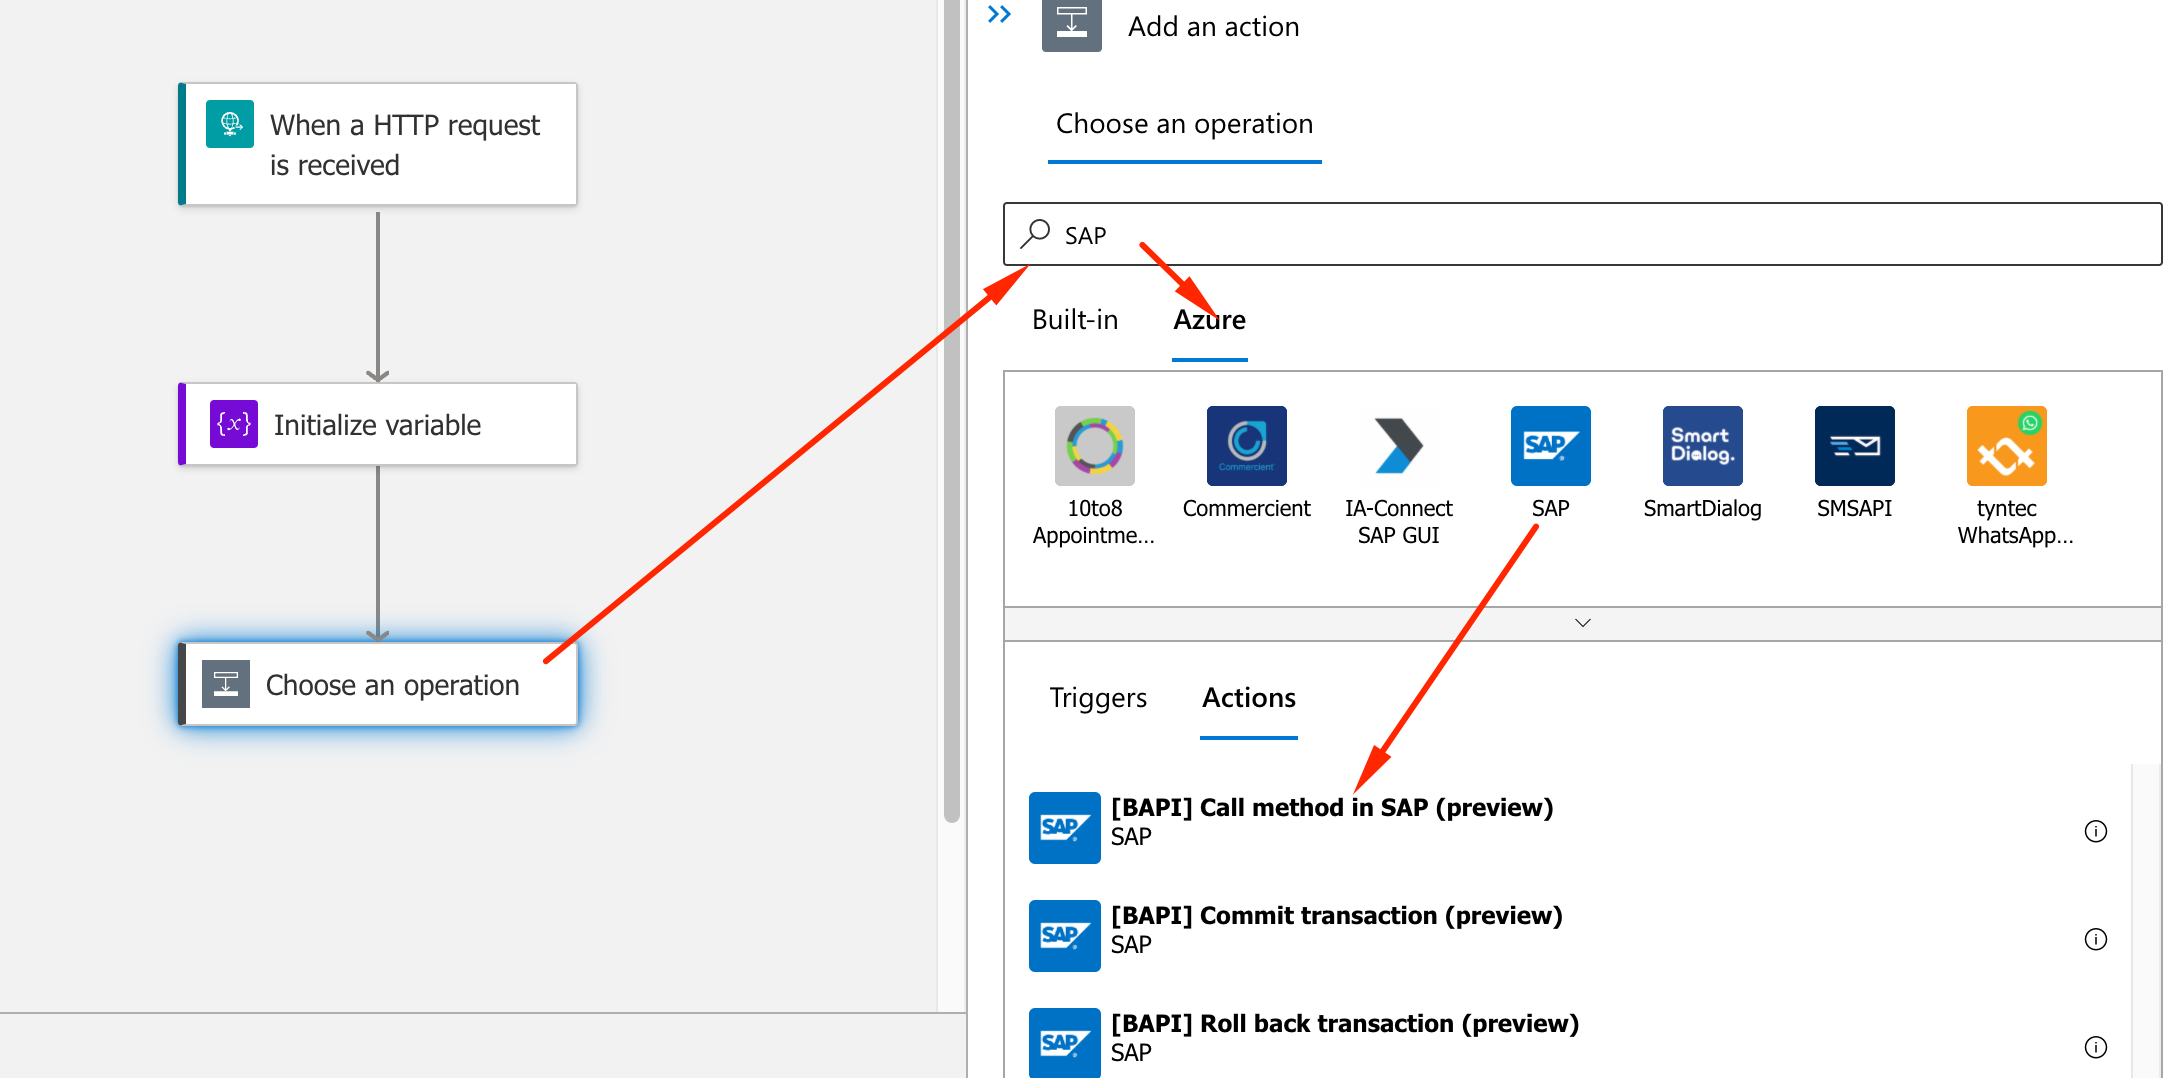
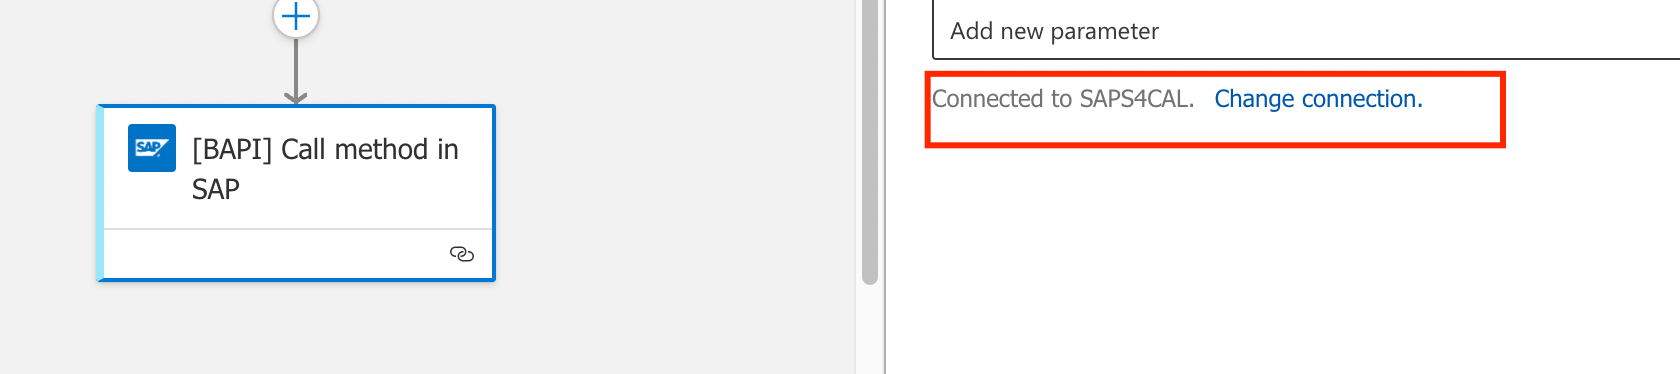
- Next we will invoke BAPI method in SAP by adding a new Action (make sure you select Azure ) called [BAPI] Call method in SAP
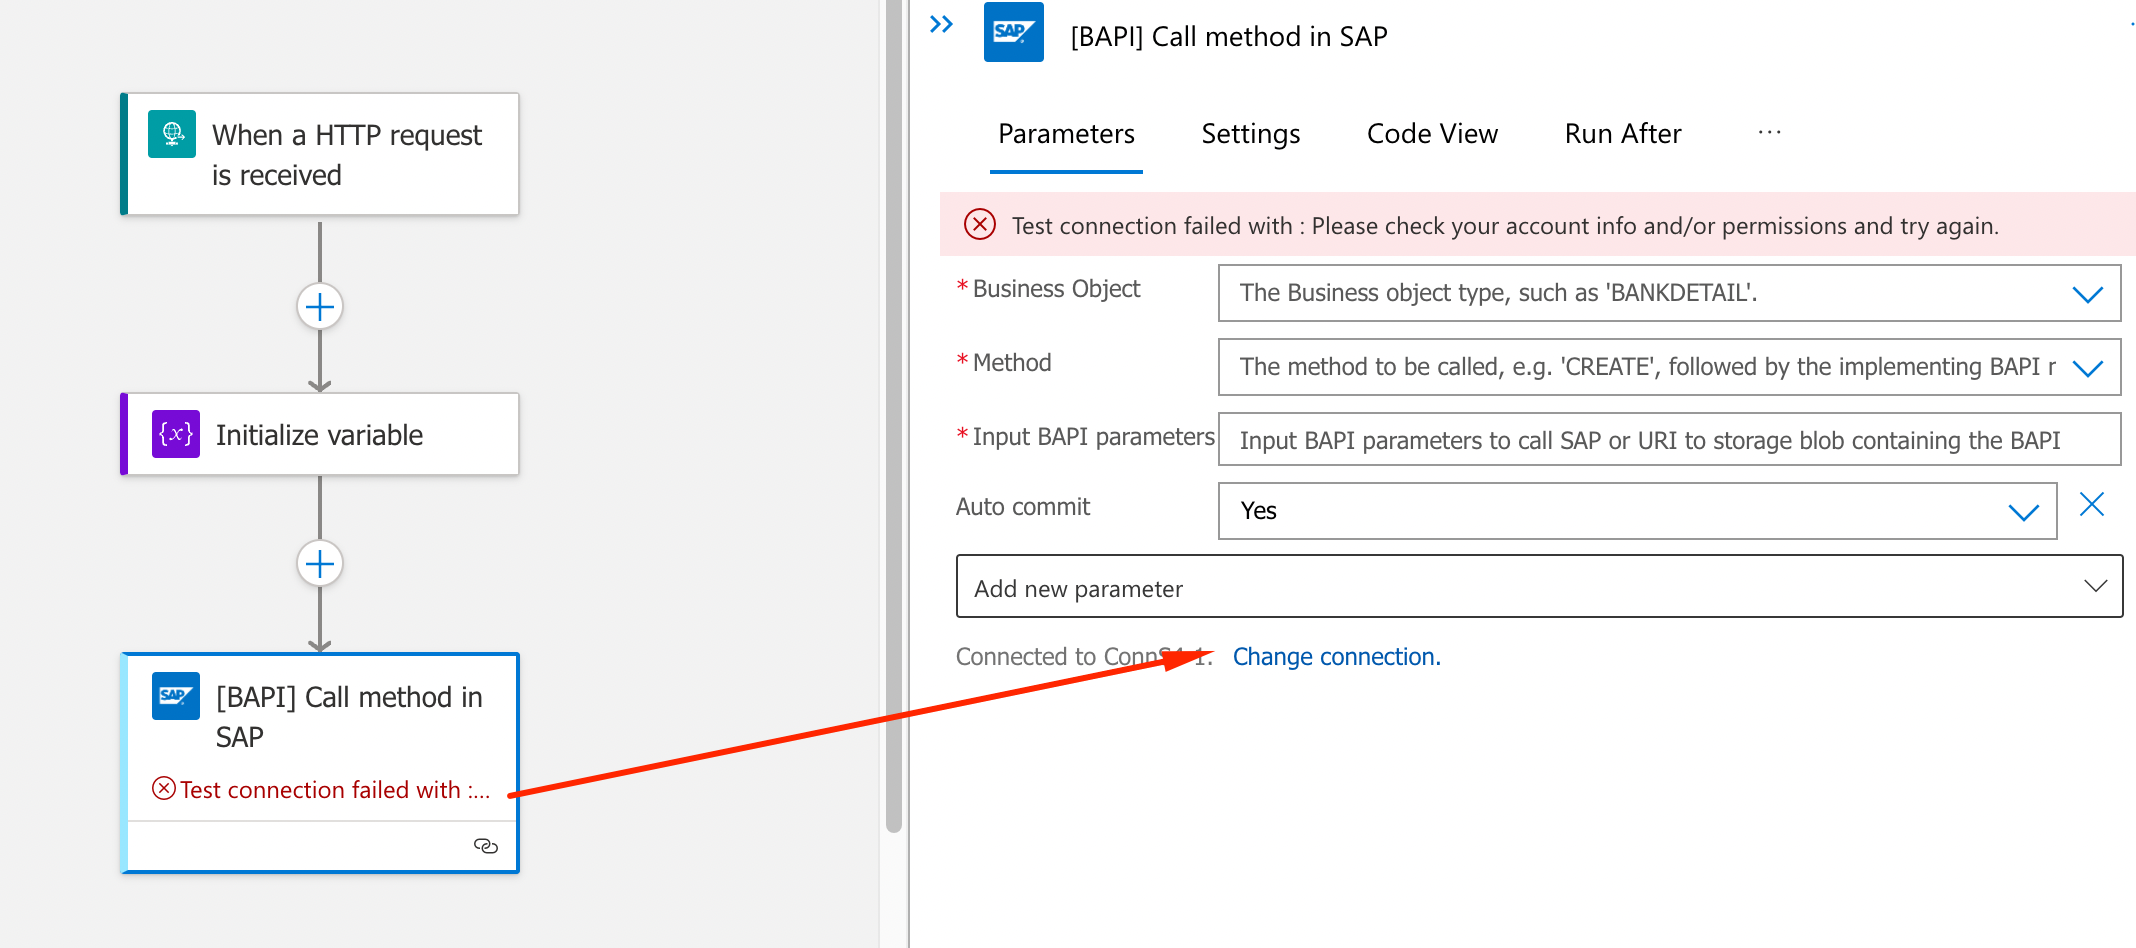
- Now we need to link this BAPI call with the On-premises Data Gateway we installed on Bastion Host. Click on Change connection
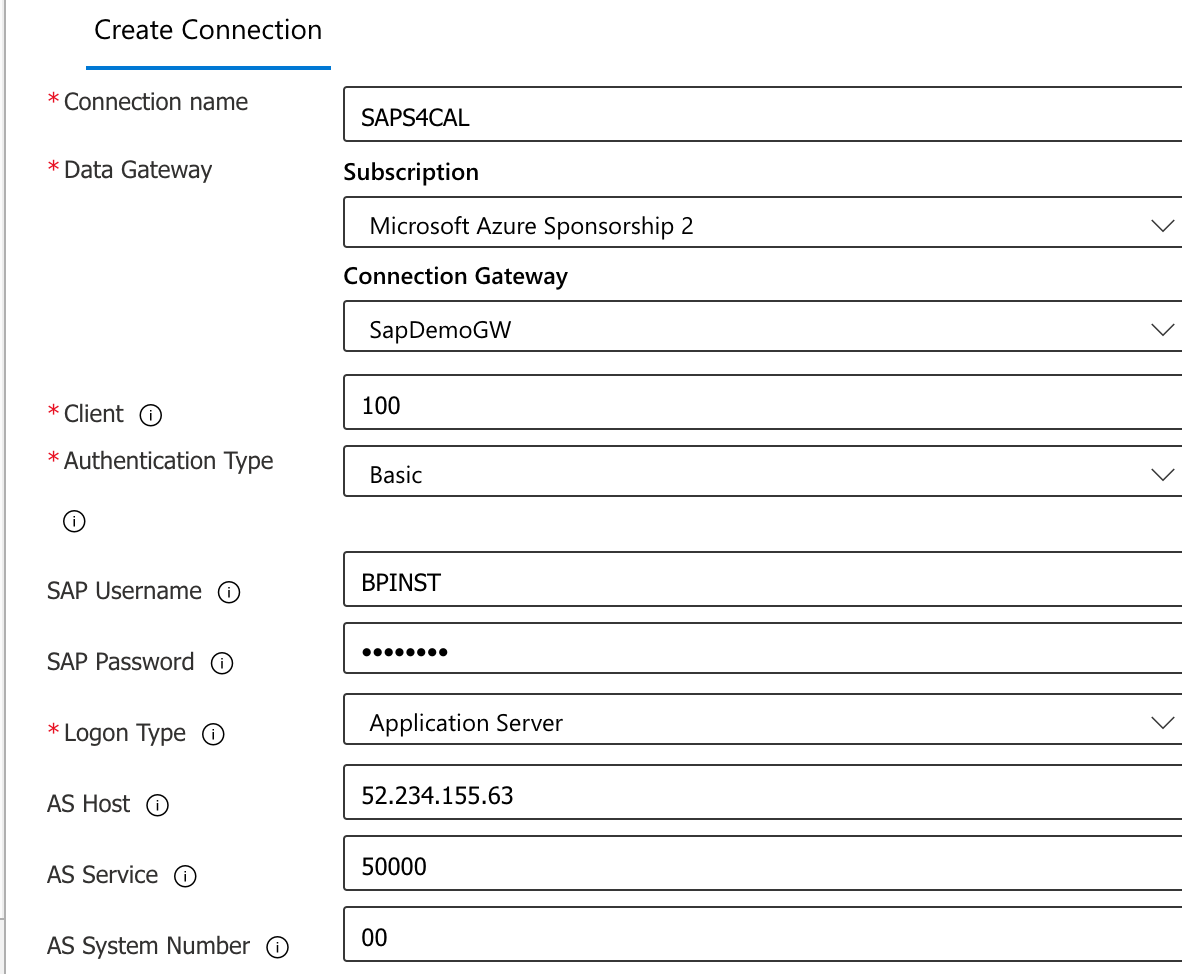
- An now we provide the connection information required so Logic Apps can communicate with SAP:
- Connection Name: SAPS4CAL
- DataGateway: Select your Gateway, in this case SapDemoGW
- Client: 100
- Auth: Basic
- User: BPINST
- Password: Welcome1
- AS HOST: Public IP of your SAP HANA on SAP CAL (this IP will change if you shutdown SAP. You will have to follow the same procedure to manually update upon activation or resort to dynamic DNS)
- AS SERVICE: 50000
- AS SYSTEM NUMBER: 00
- Accept other defaults and click Create
- Logic App will test the connection and you should see the Connected status
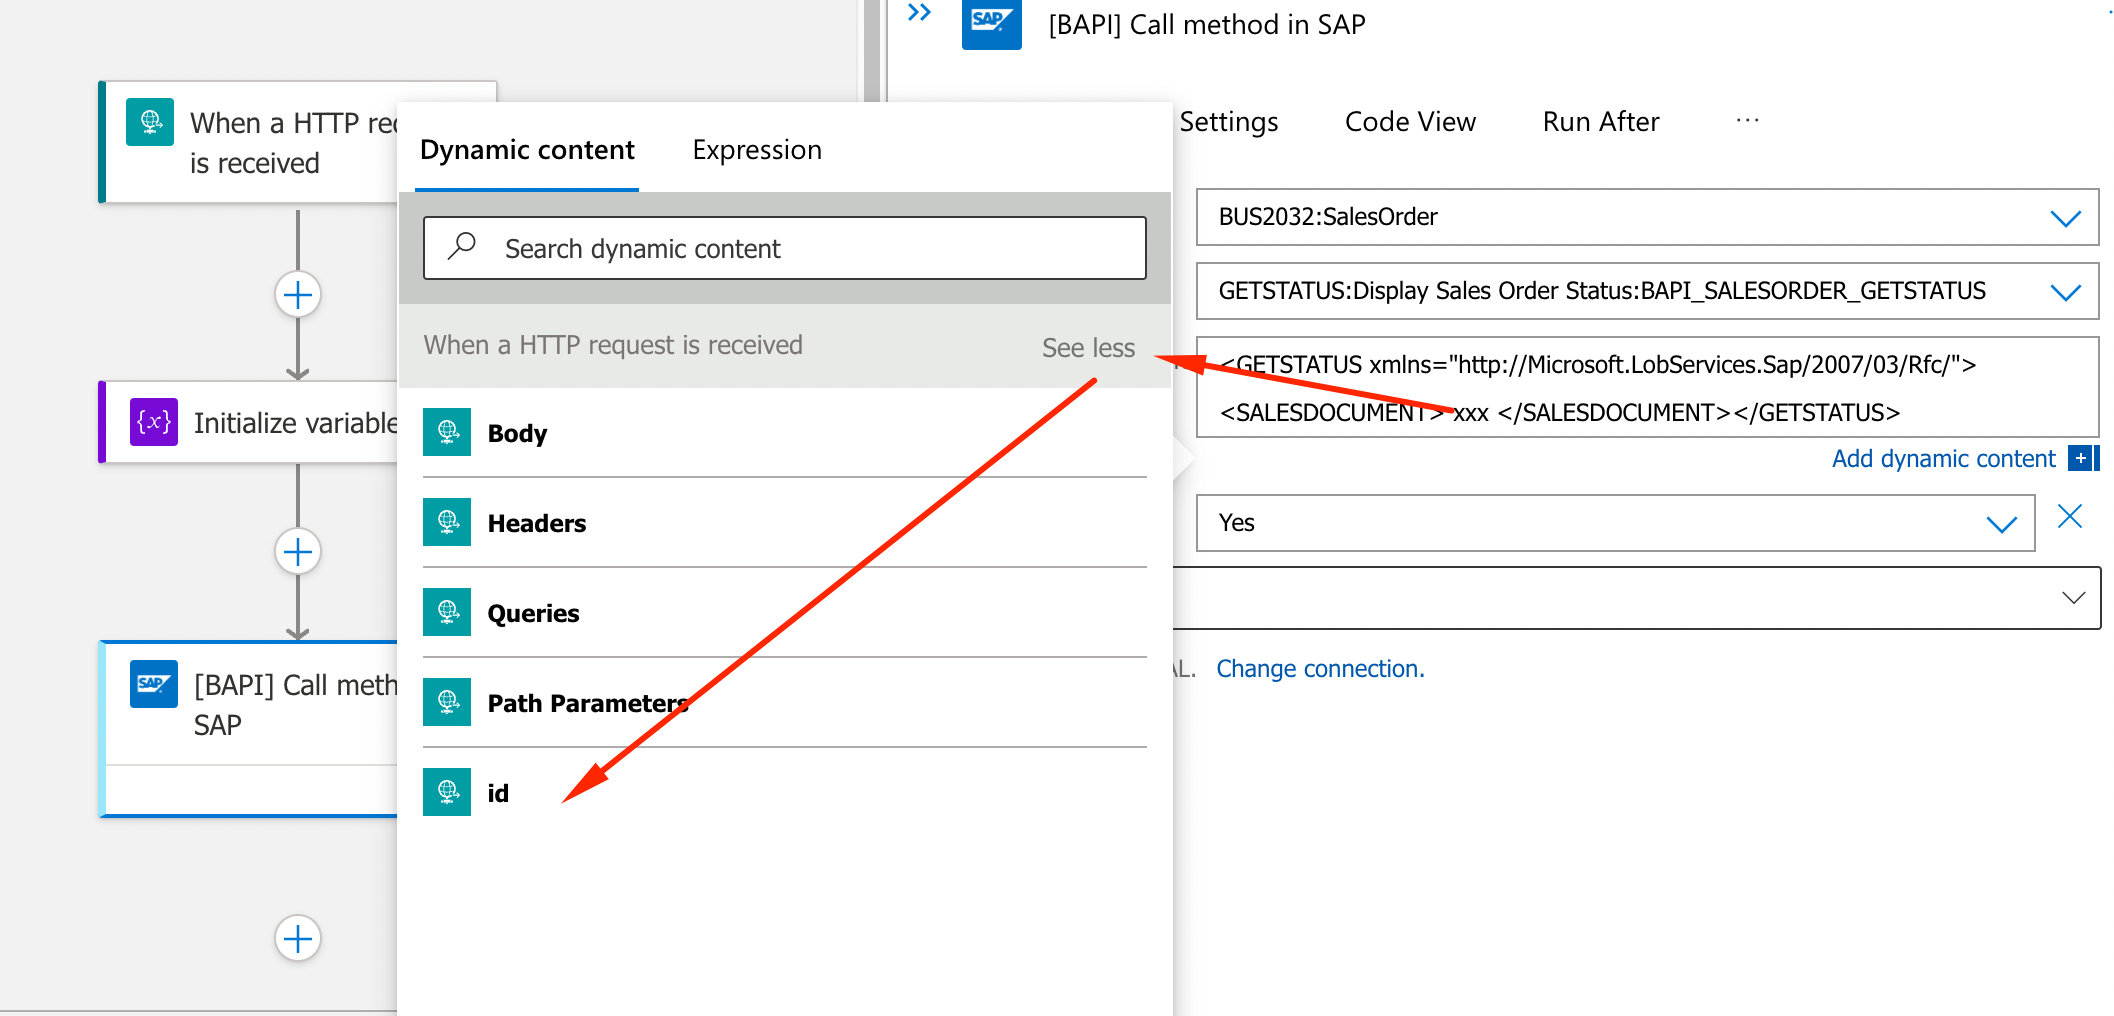
- Now let’s setup the BAPI method to be invoked
- Business Object: BUS2032:SalesOrder
- Method: GETSTATUS:Display Sales Order:BAPI_SALESORDER_GETSTATUS
- Input:
<GETSTATUS xmlns="http://Microsoft.LobServices.Sap/2007/03/Rfc/"><SALESDOCUMENT>xxx</SALESDOCUMENT></GETSTATUS> - Replace xxx on the above Input with a Dynamic Content id extracted from the trigger on step 7. Make sure there are no spaces between SALESDOCUMENT

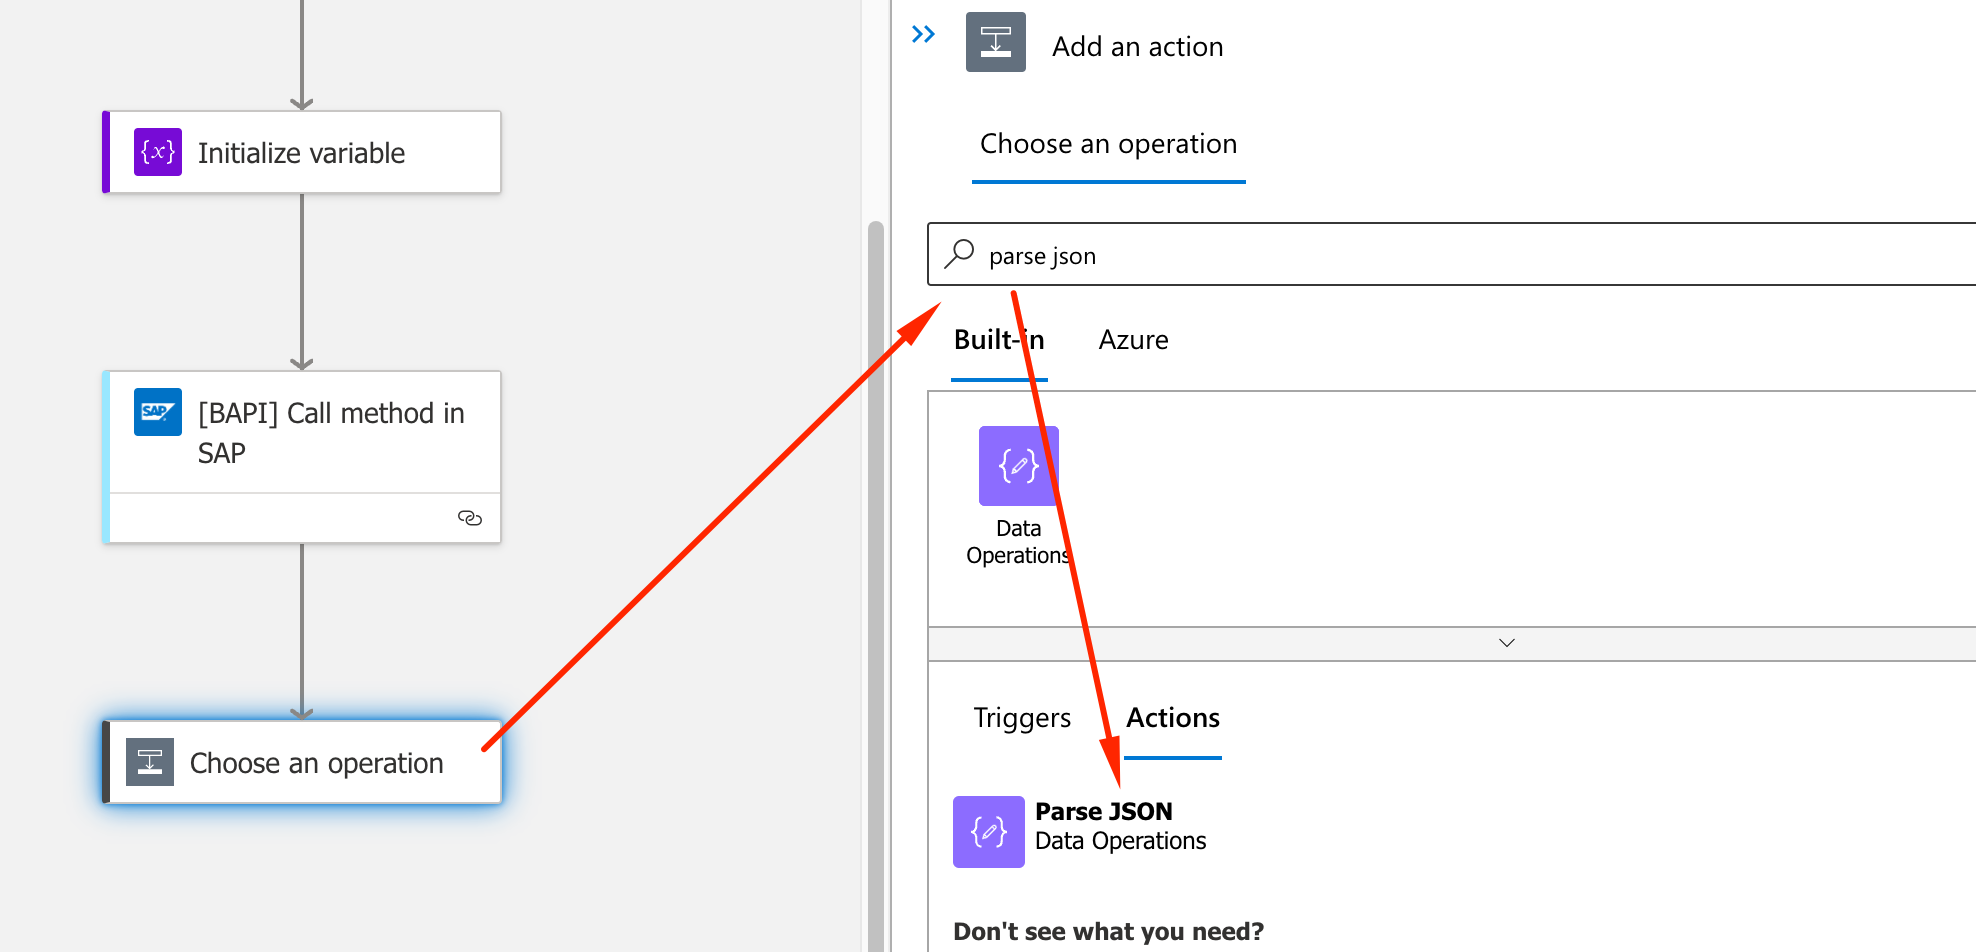
- Add a new Parse JSON action
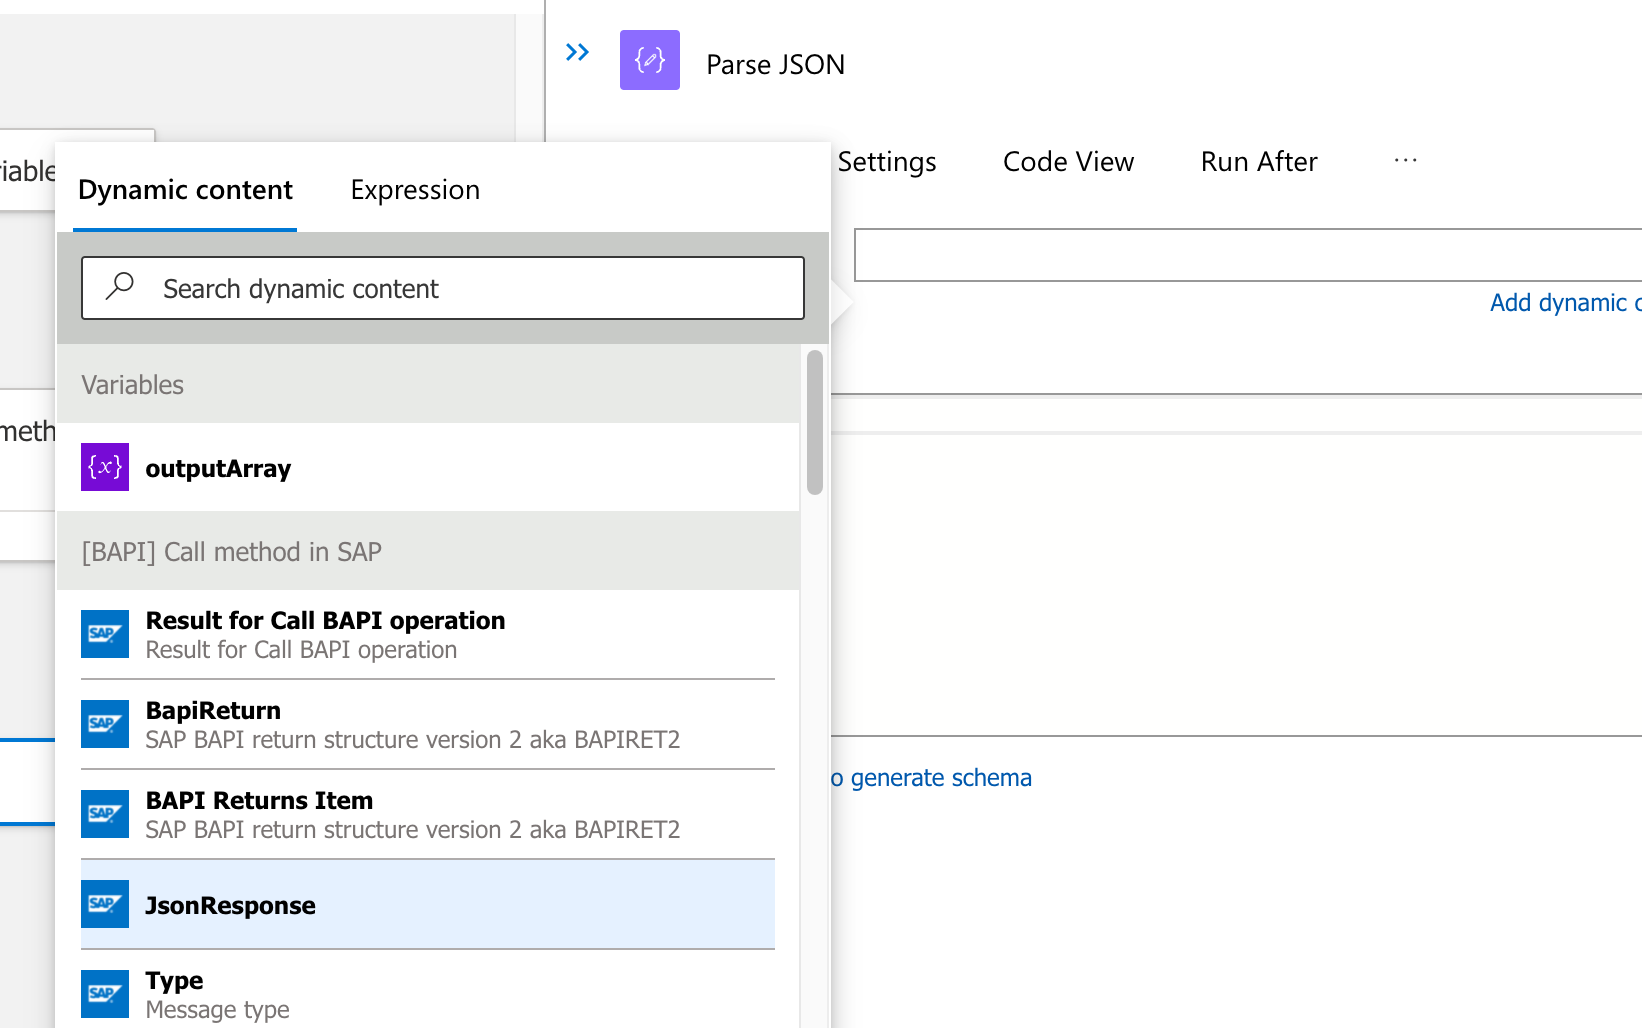
- In content use JsonResponse that will be passed by BAPI
- As we did on the initial step, select Use sample payload to generate schema and use the following JSON sample
{"STATUSINFO":[{"DOC_NUMBER":"0000000728","DOC_DATE":"2018-11-06","PURCH_NO":"xcwer","PRC_STAT_H":"C","DLV_STAT_H":"C","REQ_DATE_H":"2018-11-06","DLV_BLOCK":"","ITM_NUMBER":"000010","MATERIAL":"CM-FL-V01","SHORT_TEXT":"Forklift","REQ_DATE":"2018-11-21","REQ_QTY":1.0,"CUM_CF_QTY":1.0,"SALES_UNIT":"ST","NET_VALUE":8000.0,"CURRENCY":"USD","NET_PRICE":8000.0,"COND_P_UNT":1.0,"COND_UNIT":"ST","DLV_STAT_I":"C","DELIV_NUMB":"","DELIV_ITEM":"000000","DELIV_DATE":"","DLV_QTY":0.0,"REF_QTY":0.0,"S_UNIT_ISO":"PCE","CD_UNT_ISO":"PCE","CURR_ISO":"USD","MATERIAL_EXTERNAL":"","MATERIAL_GUID":"","MATERIAL_VERSION":"","PO_ITM_NO":"","CREATION_DATE":"","CREATION_TIME":"00:00:00","S_UNIT_DLV":"","DLV_UNIT_ISO":"","REA_FOR_RE":"70","PURCH_NO_C":"xcwer","MATERIAL_LONG":"CM-FL-V01"},{"DOC_NUMBER":"0000000728","DOC_DATE":"2018-11-06","PURCH_NO":"xcwer","PRC_STAT_H":"C","DLV_STAT_H":"C","REQ_DATE_H":"2018-11-06","DLV_BLOCK":"","ITM_NUMBER":"000020","MATERIAL":"CM-FL-V00","SHORT_TEXT":"Forklift","REQ_DATE":"2018-11-06","REQ_QTY":7.0,"CUM_CF_QTY":0.0,"SALES_UNIT":"ST","NET_VALUE":58800.0,"CURRENCY":"USD","NET_PRICE":8400.0,"COND_P_UNT":1.0,"COND_UNIT":"ST","DLV_STAT_I":"C","DELIV_NUMB":"","DELIV_ITEM":"000000","DELIV_DATE":"","DLV_QTY":0.0,"REF_QTY":0.0,"S_UNIT_ISO":"PCE","CD_UNT_ISO":"PCE","CURR_ISO":"USD","MATERIAL_EXTERNAL":"","MATERIAL_GUID":"","MATERIAL_VERSION":"","PO_ITM_NO":"","CREATION_DATE":"","CREATION_TIME":"00:00:00","S_UNIT_DLV":"","DLV_UNIT_ISO":"","REA_FOR_RE":"70","PURCH_NO_C":"xcwer","MATERIAL_LONG":"CM-FL-V00"}]}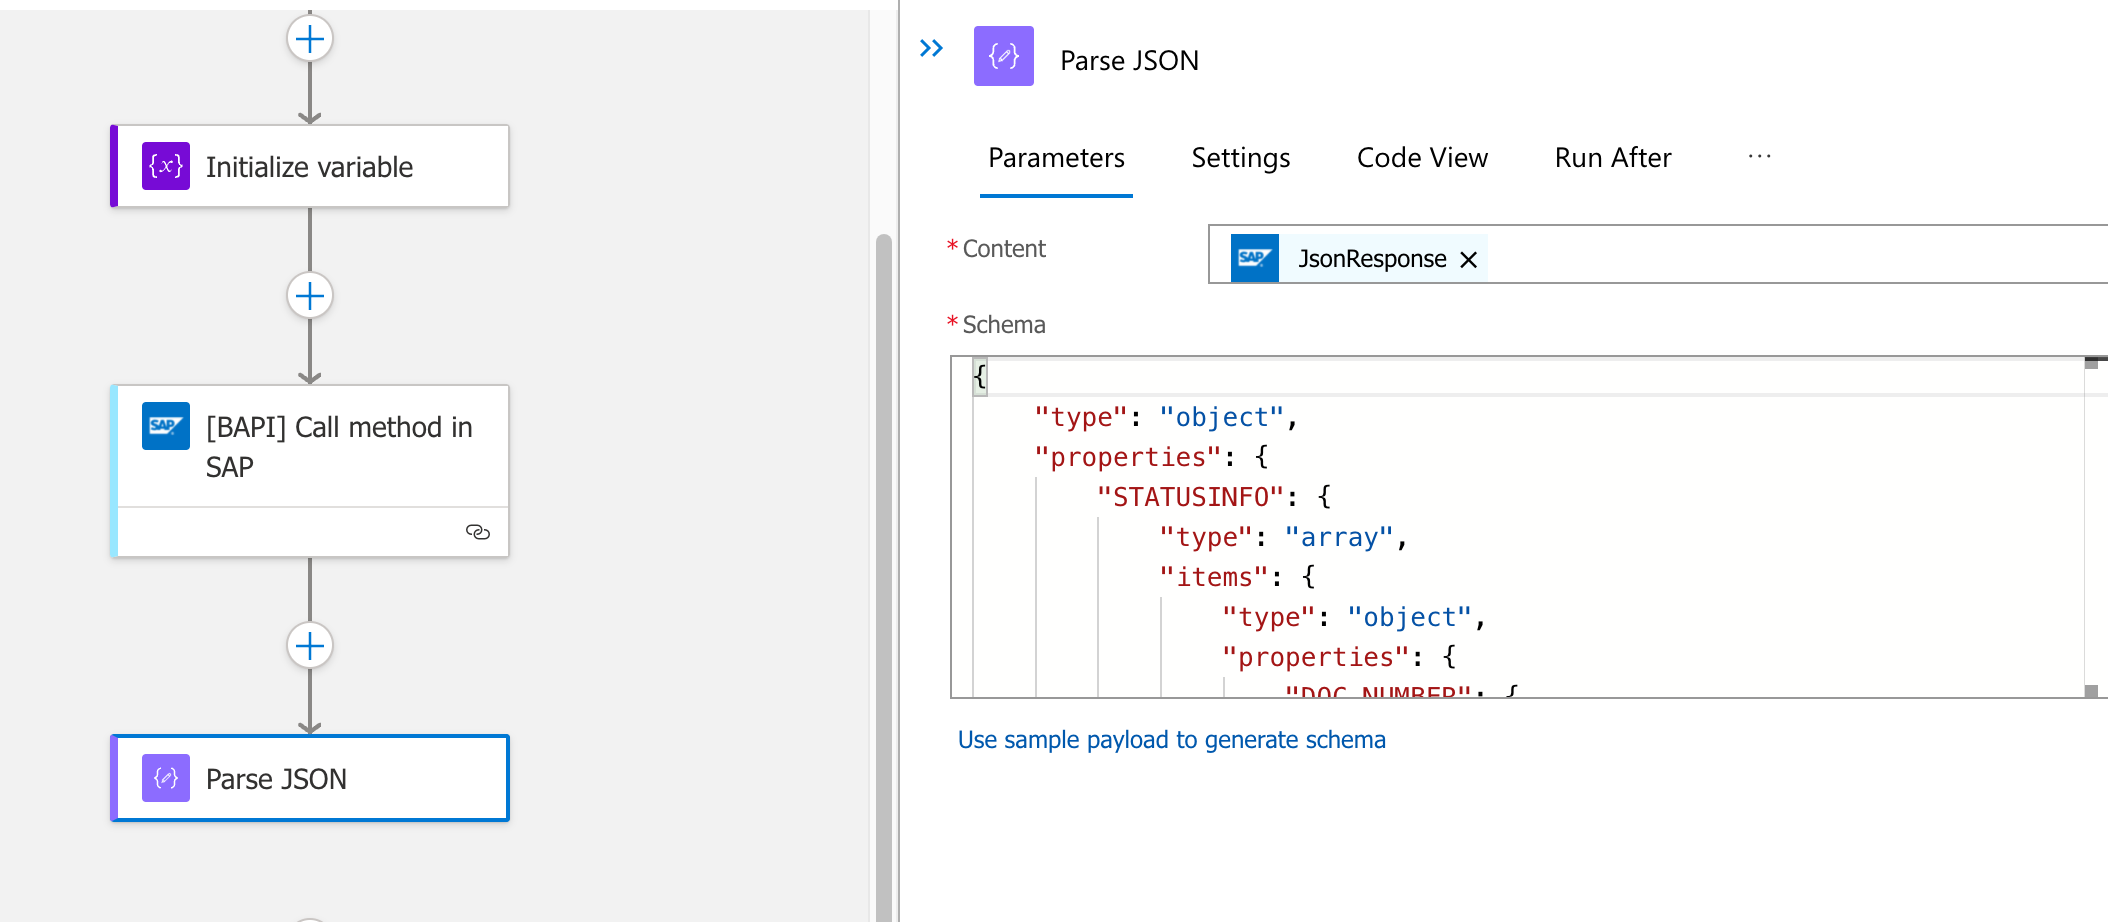
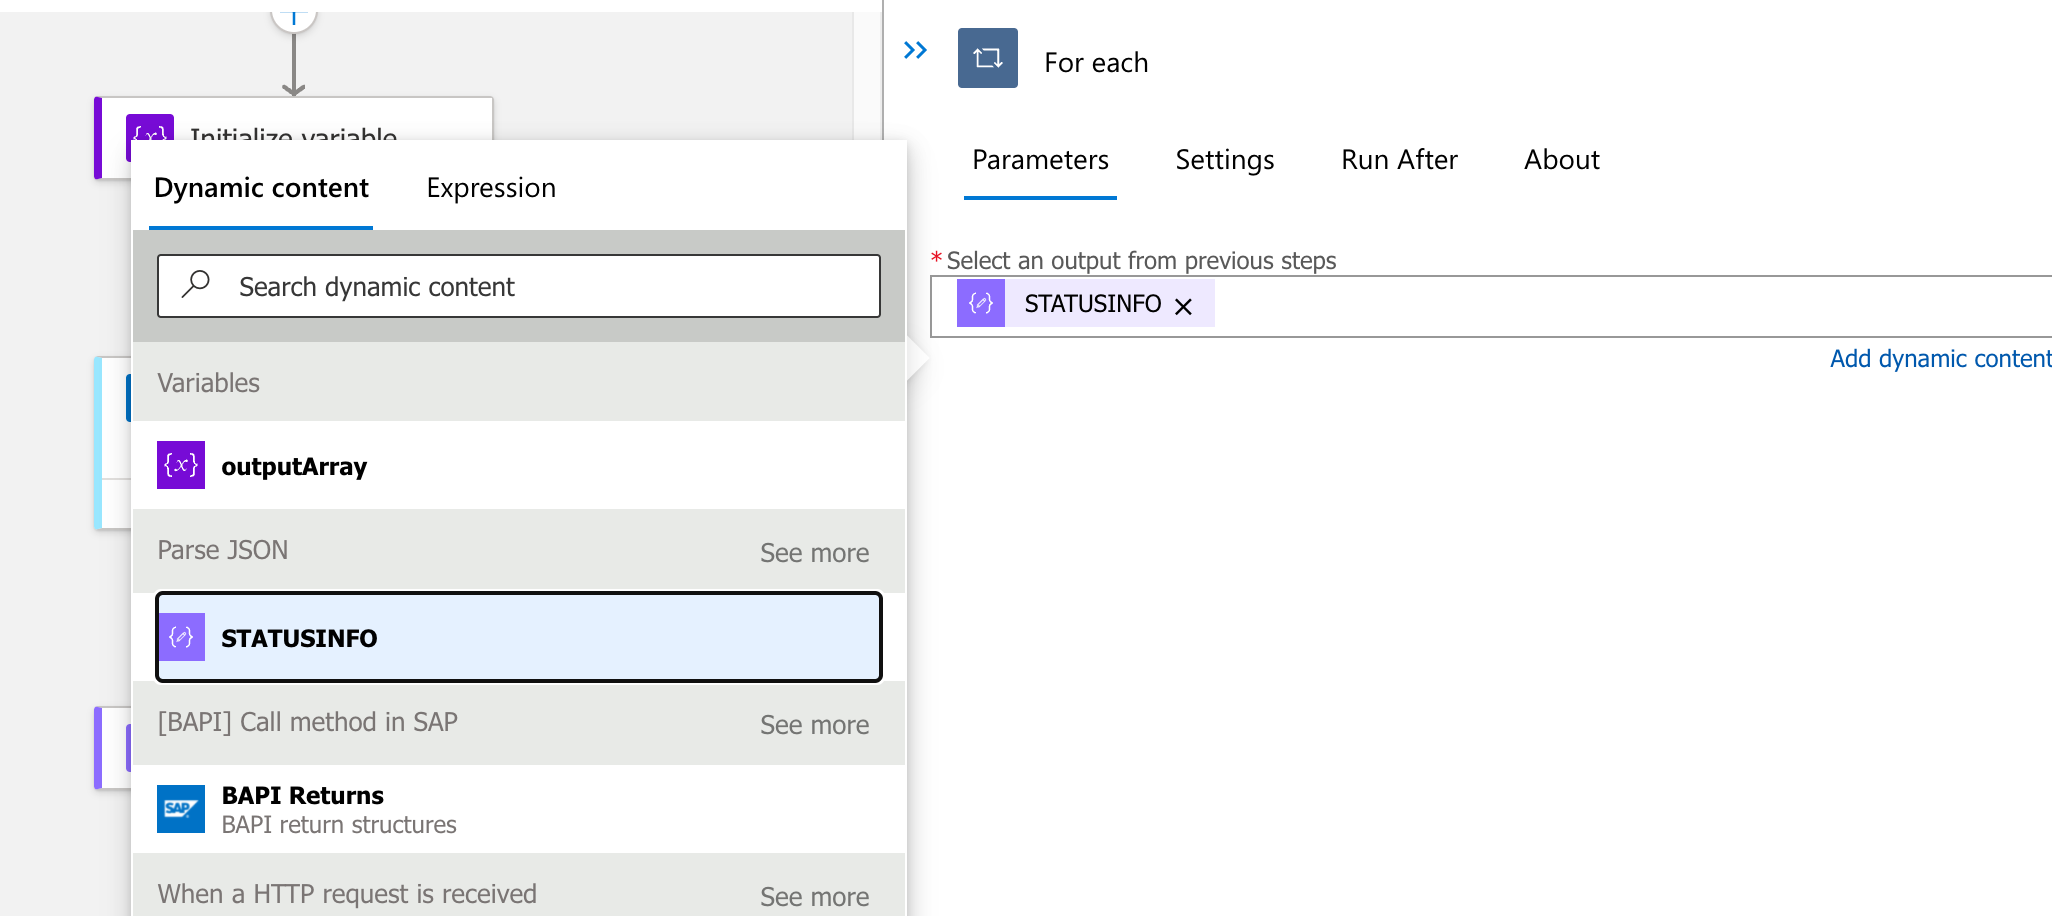
- SAP Sales Order can have multiple Line Items, so we have to iterate in them. Add na For Each action and as parameter, STATUSINFO from Parse JSON previous action.
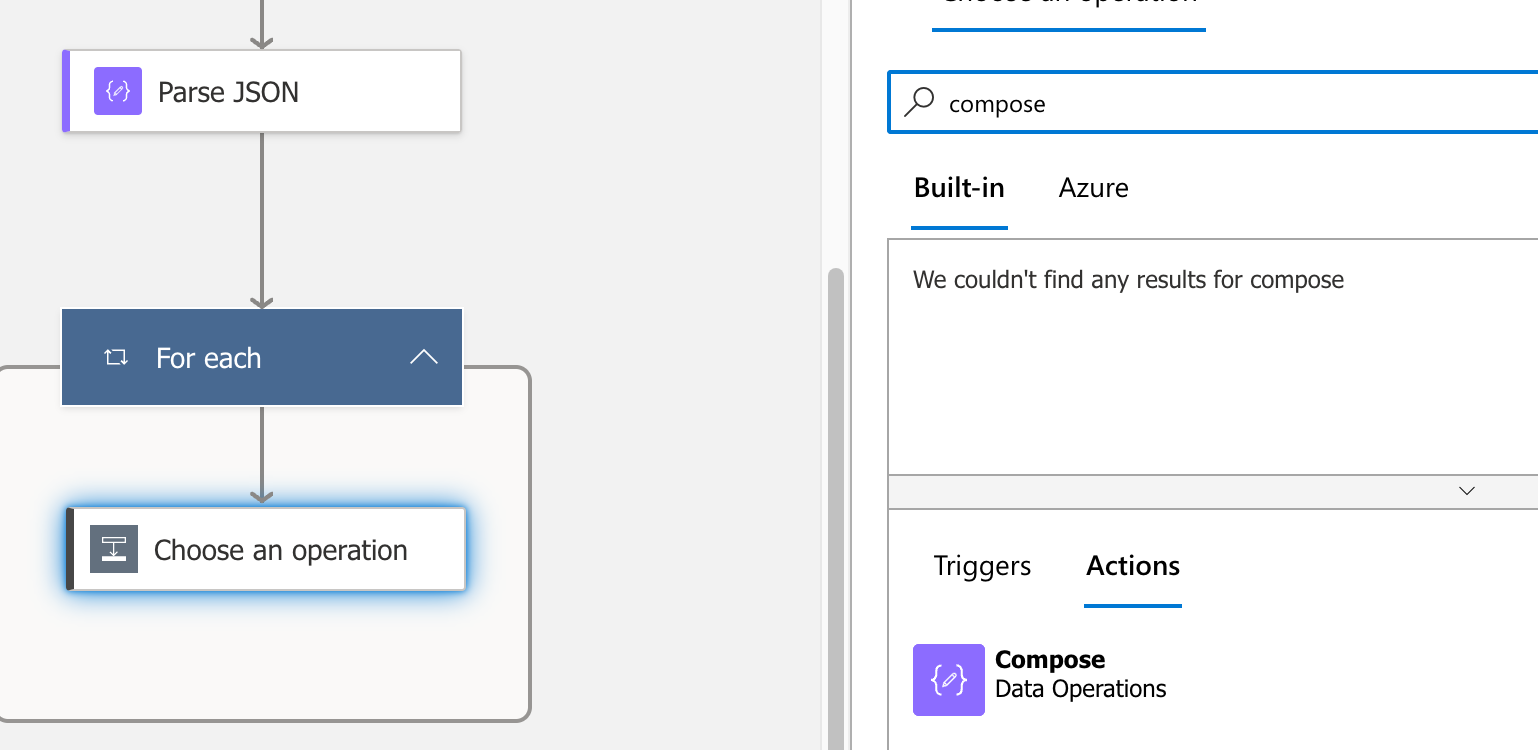
- Inside the For Each loop add a Compose action. It will allow for us to pick desired fields for each line and build a JSON that suits our needs.
- Build the desired JSON using the sample JSON below and replacing fields enclosed by
<>using Dynamic Inputs as inputs (make sure you keep the commas){ "Order": <DOC_NUMBER>, "Date": <DOC_DATE>, "Item": <MATERIAL>, "Description": <SHORT_TEXT>, "Quantity": <REQ_QTY>, "Price": <NET_PRICE> }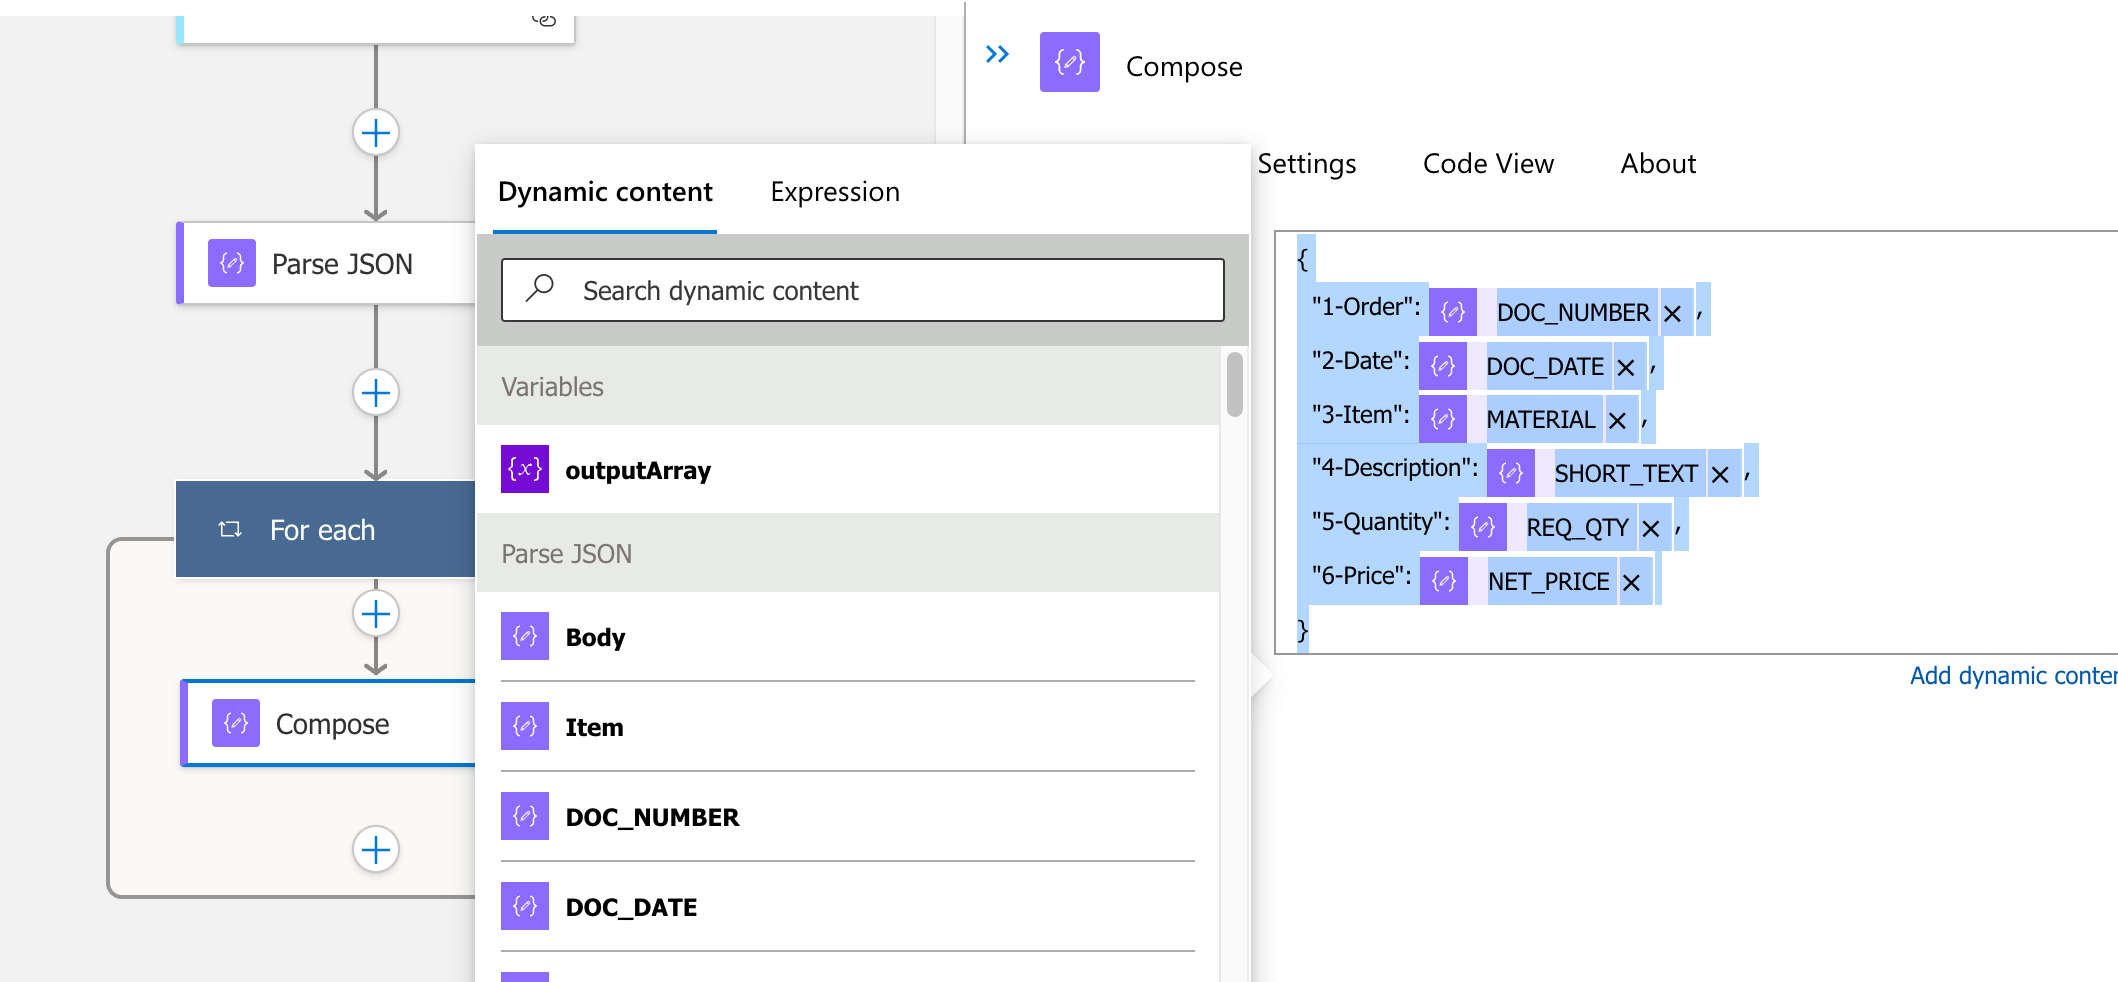
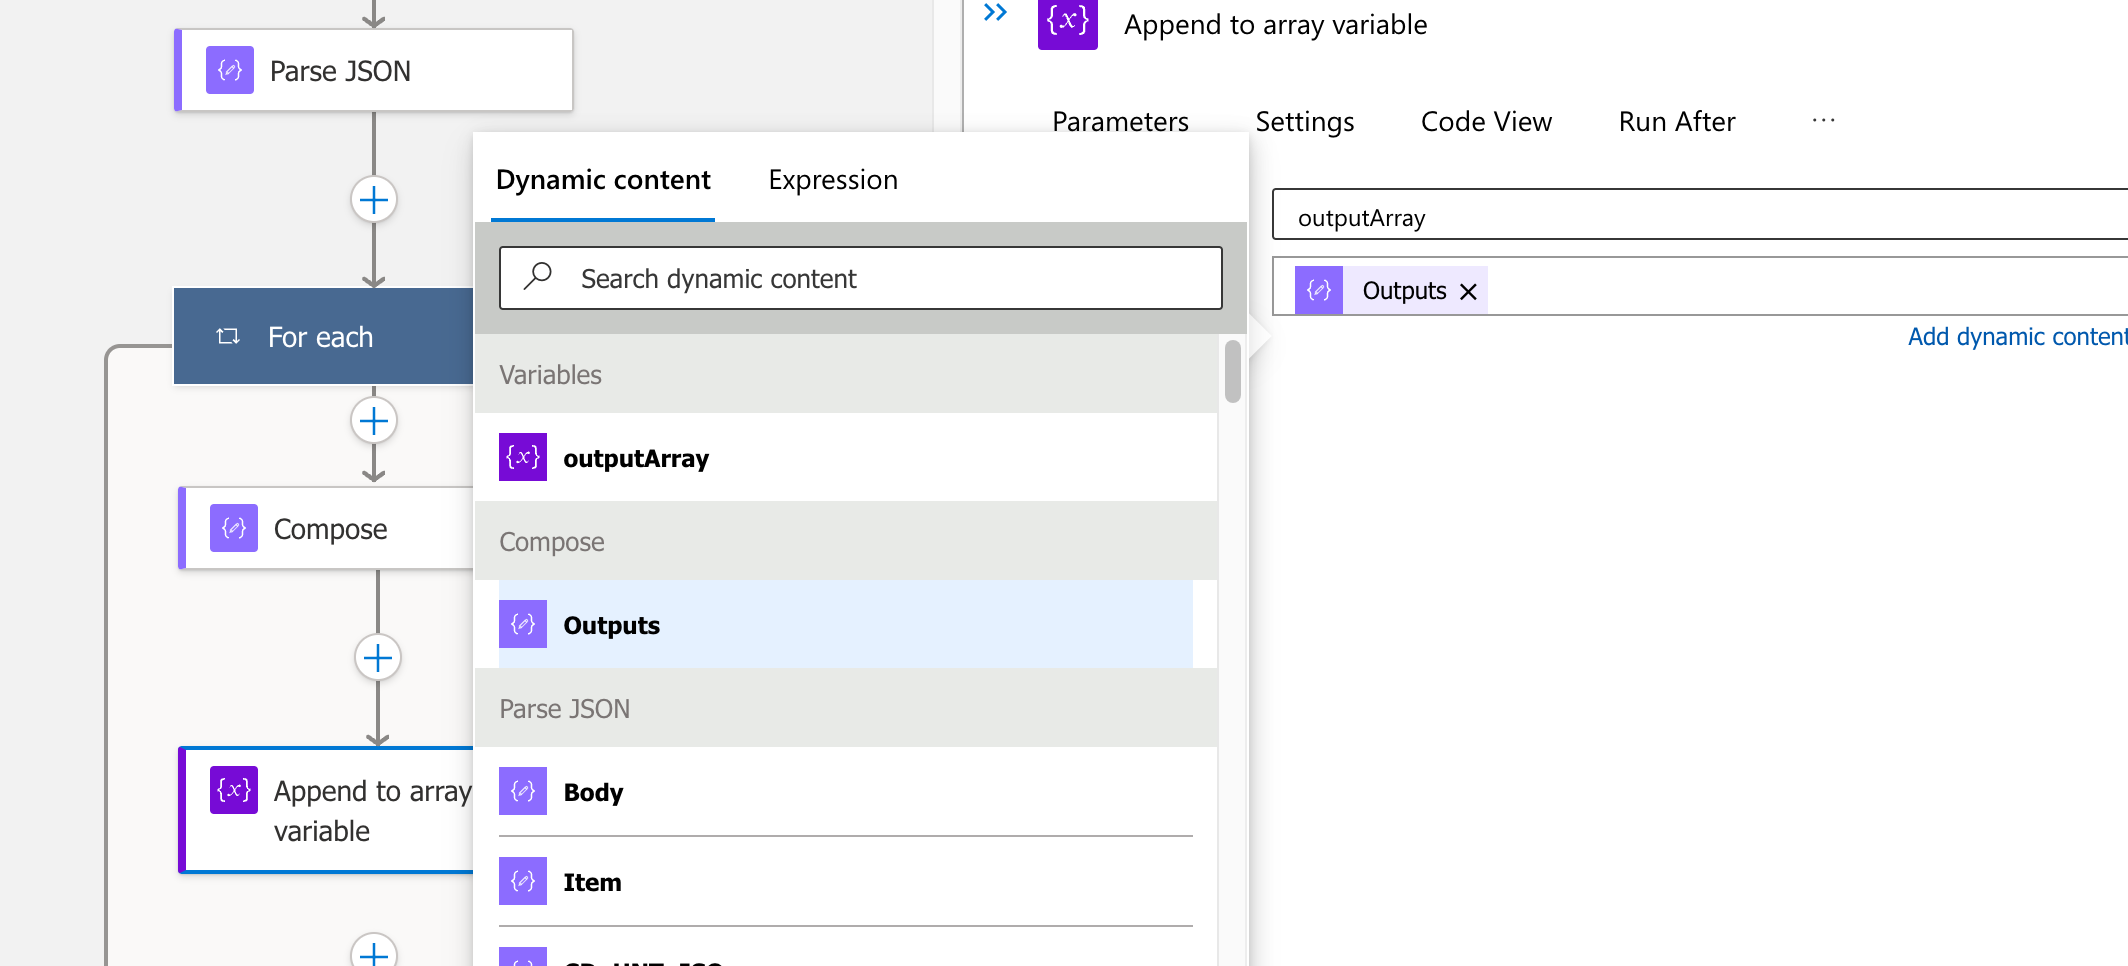
- Inside the For Each loop, after Compose, add na action Append to array variable. Select outputArray previously initialized as empty and for Value Outputs from Compose action
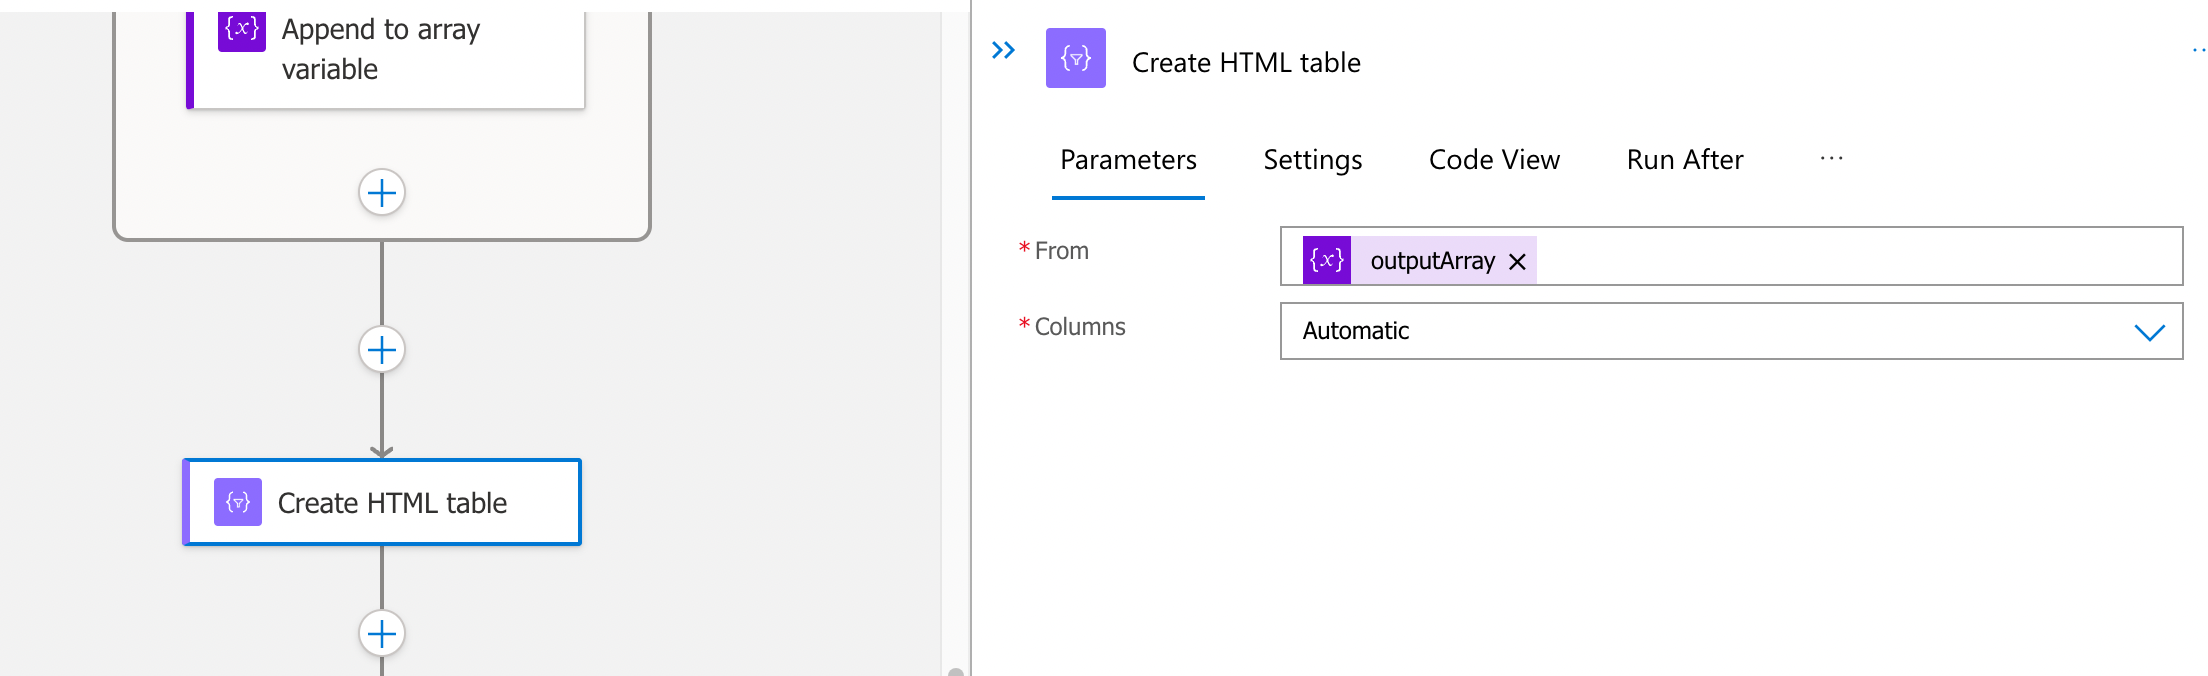
- Once For Each runs and populates outputArray with the desired data, we will convert it to an HTML table. Add a Create HTML table Action and use the outputArray as the data for the table.
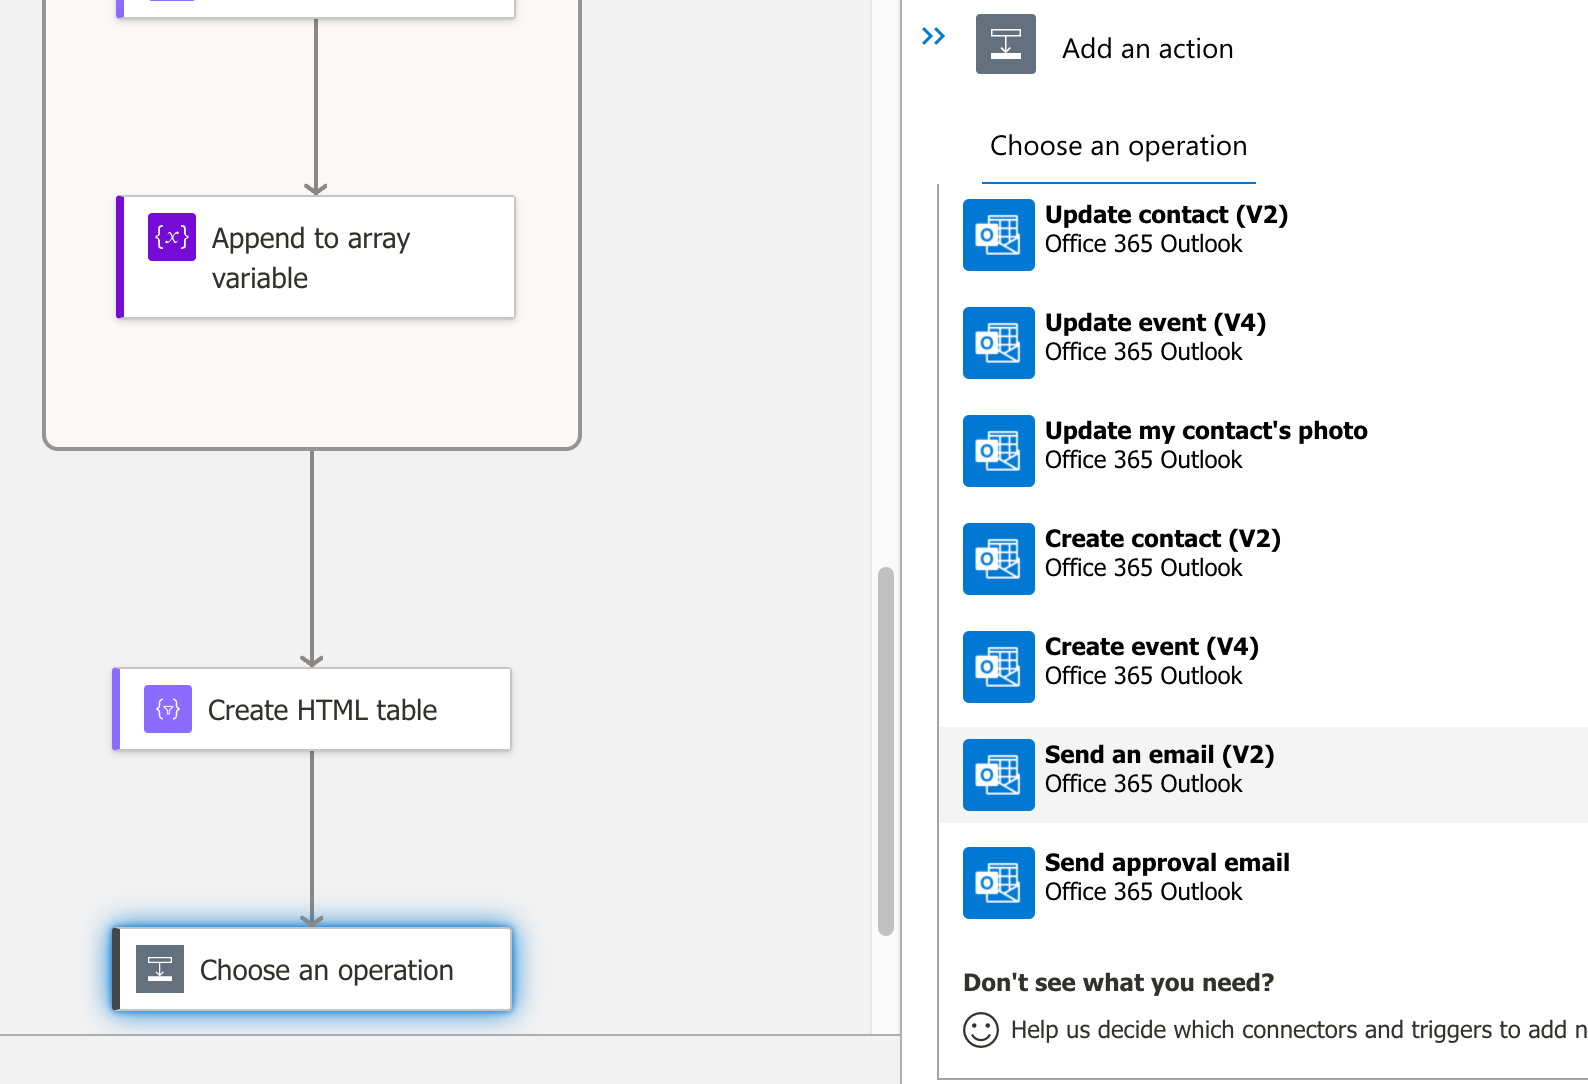
- Finally, we will add an action Send an email from Office 365 Outlook. You may need to connect Logic Apps with Office 365, by clicking on Change connection as did previously for SAP.
- Let’s now build the email template that will be used on every invocation
- To: Destination email
- Subject: Details for order (replace with dynamic content)
- Body: as picture below

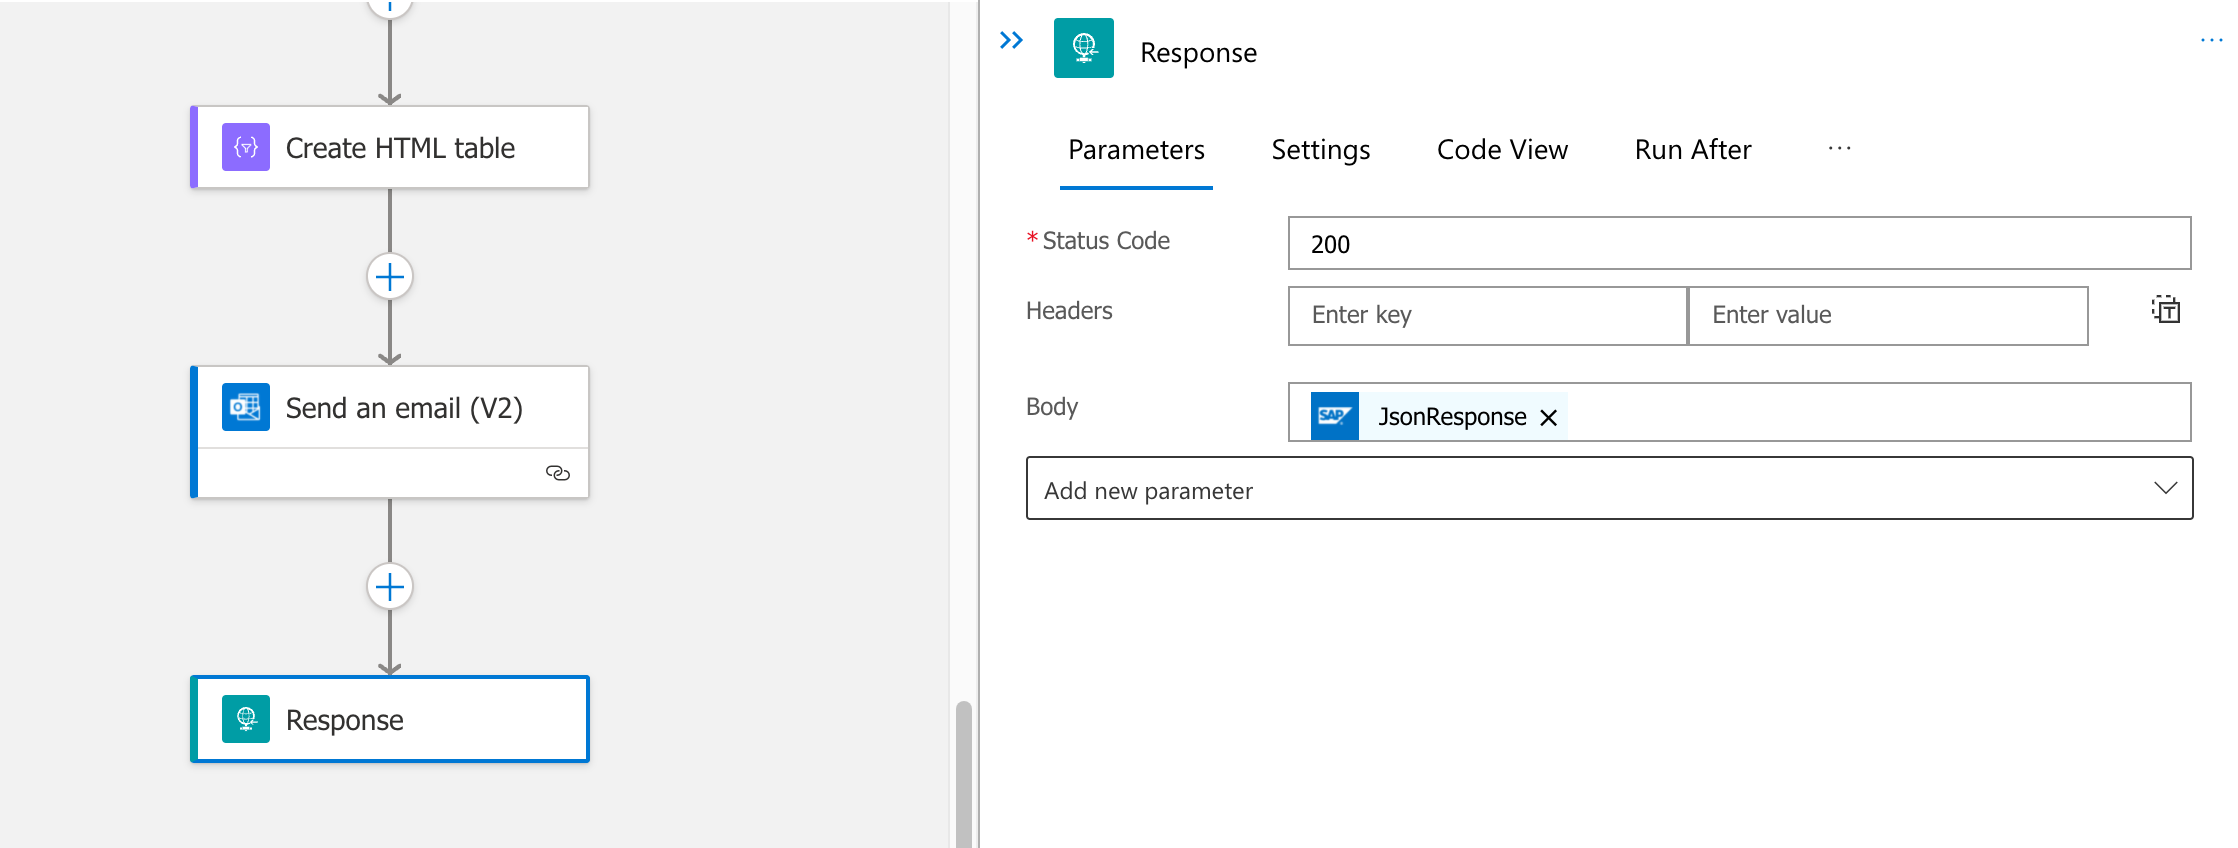
- As the API response we will add a Response action and return
- Status Code: 200
- Body: JsonResponse from Dynamic inputs
- Don’t forget to click SAVE !!!! ;)
If everything wen’t fine, we are ready to test the lab we just built, with NO CODE at all !